Cella PDF User Guide
Cella PDF opens PDF drawing sets the way architects and contractors use them. You can mark them up, measure them and hand them on as ordinary PDFs that Acrobat and other PDF apps read. Nothing leaves your computer unless your office shares its drawings through an Atrium server.
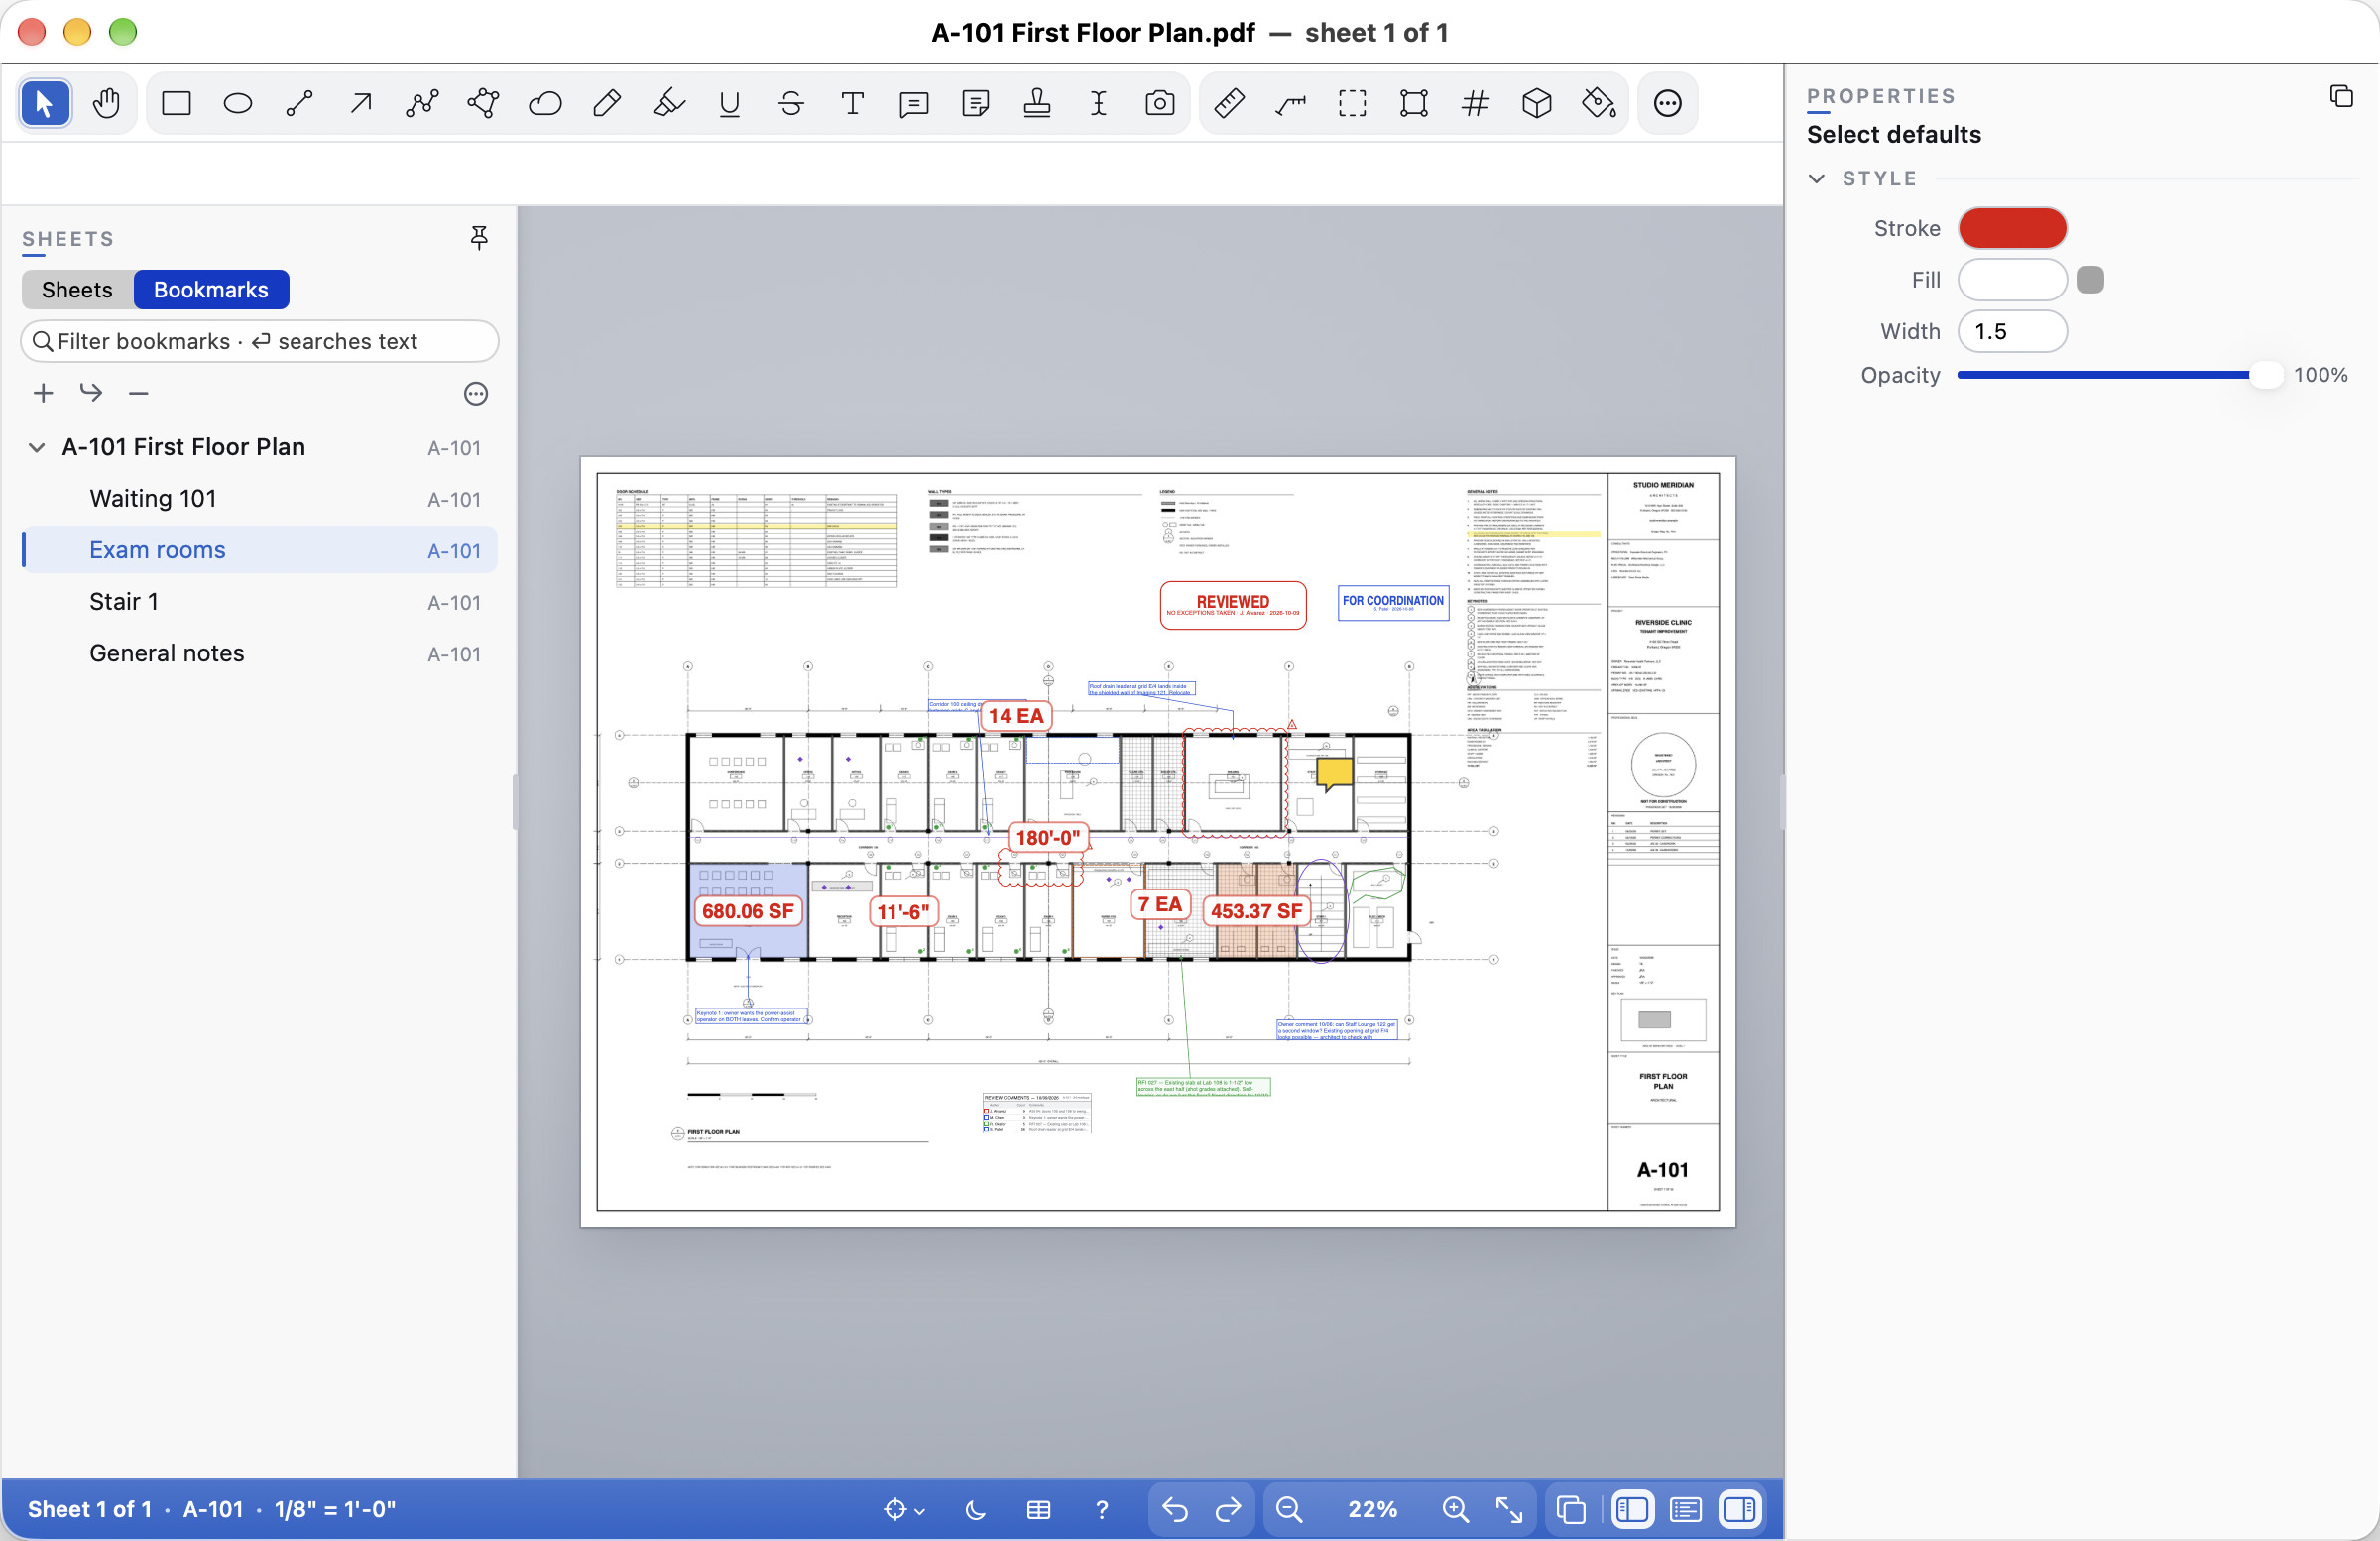
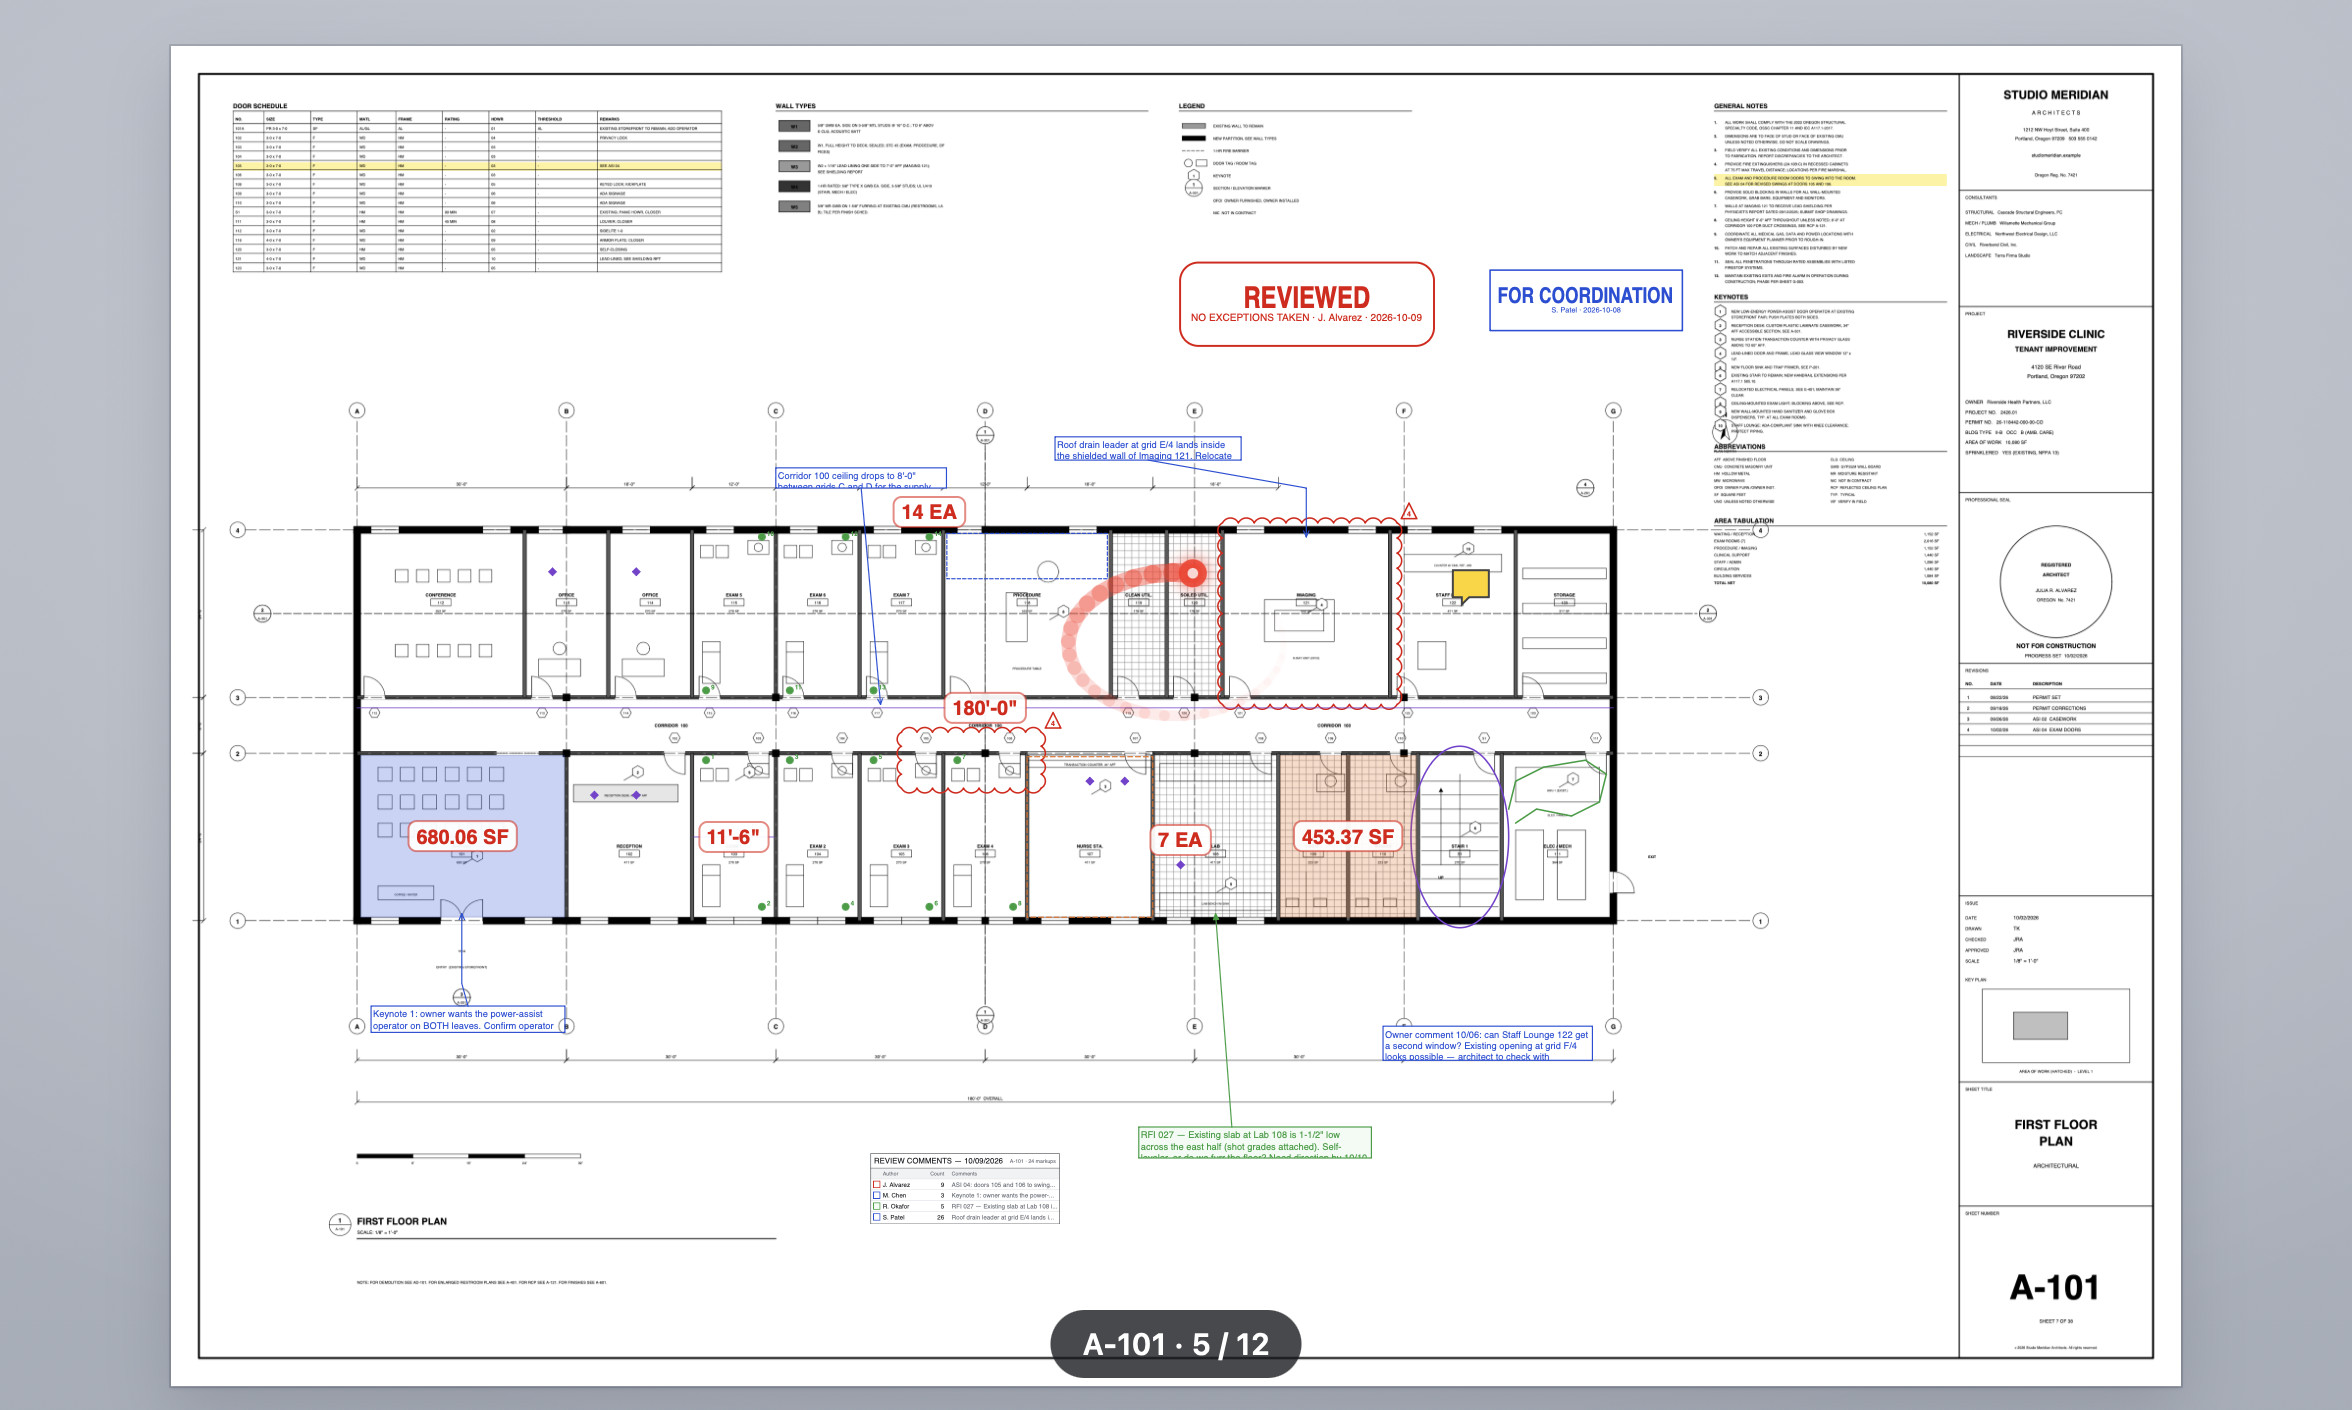
This guide covers Cella PDF on the Mac, Windows and Linux. Every key is given for both: the Mac's first, then Windows and Linux's, as in (⌘O; Ctrl+O); where Windows and Linux differ, each is named (see Keyboard shortcuts). The pictures and videos show the Mac. Every picture is of the same sheet, A-101 First Floor Plan of a small clinic, part-way through a review by four people.
Menus. The commands you use all day sit at the top level of the menus. Occasional ones live in submenus named for the job: File ▸ Export, File ▸ File Tools, Edit ▸ Text Markup, View ▸ Show, View ▸ Layout, View ▸ Compare, Tools ▸ Measure, Tools ▸ Sheet Setup, Markups ▸ Revisions, Redaction, Arrange, Flatten and Changes. This guide writes a command's whole path, as in File ▸ Export ▸ Markups as CSV…. Keys are the same wherever a command sits. If you cannot find a command, open the command palette (⌘K; Ctrl+K) and type a word from its name: it finds everything, submenu items included, and runs it.
Welcome and licensing
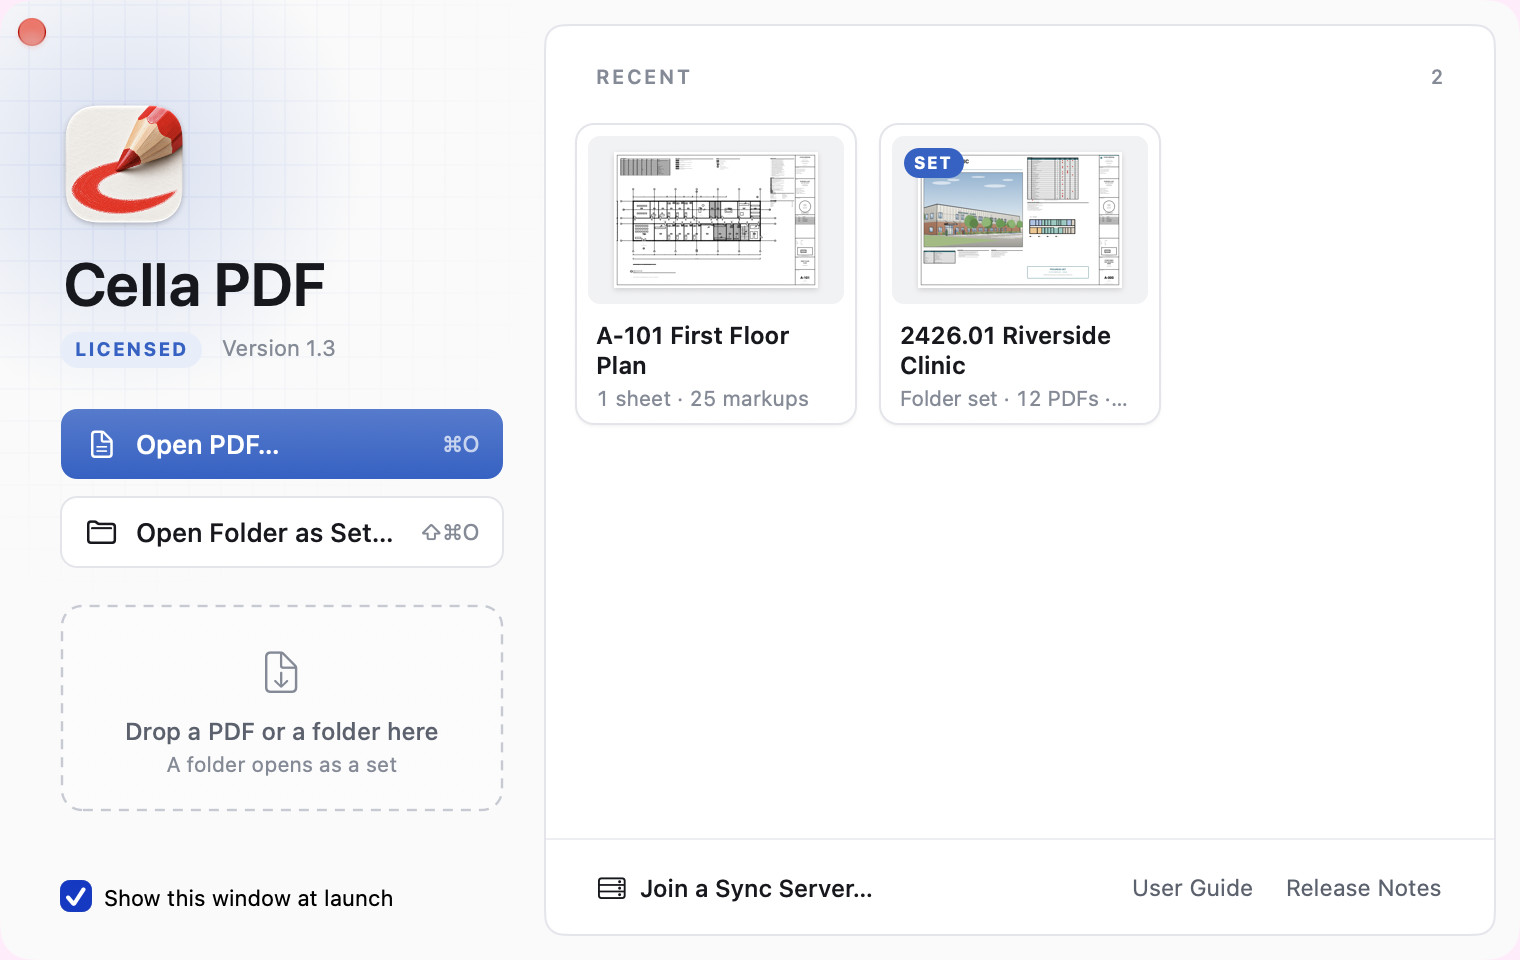
When Cella PDF starts without a document it shows the Welcome window. Open PDF… (⌘O; Ctrl+O) and Open Folder as Set… (⇧⌘O; Ctrl+Shift+O) are on the left, with a place to drop a PDF or a folder. On the right, Recent shows the documents and sets you have had open as cards: a picture of the first sheet, the folder it is in, and the sheet and markup counts from the last time you had it open. Click a card to open it; right-click it for Show in Finder (Show in Explorer, Show in Files) and Remove from Recents. A file that has been moved or deleted is greyed out as "Not found". Join a sync server…, the User Guide (this guide) and the Release Notes are at the bottom. Release Notes opens What's New, the same page as Help ▸ What's New: what each version added.
The Welcome window closes as soon as a document opens. Bring it back with Window ▸ Welcome (⇧⌘1; Ctrl+Shift+1). Untick Show this window at launch to go straight to the Open dialog instead.
Until you have opened it, a Try the sample set card at the top of Recent offers Open the sample drawing (the clinic floor plan used for the pictures in this guide) and Open the sample set (a folder of twelve sheets of the same clinic, A-000 to A-602: cover, notes, code plan, site plan, plans, ceiling plan, elevations, sections, details and schedules). Each puts a copy in Documents/Cella Samples and opens it, and never overwrites a copy you already have. Once you have used it the card goes, and Recent moves up to the top. Help ▸ What’s New lists what every version brought, and Help ▸ Report a Bug… sends us a report (see Getting help).
Installing
Mac (macOS 12 or later, Apple silicon or Intel). Open the CellaPDF-<version>.dmg you downloaded and drag Cella PDF into Applications.
Windows (Windows 10 or 11, 64-bit, with the Microsoft Edge WebView2 Runtime, which Windows 11 and up-to-date Windows 10 already have). Open CellaPDF-<version>-Setup.msi. It installs Cella PDF for you alone (no administrator password) in your user folder and adds it to the Start menu; later versions install over it by themselves. Uninstall it from Settings ▸ Apps ▸ Installed apps. If you'd rather not use an installer, unzip CellaPDF-<version>-Windows.zip instead and move CellaPDF.exe to a folder you can change, such as Documents (not Program Files), so it can update itself; if the installer fails, use the zip and tell us.
Linux (Ubuntu 24.04 or later on x86_64 or arm64, or Arch Linux / Omarchy on x86_64). In the folder where you saved the download:
sudo apt install ./cella_<version>-1_amd64.deb             # Ubuntu; arm64: ./cella_<version>-1_arm64.deb
sudo pacman -U cella-bin-<version>-1-x86_64.pkg.tar.zst     # Arch / Omarchy
Cella PDF updates itself on the Mac, Windows and Linux: it checks once a day and asks before installing (see Getting help).
One product, one key
Cella PDF is one product, the same download for everyone, and a key takes every 1.x update. One key covers one computer (Mac, Windows and Linux).
A 14-day free trial starts by itself the first time you open Cella PDF on a computer, with no sign-up and no payment details, and everything works. The toolbar (status bar on Windows and Linux) counts the days left, and so do About (Free trial · N days left) and the license window. The trial runs once per computer.
When the trial ends without a key, Cella PDF is view-only (About says Trial ended · view only). What stays open to everyone, key or not:
| Always | Needs a key (or the trial) |
|---|---|
| Open, navigate and zoom; sheet thumbnails, sheet numbers and bookmarks; open a folder as a set | Draw and edit markups, stamps, signatures, legends, sequences and counts; snap to the drawing; save |
| Window tabs, Split View, Invert Drawing, the command palette | Calibrated measurements, Dynamic Fill, slope and 3D length, scale regions, cut-outs, custom columns and formulas, the take-off list, CSV, Excel, the take-off summary and DXF |
| Search the drawings' text and the markups; select and copy the drawings' text; PDF layers on and off | Recognize Text (OCR), Edit Text, Visual Search, digital signatures |
| See every markup, measurement, comment, reply and status; the Markups List, read-only, with saved views; the recognized words of a scan | Revision clouds, links and Spaces you make, bookmarks you edit, sheets you rename |
| Follow links and sheet references; see filled-in form fields | Compare Documents, Compare Sets, Overlay Pages, slip-sheeting |
| Print, with the Print sheet (sheets, scale, tiling, grayscale, Print as PDF) | Sheet operations (rotate, reorder, insert, extract, delete), Combine Files, Reduce File Size, Rasterize Sheets, Headers & Footers, Split Document, crop and resize pages, sheets as images, Insert Image Pages |
| Open encrypted PDFs that need no password | Redaction, filling PDF forms, PDF/A-2b copies, the Tool Chest and .bax exchange |
| Folder-set operations (Whole Set list and search, Replace in markups, Print Set, transmittal, Rename Files from Sheets), profiles and firm standards, markup history | |
| Sync with your office's server, Project Tools, and seeing who else is on the sheet |
In view-only Cella PDF the markup and measuring tools and the style strip are not on the toolbar, and Undo / Redo and the Tool Palette button are not in the status band. The commands that change a document are greyed out with a tooltip saying a license is needed. If you try one anyway, Cella PDF says: "Your 14-day free trial has ended. Buy Cella PDF or enter a license key to keep marking up." Your drawings and markups stay open and readable, nothing is lost, and markups you haven't saved can still be discarded when you close the window.
Buying, entering a key and deactivating
The license commands are under Cella PDF ▸ Cella PDF License… on the Mac and Help ▸ Cella PDF License… on Windows and Linux; the Buy Cella PDF… button on the toolbar opens the same window.
- Buy Cella PDF… opens the checkout in your browser; the license key arrives by email.
- Enter License Key…: paste the key (spaces and line breaks from the email don't matter) and click Activate. The computer appears under its own name in your key's list of devices, and About reads Licensed to your name. A key for another product is refused.
- Deactivate This Device… frees this computer's place on the key, for a new computer. Do it before you replace or wipe a computer. If the license server can't be reached, the license stays until you try again online.
- Cella PDF checks the license with the store at most once a day. Offline, a licensed Cella PDF keeps working for 30 days after the last successful check. After that it is view-only until Check Again in the license window gets through. A refunded or disabled key switches to view-only at the next check, with a message.
The key is kept in the Keychain on the Mac, encrypted for your Windows account on Windows, and in your desktop's keyring on Linux. Checking it sends Lemon Squeezy, the store that sells Cella PDF, the key and the computer's name (on Windows and Linux with the name you sign in with, so a firm can tell its computers apart), nothing else.
Licenses for a firm
A firm can buy one key for everyone: a seat pack of 5, 10 or 25 seats. Each seat covers two devices, so a 10-seat key works on 20 devices in all.
- Buying: in the license window, click Buying for a Firm… and pick the pack. The key arrives by email, like a single license. A firm that pays by invoice gets a link from Sorted Solution instead.
- Sharing the key: send the same key to everyone at the firm. Each person enters it with Enter License Key… on their computer, as above.
- Seeing the seats: on a computer with the firm's key, the license window shows the pack and how many devices use it, for example Firm license · 10 seats: 7 of 20 activations in use when last checked. The count is brought up to date at the daily check.
- Freeing a seat: when someone leaves or a computer is replaced, choose Deactivate This Device… on that computer (Cella PDF menu on the Mac, Help menu on Windows and Linux). Its place goes back to the key straight away. If the computer is already gone, ask Sorted Solution to remove it from the key.
- All seats in use: a new computer is refused with "All 10 seats of your firm's license are in use…". Free a seat as above, or click Buy More Seats… in the license window. Once seats are added, the refused computer can activate straight away; the others show the new count after their next daily check.
Windows and Linux
The Windows and Linux versions have the same menus and panels as the Mac and nearly all of its features, with the keys listed under Keyboard shortcuts. Where they differ it is said in the section.
Getting started
Take the tour
The first time Cella PDF opens it offers a short tour. Help ▸ Take the Tour runs it again whenever you like. It opens the sample drawing in a window of its own and walks through seven things, one small note at a time: opening a drawing or a whole folder as a set, the tools, drawing a markup, changing how it looks (and keeping that look with Set as Default for Tool), setting the scale and measuring a length, the Markups List, and finding any command by name with the command palette (⌘K; Ctrl+K on Windows and Linux).
Each note points at the real control, wherever you have put it: the toolbar at a side, the Tool Palette floating, the Markups List closed (the tour opens it for its step and closes it again after). Two steps wait for you to try them: draw a rectangle or a cloud, then measure a length, and the tour moves on by itself. Next and Back move between the notes, Skip Tour or Esc leaves, and closing the window ends it. Your own drawings are never touched.
Tips. Now and then a one-line tip appears at the foot of the drawing the first time it can help: when a tool you want is under ⋯ More tools, when you draw several markups in the same changed look, when you measure on a sheet with no scale, when the thumbnails crowd a small window, or when a file opens read-only. Got It puts it away for good. Turn them all off with Show tips in Settings (Options on Windows), and bring every tip and the tour's offer back with Reset Tips.
Empty panes. A pane with nothing in it yet says what goes there and offers the one thing that fills it: the Markups List Draw a Rectangle, Bookmarks Add Bookmark, Layers New Layer…, and the Tool Chest Add Selected Markup to Tool Chest….
Opening a sheet or a set
- File ▸ Open… (⌘O; Ctrl+O) opens one or more PDFs. They open as tabs of the front window (see Tabs).
- File ▸ Open Folder as Set… (⇧⌘O; Ctrl+Shift+O) opens a folder of PDFs as a set: every PDF in the folder and one level of subfolders, sorted the way people sort sheet numbers (A-101 before A-1001). The sidebar opens on its Set tab, which lists the files with their markup counts; click one to open it in the same window. More under Folder sets.
- File ▸ Open Recent lists the documents and sets you opened lately, the same ones the Welcome window shows as cards. Clear Menu at its foot empties both.
- You can also drop PDFs and folders on the Welcome window, or PDFs on Cella PDF's Dock icon.
- A picture opens as a new drawing. Choose a JPEG, PNG, HEIC (not on Windows) or TIFF in File ▸ Open…, open it with Cella PDF from the Finder (or Explorer, or your file manager: Open With), drop it on the Dock icon, the Welcome window or an empty window, or pick it from Open Recent. It becomes a new untitled PDF of one sheet, named after the picture (site-photo.jpg opens as site-photo.pdf). The sheet is made as Insert Image Pages makes one: the picture's own size at the resolution the file gives, or at the resolution last chosen in Insert Image Pages (150 dpi at first); JPEGs go in as they are. The picture itself is never changed. Save asks where to put the PDF, starting in the picture's folder; until then closing it asks whether to save only if you marked it up. Choose several pictures and each opens as a drawing of its own. Cella PDF is offered in the pictures' Open With list, never made their default app.
- Make Cella PDF your default app for PDFs with the Finder's Get Info ▸ Open with ▸ Change All…, or on Windows a PDF's Open with ▸ Choose another app with Always ticked. Your PDFs then show Cella PDF's document icon, a sheet with a red PDF label, so a drawing never looks like the app itself. (The Finder shows a preview of the first sheet where it can, and the document icon where it has none. On Linux the file manager keeps your icon theme's PDF icon.)
Cella PDF reopens the documents you had open when you quit (Settings ▸ Reopen documents at launch).
Opening from the cloud: Dropbox, OneDrive and Google Drive
Cella PDF opens drawings on Dropbox, OneDrive and Google Drive and saves back to them, so nothing is downloaded and uploaded by hand.
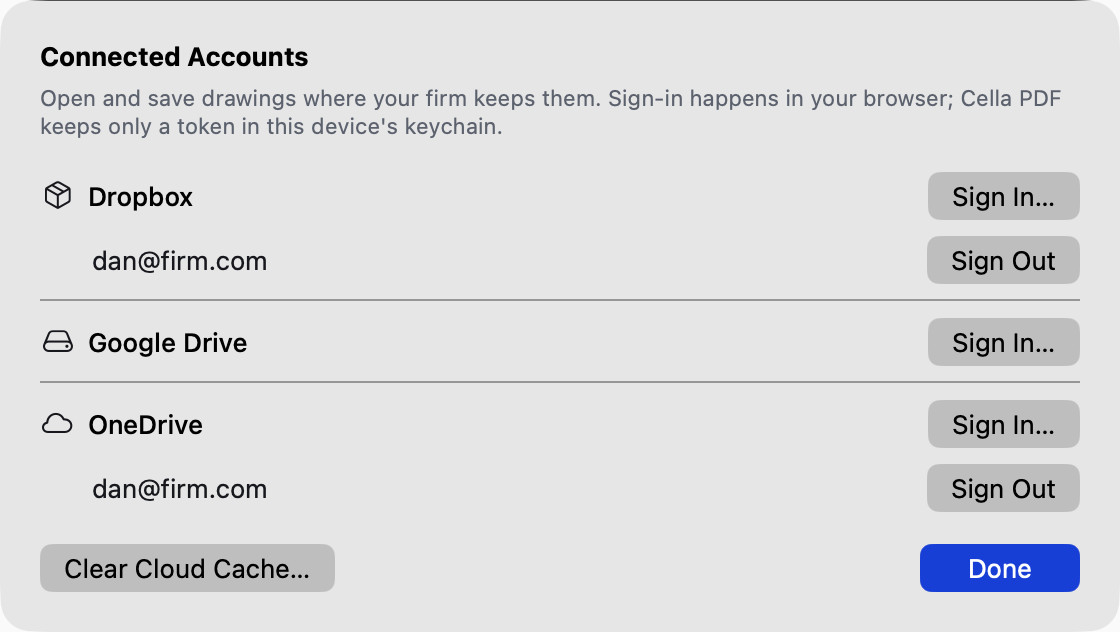
- Sign in once. Settings ▸ Connected Accounts… (Options on Windows) lists the services with Sign In… for each. Signing in opens your web browser on the service's own sign-in page; Cella PDF never sees your password, and the browser tab says when you can come back. A service can be signed in with more than one account. Sign Out forgets the account on this computer only. If your firm's IT approves apps before staff can use them, they may need to approve Cella PDF once.
- File ▸ Open from Cloud… shows your accounts at the left and their folders at the right: your files, files shared with you, and shared drives (Google Drive) or SharePoint sites you follow (OneDrive). Double-click a PDF to open it. The folder you were in is remembered. On Google Drive, My Drive, Shared with Me and each shared drive you belong to are listed under your account, so a firm's shared projects folder opens directly, without copying it to your own drive first. A folder someone shared with you from a shared drive opens from Shared with Me.
- A folder you can only view (for example a shared drive where you are a Viewer or Commenter) can be opened from but not saved to: in Save to Cloud… the Save button stays unavailable there. Choose a folder where you can add files.
- File ▸ Open Set from Cloud… opens a cloud folder as a set: every PDF in it is downloaded (a progress sheet you can cancel), and File ▸ Set works on it as on any folder. Open the same folder again and only the files that changed are downloaded.
- Save on a drawing from the cloud saves it here first, as always, then uploads it as a new version of the same file; the status band says "Saved to Dropbox 14:02". Each service keeps the earlier versions, so nothing is overwritten. If someone uploaded a newer version while you had it open, Cella PDF asks before putting yours on top. If the upload fails (no network, signed out), your save is safe on this computer and the next Save tries again; the window's subtitle says "not uploaded" until it goes.
- File ▸ Save to Cloud… puts a copy in a folder you choose (with New Folder…), and from then on Save uploads there. Saving to a name that already exists makes a new version of that file.
- Cloud files are kept in a cache folder on this computer, so Open Recent, autosave and crash recovery work on them like any file. Single files not opened for a month are removed; sets stay until you use Clear Cloud Cache… in Connected Accounts. Opening from the cloud works without a licence; saving and uploading need one, like every save.
The window
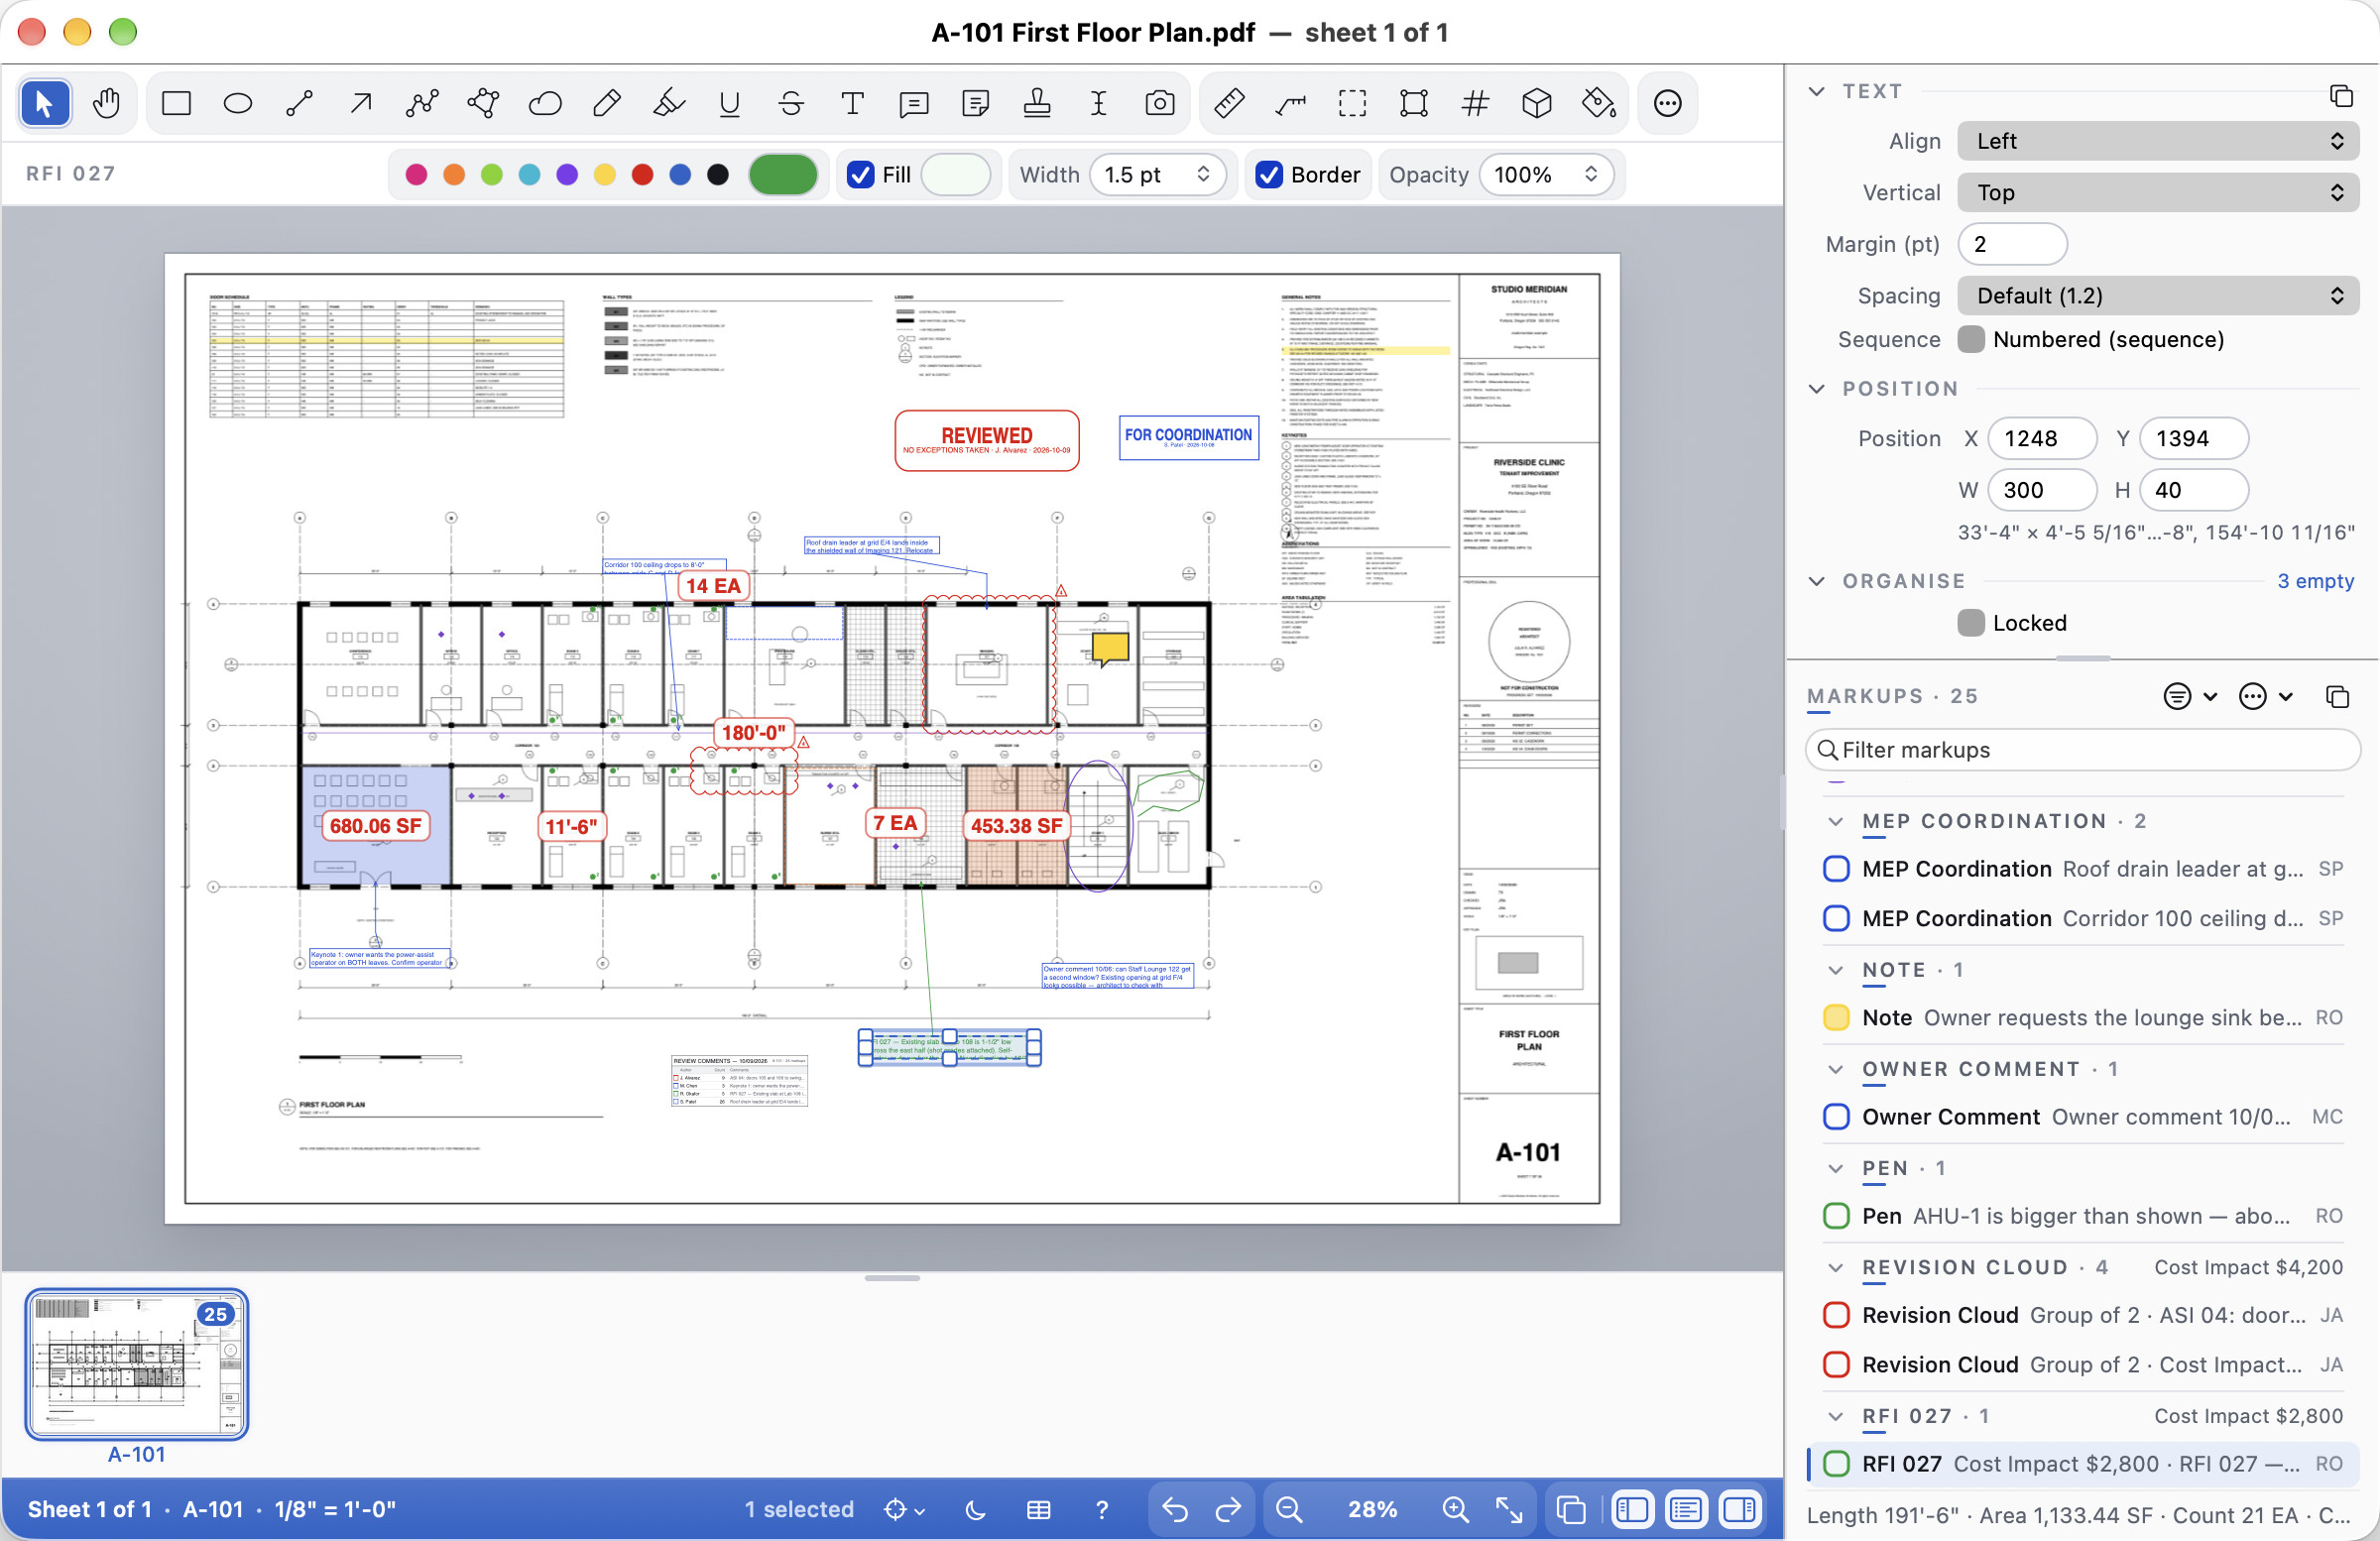
- Toolbar, left to right: Select and Pan; the markup tools; the measuring tools. Undo, Redo, zoom and the Palette, Sheets, Markups and Properties buttons are at the right end of the status band; your saved tools are under Tools ▸ Tool Chest; Open, Save and Print are in the File menu.
- Options row, under the toolbar. It always keeps one height, so the drawing never jumps (with the toolbar at a side it folds away when empty; see Thumbnails and tools at the sides). While a drawing tool is picked or markups are selected, it shows the colours, fill, line width, opacity and whatever else that tool uses (line ends, cloud, and for text the font, size, bold, italic, underline, strikethrough and alignment).
- The drawing fills the middle. The side panels run the window's full height, so the toolbar, the options row, the sheets strip and the status band are as wide as the drawing.
- Properties, at the right (⌥⌘P; Ctrl+Alt+P), shows the selected markup, or the defaults of the tool you have picked when nothing is selected.
- Markups List, under Properties (⌥⌘M; Ctrl+Alt+M), lists every markup in the document. See The Markups List. Drag the line between Properties and the list to share the column between them. Properties' Style, Position, Organise and People headings fold away with a click, and empty Layer, Space, Label and reply rows stay out of the way until you click "empty" beside the heading. Settings ▸ Panel rows ▸ Compact packs the rows closer, and Settings ▸ Right column puts the Markups List on top.
- Pop the panels out onto a second display, or beside the window on a large one. Each floats in a panel of its own with the pop-out button at the right of the PROPERTIES, MARKUPS and LAYERS captions (two overlapping squares), with View ▸ Pop Out Properties (⌥⇧⌘P; Ctrl+Shift+Alt+P) and View ▸ Pop Out Markups List (⌥⇧⌘M; Ctrl+Shift+Alt+M), or when you drag a caption off the window. To put a panel back in the window, click Dock at the right of its title bar, or drag the panel by its title bar over the right column (or to the window's right edge): the column lights up, and the panel docks there when you let go. The same keys, View ▸ Dock …, the panel's close button and View ▸ Layout ▸ Dock All Panels put it back too. Show Properties (⌥⌘P; Ctrl+Alt+P) and Show Markups List (⌥⌘M; Ctrl+Alt+M) still show and hide a popped-out panel. The first time you use Cella PDF, a small tip under the caption points this out; close it with its ×.
- Sheets strip, along the bottom: see below.
- Status band, along the very bottom:
Sheet 1 of 1, the sheet's name and scale (click the scale to set it; the text lines up with the first sheet thumbnail above it), the sync state and how many markups are selected, the moon for Invert Drawing and ? for the keyboard shortcuts; then Undo and Redo; zoom out, the zoom percentage (click it for presets), zoom in and Fit Page; then Palette (the tools in a floating window) and the three panel buttons, Sheets, Markups and Properties, each showing or hiding its panel.
The hot colours in the options row (magenta, orange, lime, cyan, violet, yellow, red, blue and ink) are for marking up quickly: click one for the stroke, Option-click or Alt-click for the fill. The Colour… well next to them takes any other colour.
When the window is too narrow for every tool, the ones that don't fit move to a ⋯ menu after the tool groups; their keys still work, and Properties always has the full set of controls. Below 1280 points wide the sidebar floats over the drawing instead of squeezing it. The pin at the top right of the sidebar docks it beside the drawing (or floats it) until you quit, and View ▸ Panels Overlay the Drawing chooses Automatic, Always or Never. Properties and the Markups List always keep their full-height column at the right, so they have all the room the window can give them. That column has no pin and never floats (on Windows and Linux it still floats below 1280 and has a pin).
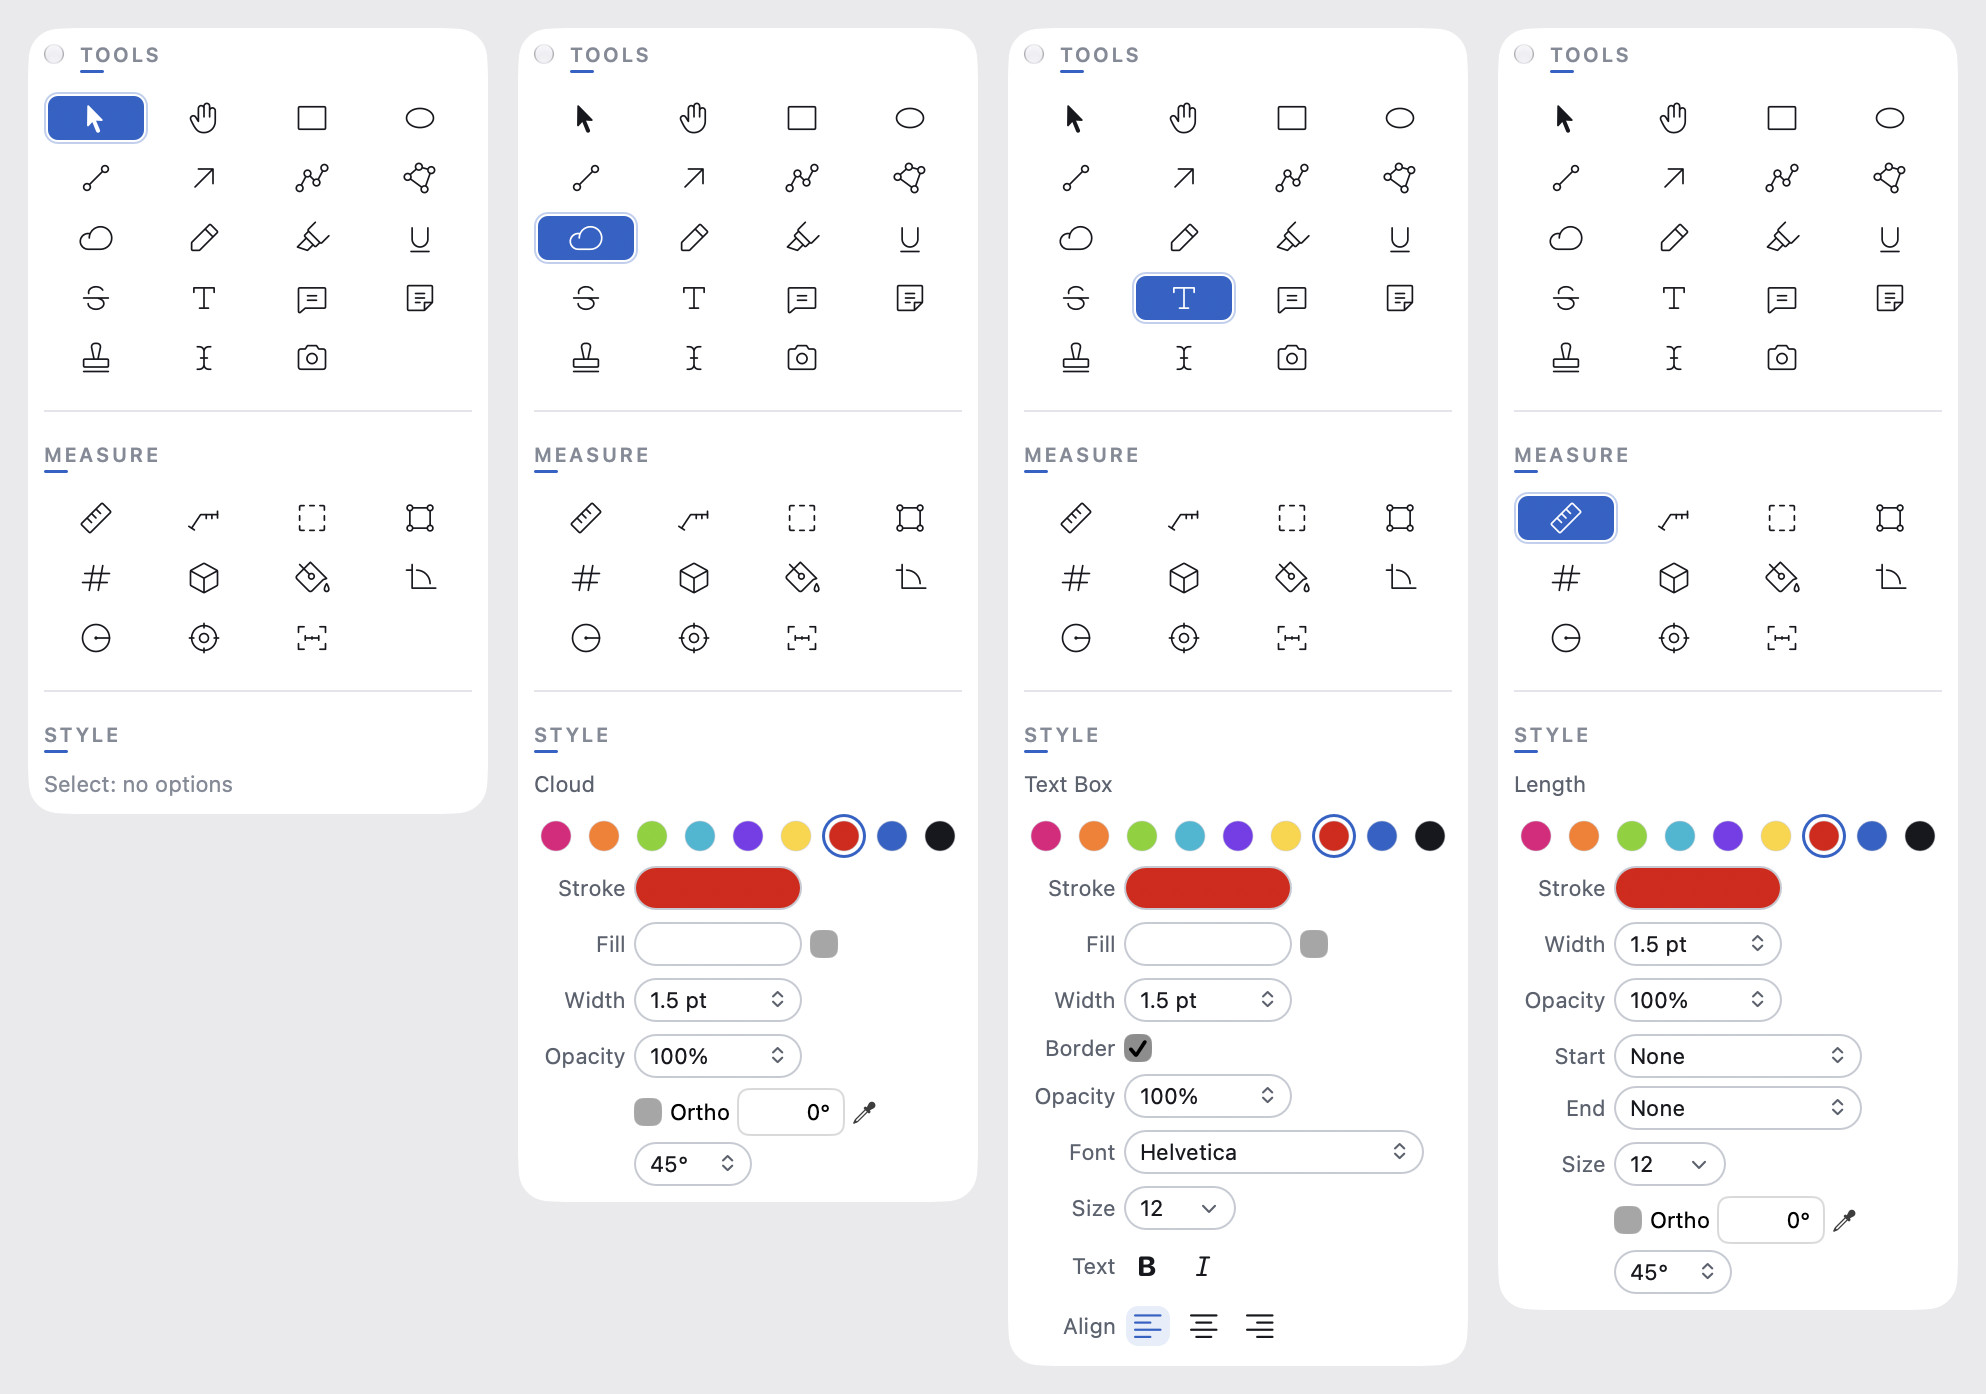
View ▸ Tool Palette (⌥⌘T; Ctrl+Shift+T), or the pop-out button, floats the tools and the style strip in a small window of their own that you can park beside the drawing. To dock the tools back, click Dock at the right of the palette's title bar (or close it), or drag the palette by its title bar to the top, left or right edge of the drawing: a band lights up where the tools will go, and they dock there as the toolbar (at the top, or as a column at that side) when you let go. View ▸ Layout ▸ Dock All Panels docks the tool palette, Properties, the Markups List and Layers at once. On the Mac the toolbar and the options row leave the window while the palette is out, so the drawing reaches up to the title bar. Tool keys still work, and the Tool Chest's tools are in the command palette (⌘K; Ctrl+K, then @).
The sheets strip and the sidebar
Sheets run as a strip of thumbnails under the drawing (View ▸ Layout ▸ Sheets at Bottom, the default), where a landscape drawing has room to spare. The pill on a thumbnail is its markup count; the sheet on screen is ringed. Click a thumbnail, or click the strip and use ← and → (Home and End for the first and last). When there are more sheets than fit, ‹ and › buttons at the strip's ends scroll it a page at a time (each disappears at its own end). View ▸ Show Sheets (⌥⌘S; Ctrl+Alt+S) hides and shows it. Shift-click and ⌘-click (Ctrl-click) select several sheets at once, to delete, extract, turn or move them together; see Page operations. Drag the strip's top edge to make the thumbnails bigger or smaller (double-click it for the usual size), or click the strip and zoom with it (⌘+ and ⌘−; Ctrl++ and Ctrl+−); View ▸ Sheets ▸ Larger Thumbnails and Smaller Thumbnails do the same, and with the sheets at the left they switch the list between small, medium and large thumbnails.
The sidebar at the left opens when you need it: for searching (⌘F; Ctrl+F) and when a folder set opens. Its tabs are Sheets, Set (with a folder set open) and Bookmarks (when the PDF has bookmarks). Close it with the × in its heading. View ▸ Layout ▸ Sheets at Left keeps the sheets in the sidebar instead of the strip, with a filter field above them.
Thumbnails and tools at the sides
A landscape drawing on a wide screen is usually limited by the window's height, with room to spare at the sides. You can move the sheet thumbnails and the toolbar to the sides to give the drawing that height back. The Markups Table and the status band stay at the bottom.
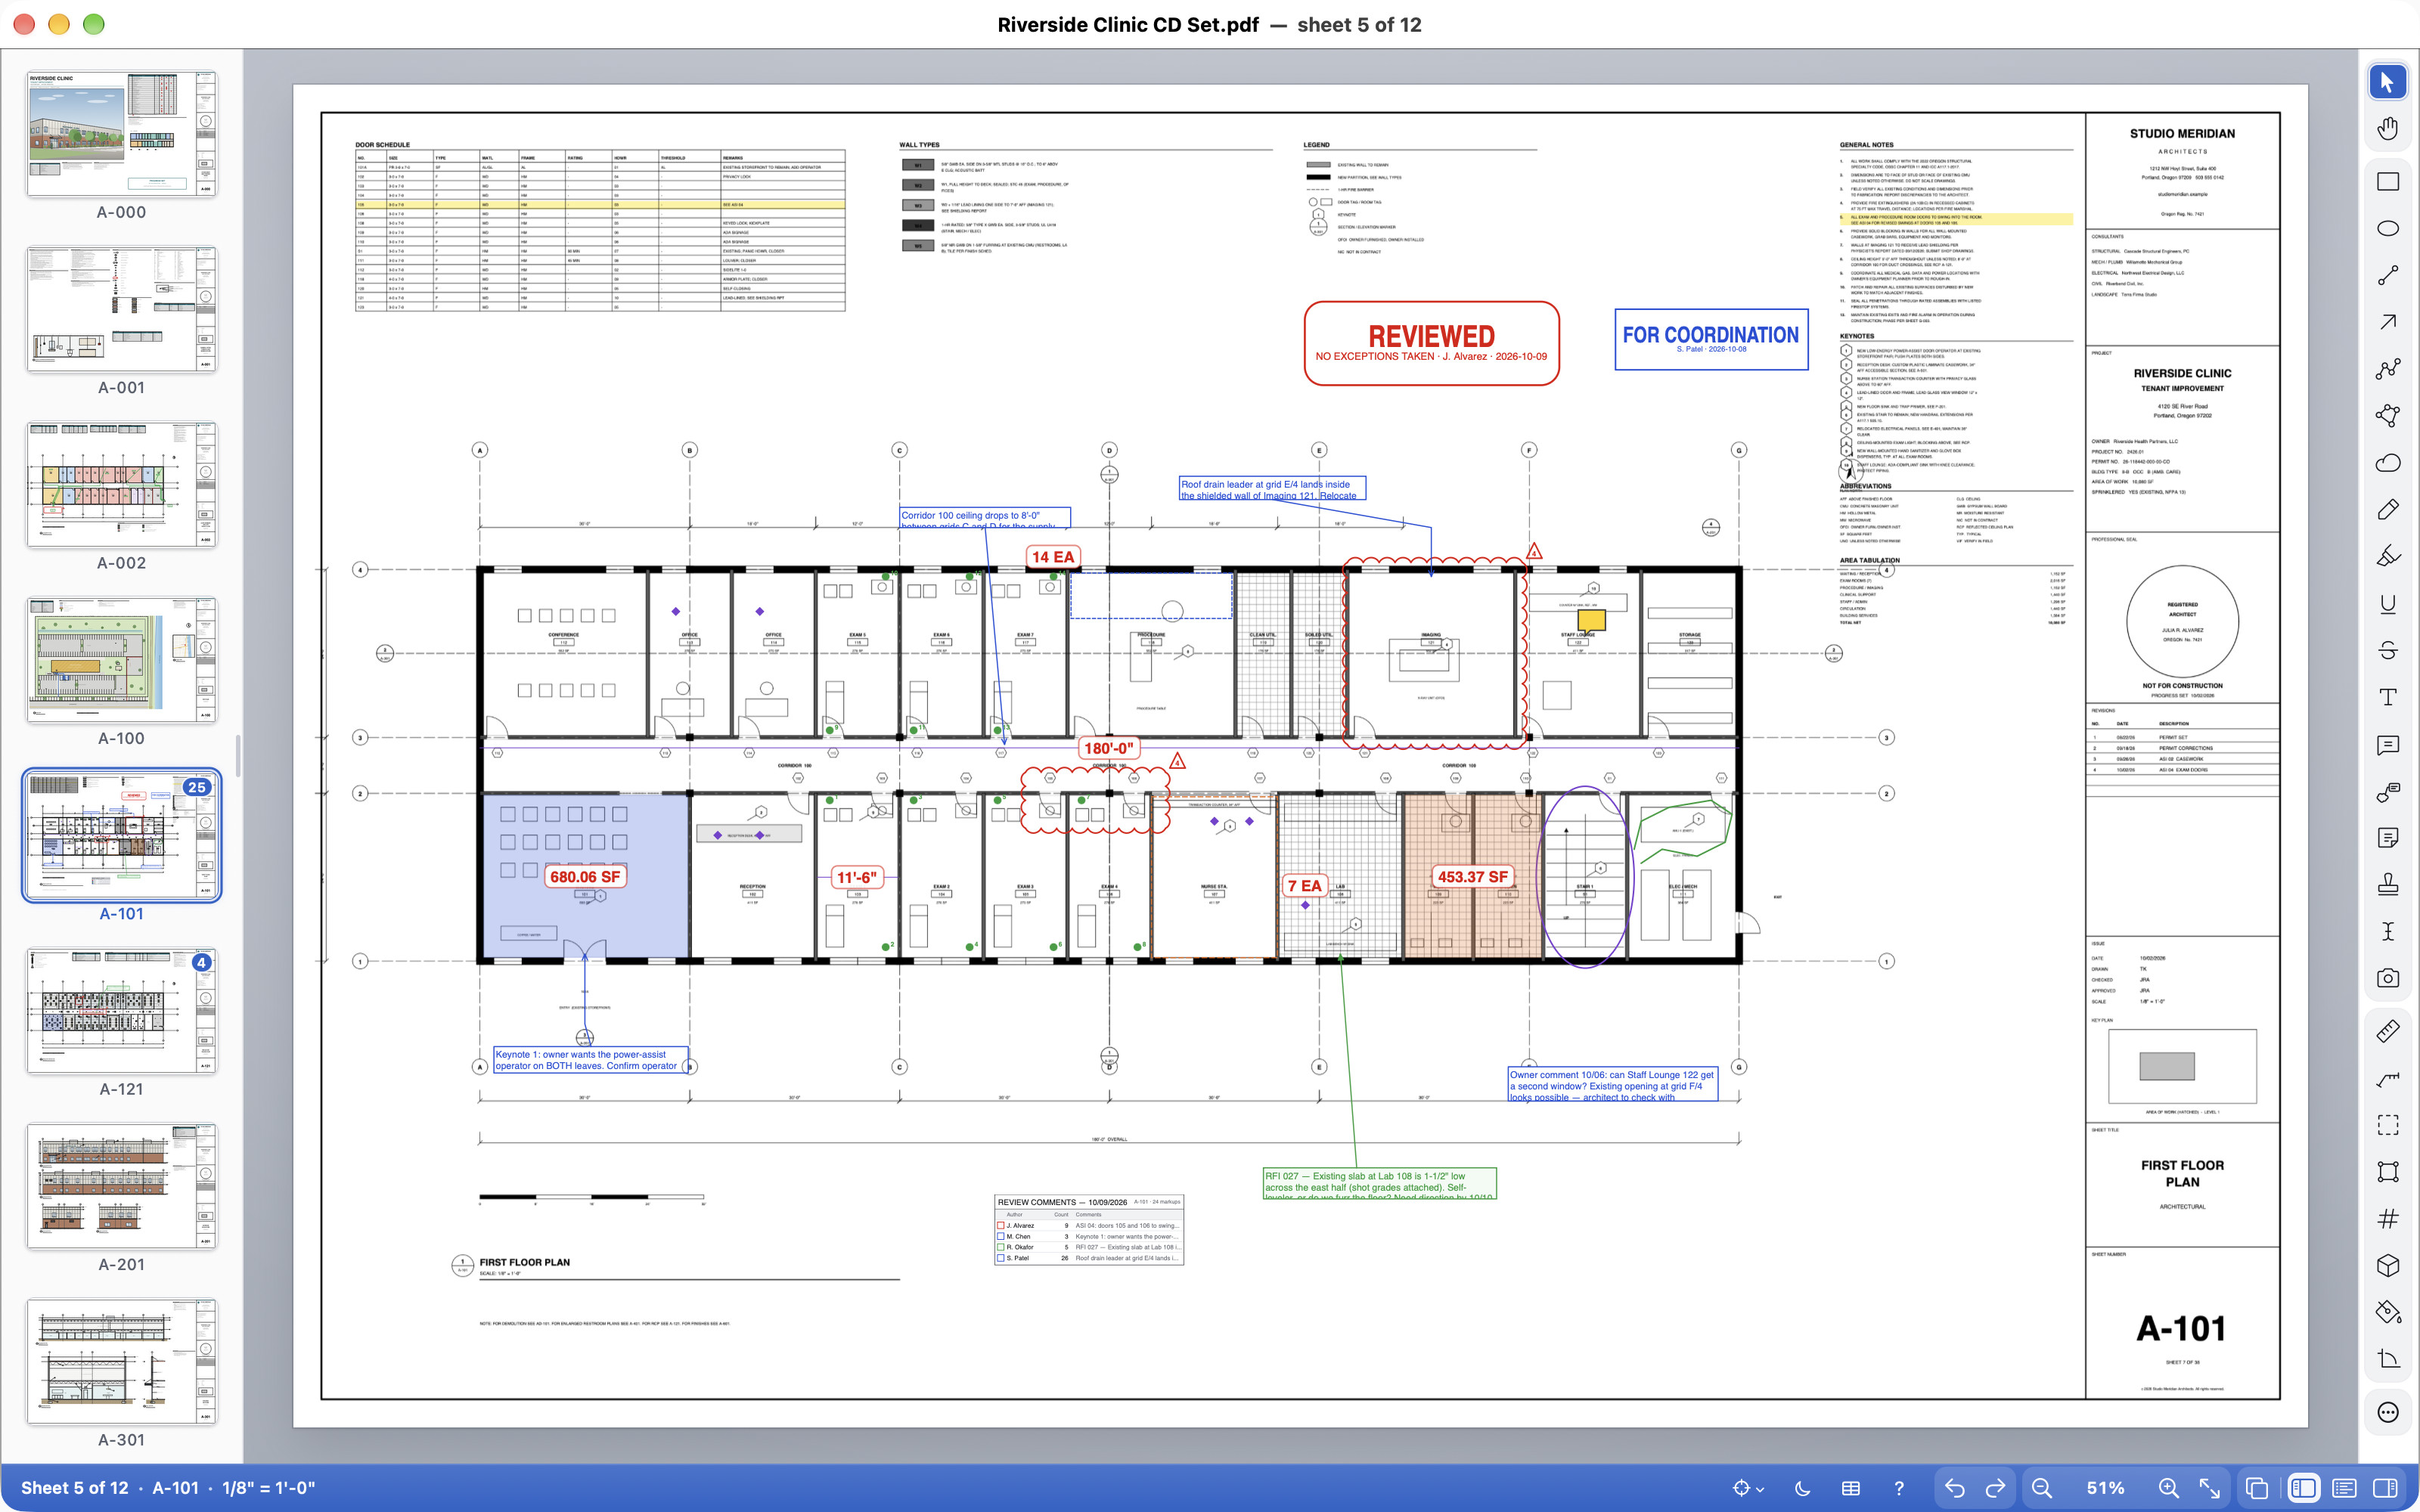
- View ▸ Layout ▸ Thumbnails: Left or Thumbnails: Right turns the strip into a column of thumbnails beside the drawing. It works like the strip at the bottom: click a thumbnail, or click the column and use ↑ and ↓ (or ← and →; Home and End for the first and last), and right-click a thumbnail for its commands. Drag the column's inner edge to make it wider or narrower (double-click that edge for the usual width): the thumbnails grow to fill the width, and once they are as big as they go, a wider column shows them two or three to a row. ⌘+ and ⌘− (Ctrl++ and Ctrl+−) and Larger Thumbnails / Smaller Thumbnails step one thumbnail to a row through its sizes. Thumbnails: Bottom puts the strip back under the drawing, and Thumbnails: Hidden hides it, like View ▸ Show Sheets (⌥⌘S; Ctrl+Alt+S), which brings it back where it was. With the thumbnails at a side, the sidebar can still open beside them for search and Bookmarks, so you can see the thumbnails and the bookmarks together.
- View ▸ Layout ▸ Toolbar: Left or Toolbar: Right puts the tools in a column at that side of the drawing, in the same order and groups. On a short window the tools that don't fit move to the ⋯ menu at the end of the column. The options row stays above the drawing, and it only takes room while it has something to show, such as a drawing tool's colours and line width. Toolbar: Top puts the tools back in a row.
- Right-click the strip between thumbnails, or the toolbar between buttons, to choose the same places from there. The command palette (⌘K; Ctrl+K) finds them too: type "thumbnails" or "toolbar".
Your choices are kept for every window and the next time you start Cella PDF, and they are saved in a profile's layout. Presentation mode hides the thumbnails and the tools wherever they are.
Zoom and navigation
- Zoom (⌘+ and ⌘−; Ctrl++ and Ctrl+−), a pinch, or the scroll wheel with ⌘ (Mac) or Ctrl (Windows and Linux) held down. Each click of a mouse wheel zooms by the same small step, smoothly, about the pointer. On the way in or out the wheel stops once at the zoom that shows the whole sheet, and the steps are smaller near it, so it is hard to go past; the next click carries on. A pinch or a trackpad zooms continuously. View ▸ Fit Page (⌘0; Ctrl+0), Fit Width (⌘1; Ctrl+1), Actual Size (⌘2; Ctrl+2). The fit button beside the zoom in the status band (or a click on the zoom itself) always brings the whole sheet back; Option-click or Alt-click fits the width. Double-click the middle mouse button (the wheel) anywhere on the drawing for the same zoom to extents, as in CAD. Home, or View ▸ Top-Left Corner, puts the sheet's top-left corner back in view at the same zoom. Fit Page and Top-Left Corner can each be given a key in the shortcut settings (search "extents" or "home" there).
- Pan with Space held down while you drag, the middle mouse button, the Pan tool (⇧V; Shift+V), or the scroll wheel and trackpad.
- Make the mouse wheel zoom: set Mouse wheel to Zooms in Settings (Options on Windows), or choose View ▸ Mouse Wheel Zooms. Each click of the wheel then zooms about the pointer, with no key held. To scroll instead, hold ⌥ (Alt on Windows and Linux) to move up and down, or ⇧ (Shift) to move sideways. ⌘ (Ctrl) with the wheel and a pinch still zoom. A trackpad, a Magic Mouse and a smooth-scrolling wheel keep scrolling, so on a laptop you can still move about the sheet. Scrolls the sheet, the first choice, is the wheel as described above.
- Sheets: the next and previous sheet with Page Down and Page Up or (⌘↓ and ⌘↑; Ctrl+Down and Ctrl+Up); the first and last with (⌥⌘↑ and ⌥⌘↓; Ctrl+Home and Ctrl+End). Zoom and position stay put when you change sheet.
- View ▸ Go to Sheet… (⌥⌘G; Ctrl+Alt+G, or ⌘G; Ctrl+G when nothing is being searched) takes a sheet number or a sheet name such as A-101.
- With the Select tool, click a sheet reference in the drawing ("12/A-512", "SEE A-301") to go there (see Links).
The command palette
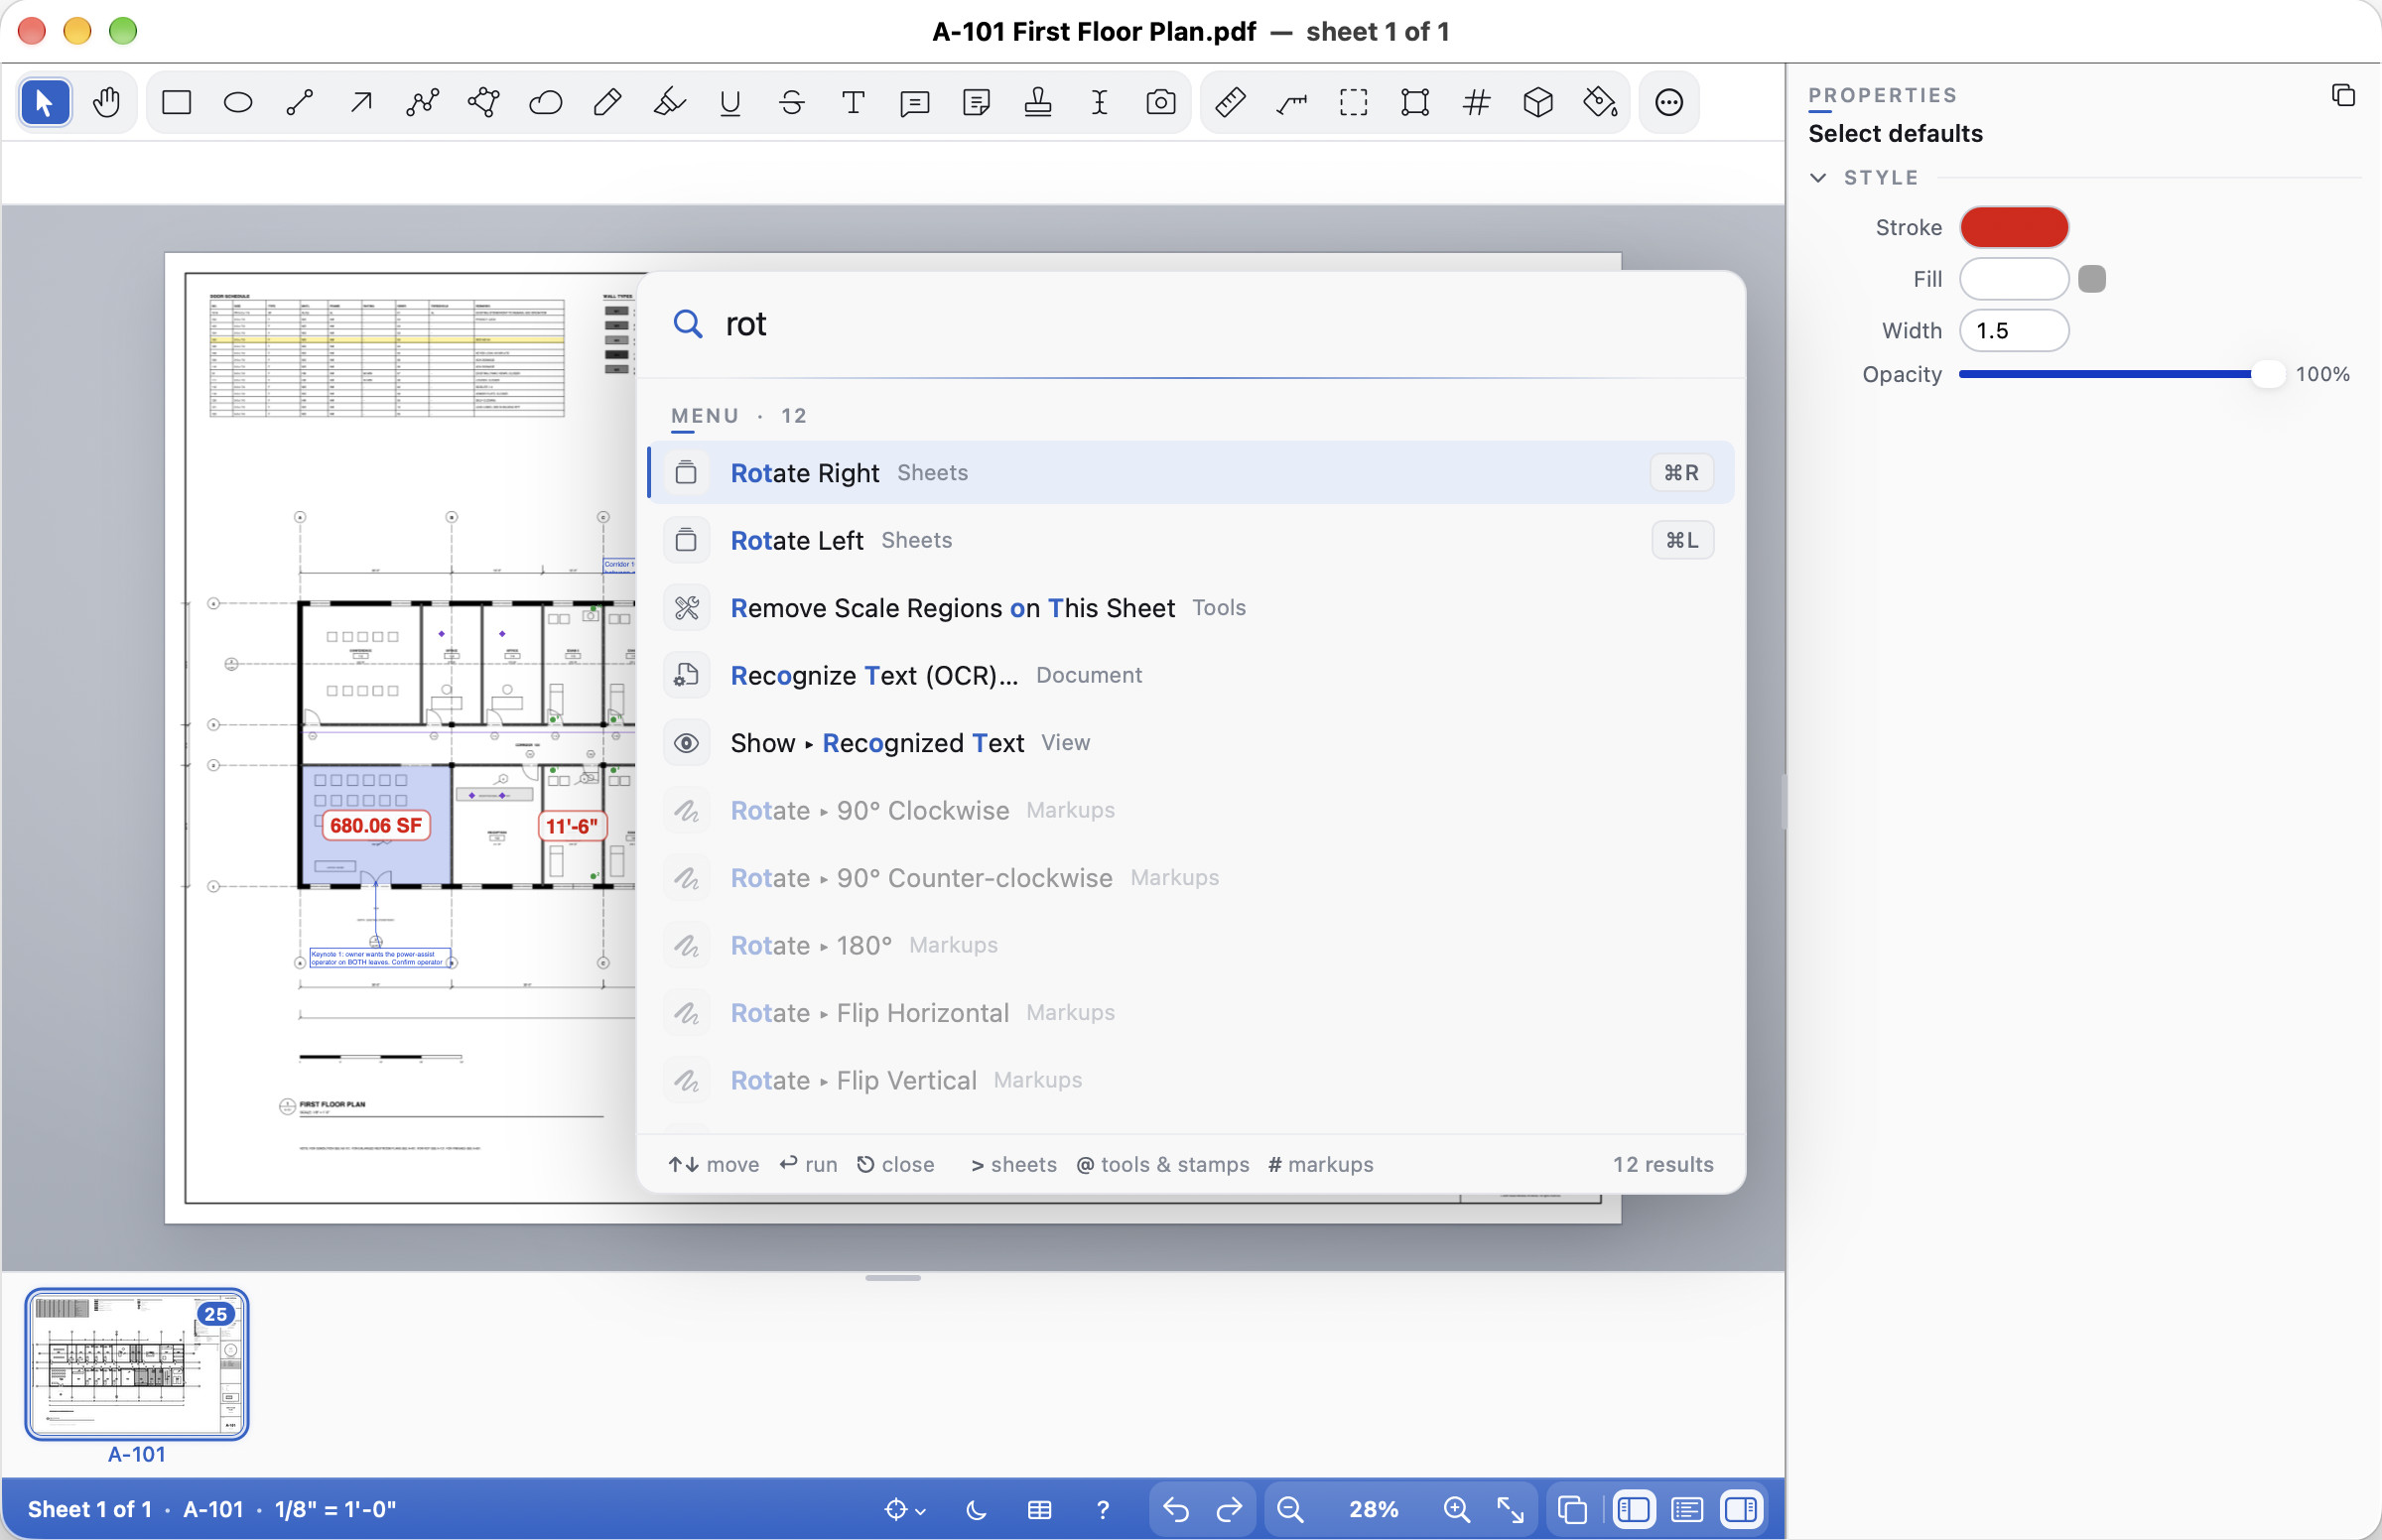
Help ▸ Command Palette… (⌘K; Ctrl+K) finds any command by typing a few of its letters: "fw" finds Fit Width, "rot" Rotate Right. Each result shows where it lives in the menus and its shortcut; ↑ and ↓ choose, Return or Enter runs it, Esc closes. Start with > to jump to a sheet (with its thumbnail), @ for tools, Tool Chest tools and stamps, and # to find a markup by its subject or comment and select it. The commands you ran lately come first.
Settings are in the palette too, listed after the menu commands: type a setting's name ("autosave", "spelling") or its page's name ("AI assistants") and choose it to open Settings (Options on Windows) with that setting picked out, ready to change.
Dark mode and Invert Drawing
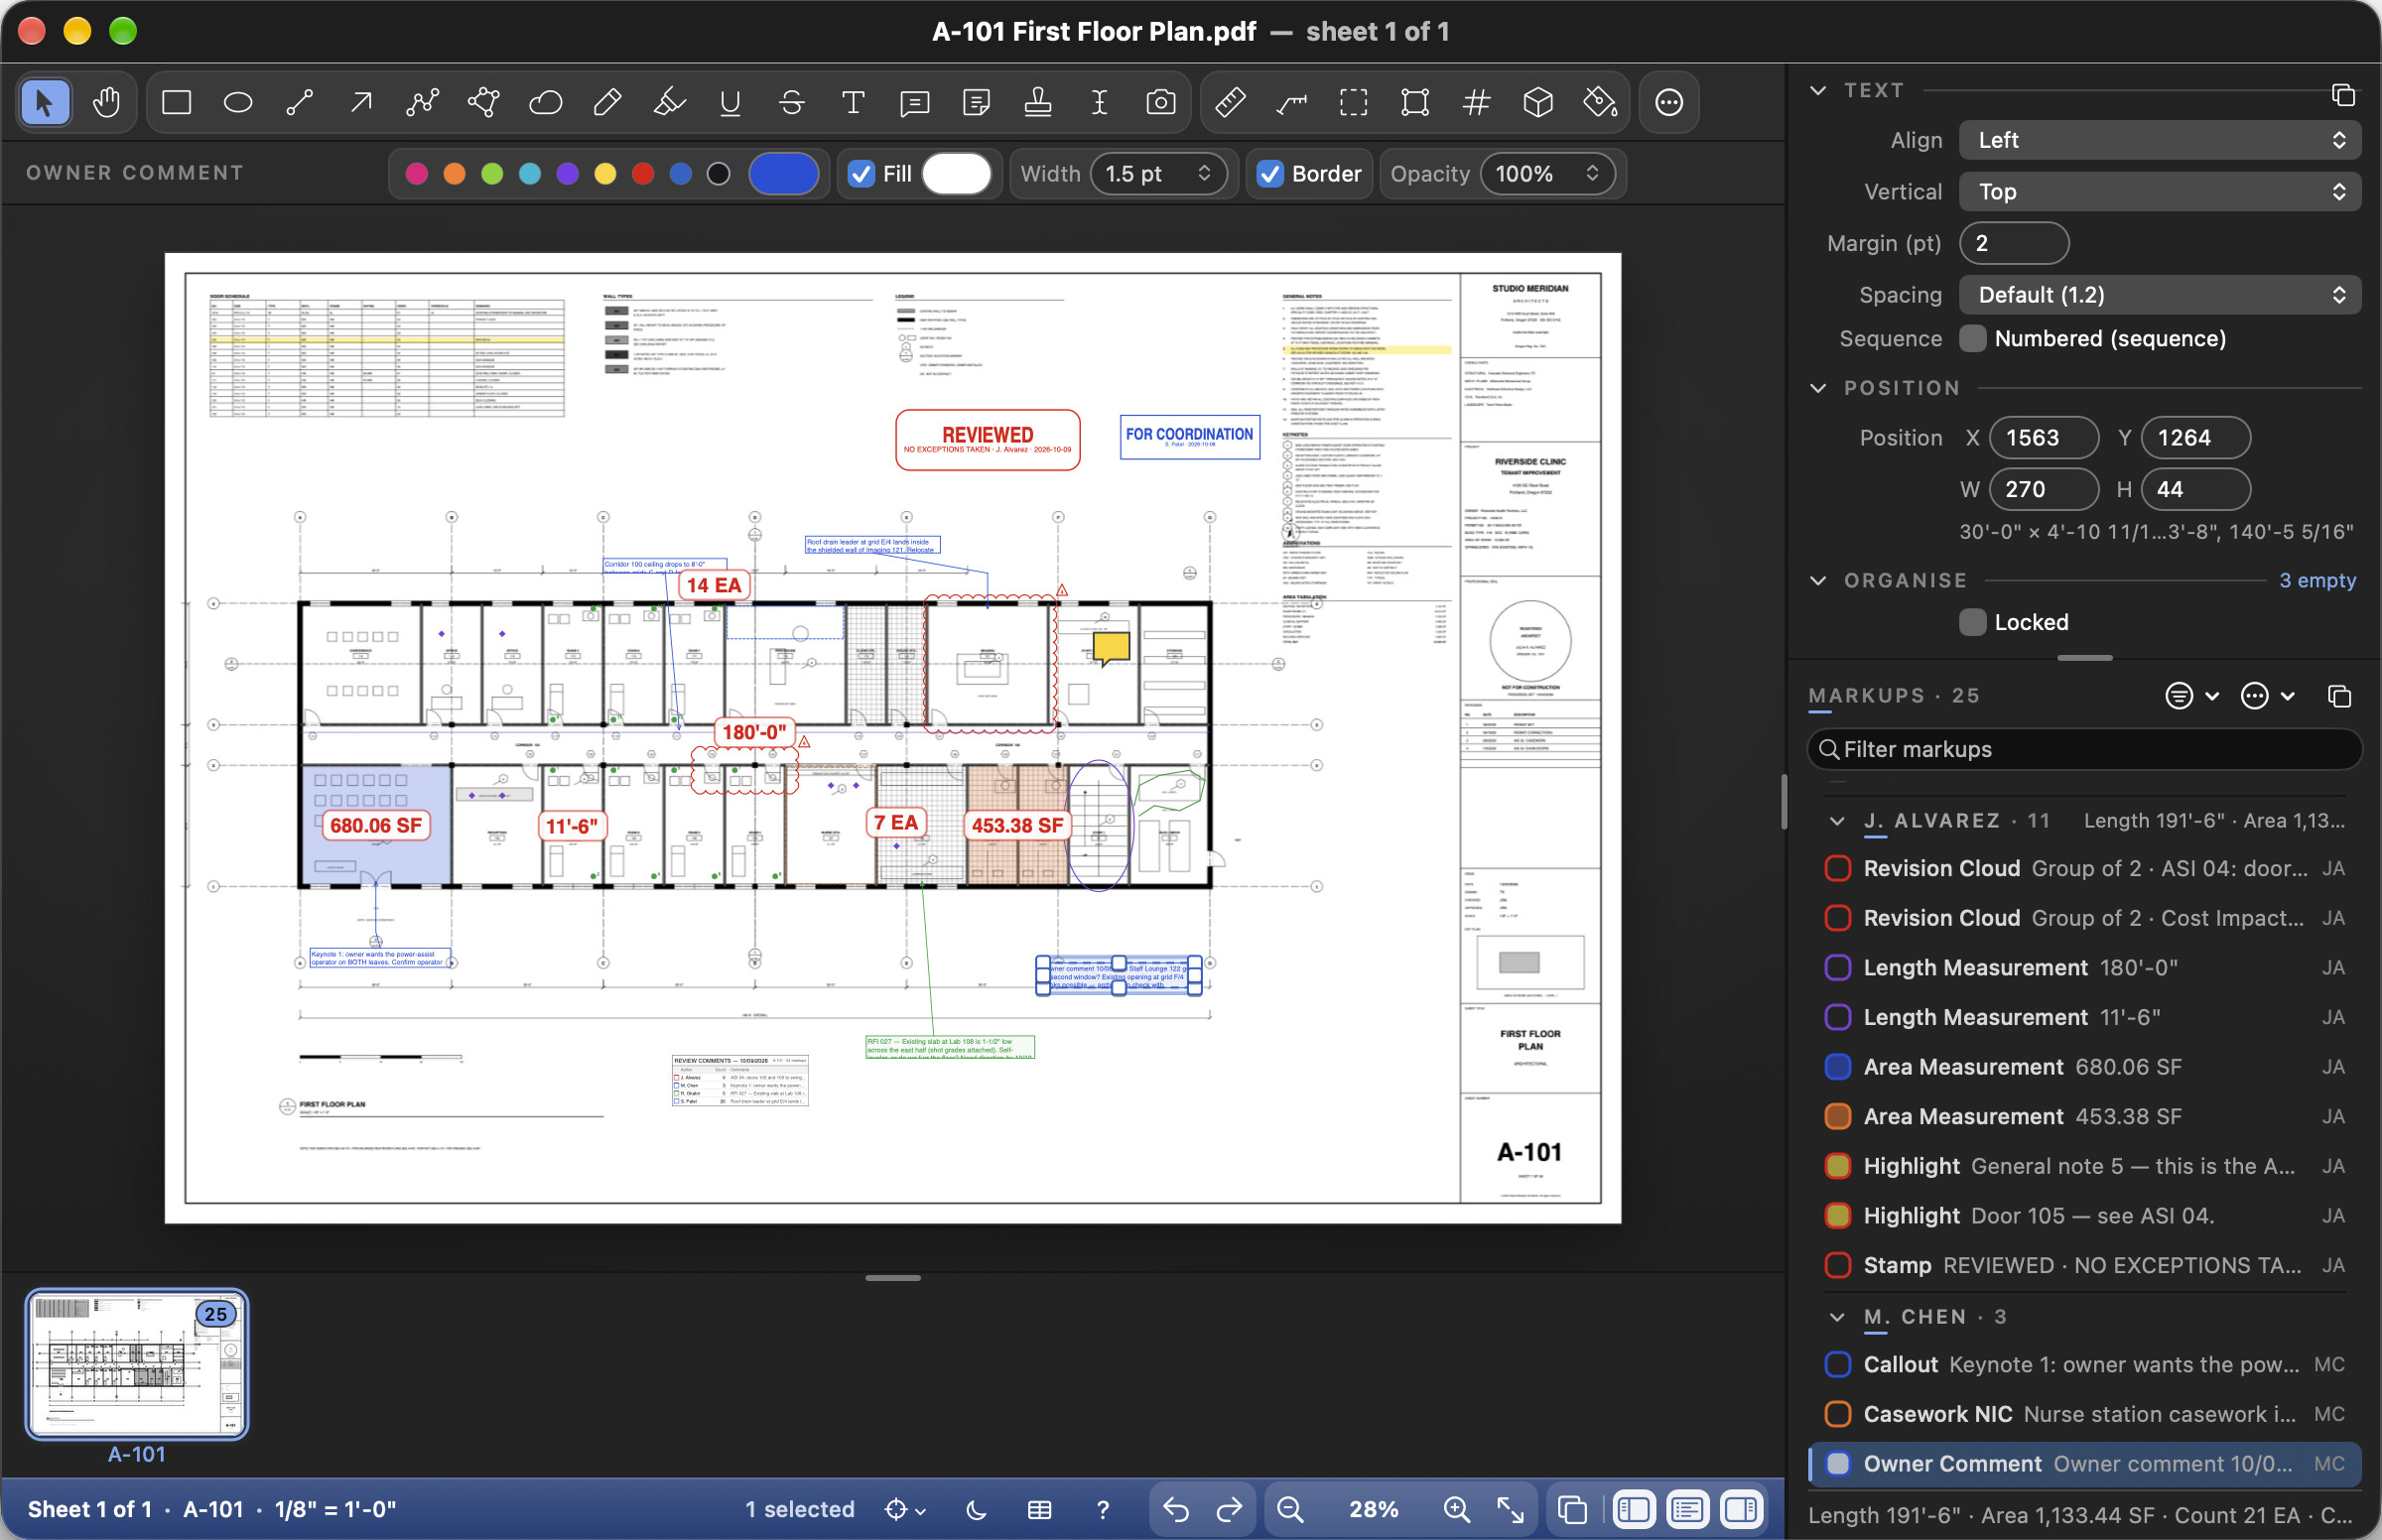
The interface and the drawing are set separately. View ▸ Appearance chooses Match System, Light or Dark for Cella PDF's own panels, bars and menus (the same choice as Settings ▸ Appearance, Options ▸ Appearance on Windows), and the change shows at once in every window. It never touches the drawing: in a dark interface the sheet stays paper-white, so colours read as they will print. To find it quickly, type "dark" or "light" in the command palette.
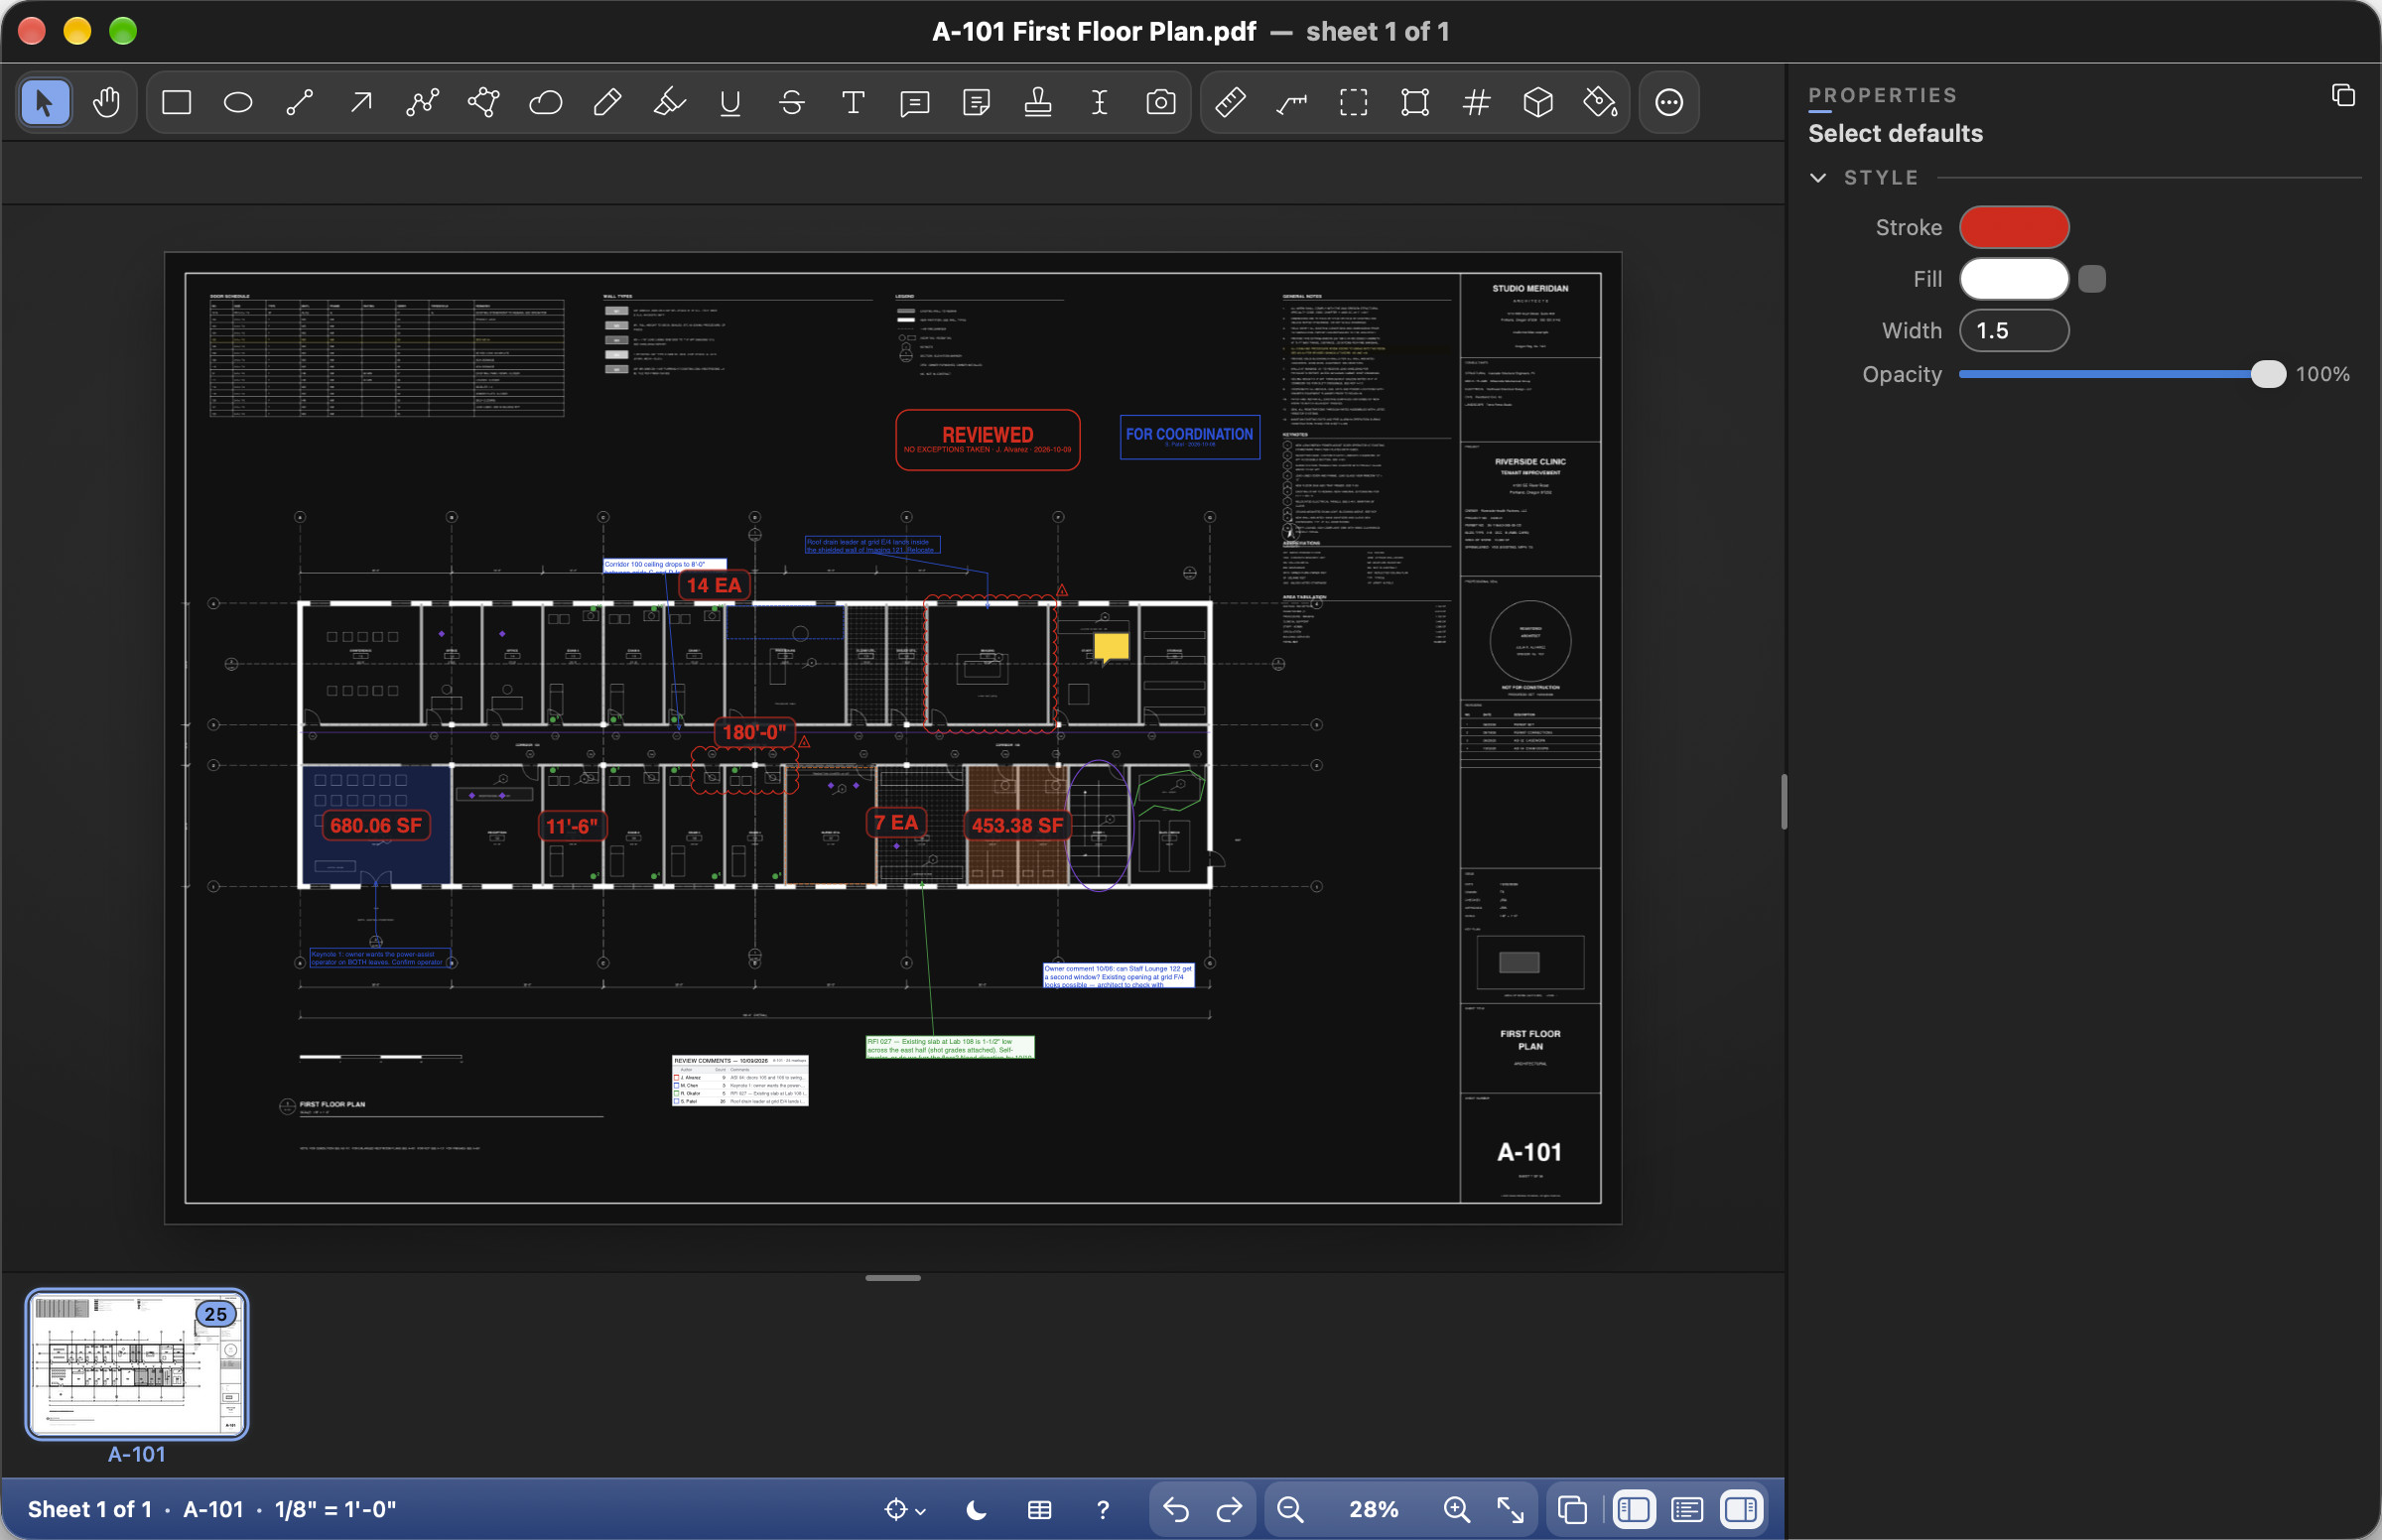
For night work, View ▸ Invert Drawing (⌃⌘I; Ctrl+Alt+I), or the moon in the status band, shows the sheets white on near-black. Your markups keep their real colours, a red line in the drawing stays red, and printing, exporting and the thumbnails are unchanged. Cella PDF remembers it. Invert Drawing and Appearance are independent: a dark interface with the drawing as it is, a light interface with an inverted drawing, or both dark.
Tabs
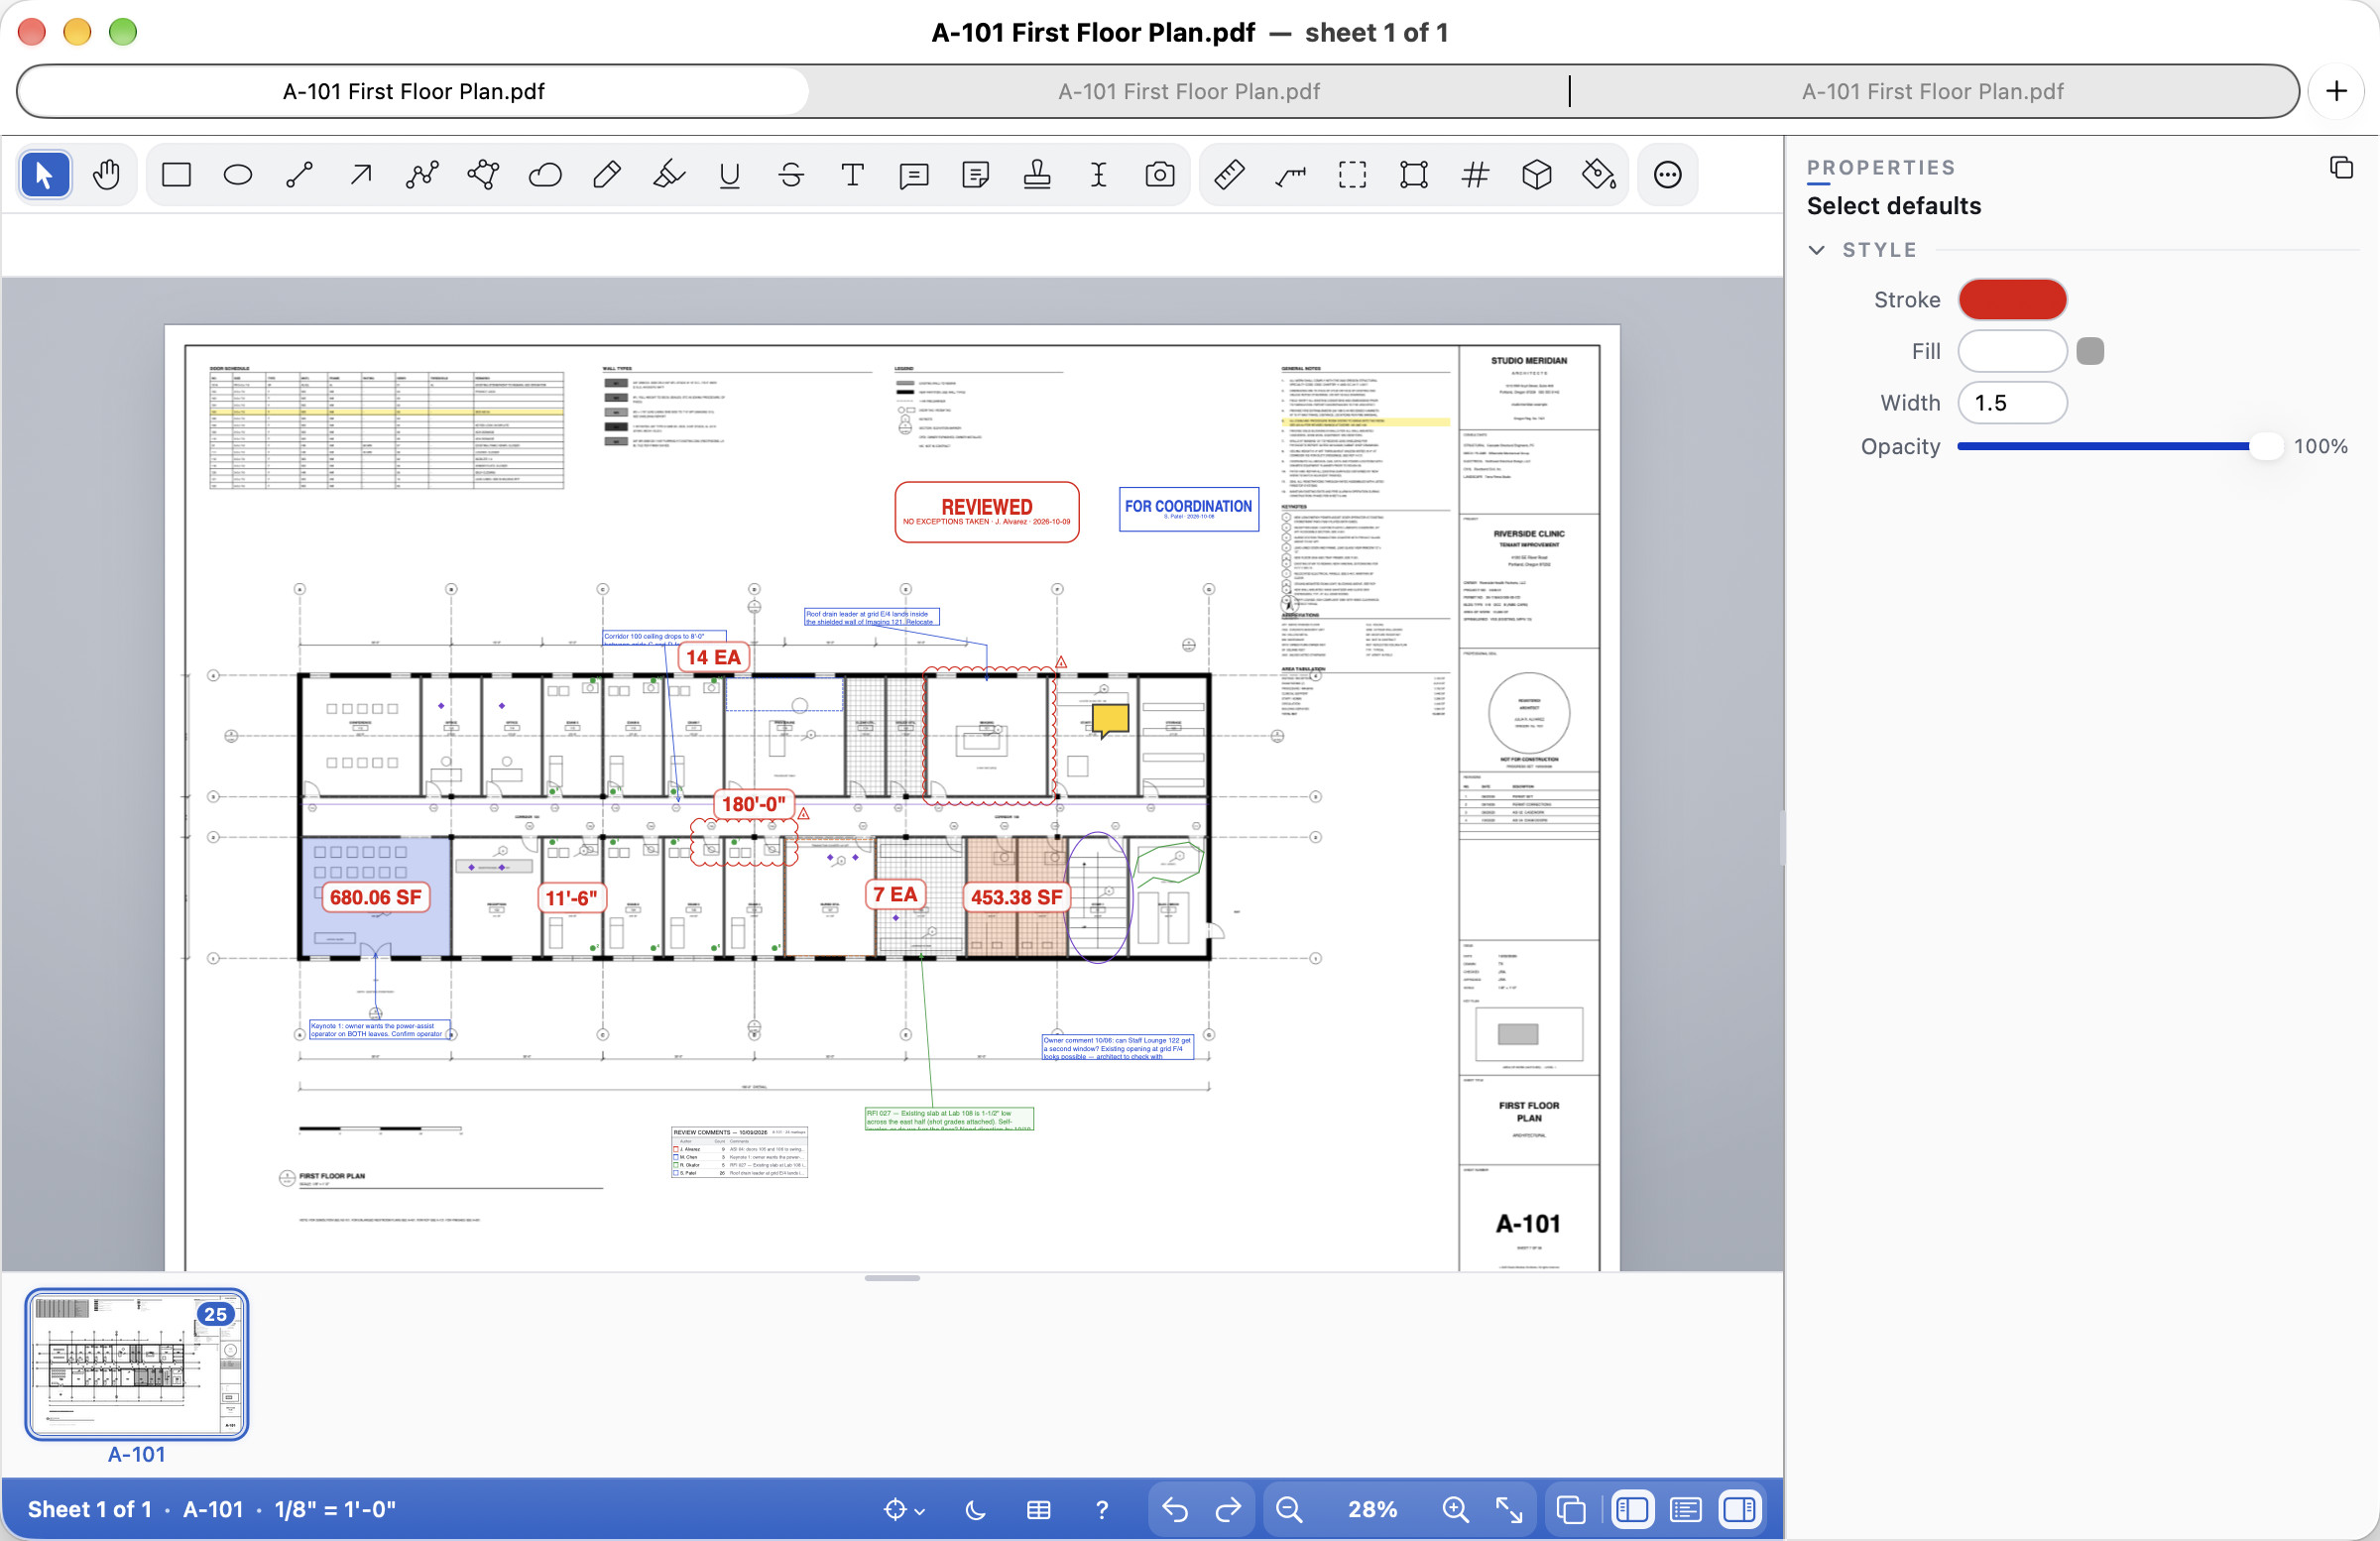
Documents open as tabs of the front window (Settings ▸ Open documents in tabs turns this off). On the Mac, Window ▸ Show Previous Tab / Show Next Tab (⌥⌘← and ⌥⌘→; Ctrl+Page Up and Ctrl+Page Down) move between tabs; drag a tab out for its own window, or use Window ▸ Move Tab to New Window, and Window ▸ Merge All Windows to gather them again. Each tab keeps its own sheet, zoom, panels and selection.
File ▸ New Tab (⌘T; Ctrl+T), or the + at the end of the tab bar, brings up the Welcome window for a new tab: pick a recent document or set, Open PDF…, Open Folder as Set… or drop a file on it, and it opens as a new tab of that window (in the window itself while it is empty). Close the Welcome window to leave the tabs as they were.
On Windows and Linux a tab strip appears under the toolbar once a window holds two documents. Ctrl+Page Up and Ctrl+Page Down move between tabs, Alt+1 to Alt+9 jump to one, a middle click or the tab's × closes it, and Window ▸ Move Tab to New Window gives a tab its own window. Right-click a tab for Open Document Folder, Move Tab to New Window and Close Tab.
To find a document's file, choose File ▸ Show in Finder on the Mac, or File ▸ Open Document Folder on Windows and Linux: its folder opens in Finder, Explorer or the file manager with the file selected. The command palette finds it too. A document opened from the cloud has no folder on your computer to show.
Split View
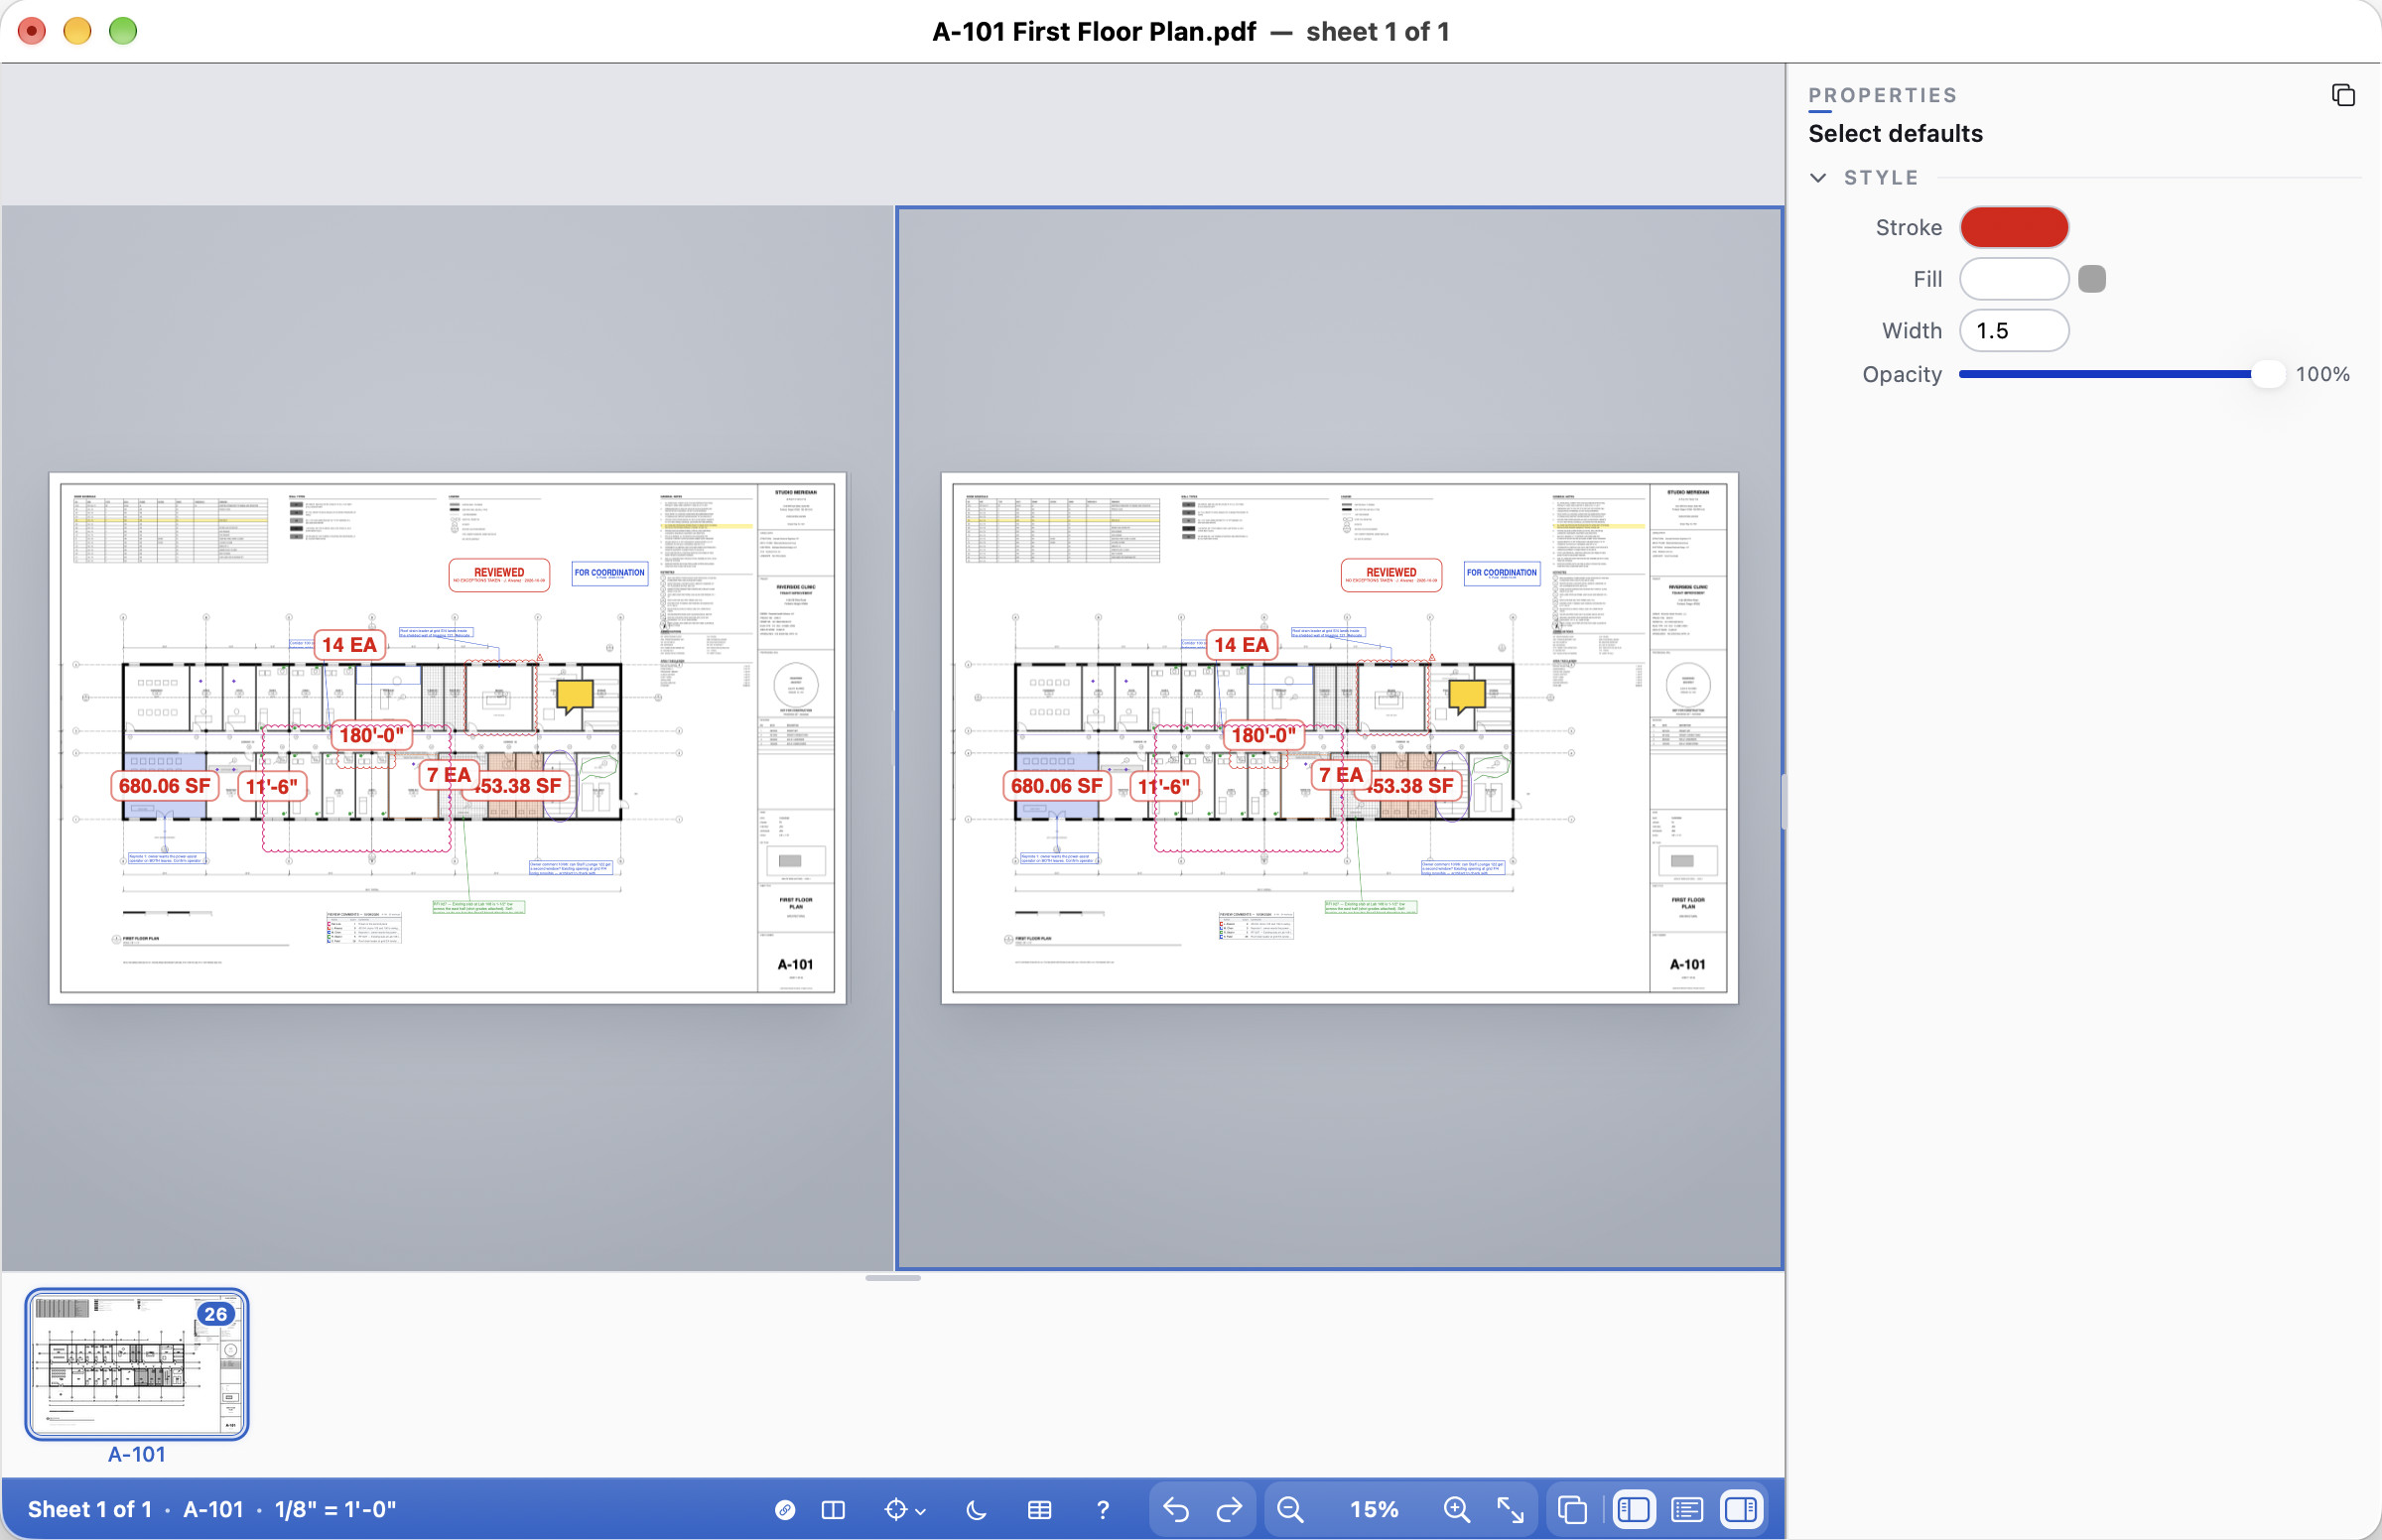
View ▸ Split View (⌘\; Ctrl+\) shows the document twice, side by side (Vertical) or stacked (Horizontal), each pane with its own sheet and zoom: a plan beside its detail. Drag the line between them to resize; double-click it for half and half. View ▸ Split View (⌘\; Ctrl+\) again closes the split; the first pane stays.
- Markups you draw or change in either pane appear in the other straight away; you save as usual (⌘S; Ctrl+S).
- The pane you are working in has a blue outline, and the Markups List, Properties and the sheets strip follow it.
- The link button in the status band (Sync Pan and Zoom) keeps both panes at the same zoom and centre; the two panes button next to it (Sync Sheets) also follows sheet changes.
- Split View ▸ Nudge Second Pane Left / Right / Up / Down moves the second pane's drawing a little, for two issues plotted slightly apart; click the offset in the status band (or Reset Offset) to put it back.
- Open Another File in Second Pane… shows a different PDF there, read-only, for looking at two issues side by side. Show This Document in Second Pane goes back.
Each window or tab has its own split.
Two documents side by side
With several documents open as tabs, each pane can show a different one: a plan beside the consultant's drawing, or this week's issue beside last week's.
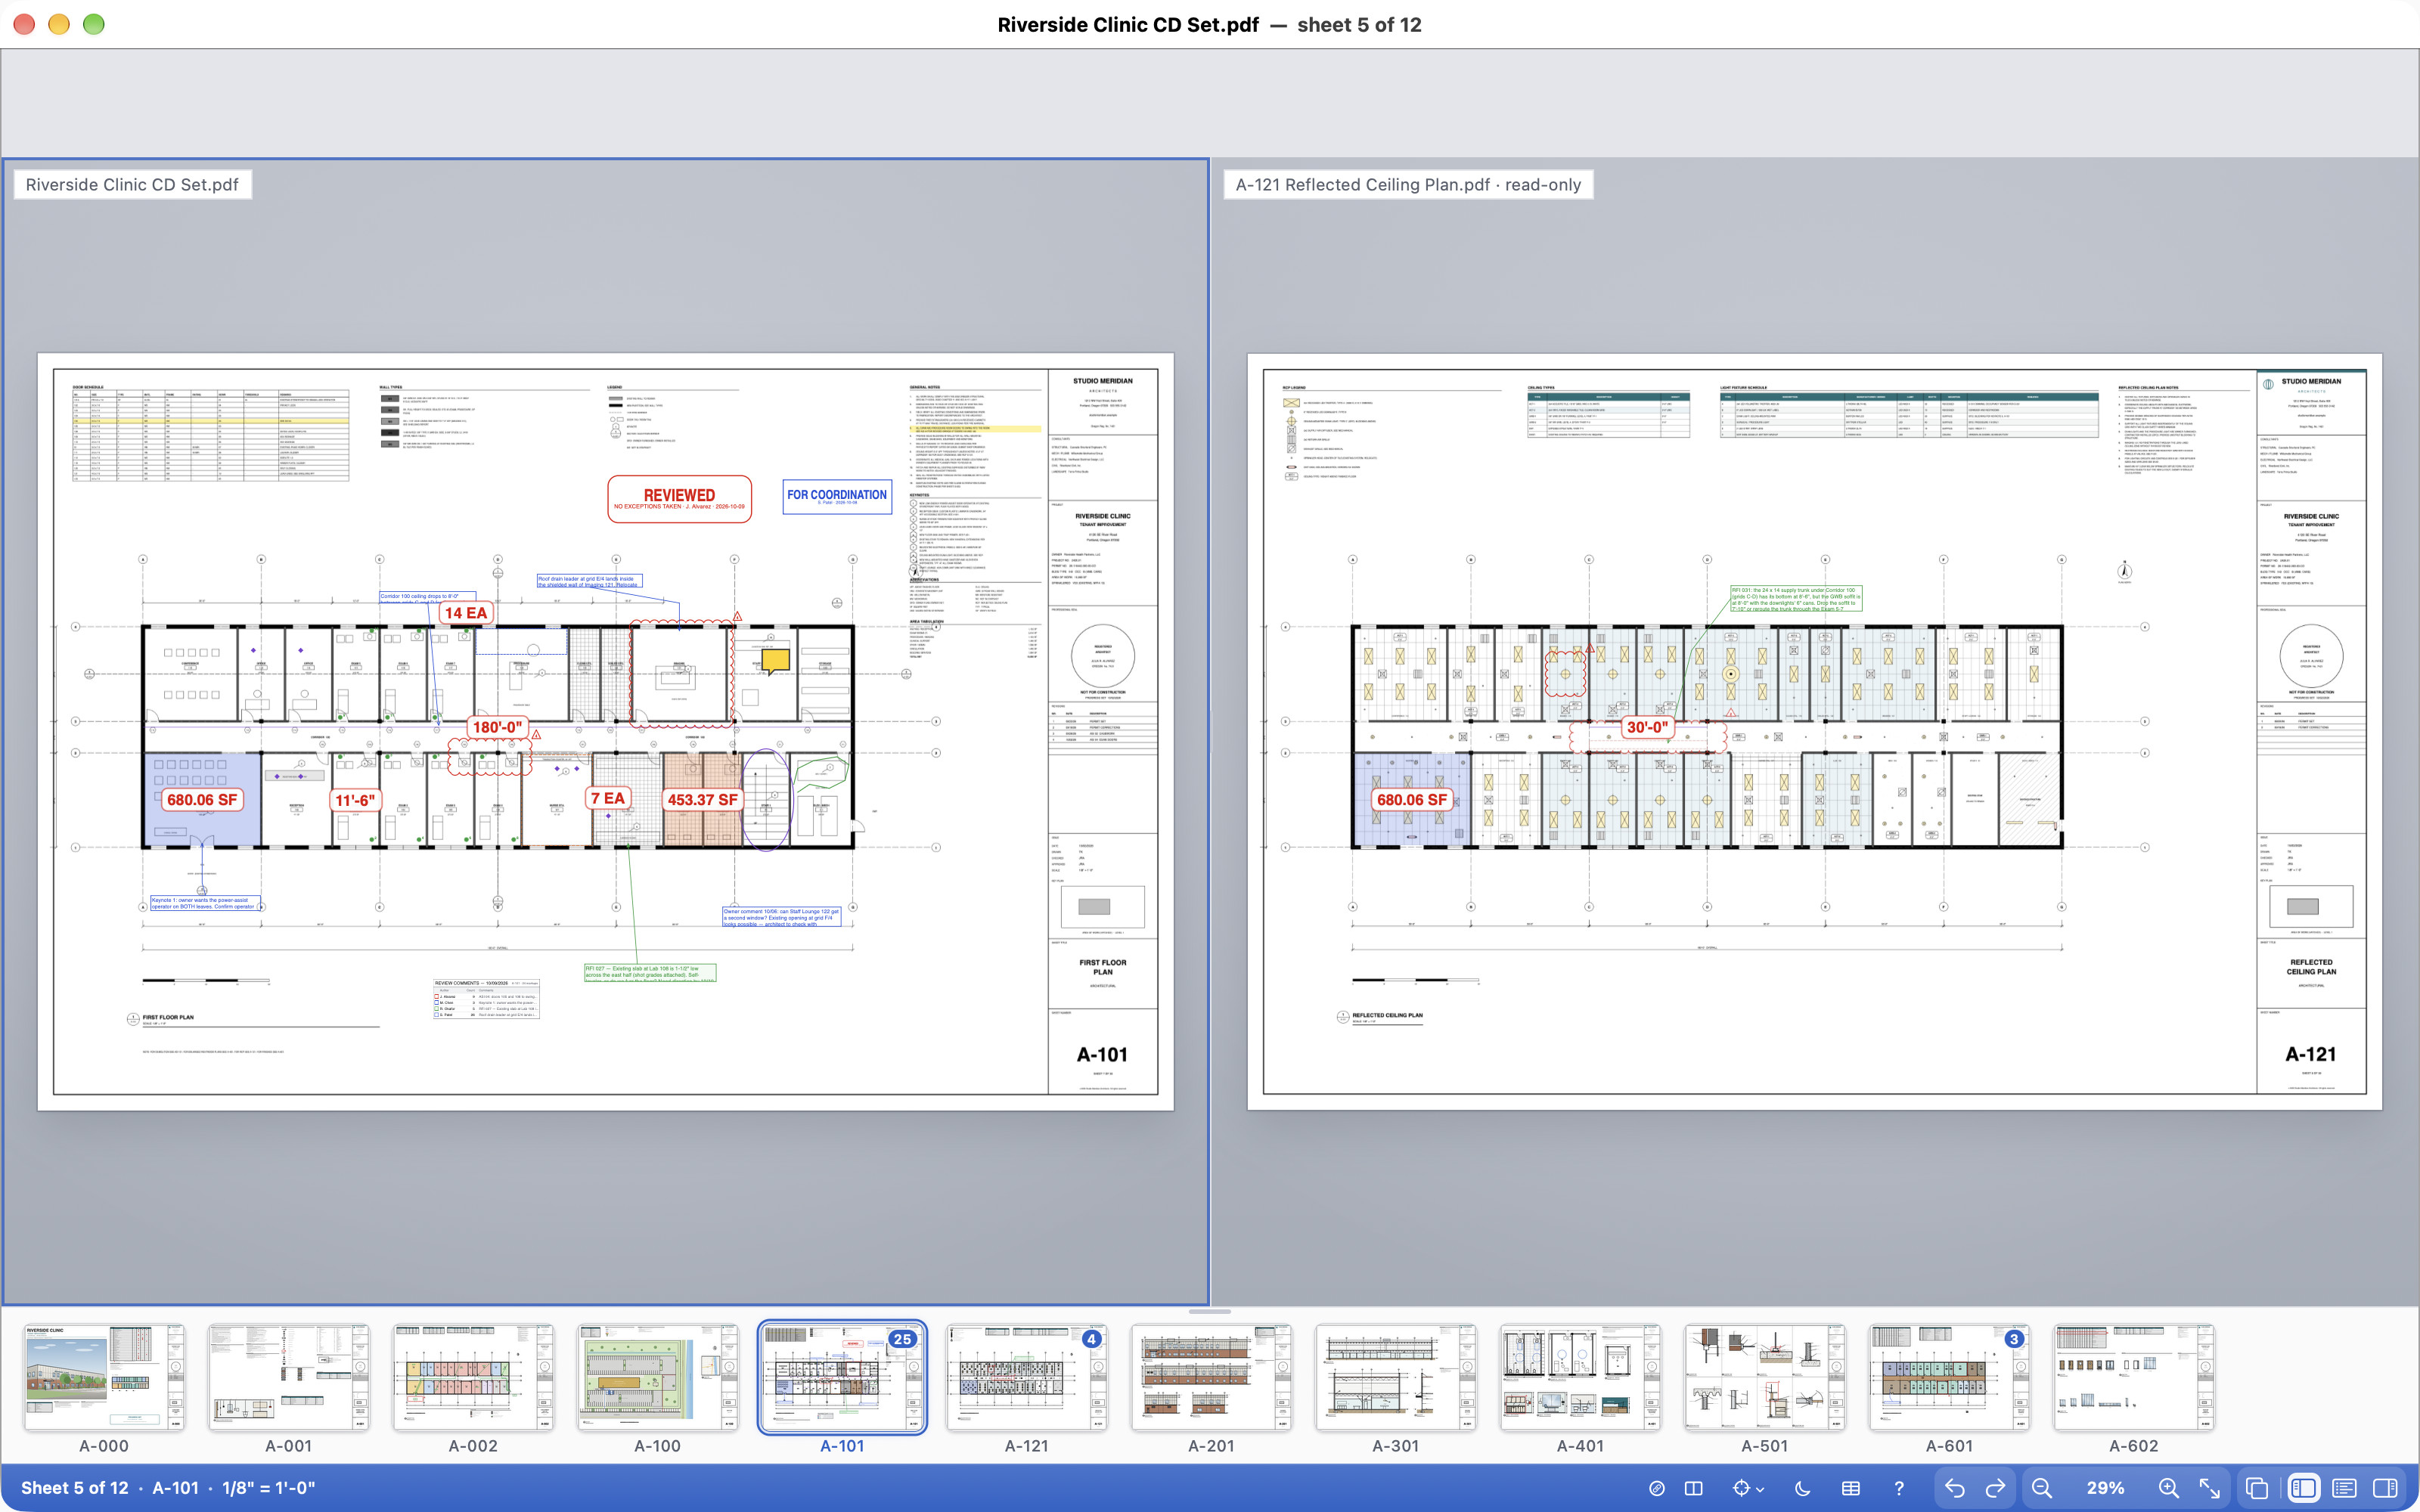
- Click a tab while Split View is open and the pane you are working in (the one with the blue outline) changes to that document; the other pane stays as it is. Click the first pane's own tab with the second pane outlined to show one document in both panes again.
- Right-click a tab ▸ Open in Other Pane puts it in the pane you are not working in (and opens Split View if it is closed). On Windows you can also drag a tab down onto a pane. On the Mac, choose the pane, then click the tab.
- View ▸ Split View ▸ Open in Other Pane steps the other pane through your open tabs, and Swap Panes trades the two documents between the panes.
- Each pane shows its document's name at its top left while the two differ. In the tab strip the document in the pane you are working in has the current look, and the one in the other pane a grey underline (on the Mac, a small split-view symbol on its tab).
The first pane is where you work: the sidebar, Properties, the Markups List and Table, the status band, the window's title, Save, Print, Export and undo are all for its document. The second pane shows its document exactly as it is in its own tab, unsaved markups included, but read-only: to mark it up, use Swap Panes (or click its tab with the first pane outlined) and it moves into the first pane with all its panels. Sync Pan and Zoom and Sync Sheets work with two documents too: the panes keep the same zoom and the same place on the sheet (by its share of the sheet when the sheets differ in size), and Sync Sheets finds the sheet with the same number.
Closing a tab that one pane shows puts the other pane's document in that pane. Unsaved changes are asked about tab by tab, as always. When Cella reopens your documents at launch, each window's split comes back with the same document in each pane.
Presentation mode
For a meeting: View ▸ Presentation (⇧⌘↩; F5 on Windows and Linux). The window fills the screen, every panel and bar goes, and the sheet is fitted whole. Under the mouse is a laser pointer, a red dot with a short fading trail that is never a markup and is never saved; drag to pan, use the wheel with ⌘ (Ctrl) held, or a pinch, to zoom into a detail (the wheel alone when Mouse wheel is set to Zooms), double-click to fit the sheet again.
- → ↓ Page Down, Space or Return go to the next sheet, ← ↑ Page Up or Backspace to the previous, Home and End to the first and last. Each sheet comes up fitted.
- Type a sheet number or name ("A-201", or "12") and press Return to jump to it; the name shows at the bottom as you type, and an exact match goes by itself after a moment.
- The sheet's name and place ("A-101 · 3 / 12") show for a moment after each change.
- Esc ends the presentation (or the ✕ at the top right, shown when the pointer is near the top); the window comes back as it was.
Reading a set
Sheets and sheet numbers
Cella PDF reads each sheet's number from its title block, so the strip, the sidebar and the status band say A-101 rather than "page 1". A PDF that carries sheet names (page labels) shows those.
- Rename a sheet: double-click its row in the Sheets list, press Return or Enter on it, or right-click ▸ Rename Sheet…; type the name and press Return or Enter (Esc cancels; an empty name goes back to "Sheet N").
- Tools ▸ Sheet Setup ▸ Detect Sheet Numbers… renames every sheet to the number in its title block, replacing the names the file had and your own.
- Tools ▸ Sheet Setup ▸ Sheet Labels from Title Block… names every sheet from the places you show it on one sheet (below).
- Tools ▸ Sheet Setup ▸ Sheet Index… reads the drawing list off the cover sheet; see Sheet index.
Saving writes the names into the PDF as page labels, so Acrobat and other PDF apps show the same names.
Sheet labels from the title block
When a set comes in with its sheets called 1, 2, 3 and its bookmarks "Sheet 1, Sheet 2…", show Cella PDF where the sheet number and title are on one sheet and it names them all.
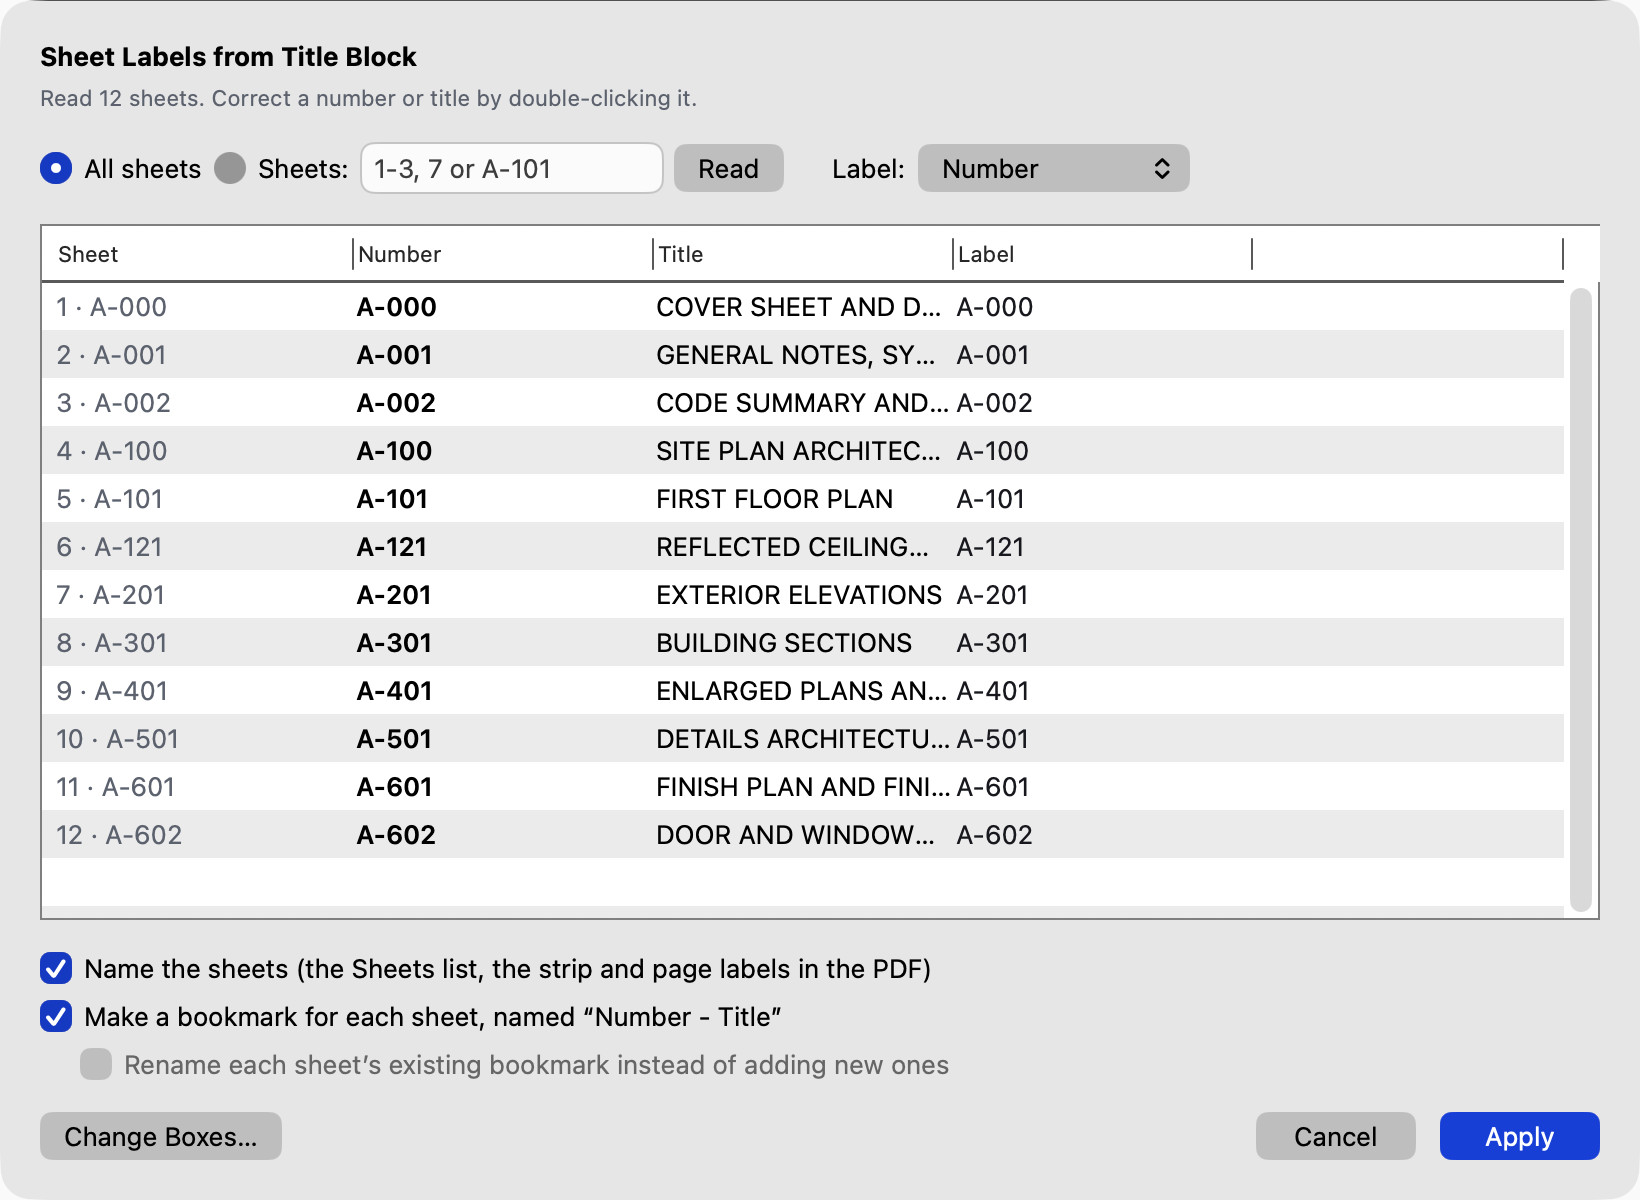
- Open a sheet with a typical title block and choose Tools ▸ Sheet Setup ▸ Sheet Labels from Title Block… (also on the right-click menu of the Sheets list and of the Bookmarks tab). A panel at the top of the drawing shows the boxes Cella PDF guessed, or the ones you used last time.
- Drag a box over the sheet number. Then drag one over the sheet title, or leave it out. The panel shows what each box reads on this sheet as you drag. Turn to other sheets (click them in the Sheets list or strip) to check they read right there too; click a line in the panel to draw that box again. Continue… goes on; Esc or Cancel stops.
- A table lists every sheet with the number and title read from it and the label it will get. Double-click a number or title to correct it. Choose All sheets or type a range (
1-3, 7orA-101) and click Read. Choose the label: Number (the title is kept as the sheet's title and shows under the number), Number - Title or Title. Sheets whose label would be blank are left as they are, and labels used twice are marked. - Tick what to do and click Apply: Name the sheets, and Make a bookmark for each sheet, named "Number - Title". With bookmarks already there, tick Rename each sheet's existing bookmark to rename them in place; otherwise the new ones go after them. Edit ▸ Undo takes the bookmarks back. Save to write the names into the PDF.
The boxes keep to the nearest corner of the sheet, so a title block at the bottom right is found on larger and smaller sheets of the set, and on turned sheets. Cella PDF remembers them for the document and offers them for the next set, so a set from the same office is one click. A scanned sheet has no text to read until you choose Document ▸ Recognize Text (OCR)…; the table says which sheets those are.
Bookmarks
When the PDF has bookmarks, a Bookmarks tab appears in the sidebar. They are nested as the file has them (click a triangle to open or close a group). Click one, or arrow through them, to go to its sheet, zoomed to the place it marks.
You can edit them:
- Sheets ▸ Add Bookmark, or + at the top of the Bookmarks tab, marks the sheet and the view on screen; type its name straight away. ↳ adds it inside the selected bookmark.
- Double-click a bookmark to rename it; Delete (or −) removes it; drag bookmarks to reorder them, or onto another to nest them.
- Markups ▸ Bookmark This Markup (also on a markup's right-click menu) marks a markup, zoomed to it. Sheets ▸ Bookmarks from Sheet Labels… makes one bookmark per sheet, named like the sheet. Sheet Labels from Title Block… makes or renames them as "Number - Title" read from the title blocks (Sheet labels from the title block).
- Save writes the bookmarks into the PDF, where Acrobat, Preview and other PDF apps show them too. Undo (⌘Z; Ctrl+Z) undoes bookmark changes one at a time, with your markup edits. Bookmarks follow their sheets when you move or insert sheets.
Search
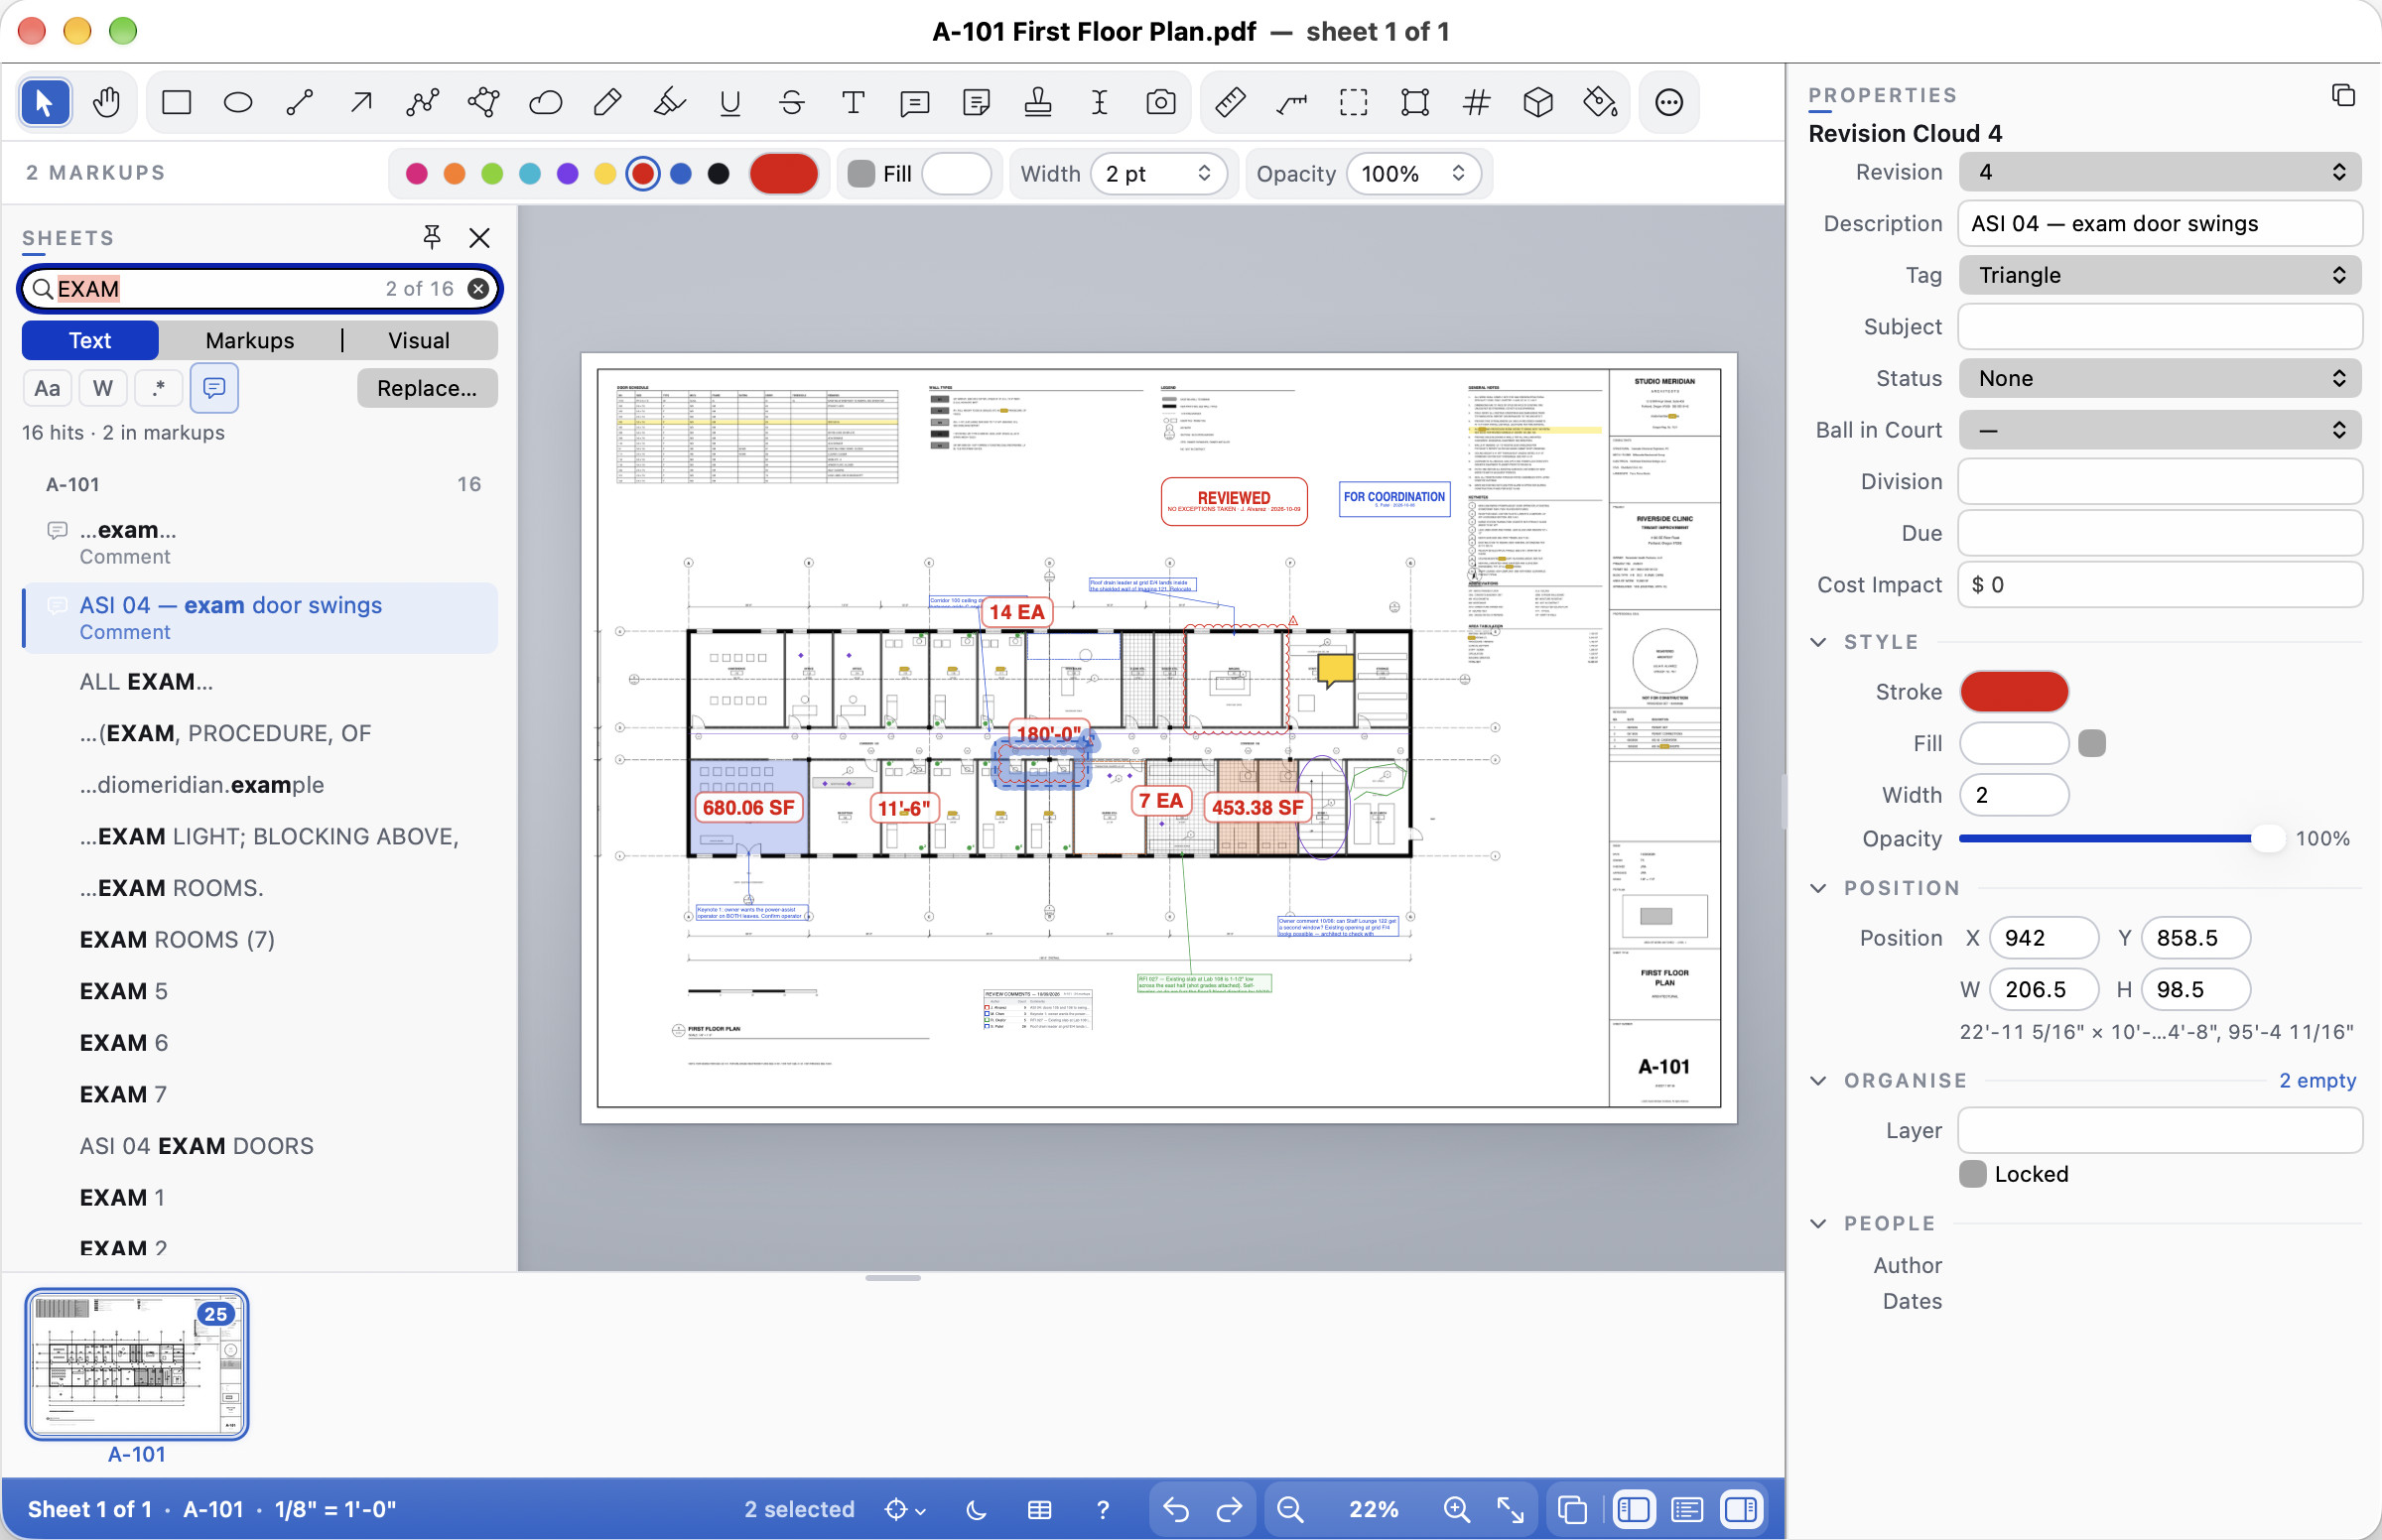
Edit ▸ Find… (⌘F; Ctrl+F) puts the cursor in the sidebar's search field. Type and press Return or Enter to search the drawings' text and the markups (subjects, comments, replies, custom columns and stamp text). The results replace the sheet list, grouped by sheet with their counts and the match in bold; the field shows "2 of 16".
- ↑ and ↓ move through the hits; Return or Enter jumps to one (again: to the next).
- Edit ▸ Find Next (⌘G; Ctrl+G or F3) and Find Previous (⇧⌘G; Ctrl+Shift+G or Shift+F3) step through them from anywhere. Esc clears the search.
- The toggles under the field: Aa Match Case; W Whole Word ("22" finds DETAIL 22/M-152 but not M-222); .* Regular Expression (
A-5\d\d,RFI\s*12; a pattern with a mistake says so); and the speech bubble, which includes the markups. - With a folder set open, Whole Set searches every file (the same choice as the Markups List's This File / Whole Set). Results are grouped by file; choosing a hit in another file opens it there. Cella PDF keeps what it read of each file in the
.cellafolder beside the files, so a second search of a big set takes a moment instead of reading every PDF again. - Replace…, under the field, changes the matching text in this file's markups (subjects, comments and replies: "ASI 4" to "ASI 7") after telling you how many it will change. One Undo puts it all back.
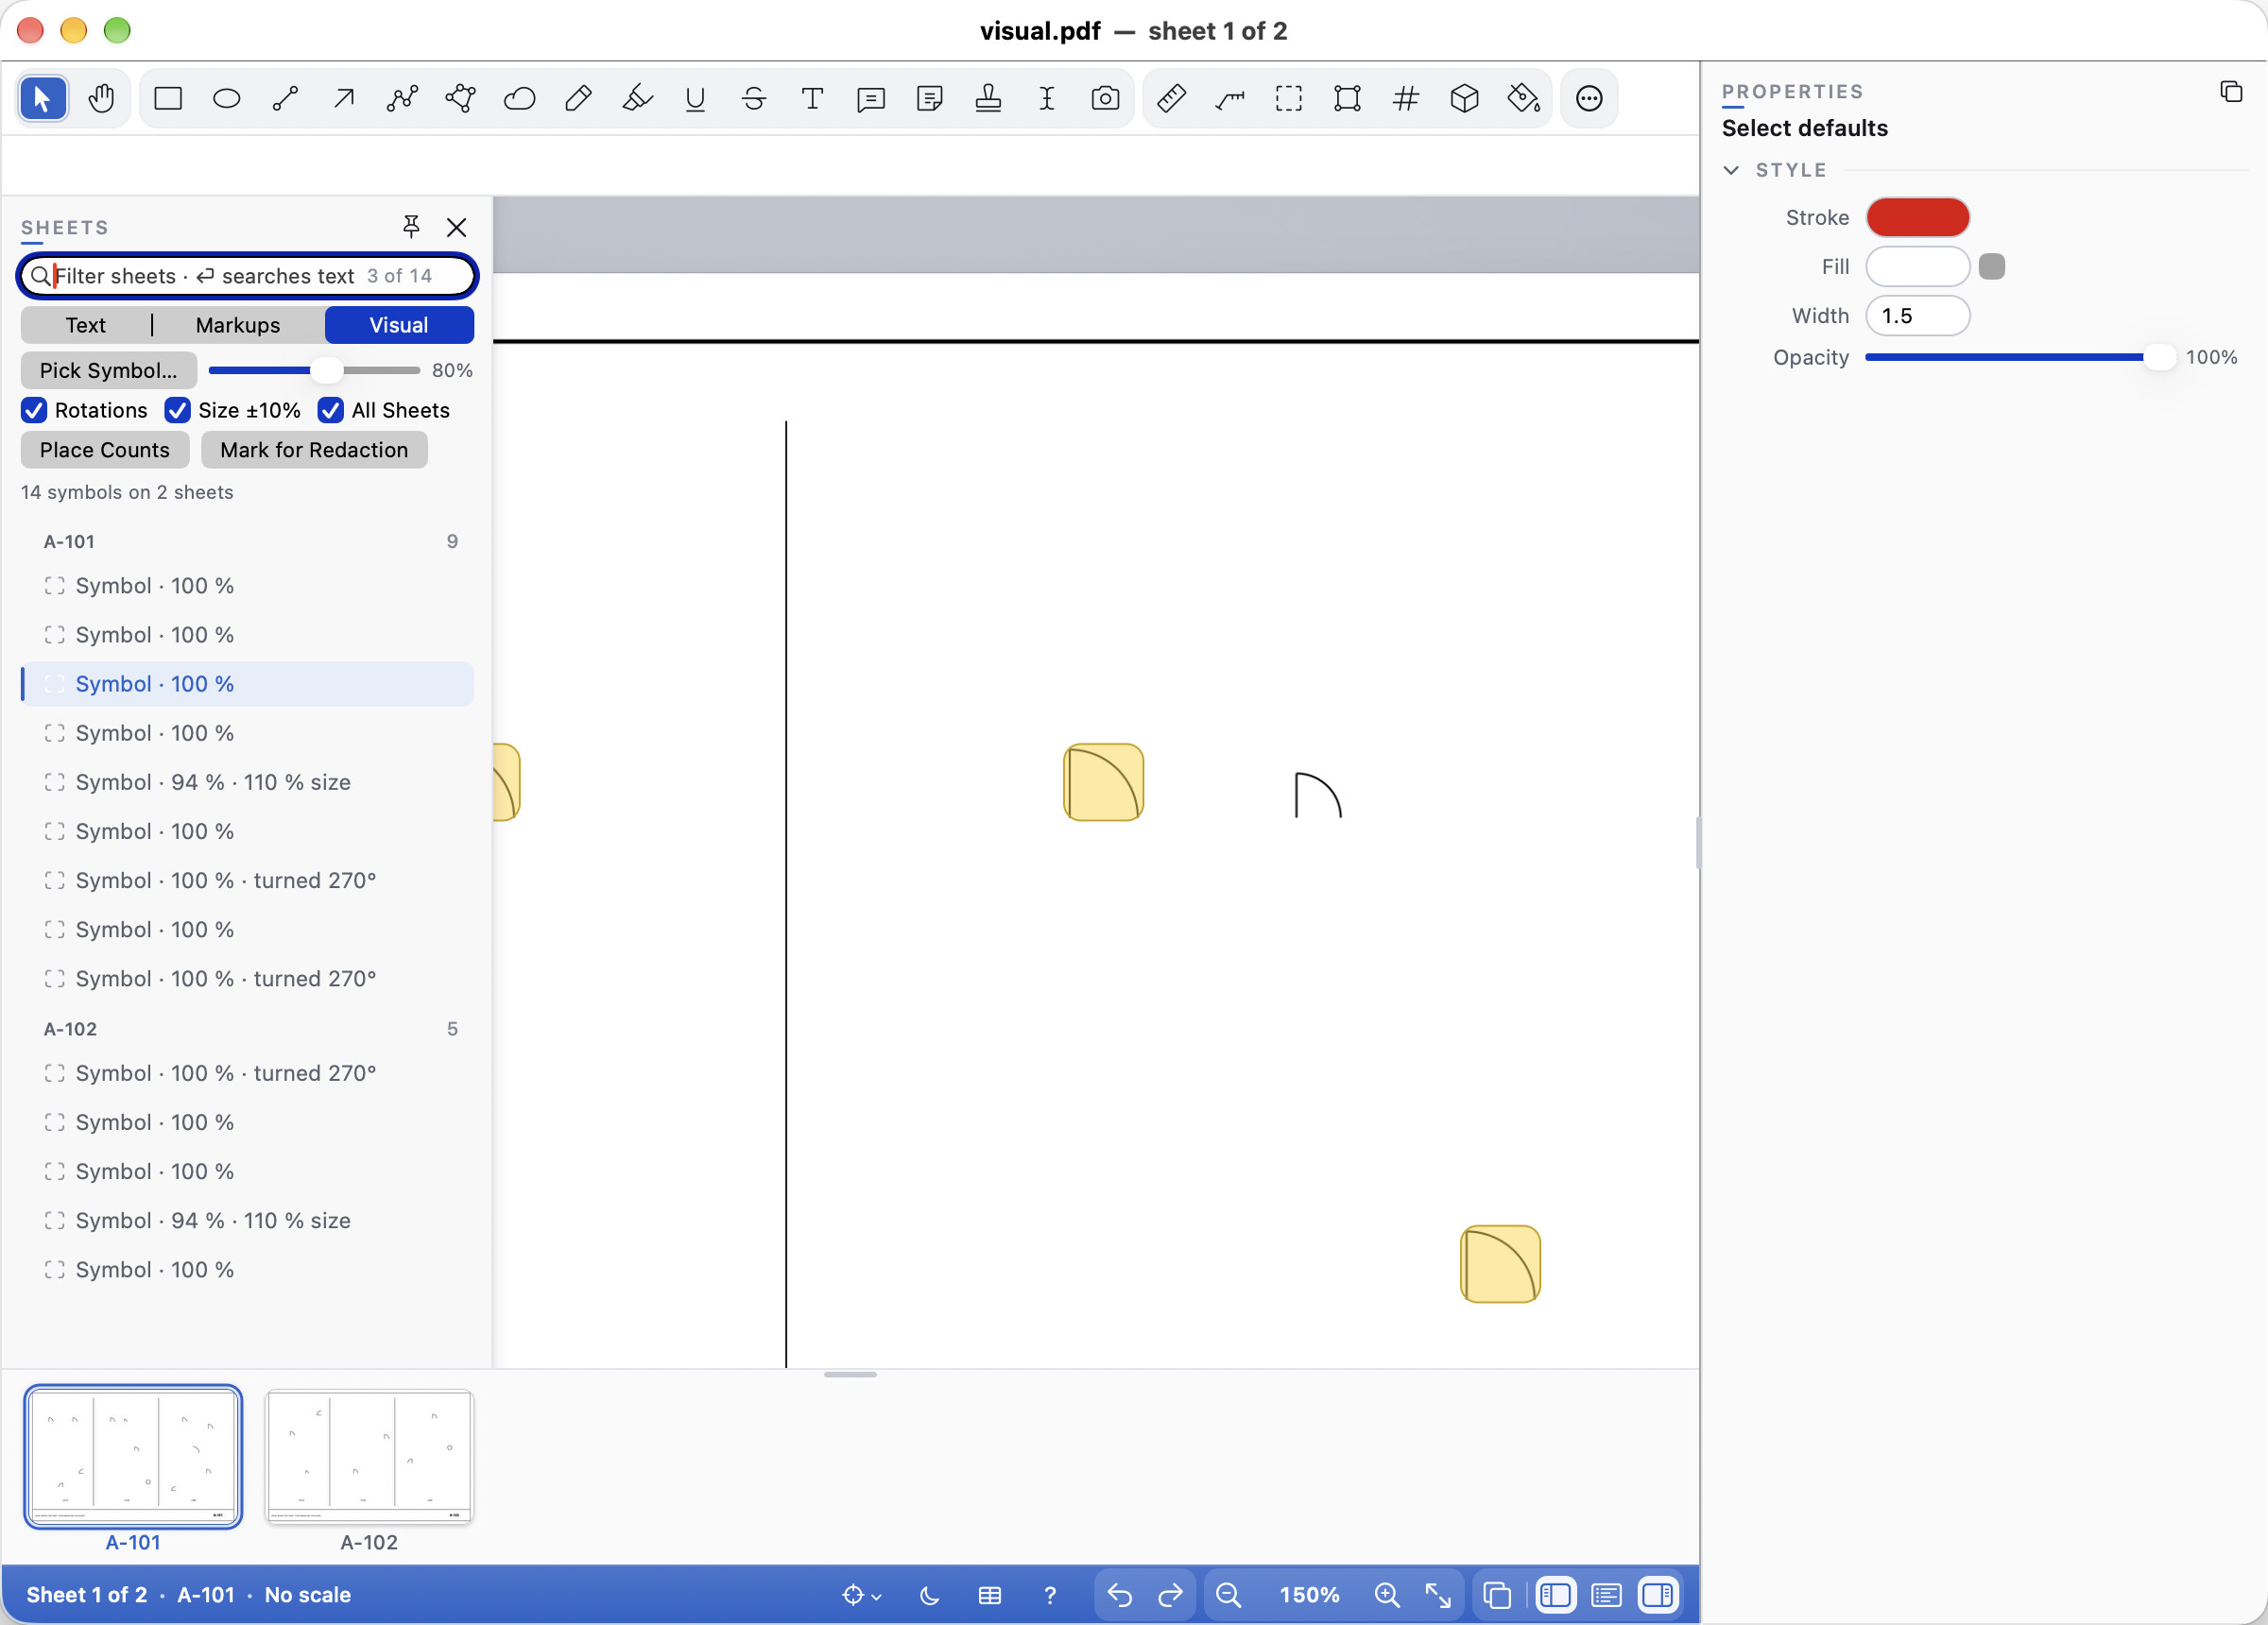
Visual Search finds a symbol by how it looks, not by its text. Choose Visual above the toggles (Markups searches only the markups' text), click Pick Symbol… and drag a box around one door swing, receptacle or fixture tag on the sheet. Cella PDF lists every other place it is drawn, grouped by sheet like text hits, and outlines them on the sheet. All Sheets looks on every sheet of the document; Rotations also finds it turned 90°, 180° or 270°; Size ±10 % finds it a little smaller or larger; and the Match threshold slider (60–95 %) says how alike a place must be. Place Counts then puts a Count markup on every symbol found, with the Count tool's symbol, ready for the take-off. Mark for Redaction covers each one with a redaction mark. One Undo takes either back.
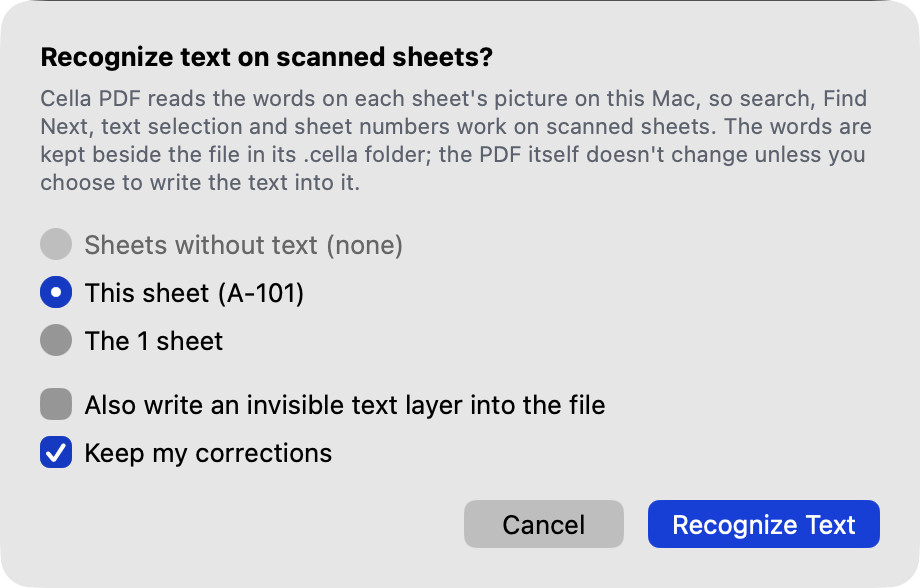
Scanned sheets are pictures with no text, so there is nothing to find on them until you choose Document ▸ Recognize Text (OCR)…. Pick the sheets without text, this sheet or all of them, and Cella PDF reads the words on your computer (nothing is sent anywhere). Search, Find Next, Whole Set, selecting and copying text, highlighting it, Mark Search Results for Redaction and Detect Sheet Numbers then work on those sheets. The words are kept in the .cella folder beside the file and the PDF is left as it was, unless you tick Also write an invisible text layer into the file so other apps can search it too. Settings ▸ Recognize text on scanned sheets automatically reads a scanned title block for its sheet number when a set opens. The Mac reads with its own text recognition and Windows with Windows' own (it uses the OCR languages installed with Windows). On Linux, install Tesseract (for example sudo apt install tesseract-ocr); Cella PDF doesn't bundle it.
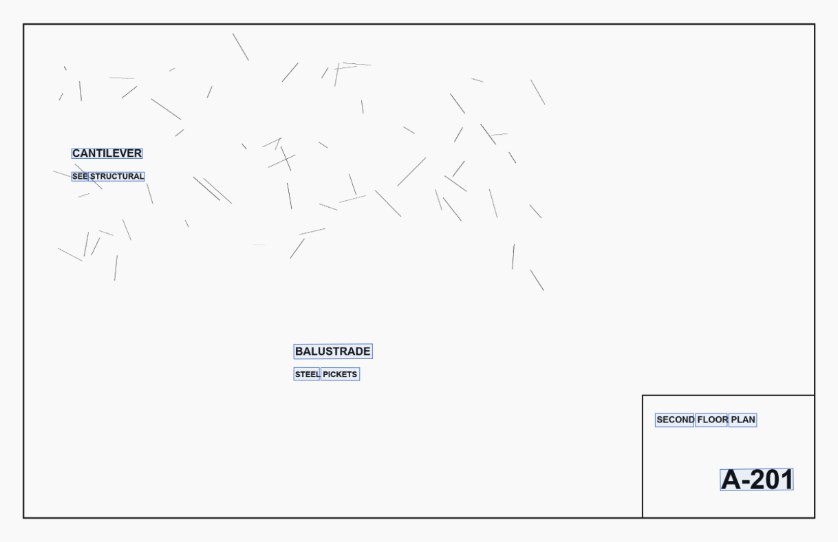
To check what was read, choose View ▸ Show ▸ Recognized Text. Every word Cella PDF found gets a thin box on the sheet, with the word in a small label when you point at it. Words the Mac's recognition was unsure of are boxed in amber (Windows doesn't say how sure it is), and words you corrected in green. Double-click or right-click a word to fix it: type the right word and press Return or Enter, press Esc to leave it, or press Delete to remove a word that isn't one (a smudge read as text). Search and selection use your correction at once, Undo takes it back, and it is kept beside the file with the rest of the words. When you recognize the text again, Keep my corrections (on by default) keeps each corrected word that is found again in the same place. If you wrote the invisible text layer into the file, the file keeps the earlier words until you run Recognize Text again with that box ticked.
Selecting and copying the drawing's text
With the Select tool, drag across the drawing's own text (the pointer becomes an I-beam over it) to select it, as in Preview. The selection follows reading order across lines, and down a notes column rather than across the plan beside it. Double-click selects a word (a sheet reference such as 12/A-512 counts as one), triple-click a line, Shift-click extends. Copy (⌘C; Ctrl+C) copies it; Esc or a click elsewhere clears it.
Right-click the selection (or use the Edit menu) to Search for it, or to Highlight, Underline or Strikeout it, or Mark Text for Redaction. The rule that lets one Select tool do both jobs: a drag that starts on a markup moves the markup, one that starts on text selects text, and one that starts on empty paper draws a marquee that selects markups.
Layers
View ▸ Layers lists the PDF's own layers (what the CAD export put on layers) and the markup layers (trace sheets among them, see Trace Paper); untick one to hide it. View ▸ Show Markups hides every markup at once, to see the bare drawing.
Markup layers
Markup layers sort your markups the way a CAD drawing sorts linework: one layer for the consultants' comments, one for internal notes, one for the fire strategy. View ▸ Layers ▸ Layers Panel shows the panel that manages them, as the LAYERS section at the bottom of the right column, under Properties and the Markups List. Drag the divider above it to make it taller or shorter. Like those two it pops out into a panel of its own: click the pop-out button at the right of its caption, choose View ▸ Pop Out Layers, or drag the caption off the window. To put it back, click Dock in the panel's title bar, close the panel, drag it by its title bar over the right column (Mac and Windows), or choose View ▸ Dock Layers or View ▸ Layout ▸ Dock All Panels. Cella PDF remembers whether it is shown, where it is and its size the next time you open it.
- New Layer adds a layer (it is saved with the document, even before anything is on it) and makes it the one you draw on: what you draw, place or stamp next goes on it. The pencil shows which layer that is. Choose another row, or No layer, and Draw on This Layer to change it. View ▸ Layers ▸ New Layer… does the same from the menu.
- The eye (a check box on Windows and Linux) shows or hides a layer, as View ▸ Layers does.
- The padlock locks every markup on the layer, so none can be moved or changed by accident; click it again to unlock them.
- Select markups on the drawing, choose a layer and click Move Selected Here to put them on it. Markups ▸ Move to Layer… does the same, and a new name typed there makes a new layer.
- Rename… (or a double-click) renames a layer and moves its markups with it. Delete… asks what happens to its markups: Keep Markups puts them on no layer, Delete Markups deletes them too (locked markups are kept). Edit ▸ Undo puts it all back.
- Right-click a row for the same commands.
The Markups List's Filter ▸ Layer shows only the markups on the layers you pick, and the Layer column names each one's layer. File ▸ Send to Client… can leave whole layers out of the copy, and leaves out the layers you have hidden.
Links
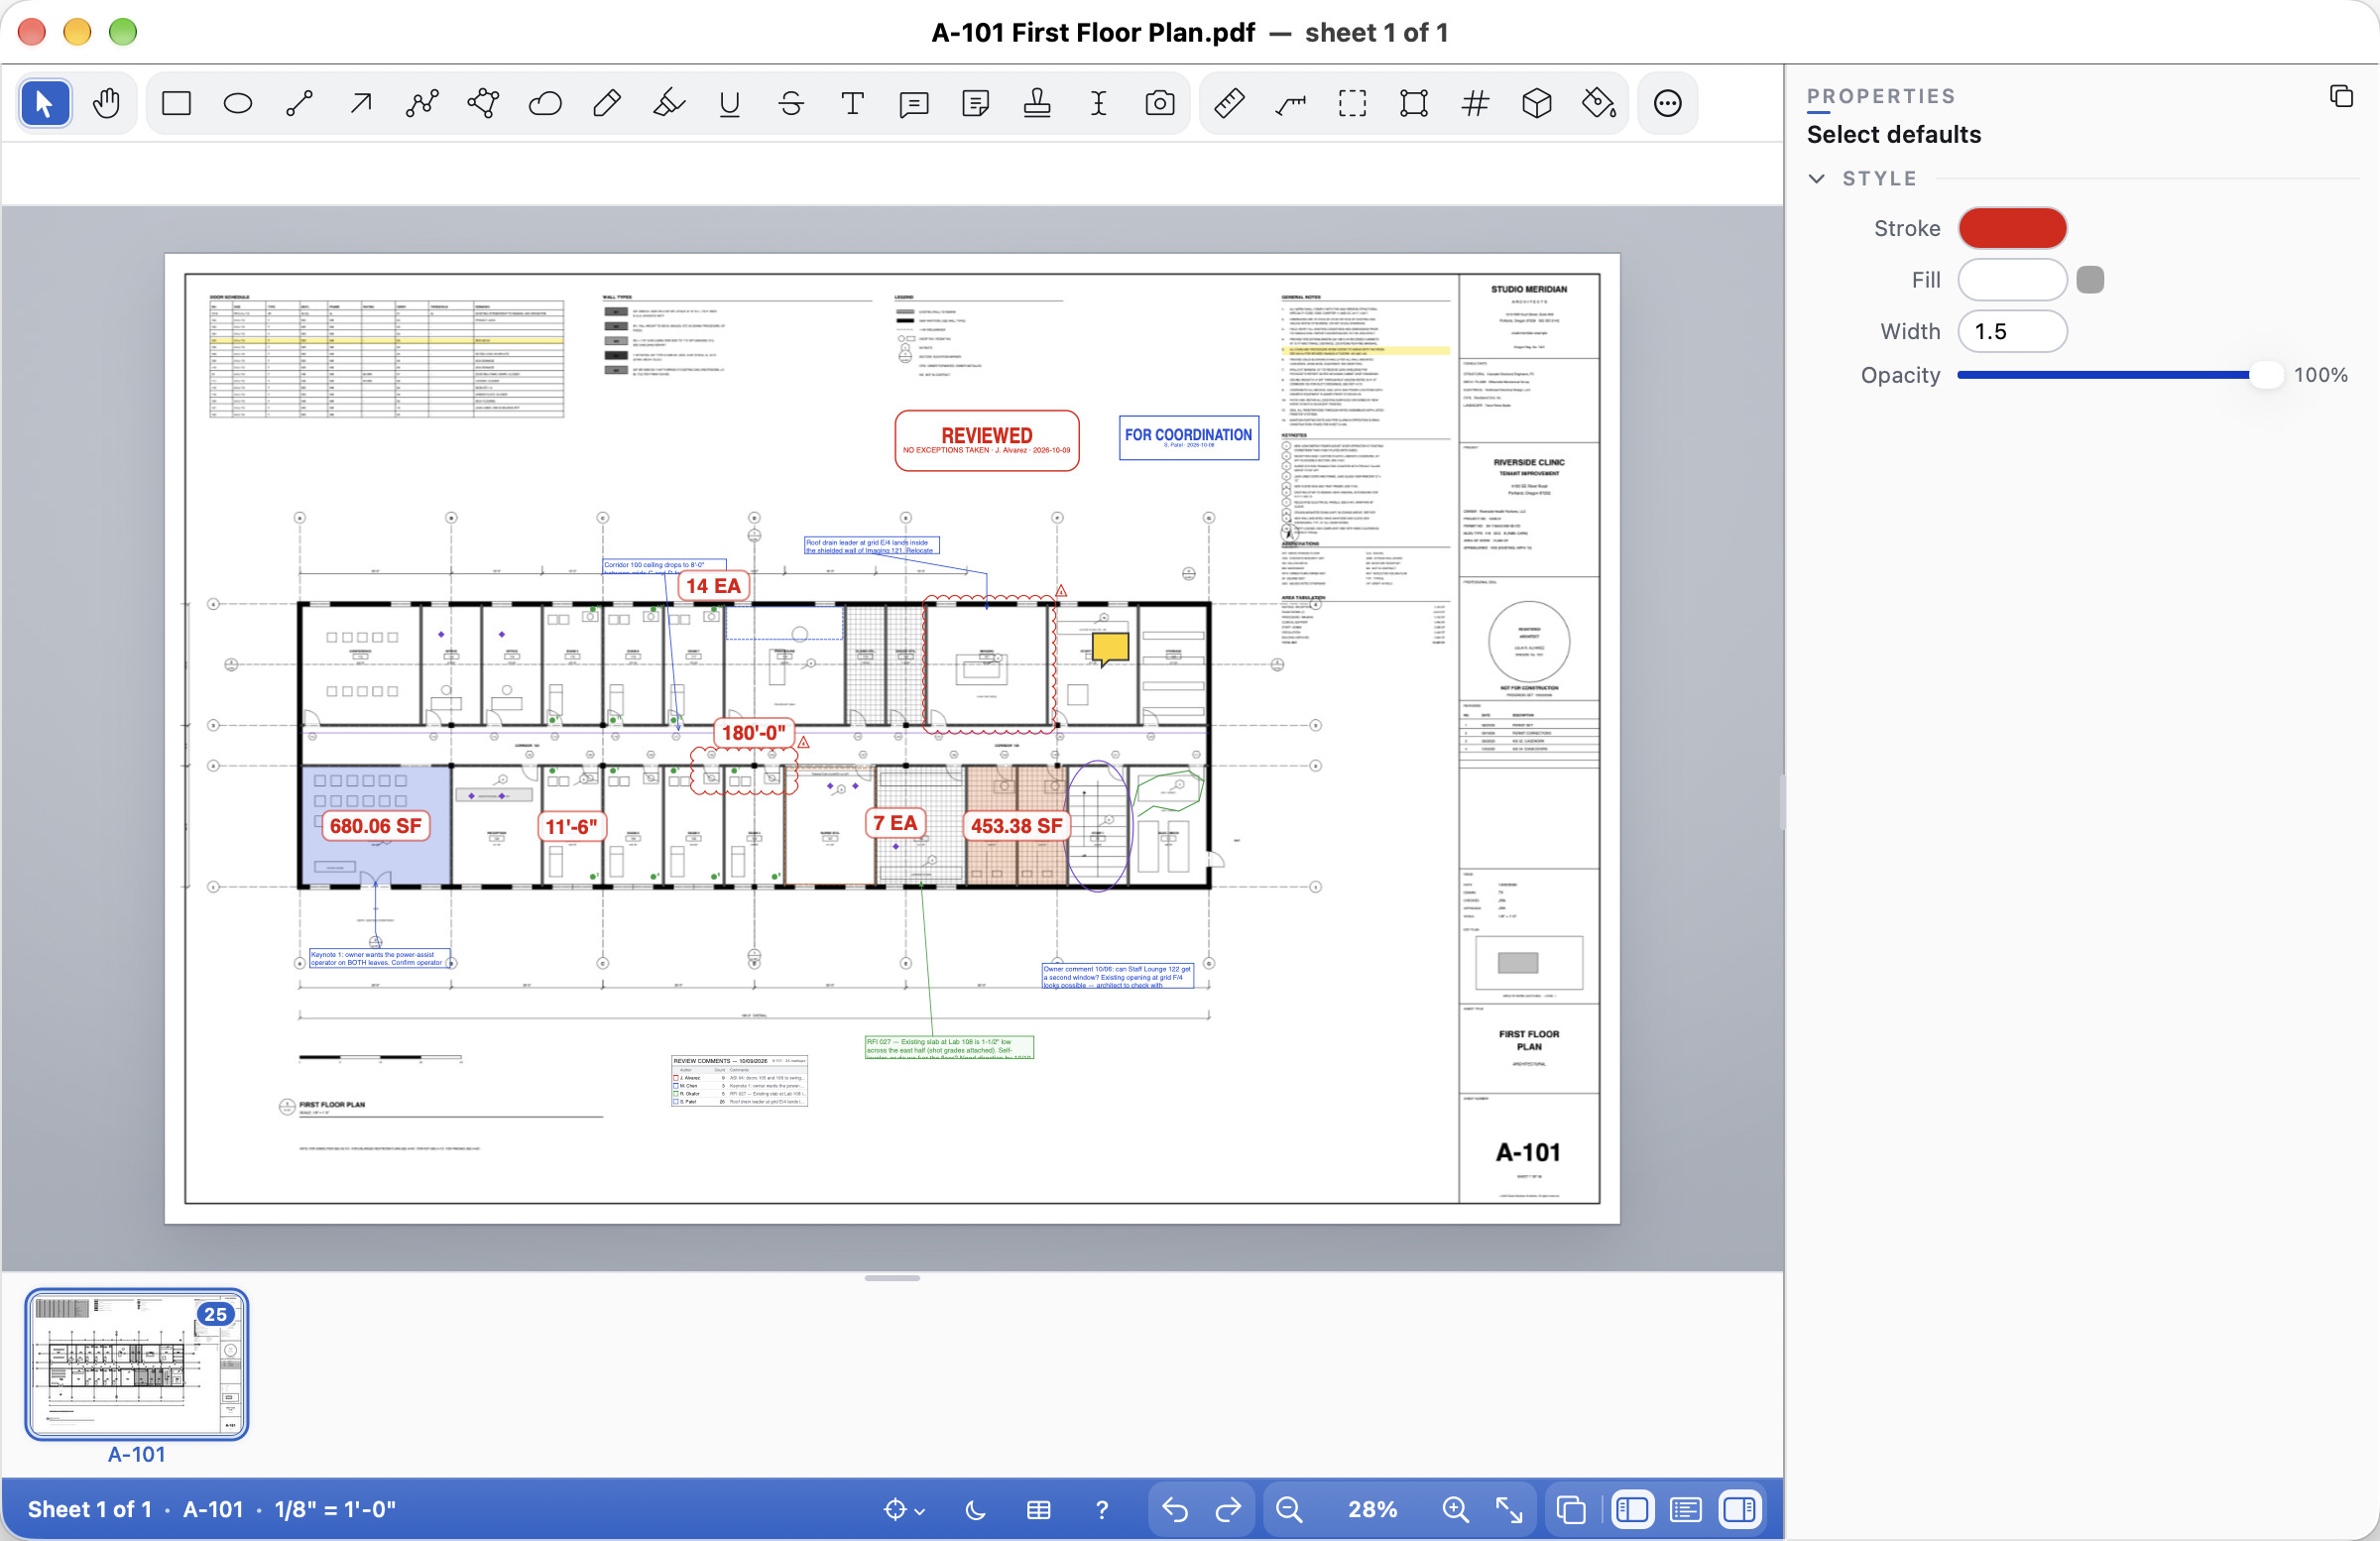
Links take whoever clicks them somewhere: another sheet, a detail at a zoom, a web page or another file. With the Select tool a click follows a link (also when the trial has ended); the status band says where a link goes while the pointer is over it. View ▸ Show ▸ Links outlines every link on the sheet.
A link to another sheet or a snapshot view of the same document moves the view in place; View ▸ Previous View (⌃⌘← on the Mac, Alt+Left on Windows and Linux) takes you back to where you were, and View ▸ Next View (⌃⌘→, Alt+Right) forward again. They also step back through bookmarks, search results and sheets you went to. A link to another file opens that file in a new tab (or brings its tab forward when it is open already), so the drawing you started from stays in its own tab. With Open documents in tabs turned off in Settings, the file opens in a window of its own. On Windows and Linux, while a markup is selected, Alt+Left and Alt+Right in the drawing still nudge it; use the View menu then.
Tools ▸ Sheet Setup ▸ Link Sheet References… turns every sheet number in the drawings' text into a link to that sheet, across the files of a set. Running it again replaces the links it made before, but not ones you have edited.
Making your own links:
- Tools ▸ Link (K): the pointer becomes a crosshair with a small link, and a banner at the top of the drawing (and the status band) says what to do. Drag a box over what should be clickable, then choose what it does. A click on a markup with the Link tool puts the link on that markup instead; with one markup already selected, the banner's Link Selected Markup button does the same. The choices: - Go to a sheet: fitting the whole sheet, keeping the zoom, or showing a region (Choose Region… takes you to that sheet to drag the region, then back). - Go to a snapshot view: Choose View… takes you to the sheet; pan and zoom to the view and click Use This View (or press Return or Enter). - Open a web address, or Open a file (another PDF, and the page to open it at). - A border (none, underline or box) and its colour.
- Markups ▸ Add Link to Markup… (or the markup's right-click menu) puts a link on a markup, and it moves with the markup. ⌘-click (Mac) or Ctrl-click (Windows and Linux) the markup to follow it; a plain click still selects it, and a ⌘-drag or Ctrl-drag moves it free of snapping without following the link.
- To change or remove a link, pick it with the Link tool (or right-click it). Properties shows where it goes, its border and colour, with Edit Link…, Follow and Remove. Drag it with the Link tool to move it; Delete removes it.
Links are standard PDF links: Acrobat, Preview and other PDF apps follow them. Rotating, moving, inserting and deleting sheets keeps every link on its sheet and pointing at the right one.
Spaces
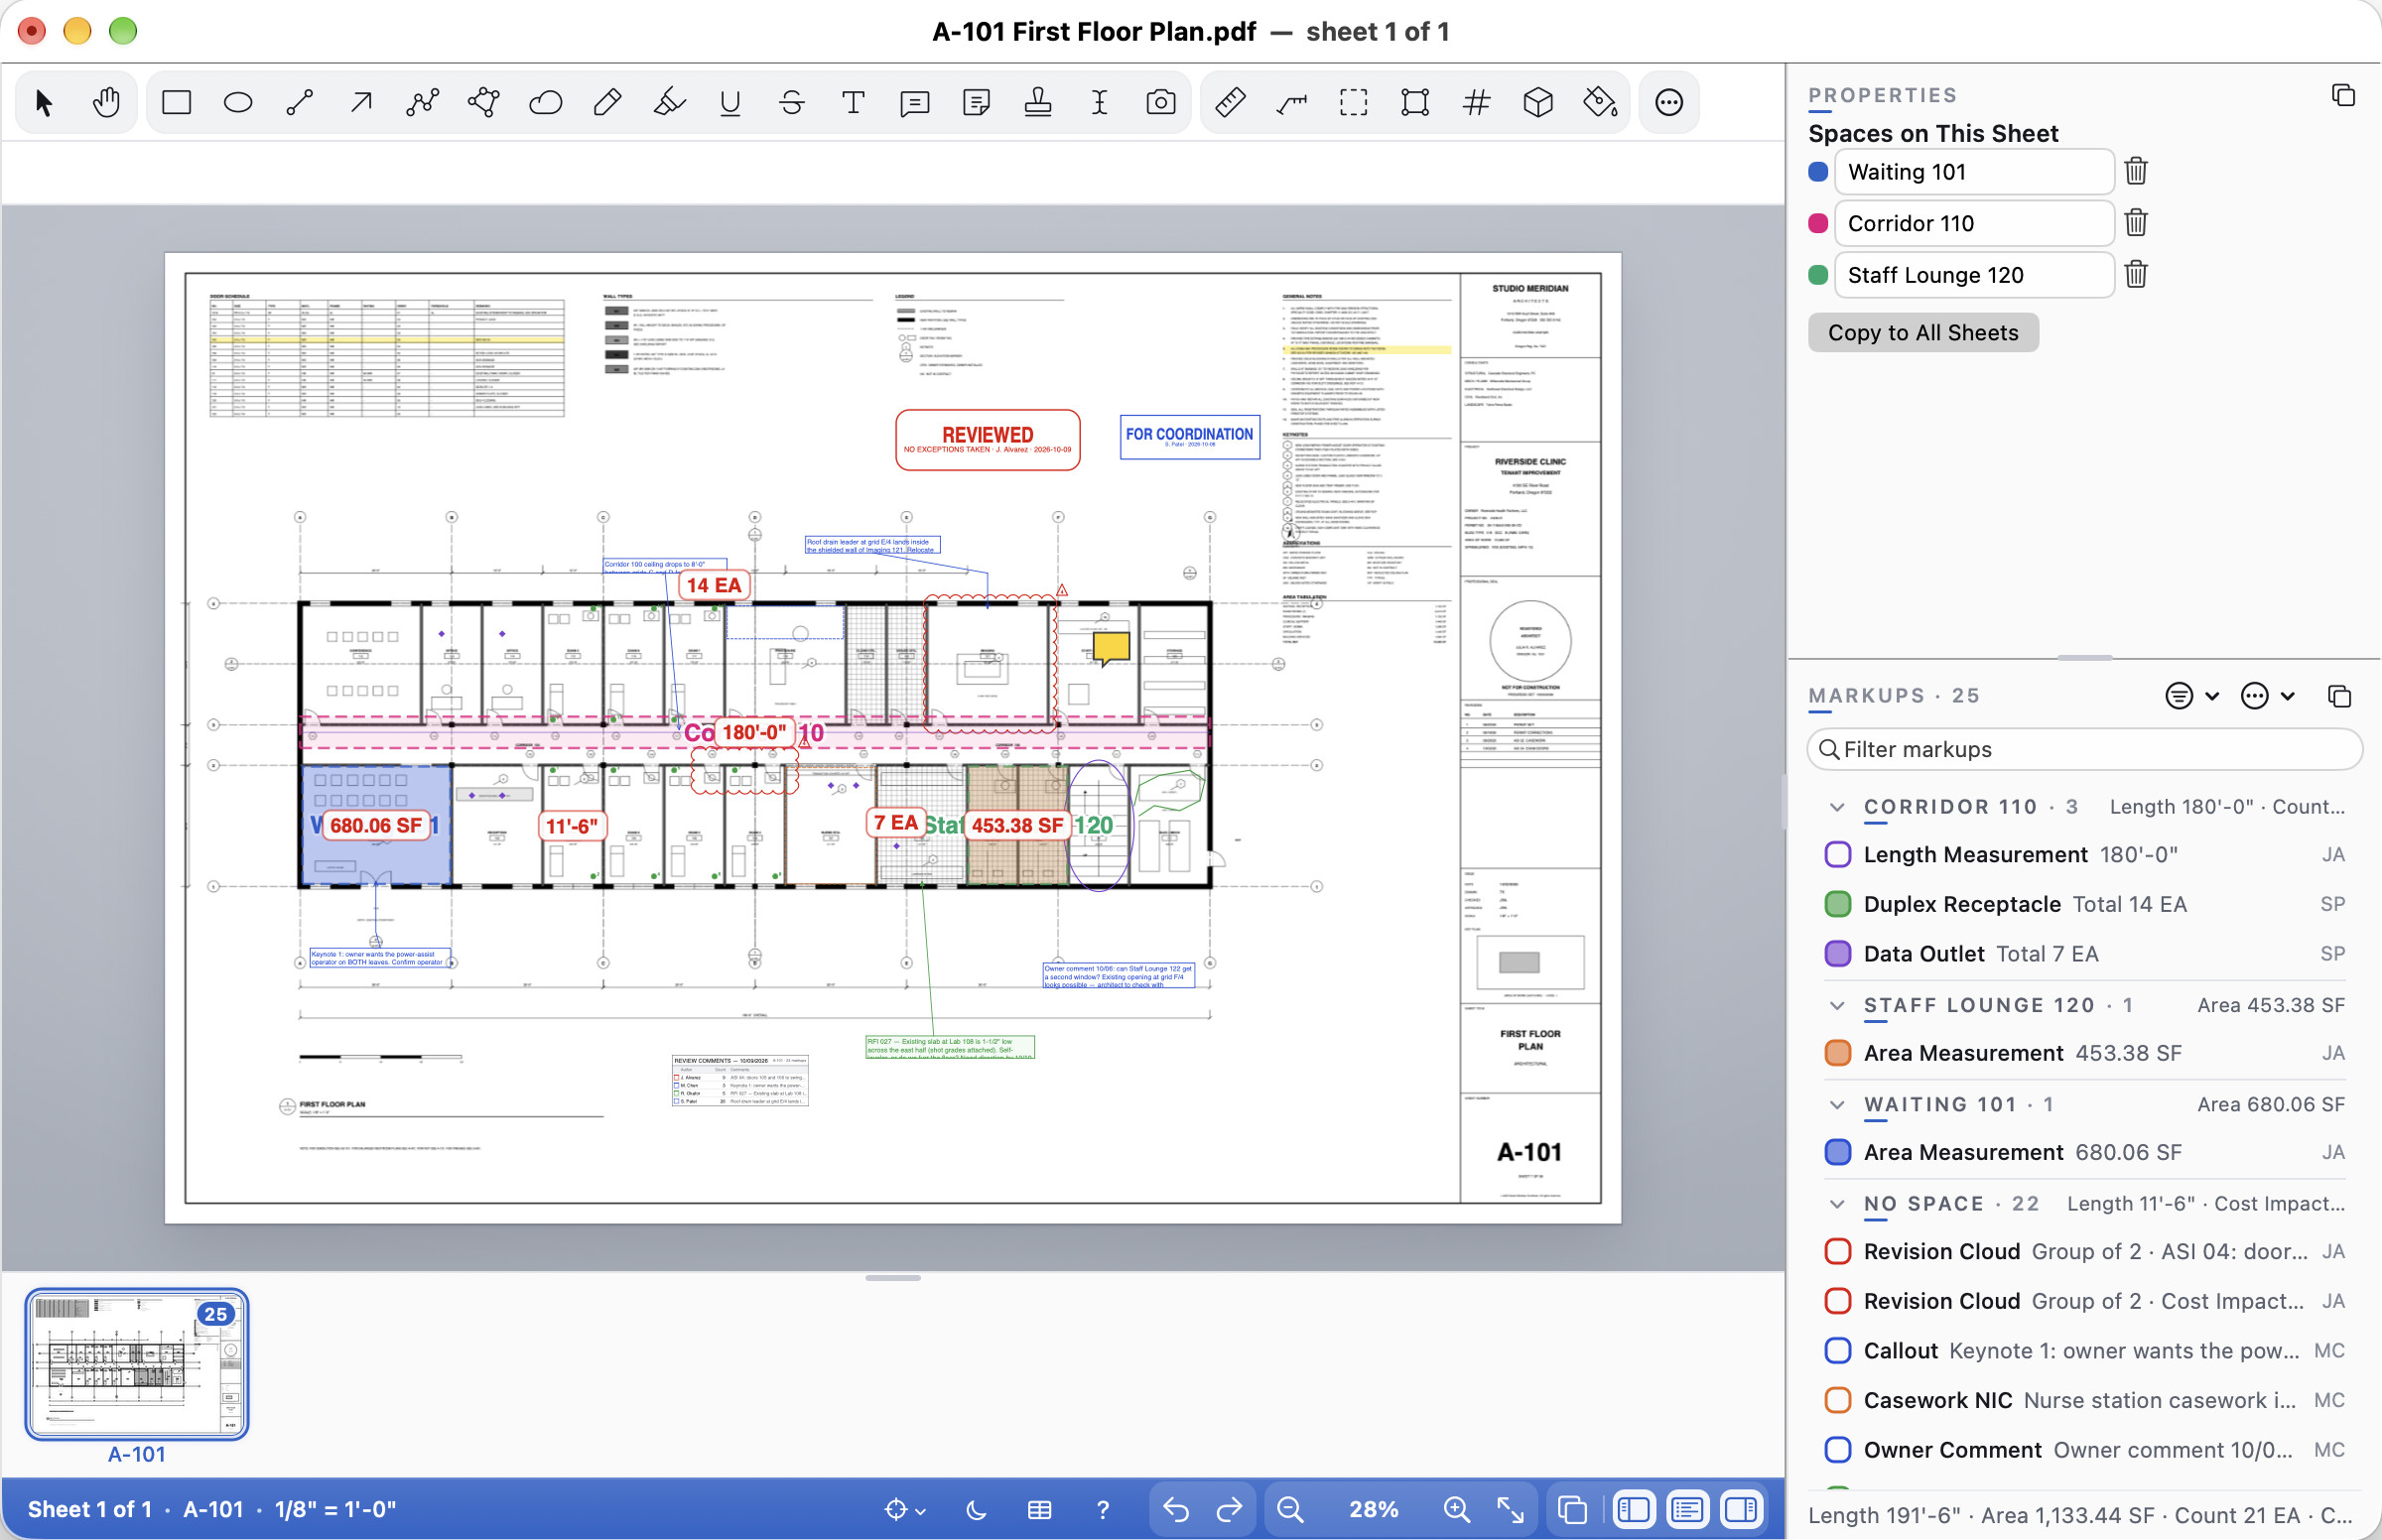
Spaces are named areas of a sheet (rooms, zones, units). Every markup drawn or moved inside a space takes its name in the Space column of the Markups List, so you can count and total by room.
- Tools ▸ Space (⇧S; Shift+S): click the corners of the room, double-click (or press Return or Enter) to close it, and name it. The tool stays on for the next room.
- While the Space tool is on, Properties lists the sheet's spaces: type over a name to rename it; the bin deletes it; Copy to All Sheets (also Tools ▸ Sheet Setup ▸ Copy Spaces to All Sheets) puts the same spaces on every other sheet, for floors that share a plan.
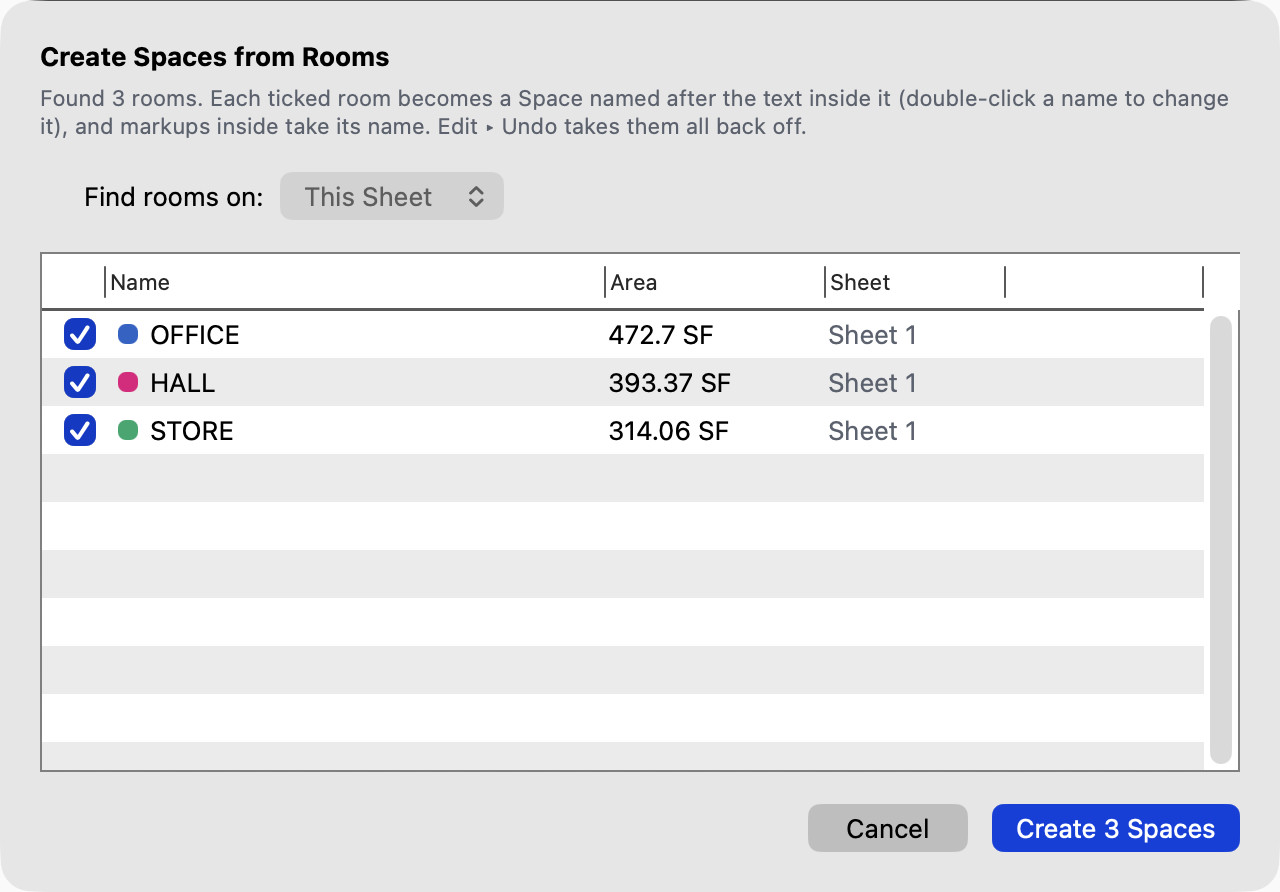
- Tools ▸ Sheet Setup ▸ Create Spaces from Rooms… finds the rooms for you, the way Dynamic Fill does. Every area of at least 20 sq ft that the walls close (doors narrower than the Fill gap count as closed) becomes a proposed space, named after the text inside it ("OFFICE" with "201" under it becomes OFFICE 201; a room without text is Room 1, Room 2…). Choose This Sheet or All Sheets, untick what you don't want (a title block's boxes, say), rename any, and click Create. A room that already has a space is listed as "already a Space" and left unticked. Markups inside take the names at once, and one Edit ▸ Undo takes all the new spaces away.
- View ▸ Show ▸ Spaces shows them as faint tinted areas with their names. Other PDF viewers never show or print them.
- A markup takes the space its middle is in (the smallest one, where spaces overlap). To choose one yourself, pick it or type it in Properties ▸ Space; the markup then keeps that name wherever it moves. Clear the field to let its position decide again.
- Markups List ⋯ ▸ By Space groups the list (and the CSV) by space, with totals; Markups ▸ Insert Legend… can group by space too.
Compare
Cella PDF has two ways to see what changed between two issues of a sheet.
View ▸ Compare ▸ Compare With… (⇧⌘K; Ctrl+Shift+K) overlays another issue on the sheet on screen: the linework both share dark, this issue red, the other blue. Step through the sheets with View ▸ Compare: Previous Sheet / Compare: Next Sheet, and Stop Comparing when you are done. The status band says what you are comparing with. When other PDFs are open, in tabs or other windows, Compare With… lists them first (Compare with:); Another File… asks for a file instead.
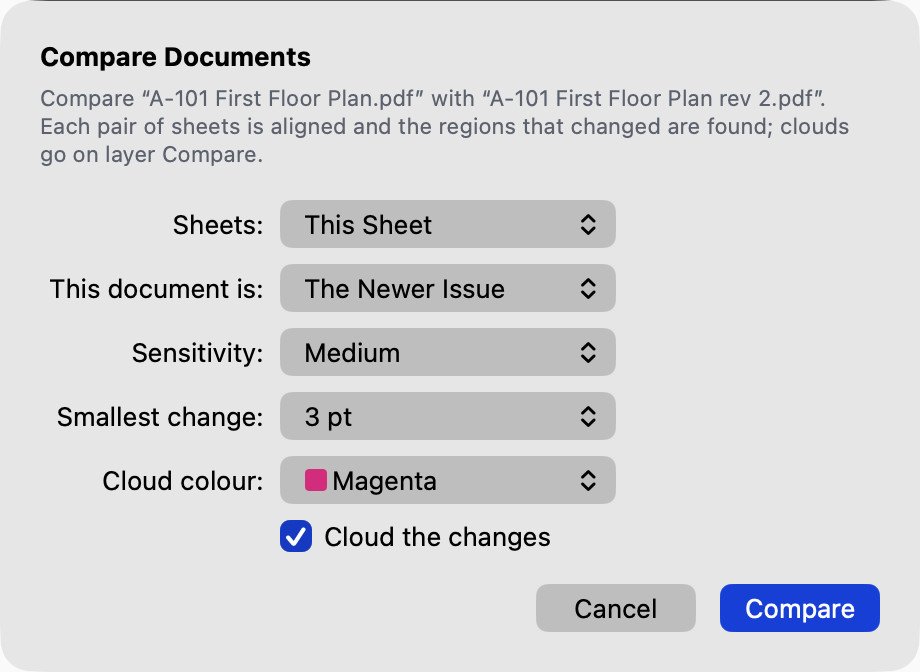
View ▸ Compare ▸ Compare Documents… finds what changed and clouds it. Pick the other issue, then choose:
- Compare with: when other PDFs are open, in tabs or other windows, the first choice lists them: pick the other issue there, with no file to find. Another File… asks for a file once you click Choose File…. An open document is compared as it was last saved. With no other PDF open, Compare Documents asks for the file first.
- Sheets: This Sheet, or All Matching Sheets (paired by sheet number when both are sets, else page by page).
- This document is: The Newer Issue or The Older Issue (whether a change reads "added" or "removed").
- Sensitivity (Low, Medium, High), Smallest change (on Windows "Ignore changes under"; 1, 3, 6 or 12 pt) and the Cloud colour; untick Cloud the changes just to count them.
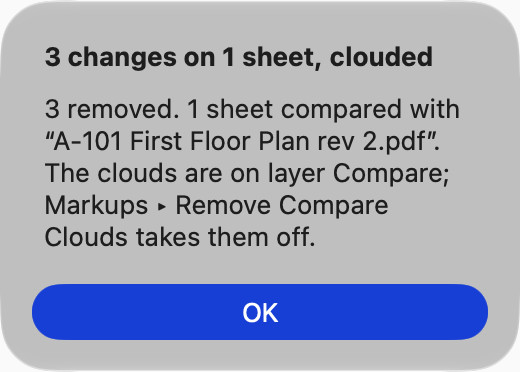
Cella PDF lines the sheets up (small plot offsets are absorbed), draws a cloud round each change on the layer Compare, commented "added", "removed" or "changed", and filters the Markups List to them. Edit ▸ Undo takes the whole run back; Markups ▸ Changes ▸ Remove Compare Clouds clears them later. Use Compare With… to look closer at one. File ▸ Set ▸ Compare Set with Folder… does the same for every file of a set; see Folder sets.
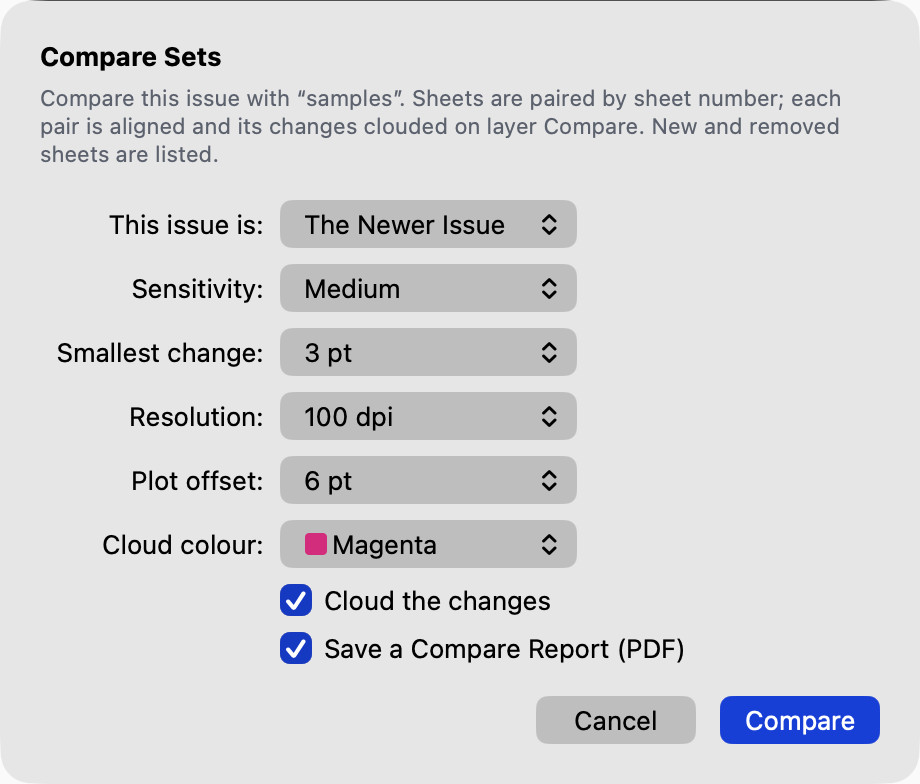
File ▸ Set ▸ Compare Sets… compares a whole issue with the previous one. Open the new issue as a folder set (or open it as one multi-sheet PDF) and choose the previous issue's folder (or PDF). Cella PDF pairs the sheets by sheet number, whatever the files are called: the number in the title block or the page label, else the file name. Each pair is compared as above (Resolution and Plot offset trade speed for finer changes and larger re-plot shifts). The changes are clouded on layer Compare, and each sheet's count is reported, with the sheets new in this issue and the ones removed. Tick Save a Compare Report for a PDF listing every pair with its counts and a picture of each clouded region. The other files of the set are saved with their clouds; the open file's clouds are one Edit ▸ Undo step. Cancel while it compares leaves every file exactly as it was.
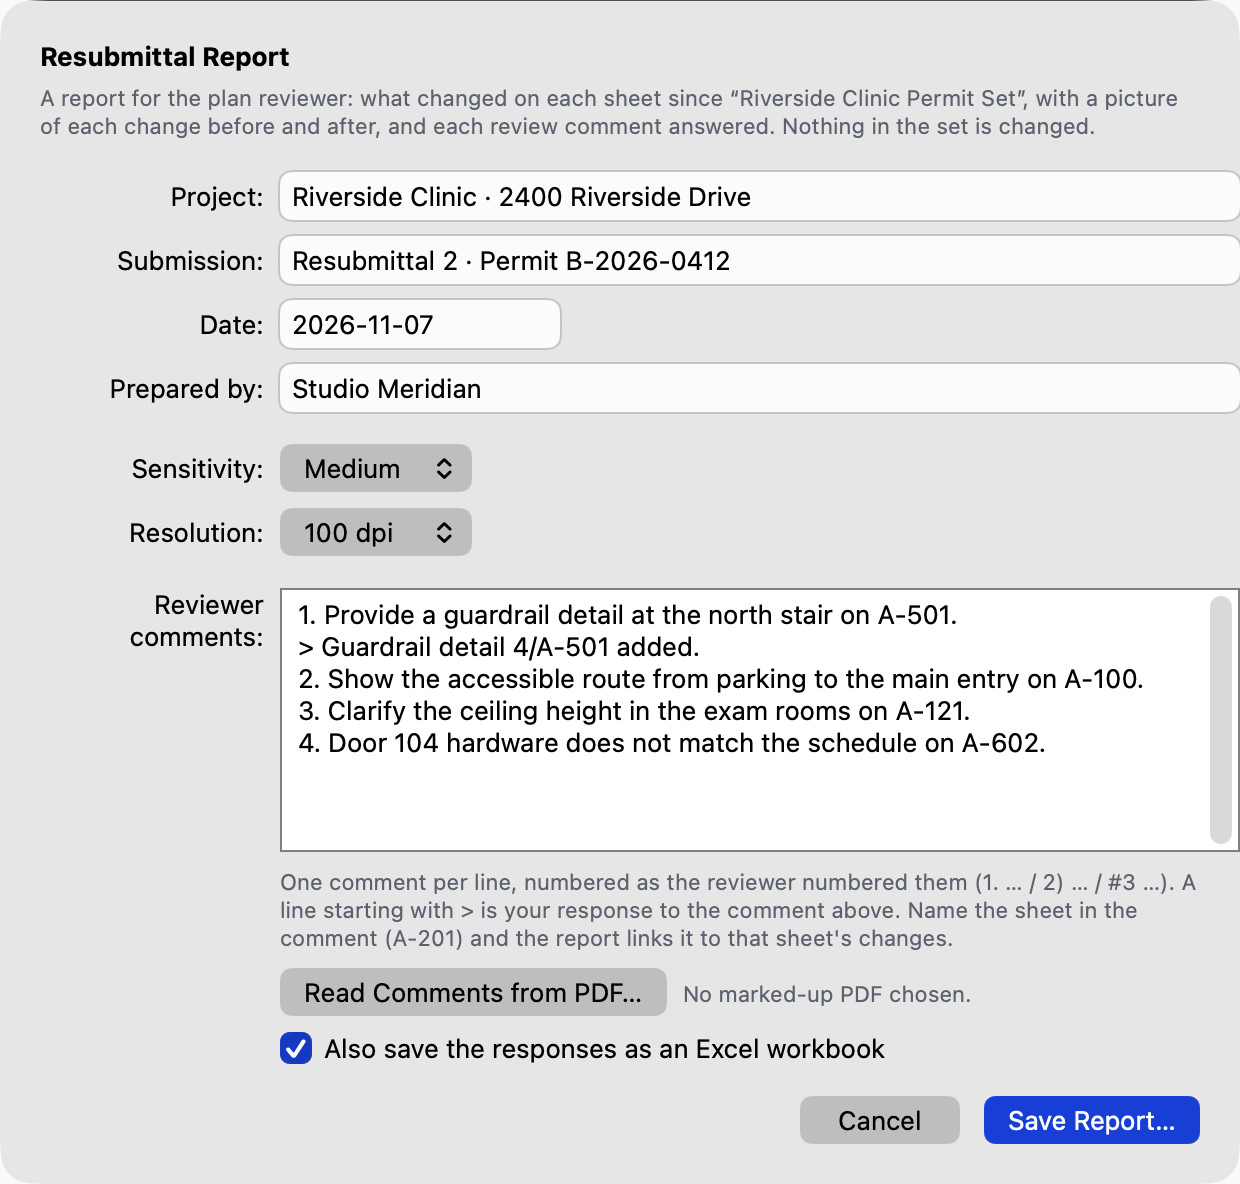
File ▸ Set ▸ Resubmittal Report… writes the same comparison the way a city's plan reviewer asks for it: a resubmittal response. Open the new submission (a folder set, or one multi-sheet PDF), choose the previous submission, and fill in the cover: Project, Submission (say "Resubmittal 2 · Permit B-2026-0412"), the Date and who it is Prepared by. Paste the reviewer's numbered comments into Reviewer comments, one per line as the reviewer numbered them (1., 2), #3); a line starting with > is your response to the comment above. Name the sheet in a comment ("Provide guardrail detail on A-501") and the report links the comment to that sheet's changes. If the reviewer marked up your set instead, Read Comments from PDF… reads every markup with words as a comment, on the sheet it sits on. Then Save Report…. The PDF has a cover with a summary, Changes by sheet (every changed sheet with its revision from the schedule, "Rev 2 (was 1)", its counts, and a BEFORE / AFTER picture of each clouded region; then the unchanged, new and removed sheets), and Responses to review comments (number, sheet, comment, response). A comment without a response gets one drafted from the changes ("Revised; see the 3 clouded changes on A-102.") so you can edit rather than write; the result tells you how many were drafted. Tick Also save the responses as an Excel workbook for the same table as an .xlsx beside the report. Nothing in the set is clouded or saved.
Overlay pages
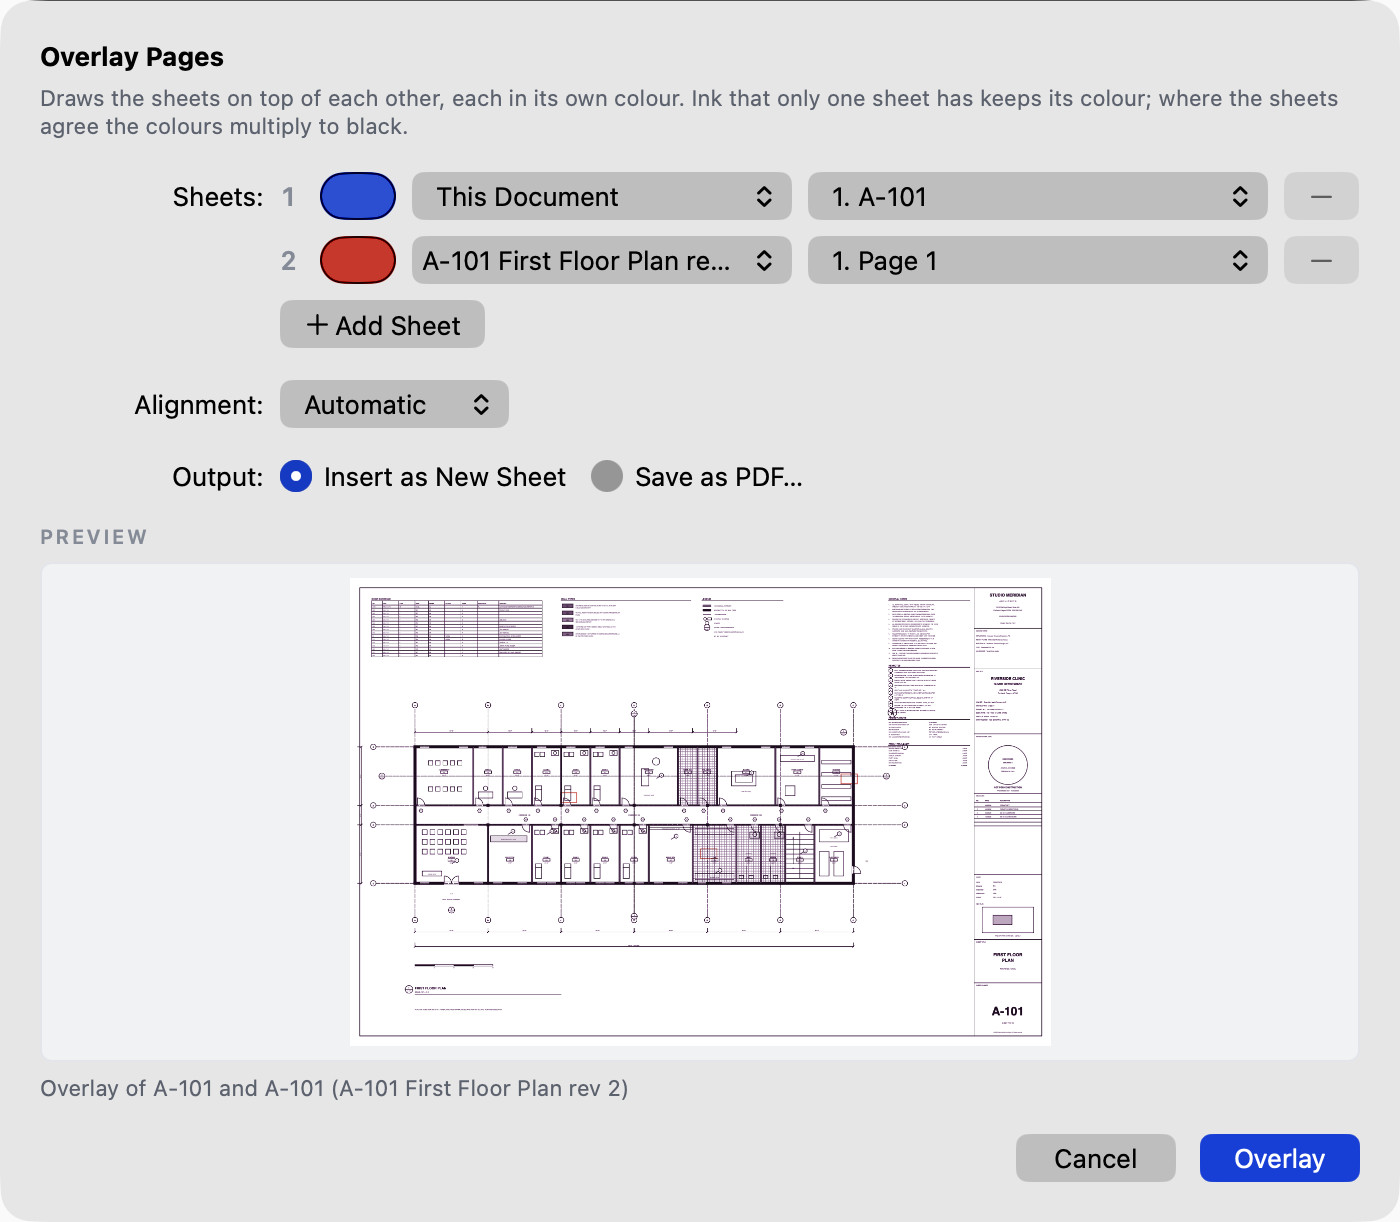
View ▸ Compare ▸ Overlay Pages… draws two to four sheets on top of each other, each in its own colour. You can see at a glance what moved between two issues, or where the structure clashes with the architecture. Ink that only one sheet has keeps that sheet's colour (blue for the first, red for the second, then green and magenta); where the sheets agree, the colours multiply to black.
- Choose the sheets. Each row is a sheet of this document or, with Choose File…, of another PDF; click the colour well to change its colour. Add Sheet adds a third and fourth; − removes one. To overlay two sheets of this document you can also select them in the Sheets list and right-click ▸ Overlay These Sheets.
- Choose the alignment. Automatic finds the offset between the sheets (a plot shifted by up to about two thirds of an inch). None lays the top-left corners together. Pick Points… shows the sheets side by side: click the same two or three points on each, in the same order (grid intersections or column corners far apart work best). Two points move, turn and scale the sheets to match; three also correct a skew.
- Choose the output. Insert as New Sheet adds the overlay right after the first sheet, named "Overlay of A-101 and A-101 (rev 2)" (Edit ▸ Undo takes it out again); Save as PDF… writes it as a one-page PDF and leaves the document as it was.
- Check the preview and click Overlay.
The overlay is a picture of the sheets (150 dpi) without their markups: it is for looking, not measuring. Compare Documents… is the tool that finds and clouds the changes.
Place a PDF
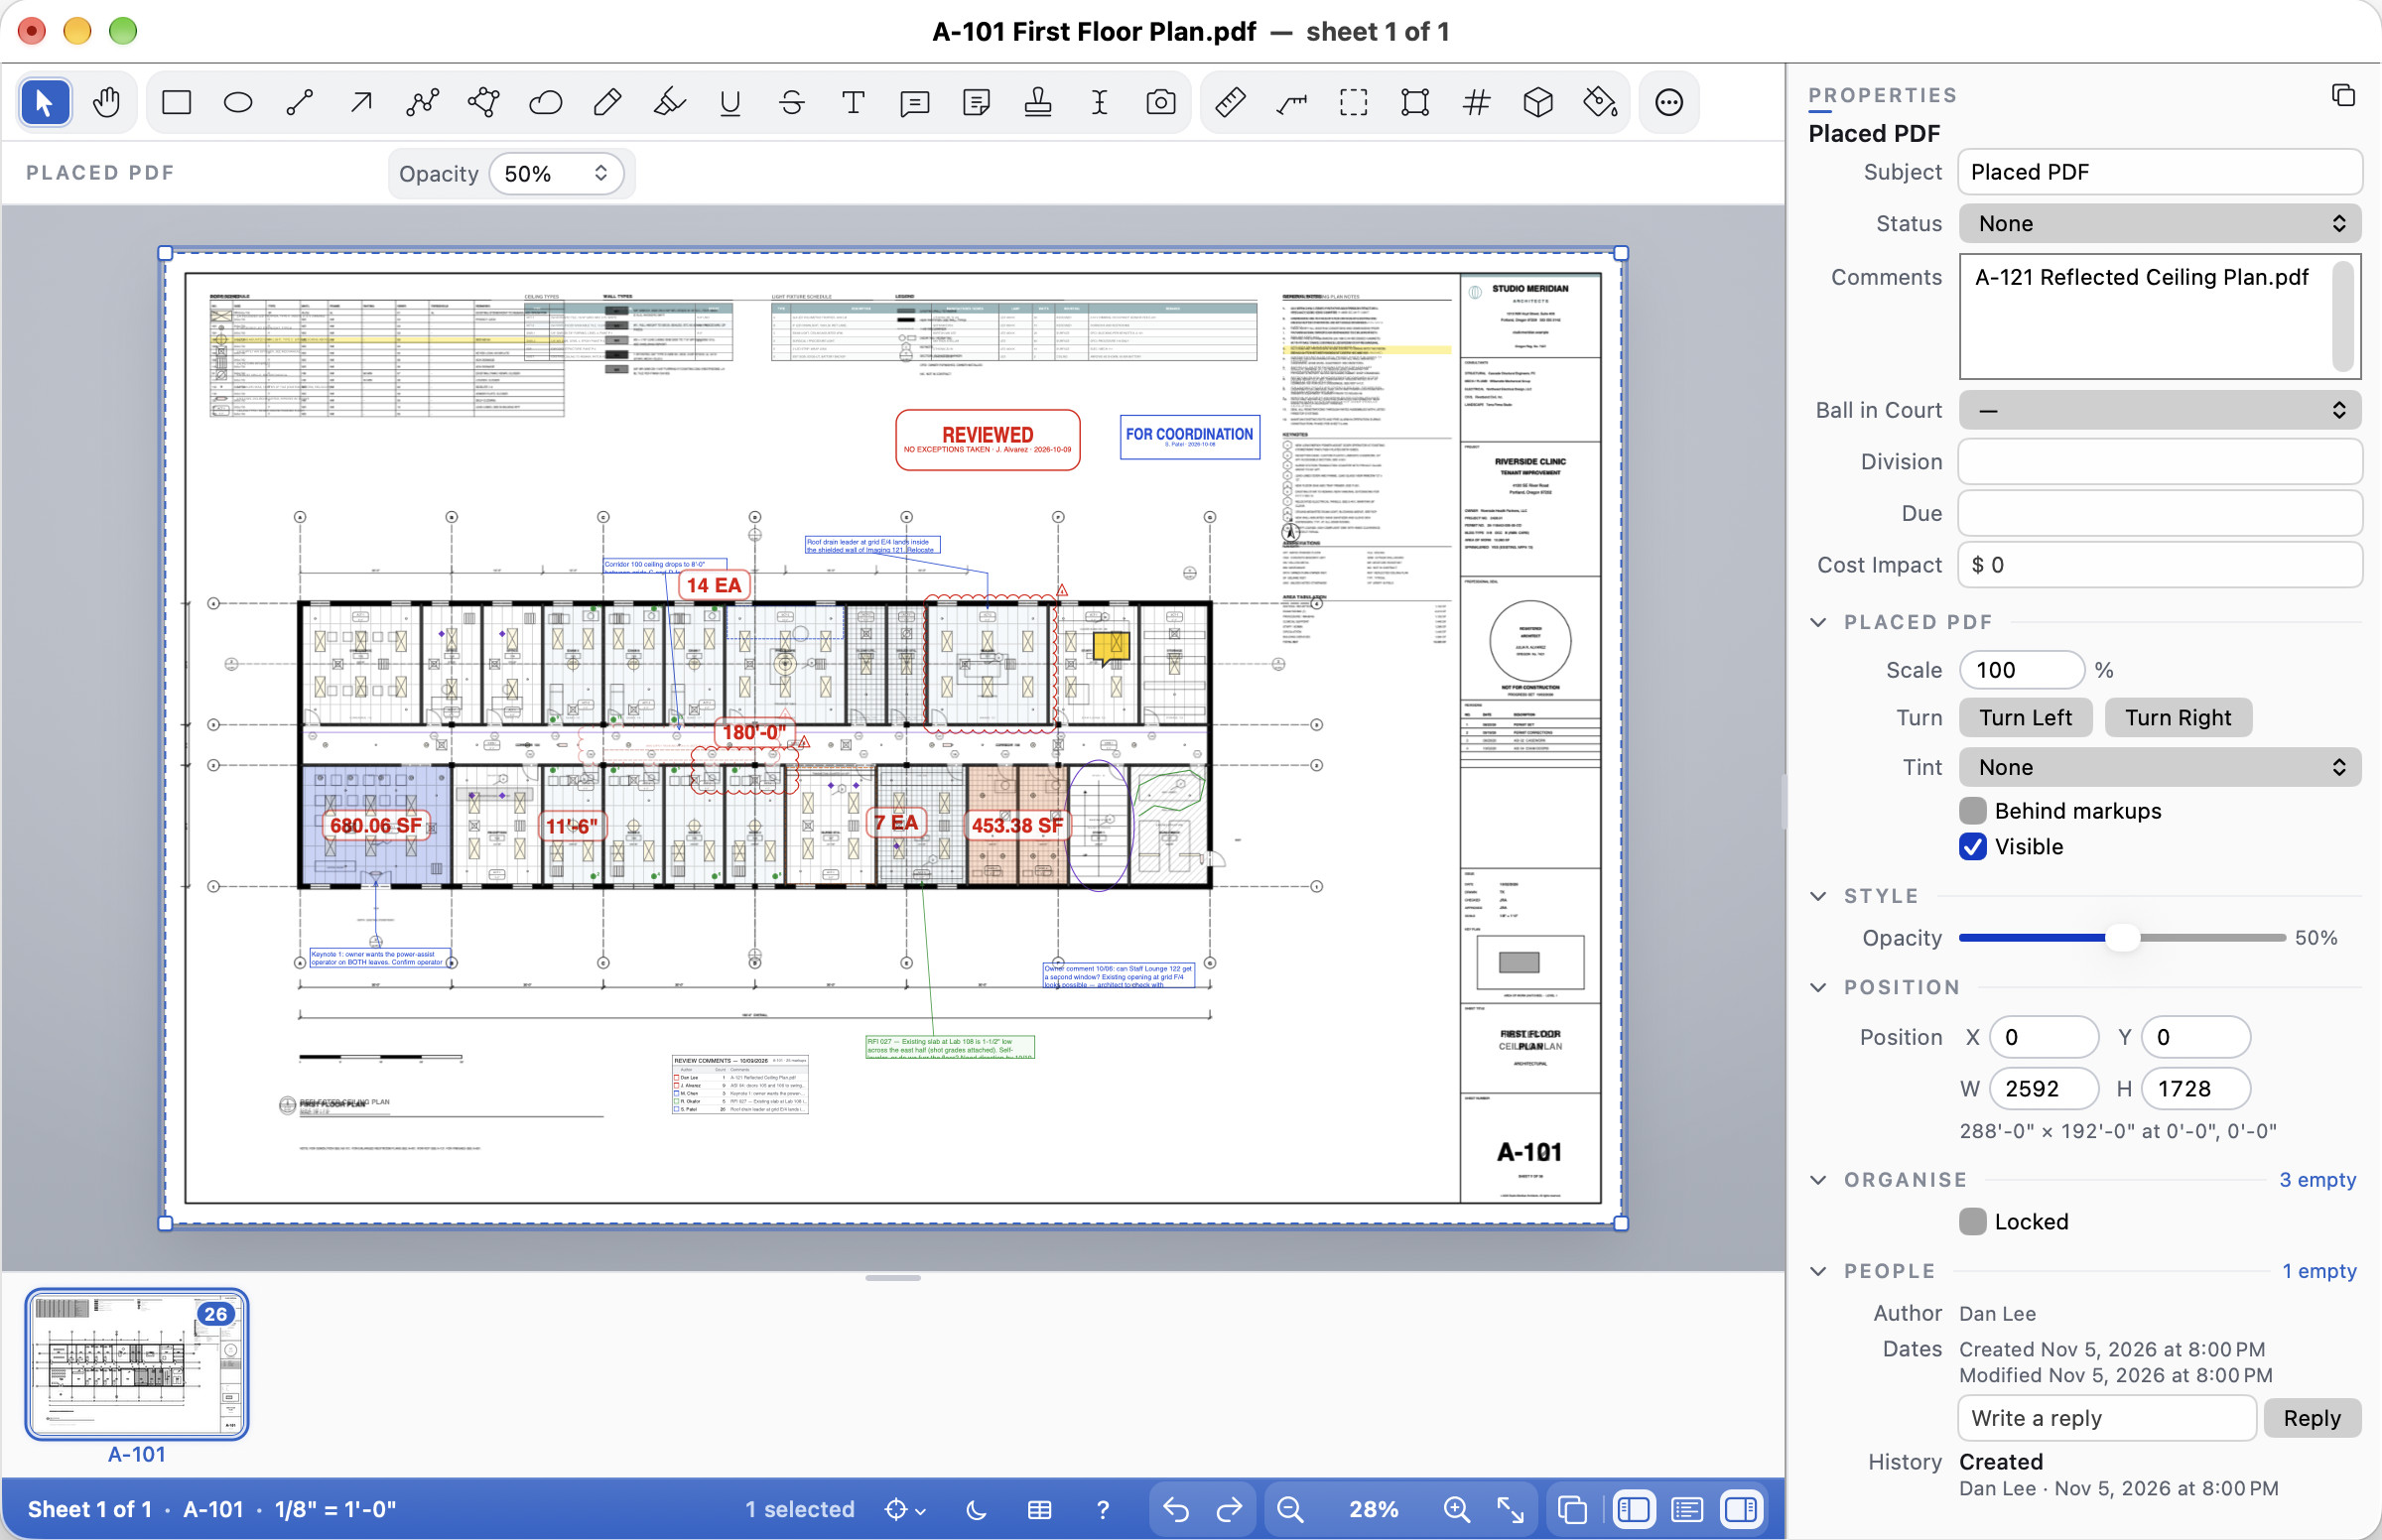
Markups ▸ Place PDF… lays a page of another PDF over the sheet as a drawing you can move, scale and turn, the way you place a PDF drawing over a plan in a CAD program: the consultant's structural plan over your floor plan, last issue's layout over this one, a manufacturer's detail beside yours. Unlike Overlay Pages it adds no sheet and makes no picture; the page stays sharp lines at any zoom, and it is a markup like any other. Right-click an empty part of the sheet ▸ Place PDF Here… to put it where you clicked.
- Choose the PDF. For a file of several pages, choose the page.
- Choose the scale. It goes in at its true size: a 36 × 24 in sheet is 36 × 24 in on yours. When the page and your sheet both have a scale (one set with Set Scale…, or from the file), you can Match the sheet's scale instead: a 1/8" = 1'-0" plan placed on a 1/4" = 1'-0" sheet goes in at 200 %, so a wall is as long on both.
- It lands centred in view, half see-through and selected. Drag it to line it up (snapping works as for any markup); drag a corner to scale it, which keeps its proportions.
Properties ▸ Placed PDF (Mac) has the rest:
- Scale: type a percentage of its true size (100 % = as drawn); it scales about its centre.
- Turn Left / Turn Right: a quarter turn about its centre.
- Tint: one colour for all its linework, paper staying white (blue, red, green or magenta, as Overlay Pages' colours), so it reads as an overlay against your black drawing.
- Behind markups: draw it under the sheet's other markups (it also goes to the back).
- Visible: hide it without deleting it. A hidden placed PDF is not drawn or printed, and a click goes through it; select it in the Markups List to show it again.
Opacity (50 % to start), Layer and Locked are the rows every markup has: a locked one doesn't move, scale or turn. The placed drawing is laid over the sheet so the paper drops out (the two multiply, as a light table would show them): your sheet's lines read through it at any opacity. Edit ▸ Undo takes back placing, moving, scaling and turning it. The Markups List shows it as "Placed PDF", with the file's name as its comment.
When you save, the page goes into your PDF as vector drawing (in a stamp, so other PDF viewers show it where you left it) and opens again as a placed PDF you can still move. Markups ▸ Flatten burns it into the sheet like other markups (a hidden one is left as it is). The placed page's own markups are not brought along.
Trace Paper
Trace paper is a see-through sheet laid over the drawing, as you would roll trace over a print to sketch a scheme without touching the plan underneath. View ▸ Trace Paper ▸ Add Trace Paper lays a sheet over the whole page. View ▸ Trace Paper ▸ Trace Paper Panel opens the Trace Paper panel. Everything stays vector: lines on the trace are sharp at any zoom and in print.
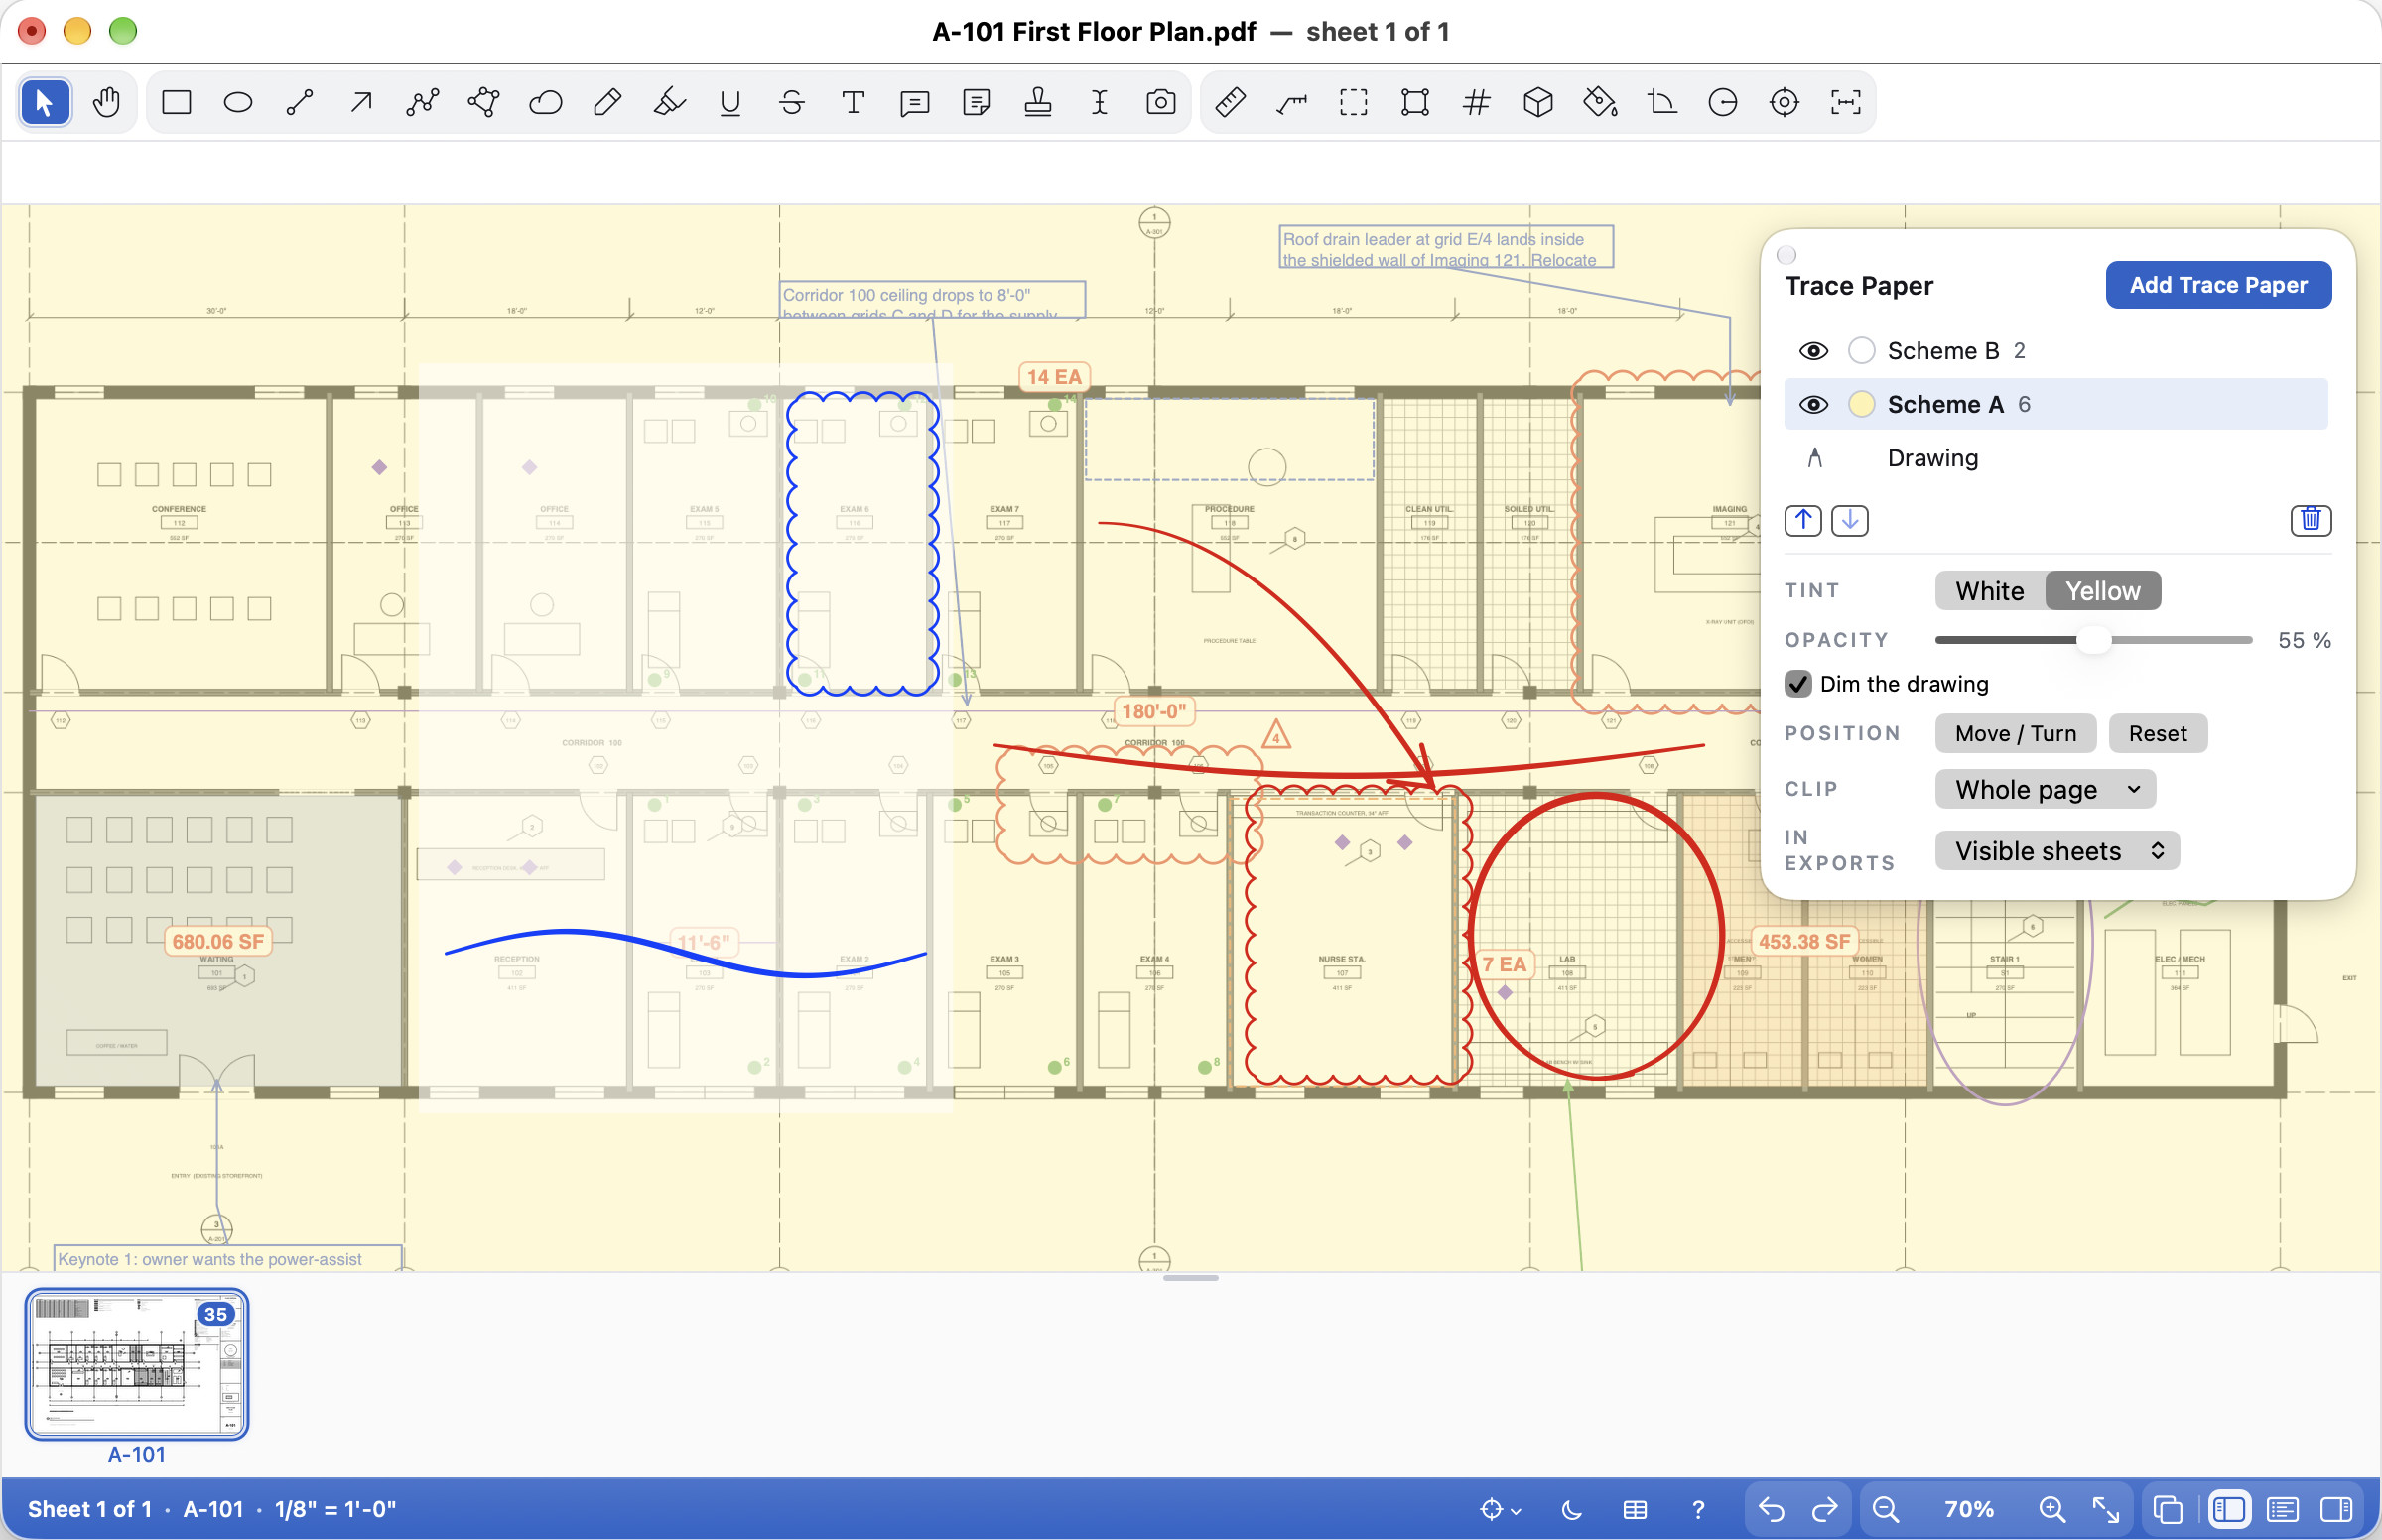
- Drawing on it. The new sheet is the active one, marked in the panel: everything you draw goes on it (with a pen or Apple Pencil too) until you pick another sheet, or Drawing to mark up the drawing itself again. Pick any sheet to draw on it, even one low in the stack: nothing is reshuffled, and the line under the list says which sheet you are drawing on ("Drawing on Scheme A"). The sheet you were drawing on is saved with the document and is the one you draw on when you open it again.
- Several sheets. A page can have as many sheets as you like, stacked: each one is drawn over the sheets under it, with its own markups on top of its paper, and the drawing's own markups stay under them all. Drag a sheet up or down the list to move it in the stack (or use Move Up and Move Down, Bring Sheet to Front and Send Sheet to Back). Double-click a name to rename it; "Scheme A", "Option 2".
- Look. White or Yellow trace, its opacity, and Dim the drawing: on, the paper fades the drawing under it as real trace does; off, the paper only tints it, so the drawing stays at full strength (with white trace you then see only your sketch).
- Show and hide. The eye beside a sheet hides it with everything on it. View ▸ Layers lists each sheet too. View ▸ Trace Paper ▸ Hide All Trace hides every sheet in the document at once, to see the clean drawing; Show All Trace brings them back. Nothing is drawn onto a hidden sheet. Showing and hiding a sheet is one Undo, like any other change, and is saved with the document.
- Solo Sheet shows the chosen sheet alone on its page, the others hidden for the moment; choose it again to bring the others back as they were. Solo is not saved and is not an Undo.
- Move / Turn. Press Move / Turn, then drag anywhere to slide the sheet over the drawing; its markups go with it. Drag the round handle above it to turn it (hold Shift for steps of 15°); the arrow keys nudge it. Press Return or Escape, or Move / Turn again, when it is where you want it. Reset puts it back where it was laid. Each move and turn is one Undo. Shapes drawn as boxes (rectangles, ellipses, text boxes, stamps) turn round with the sheet but stay square to the page; lines, polygons, clouds and pen strokes turn exactly.
- Clip. A sheet need not cover the whole page: Clip ▸ Clip to Rectangle (drag a box) or Clip to Polygon (click the corners; double-click, Return or a click on the first corner closes it) cuts the paper to that region; Clip to Selection uses a selected rectangle, polygon or cloud; Whole Page lays it over the page again. View ▸ Trace Paper ▸ Clip to Region… clips the active sheet to a box you drag. Markups on the sheet are not cut.
- Clearing a sheet removes its markups and keeps the paper, ready for the next idea. Undo brings them back.
- Removing a sheet takes its markups with it, or Keep Markups puts them back on the drawing.
- Lock Sheet keeps a sheet you are happy with safe: its markups can't be selected, moved or erased (by either Eraser, Whole Markup or Part of Stroke) until you choose Unlock Sheet. A markup you had locked on its own stays locked when the sheet is unlocked. While the chosen sheet is locked, what you draw goes on the drawing, and the panel says so.
Working in options
Sketching in options means one sheet per scheme, then folding the keepers together or carrying a scheme onto the next floor. These commands act on the sheet chosen in the panel. They are in View ▸ Trace Paper ▸, in the panel's Sheet menu and in a sheet's right-click menu.
- Merge Down puts the chosen sheet's markups on the sheet under it and removes the chosen sheet. Merge Visible folds every sheet shown on the page into the lowest one shown; hidden sheets are left as they are. The markups keep their styles, places and stacking (the merged ones sit over the kept sheet's own). The kept sheet keeps its own name, tint and opacity: when the tints differ you are asked first. Merge onto Drawing makes the sheet's markups ordinary markups on the page and removes the sheet. Each merge is one Undo. A locked sheet isn't merged until it is unlocked.
- Duplicate Sheet lays a copy of the sheet, with all its markups, over the original.
- Copy Sheet copies the sheet with its markups; Paste Trace Sheet (or Edit ▸ Paste) puts it on the page on screen, in any open document, where it was on its page. It arrives as a sheet of its own, on top, with a name of its own ("Scheme A (2)" when the name is taken).
- Copy Sheet To… and Move Sheet To… take the sheet to another page of this document (one page, or tick All pages in range to carry a grid or a north arrow through a set of floors), to another open document (listed after This document) or to Another File…, which opens in a window of its own with the sheet on the page with the same number, ready for you to save there. Moving within the document is one Undo. - On a page of the same size the sheet lands exactly where it was. On a page of another size it is centred: Keep size keeps it at its size, Fit to the page scales it to fit (line weights stay as they were), and a note says what was done. - Keep real size rescales the sketch by the two pages' scales, so a 10' line stays 10' when the plans are drawn to different scales (both pages need a scale set; otherwise the sheet keeps its size and a note says why).
- Export Sheet as PDF… saves just that sheet's sketch as a one-page PDF, on a blank page the size of the sheet or over the drawing, to send one option to a client. It stays sharp vector drawing.
Merges and copies stay vector: pen types, hatches, stencils and every stroke come through as they are on screen, and each sheet is still its own PDF layer when you save.
Saving and other viewers. Each sheet is saved as a PDF layer (an optional content group) of its own name, with the paper and the sheet's markups on it, so other PDF viewers show a layer you can switch on and off. A sheet you leave hidden is saved hidden.
Flatten, export and print. The panel's In exports says which sheets Flatten, Export Flattened Copy, the Summary PDF, Print and Export to DXF take: Visible sheets (the start), All sheets, or None. View ▸ Trace Paper ▸ Include Trace in Exports is ticked unless it is None; choosing it switches between Visible sheets and None. A hidden sheet left out of a flatten stays a sheet you can still edit. In a DXF each sheet is a layer with its paper's edge and its markups.
Marking up
Marking up needs a key or the trial. Pick a tool from the toolbar, the Tools menu or the tool palette, or press its key while the drawing has the keyboard. A tool goes back to Select after one markup; Shift-click a tool (or press its key twice) to keep it. Esc goes back to Select, or cancels the markup you are drawing.
The tools
| Tool | Mac | Windows and Linux | How to draw |
|---|---|---|---|
| Select / Pan | V / ⇧V | V / Shift+V | Click to select, drag to move, the handles to reshape; Shift-click adds to the selection; drag on empty paper for a marquee |
| Rectangle / Ellipse | R / E | R / E | Drag. Shift for a square or circle; Properties' Cloud border makes a cloud |
| Line / Arrow | L / A | L / A | Drag. Shift keeps it to 45° steps; the endings are in Properties |
| Polyline / Polygon | ⇧N / ⇧P | Shift+N / Shift+P | Click each vertex; double-click, press Return or Enter, or click the last (or first) vertex again to finish |
| Cloud | C | C | As Polygon, drawn with cloud scallops |
| Revision Cloud | ⇧C | Shift+C | A cloud with a numbered revision triangle; see Revision clouds and tags |
| Pen | P | P | Freehand; see Drawing with a pen for pressure, Ortho (F8) and favourites (1–9) |
| Highlight | H | H | Drag across text and it follows the words; elsewhere it draws freehand like a highlighter pen. See Highlighting |
| Eraser | ⇧E | Shift+E | Drag across markups to erase them, whole or only the part of a stroke you cross. See Erasing |
| Underline Sheet Text / Strike Through Sheet Text | U / D | U / D | Drag across text printed on the sheet; they follow the words. To underline text you type, see Bold, italic, underline and strikethrough |
| Text Box / Callout / Note | T / Q / N | T / Q / N | Click (or drag a box) and type; double-click later to edit |
| Stamp | S | S | Click to drop the current stamp; [ and ] change it; see Stamps |
| Stencil | ⇧B | Shift+B | Click to place the current stencil at its real size; see Stencils |
| Edit Text | ⇧T | Shift+T | Click the drawing's own text, retype it, press Return or Enter (below) |
| Snapshot | G | G | Drag round part of the sheet to copy it, drawing and markups, then click where the copy goes (below) |
| Link / Space | K / ⇧S | K / Shift+S | See Links and Spaces |
Snapshot (G) copies part of a sheet: drag round the area, and what you see there, the drawing and the markups on it, is copied as a sharp picture. A banner says "Snapshot copied": click where the copy goes and it lands at the size it was copied, selected, so you can move it or drag a corner to resize it. Drag instead of clicking to place it at another size. You can go to another sheet first. Done in the banner, or Esc, puts the copy down without placing it. The copy is on the clipboard as well: Edit ▸ Paste (⌘V; Ctrl+V) places it again, on any sheet or in another document, and it pastes as a picture into other apps (an email, a report, a presentation). The snapshot itself is a picture: it doesn't change when the drawing or the markups under the area change later.
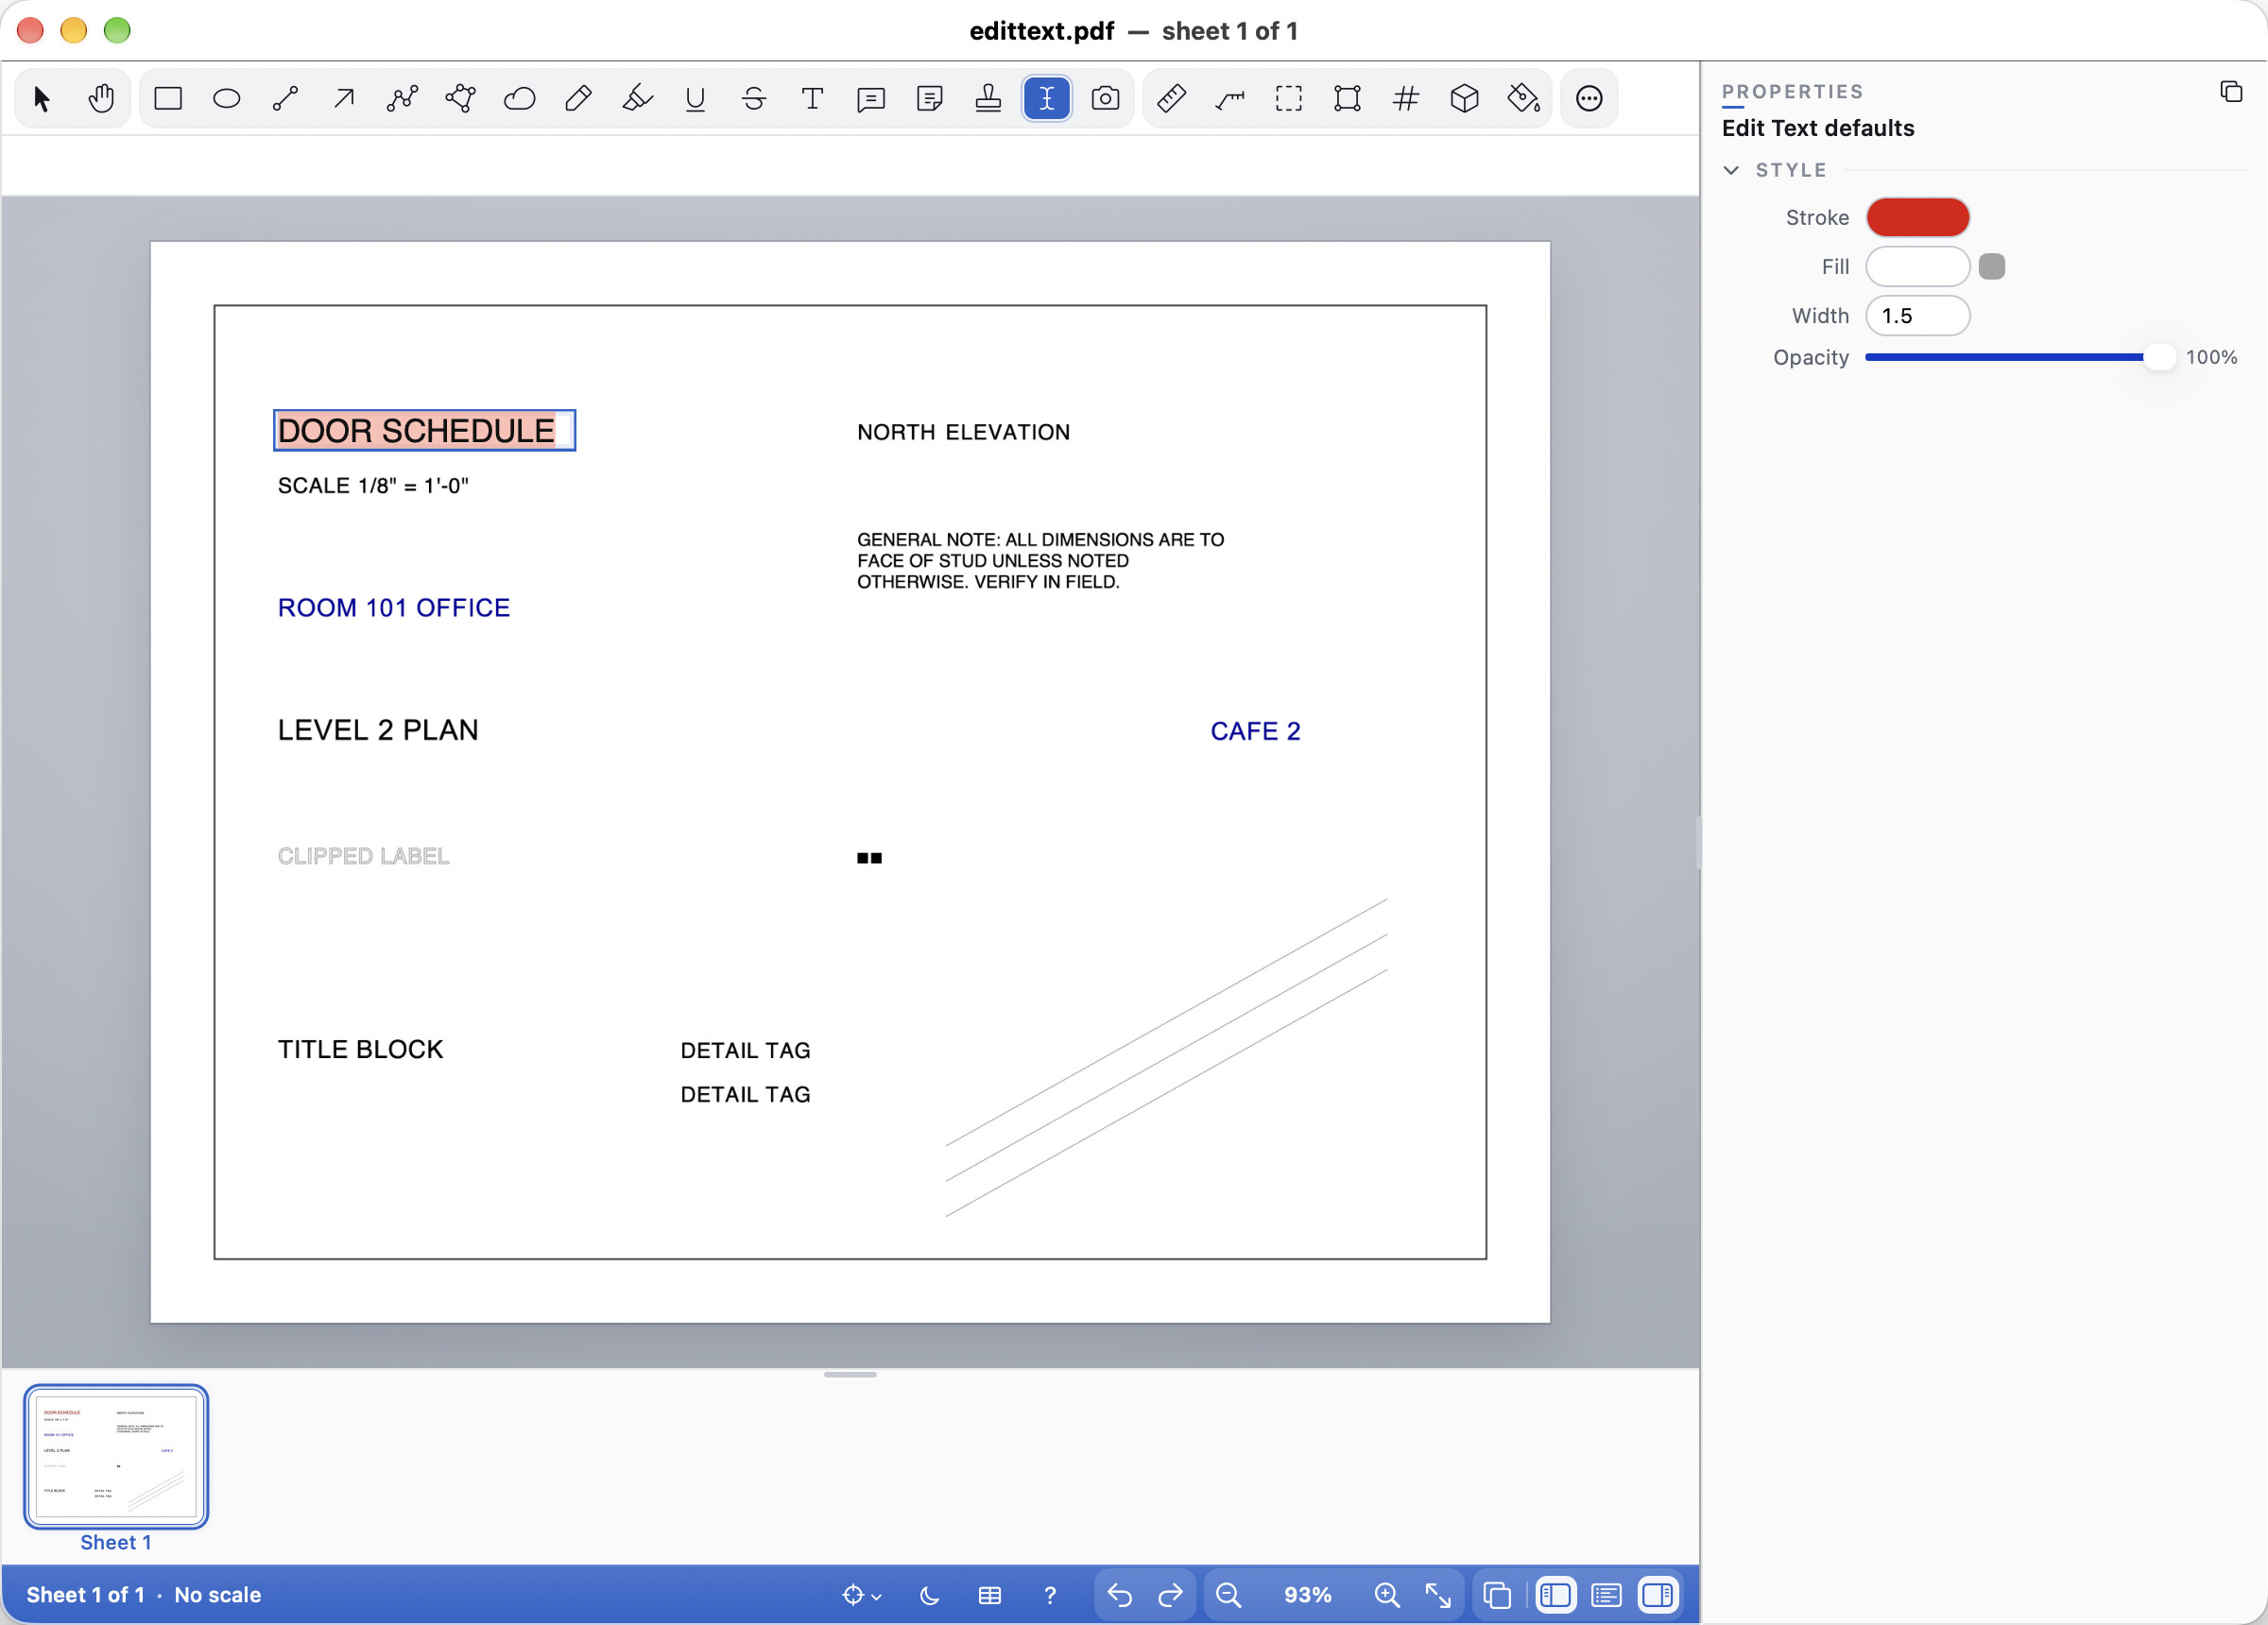
Edit Text (⇧T; Shift+T) changes the drawing's own text, not a markup: click a line of it and a field opens there with its words. Type, and press Return or Enter (Esc leaves it as it was). The sheet's text is rewritten where it is, in the same font, size, colour and place; letters you keep don't move, and longer text runs on to the right. Click a line of a paragraph (a note of several lines in one font and size, lined up on the left and evenly spaced) and the whole paragraph opens in one box: when you press Return or Enter it is broken into lines again at its own width and line spacing, with lines added below or taken away as the text needs. The rest of the sheet doesn't move, so a paragraph that grows runs down over whatever is under it; check it, and Undo if it collides. Text inside a block is edited too when the block is placed once. A block placed several times (a detail tag, a door number used everywhere) is refused with how many times it is placed, since changing it would change every copy. CAD files often embed only the letters they use. If you type a letter the drawing's font doesn't have (an "É" in a sheet that never had one), Cella PDF writes the line with Liberation Sans (or the matching serif or monospace face, bold or italic like the original) at the same size, colour and place. It says so in the status band ("Written with Liberation Sans: the drawing's font has no “É”"). It is one step of Undo. Cella PDF says so plainly and changes nothing when it can't do it faithfully, as with a character neither font has, text drawn in a Type 3 font or used as a clipping outline, and text in a block inside another block. It is not carried by sync: a synced document refuses it, as it does cropping and resizing.
Highlighting
The Highlight tool (H) works like a highlighter pen: the drawing shows through it, and lines and text under it stay dark and readable, on screen, in the saved PDF and in other PDF apps. With the Highlight tool chosen, the options row has:
- Mode. Auto (the usual) decides from where you start: start on the sheet's text and drag across it, and the highlight follows the words; start anywhere else and you draw a freehand highlight, as with a pen. Freehand always draws freehand. Area drags a rectangle, whatever is under it.
- Width (Freehand and Auto) is how wide a freehand highlight is, from 4 to 48 pt.
The colour swatches and Opacity set the highlight's colour (yellow to start with) and how strong it is. Hold Shift while you draw a freehand highlight to keep it straight; it keeps to Ortho's steps, as a line does. A freehand highlight is saved as an ink highlighter stroke, so other PDF apps show it too. Mode and Width are remembered.
Erasing
The Eraser (⇧E on the Mac, Shift+E on Windows and Linux; in the toolbar and the palette beside Highlight) takes away what you drag across. One drag is one step of Undo. With the Eraser chosen, the options row has:
- Mode. Whole Markup (the usual) erases every markup the eraser touches, whatever it is: pen and highlighter strokes, shapes, clouds, text boxes, callouts, stamps and measurements. A grouped markup goes with its group. Part of Stroke erases only the part of a pen or highlighter stroke that the eraser passes over, like a real eraser: a stroke you cross in the middle becomes two, each keeping its colour, width, pressure, layer and author. Other markups are left alone in this mode.
- Size is how wide the eraser is on screen, from 4 to 64. The pointer shows it as a ring.
The Eraser leaves locked markups, markups on hidden layers, placed PDFs and the trace paper itself as they are, and it does nothing while Cella PDF is view-only. A pen's eraser end, where the pen has one, erases in the same mode and size whatever tool is chosen. Mode and Size are remembered.
The measuring tools are under Measuring. Later, double-click a segment of a polyline, polygon or cloud to add a vertex, and Option-click or Alt-click a vertex to remove it.
Points you place, markups you move and handles you drag stick to the drawing, its text and pictures, and your other markups: see Snapping.
Drawing with a pen
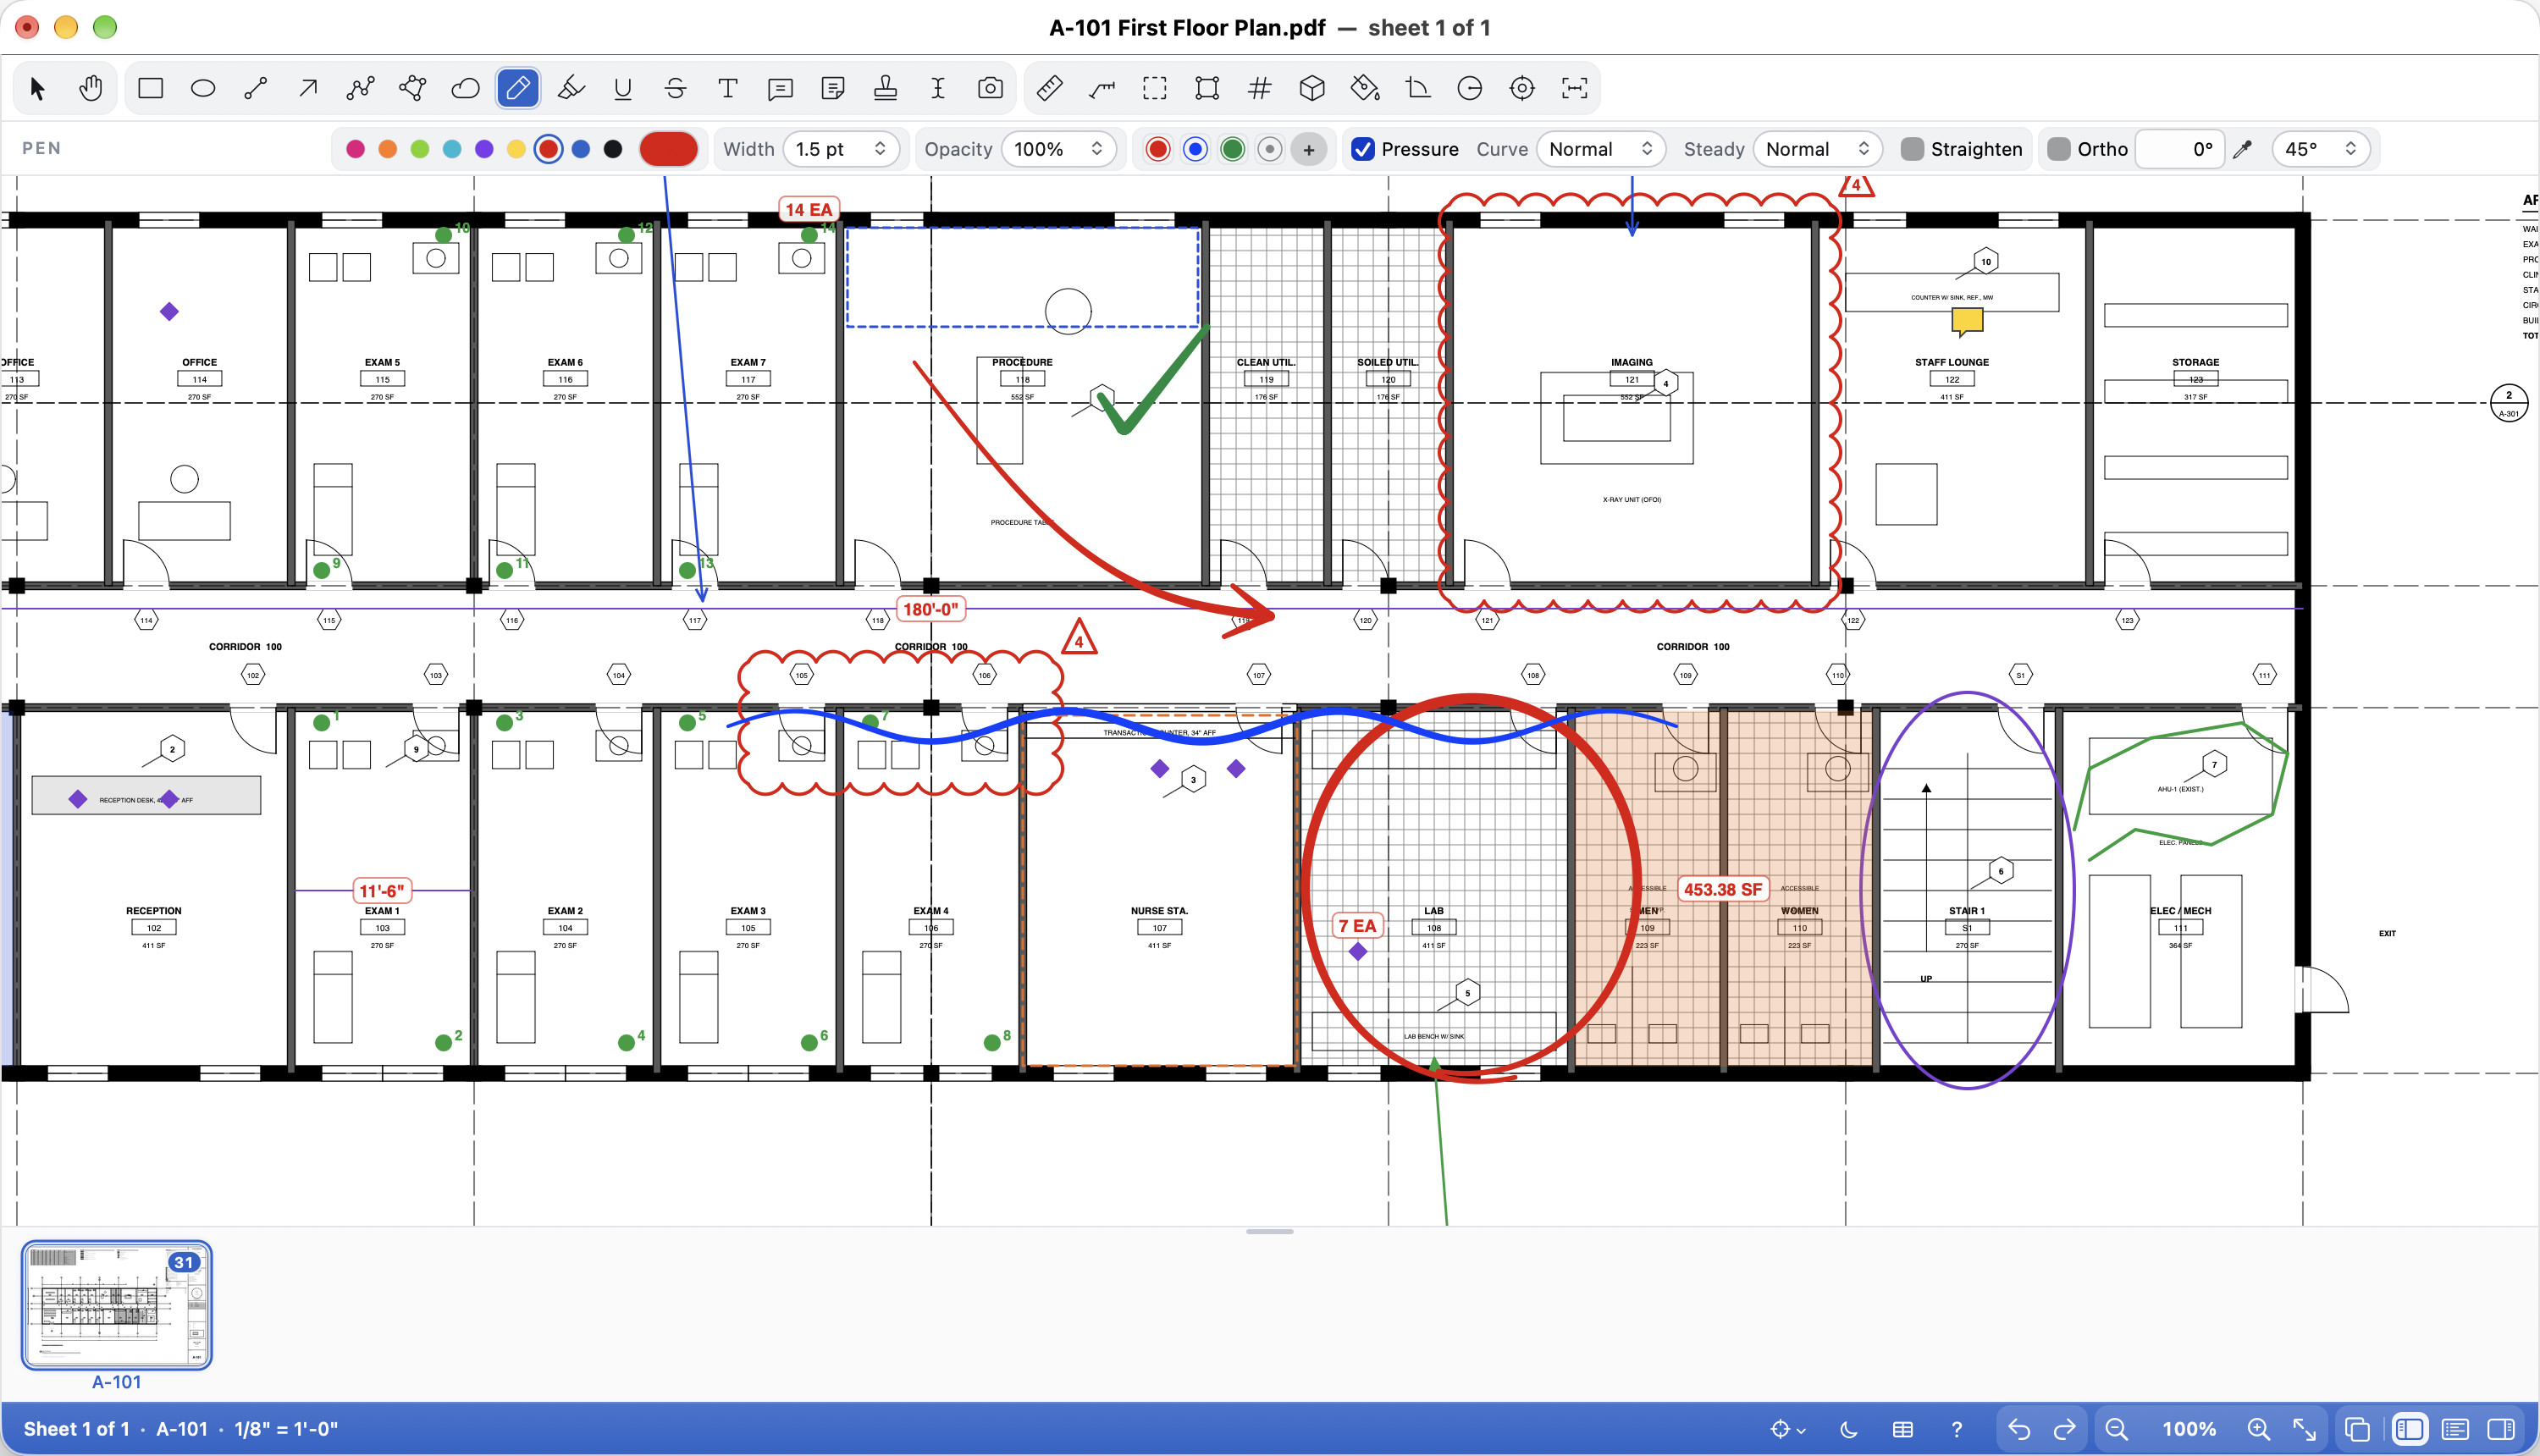
A pen display or graphics tablet (a Huion Kamvas, an XP-Pen, a Wacom, a Surface pen, Apple Pencil) draws with the Pen tool (P). With the Pen chosen, the options row under the toolbar has:
- Pressure. The line gets wider as you press harder. It is on unless you turn it off; a mouse always draws an even line. Curve sets how the pen feels: Light widens the line sooner, for a light hand; Firm needs a firmer press; Normal is the pen as it is. The curve is applied as you draw, so a stroke looks the same on any computer.
- Steadying (Off, Light, Normal, Strong) smooths the line against a shaky hand. It belongs to the pen's look, like its width.
- Straighten. Hold the pen still for a moment at the end of a stroke, before you lift it, and the stroke becomes a straight line from where it began. Keep moving after it straightens to move the line's end. It is off unless you turn it on.
- Ortho (F8 on every computer, or Tools ▸ Ortho). Lines keep to 0°, 45° and 90° on the sheet, as when you hold Shift, without holding it: Line, Arrow, Polyline, Polygon, Cloud and the measuring tools. With the Pen, a stroke becomes one straight line from where it started, at the nearest of those angles. Press F8 again to turn it off. The status band says Ortho while it is on.
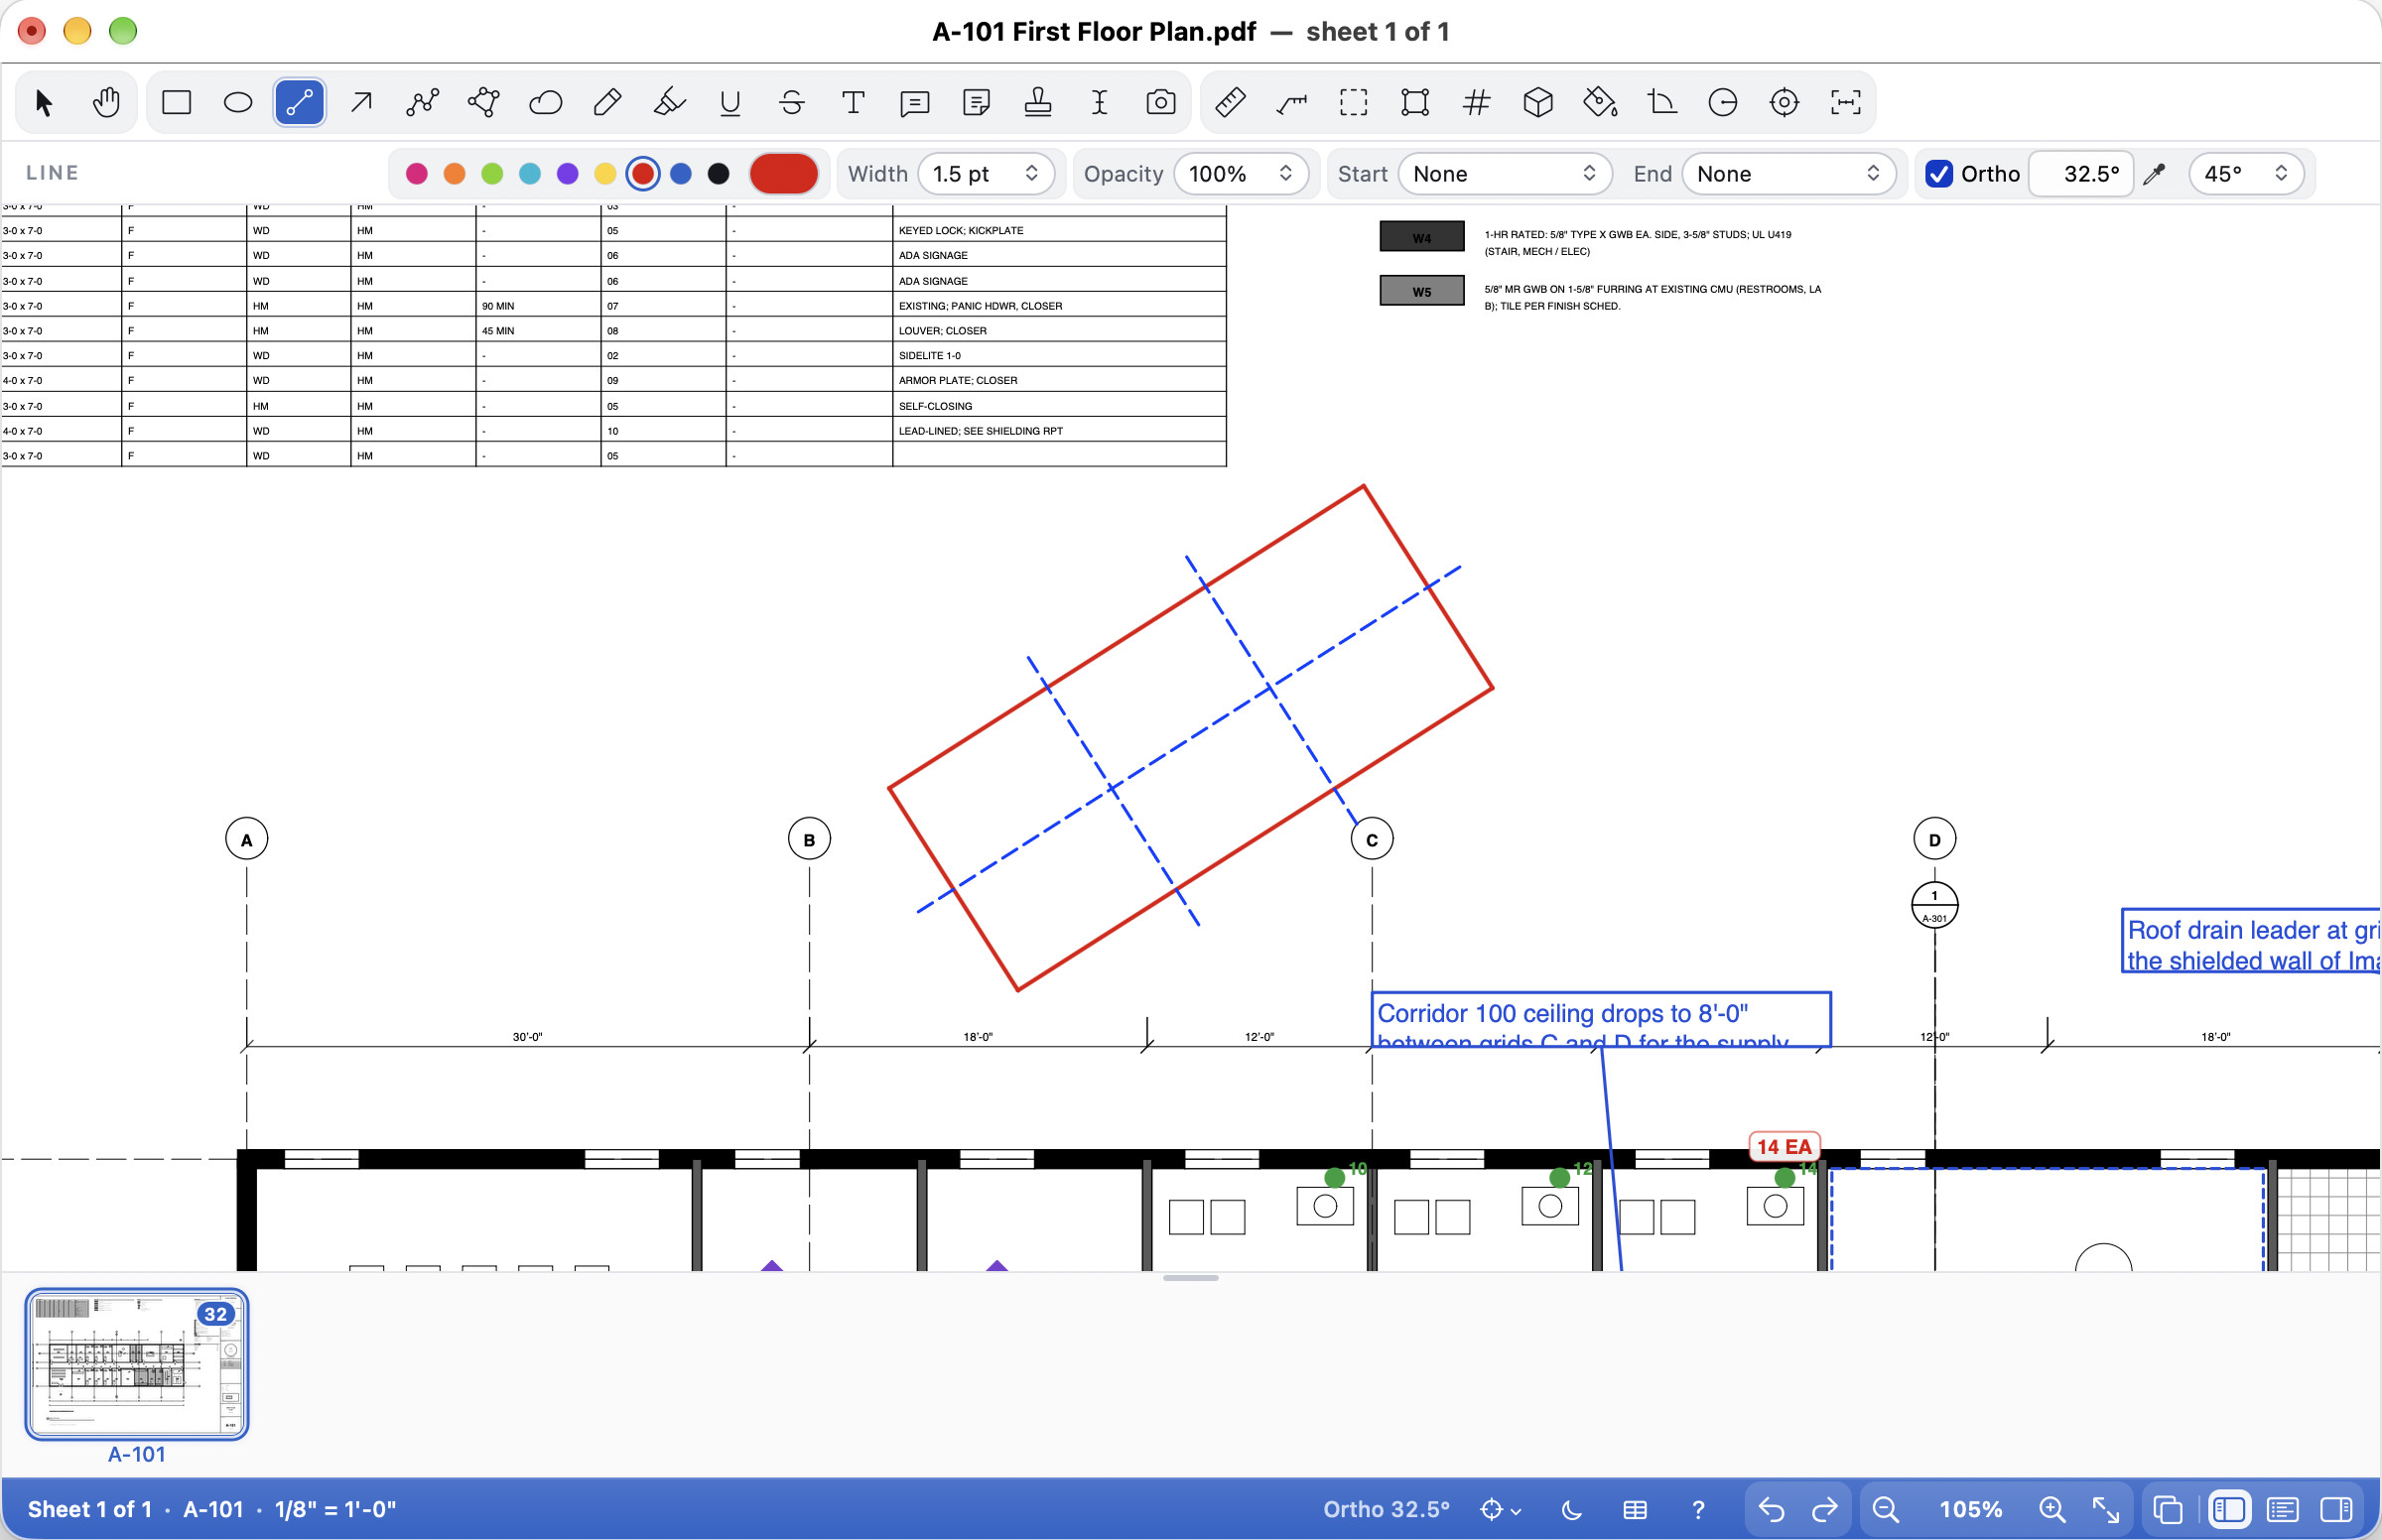
- Ortho angle, for skewed plans. When a wing or a grid sits at an angle, give the sheet its own Ortho angle and lines keep to that wall and its square instead (Shift too). Type it with Tools ▸ Ortho Angle ▸ Set Angle… or in the angle box beside Ortho, or choose Tools ▸ Ortho Angle ▸ Pick from Drawing (the eyedropper beside the box) and click two points along a wall or grid line; snapping helps you land on the line, and Esc cancels. The angle is measured as the sheet reads on screen and is kept with that sheet in the document, so each sheet can have its own and it is still there when you open the file again; Undo takes a change back. Tools ▸ Ortho Angle ▸ Reset to 0° puts it back to 0°. The Step items in the same submenu (or the step box) chooses how far apart the angles are: 45° (the usual), 15°, 30° or 90°. While Ortho is on the status band shows the angle, for example Ortho 32.5°.
- Type. What the pen draws like (see Pen types below): Technical Pen, Fineliner, Pencil, Marker, Charcoal or Brush Pen.
- Favourites. Up to nine saved pens, each a colour swatch. Set the pen up (type, colour, width, opacity, pressure, curve, steadying) and click + to save it; click a swatch to draw with it. A favourite keeps its type, so one can be a soft grey pencil and the next a yellow marker. While the Pen is chosen, the keys 1 to 9 pick favourites 1 to 9. Right-click a swatch to rename or delete it. They are kept in the Tool Chest as the set "Pen Favourites", so they go with an exported Tool Chest.
Pen types
The Pen draws a clean technical line unless you choose another Type in its options. The others give a sketch over a drawing the feel of real media, so it reads as a sketch:
| Type | What it draws |
|---|---|
| Technical Pen | A clean line, as before; with Pressure on it swells and thins with the pen. Files from earlier versions and from other apps open with this type. |
| Fineliner | An even line with slightly rounded ends and a touch of ink gathered where it starts and stops. Pressure doesn't change it. |
| Pencil | Graphite, with the paper's grain showing through. A light touch draws lighter, a firmer one darker. Strokes drawn over each other build up darker, as pencil does. |
| Marker | A flat chisel tip held at 45°: broad one way, thin the other, with square ends. See-through, and overlaps build up darker, so the drawing shows through it. The pen for colouring rooms and zones on a plan. |
| Charcoal | Broad and soft-edged with a heavy grain; pressing harder makes it both wider and darker. |
| Brush Pen | Tapers strongly: a light or quick stroke is thin, a slow firm one full. Smooth edges, for expressive linework. A mouse tapers it by speed. |
- Each type keeps its own look. The width, colour and opacity you set are remembered for each type, so choosing the Marker and widening it doesn't make the Technical Pen wide when you go back to it.
- Changing a stroke's type. Select a stroke and choose another Type in Properties: it is drawn again in that type. The Highlight tool's freehand strokes stay highlights.
- Everything else works with every type: pressure and its curve, Steadying, Straighten, Ortho, the Scale Ruler's edges and Constrain to Ruler, Erasing Part of Stroke (both pieces keep the type), Copy and Paste Style, Set as Default for Tool, the Tool Chest, trace paper sheets and layers.
- The saved PDF looks the same. The grain, the see-through marker and the build-up are in the file, so other PDF apps, printing and exported pictures show what you saw. Each stroke is still one editable pen markup.
The pen's buttons. Where the pen reports it, its eraser end erases whatever tool is chosen, in the Eraser's mode and size (Erasing). The barrel button is a right click (the context menu), as everywhere else on the computer.
Windows: turn on Windows Ink. Pen pressure on Windows comes through Windows Ink. In the Huion or XP-Pen driver's pen settings, turn on Windows Ink. Without it the pen works as a mouse and draws an even line. On a Mac, Cella PDF reads the tablet's pressure itself; keep the driver installed. On Linux, pressure comes from the tablet driver your desktop uses (libinput or the Wacom driver); if a stroke stays an even width, check the tablet is set up as a pen in your desktop's settings.
Snapping
Cella PDF snaps what you draw to what is already on the sheet. As the pointer comes within reach of something, a marker shows what it caught, and the point you click, the corner you drag or the markup you move lands exactly there.
| Marker | Snaps to |
|---|---|
| Blue: a square, a triangle, an ×, a dot | the drawing's linework: an endpoint, a midpoint, an intersection, a point on a line |
| Violet I-beam | text on the sheet: the corners and baseline of a word or line, and the corners of a note block |
| Orange diamond | pictures placed on the sheet (a logo, a scanned detail): their corners and edges |
| Magenta ring | your other markups: their ends, corners, midpoints and centres (a dot in the ring) |
| Cyan dashed line | a guide: the point lines up with another markup's edge or centre, across or up and down |
So a callout's leader can land on a word, a rectangle can hug a note block, and a cloud can line up with the one beside it.
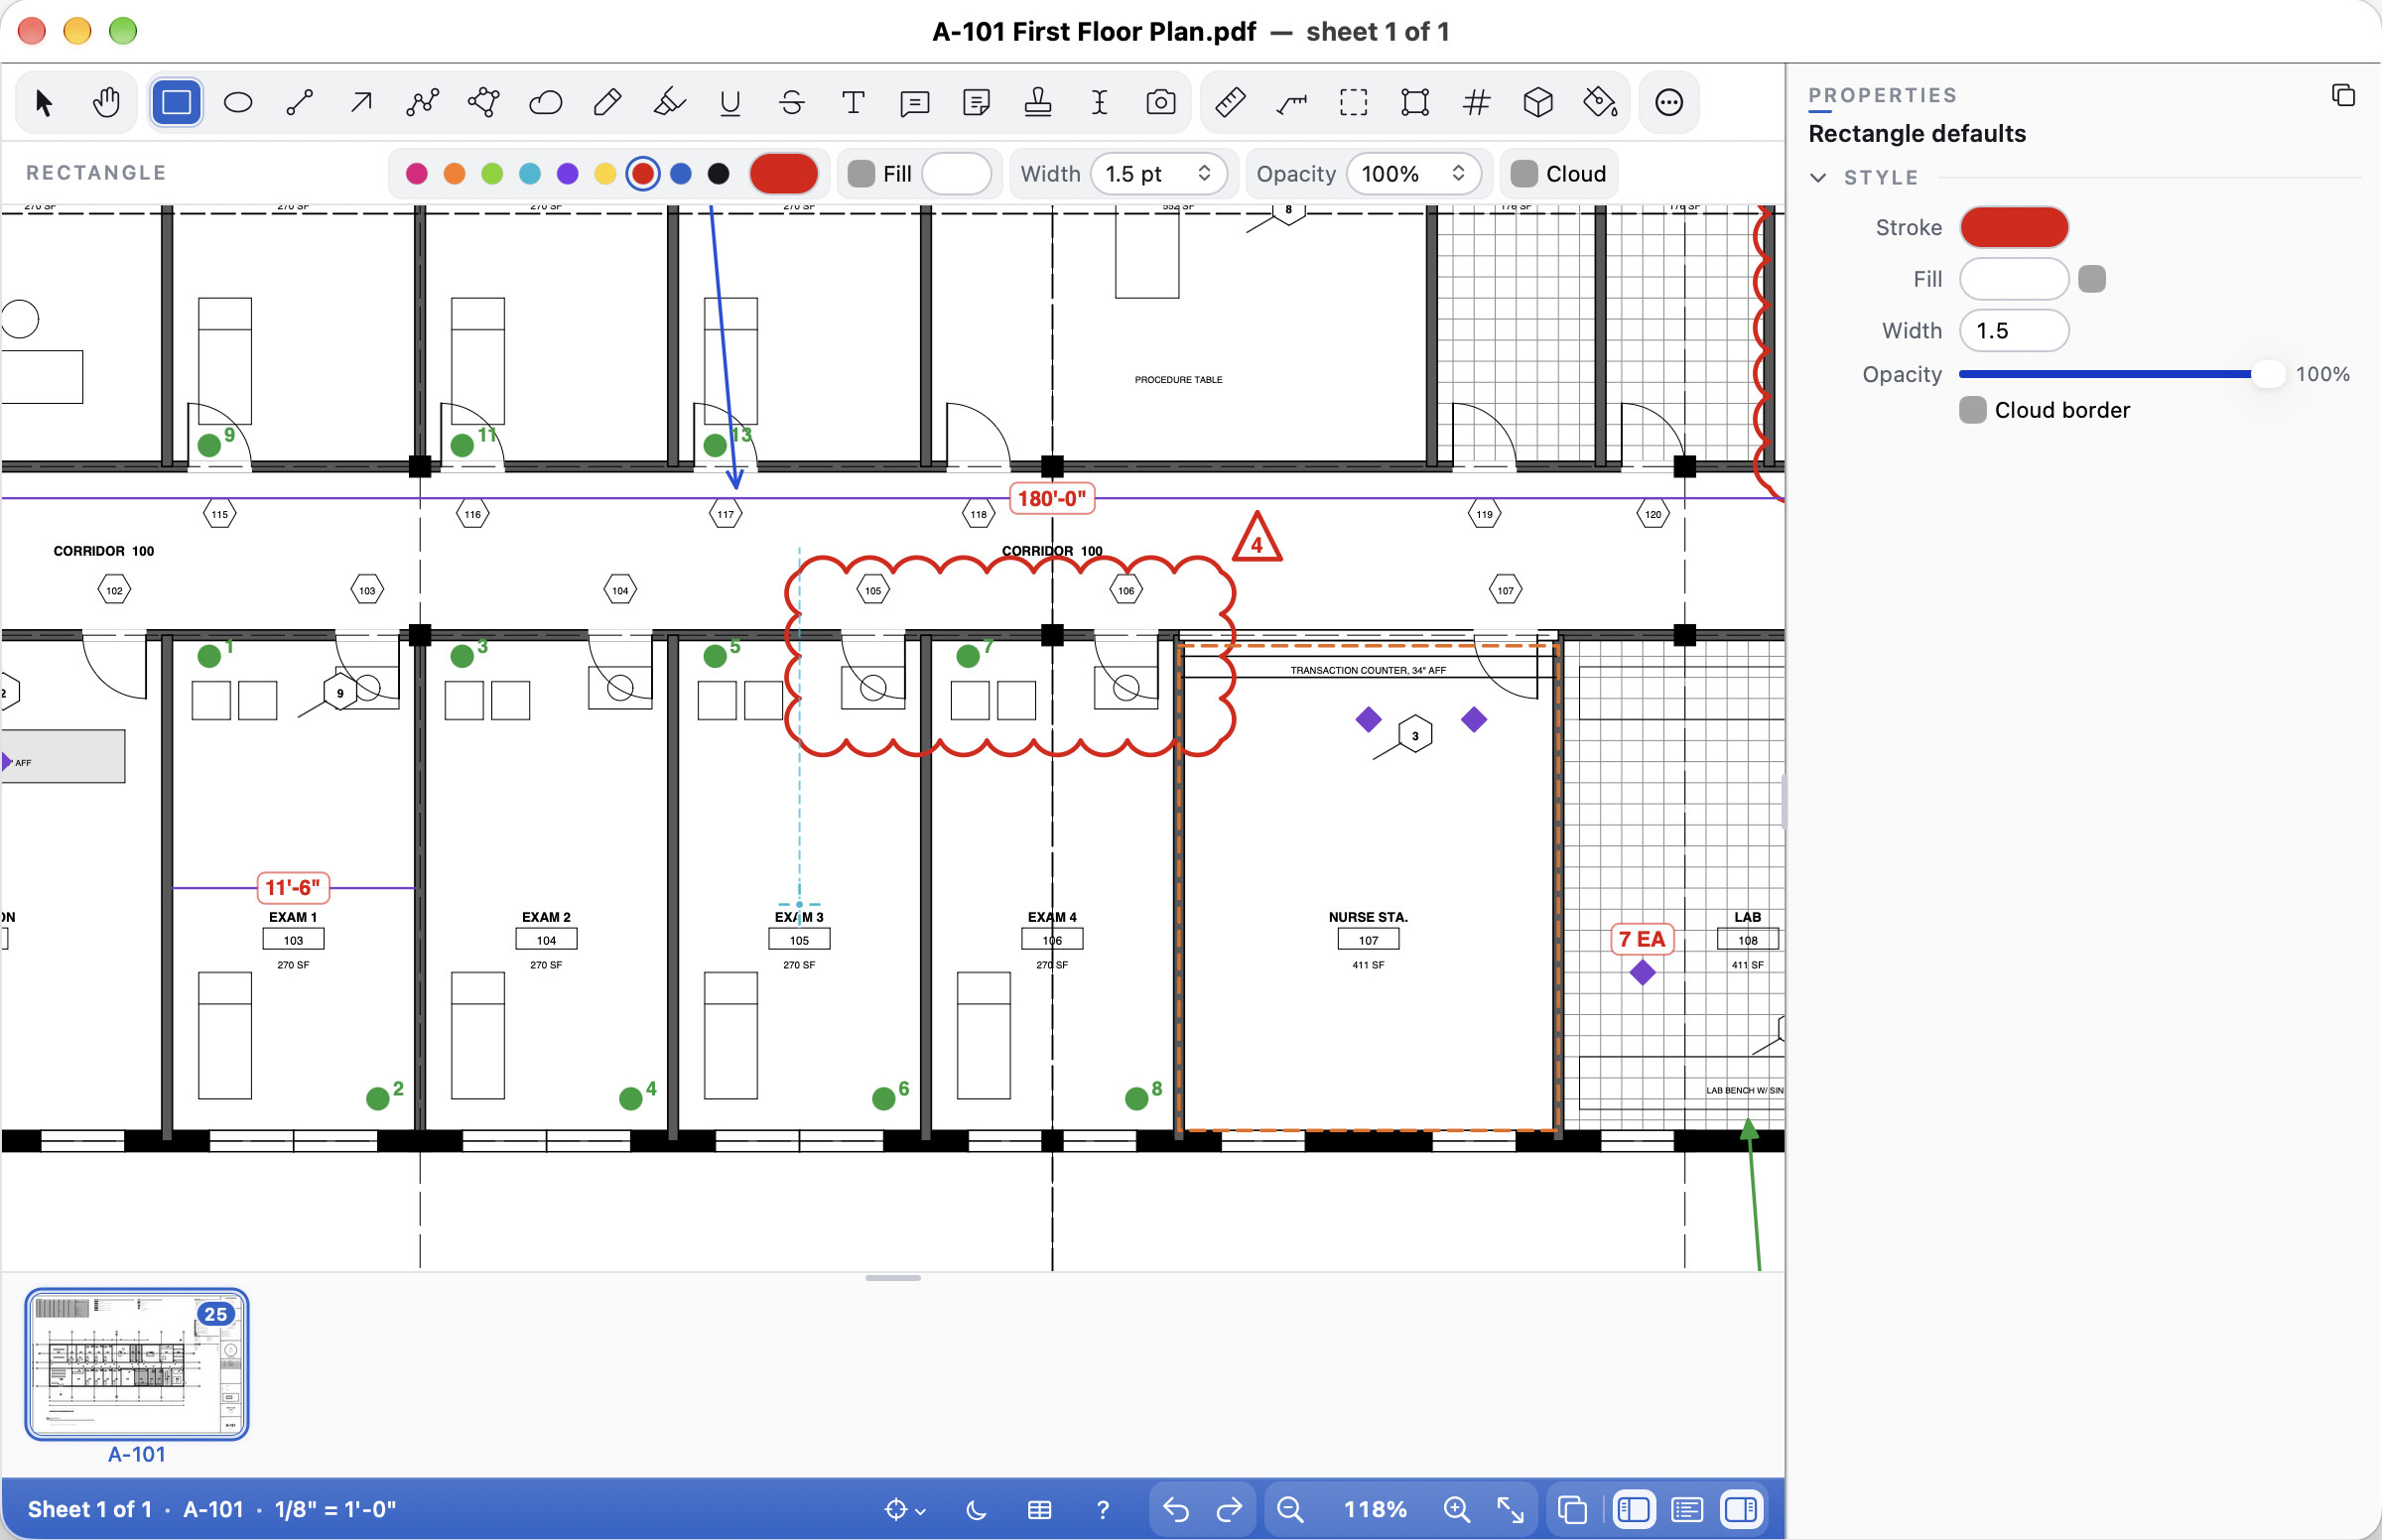
- Snap to Drawing (Tools menu, ⌥⌘N; Ctrl+Alt+N) turns snapping on and off.
- The Snap pull-down in the status band, the target with a ▾ beside the zoom, has the same switch and a checkbox for each kind: Linework, Text, Images, Markups, Guides and Spacing. Tools ▸ Snap To has the checkboxes too. Cella PDF remembers your choice. The target is struck through while snapping is off.
- Hold ⌘ (Mac) or Ctrl (Windows and Linux) to draw free while you hold it: drawing, moving and resizing ignore everything. Shift still keeps lines at 45° steps and boxes square, and Option or Alt still puts an arc point or a cut-out.
- Moving a markup snaps by its corners, centre and points, and lines it up with others on a guide. Dragging a handle snaps that corner or point. A markup never snaps to itself.
- Spacing: when a markup you move or a point you draw is about as far from the markup beside it as that one is from the next in the row (or column), or about midway between two, it snaps to the even spacing. Both gaps show with their distance, in the sheet's units when it has a scale.
- Highlight, underline and strikeout follow the words instead, and the pen draws free.
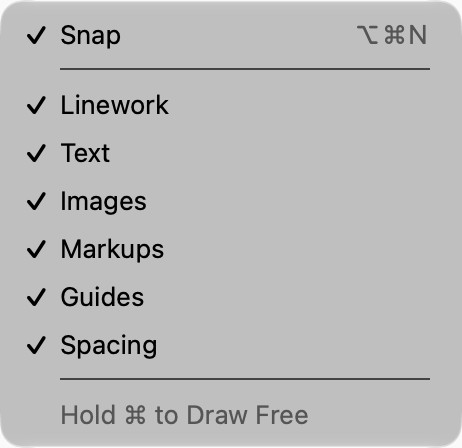
Properties and the style strip
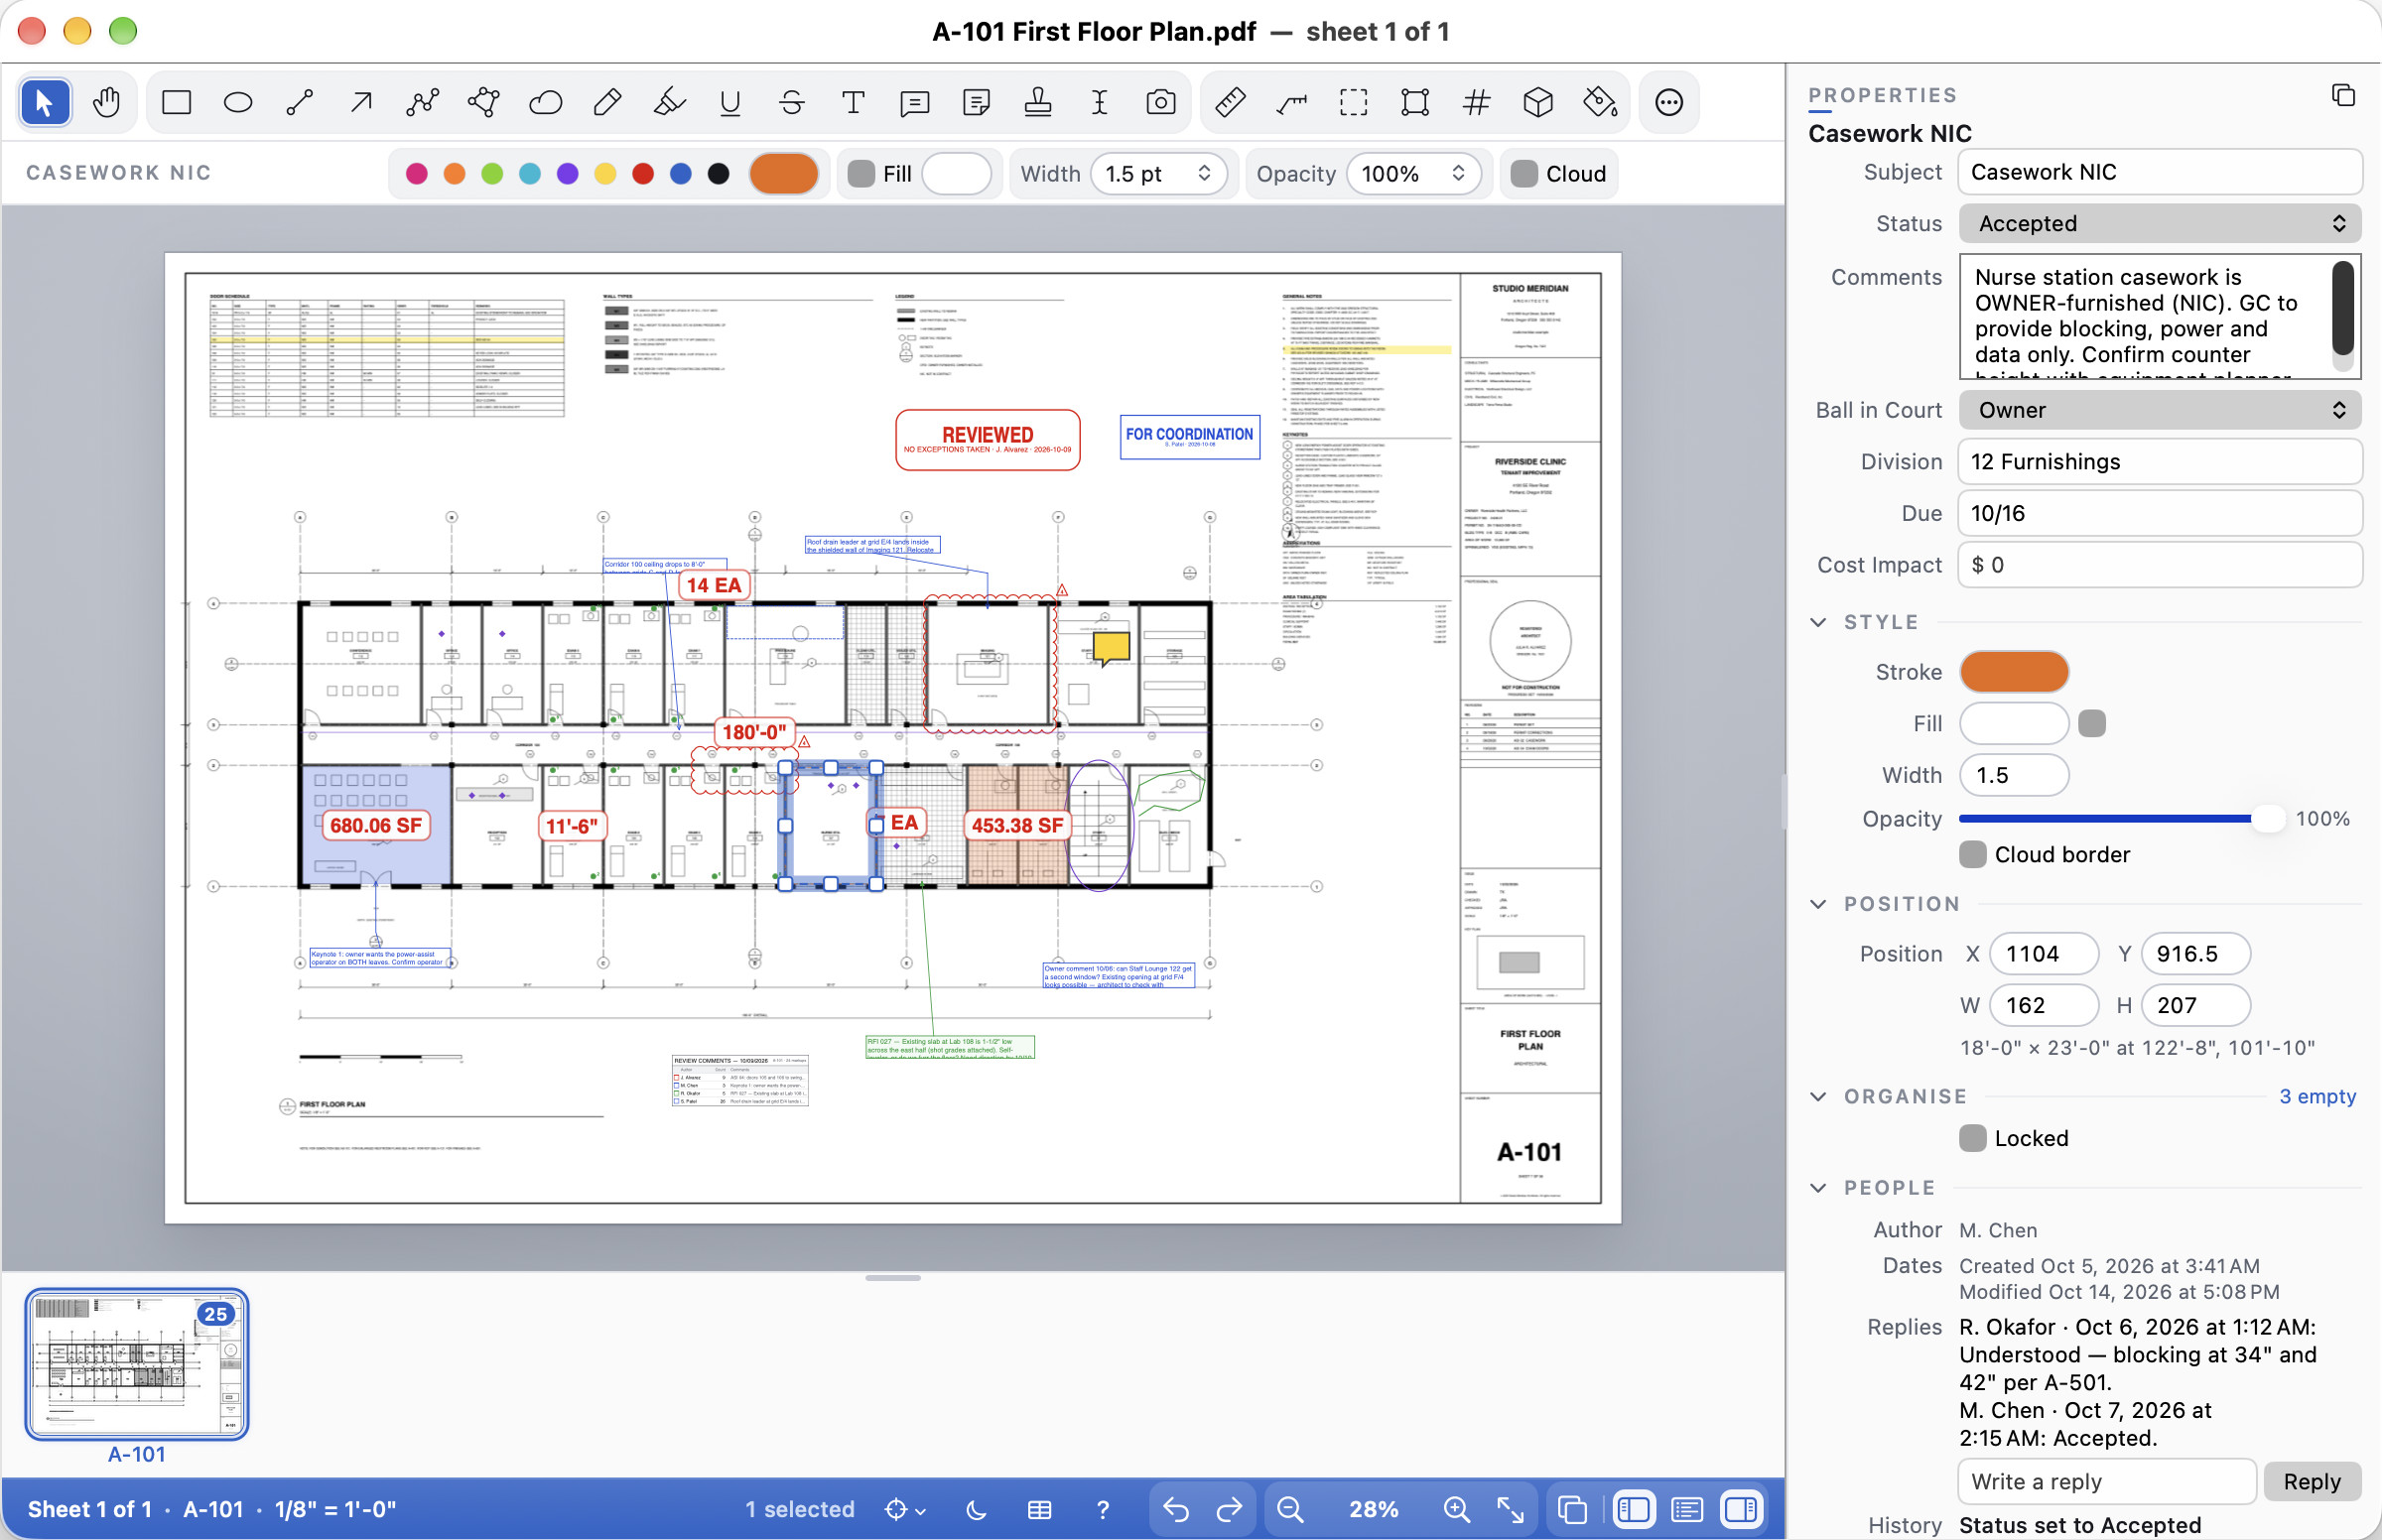
Select a markup and Properties shows everything about it: Subject, Status, Comments, your office's custom columns, stroke and fill colour, line width, opacity, dash and line endings, font size (and for text boxes and callouts Align, Vertical, Margin (pt) and Spacing), Position, Layer, Space, Label, Locked, the author and dates, the replies and the history. With several markups selected, a change applies to them all.
The style strip in the options row under the toolbar is the quick way to change colour, fill, width and opacity. Changing a style with nothing selected makes it the tool's default from then on, as does Set as Default for Tool with a markup selected.
Hatches
A fill can be a hatch as well as a colour, to show a material or an intent: brick in a wall, concrete in a slab, a diagonal over an area that is out of the contract. Choose a pattern from Hatch beside the fill in the options row, or in Properties. It works on rectangles, ellipses, polygons, clouds, text boxes and callouts (behind the text), Area and Volume measurements, and the rooms you fill with Dynamic Fill (choose the hatch before you click). The fill colour stays under the hatch, so a pale yellow fill with a diagonal hatch is one markup; turn the fill off for the hatch alone. Cut-outs in an area stay clear.
The patterns: Diagonal, Diagonal (other way), Crosshatch, Horizontal, Vertical, Grid, Dots, Sand, Concrete, Earth, Gravel, Brick, Block, Tile, Tile (diagonal), Wood, Insulation, Steel and Glass.
With a pattern chosen, Properties also shows:
- Hatch scale: from 0.25× to 8× the pattern's own size. On a sheet with a scale, the materials (brick, block, tile, wood, insulation and concrete) are drawn at their real size, so brick courses come out true at 1/4" = 1'-0"; the other patterns are a set size on paper.
- Hatch angle: turns the pattern, from 0° to 180°, in steps of 15°.
- Hatch colour: the line colour until you choose another.
- Hatch weight: how thick the hatch's lines are, in points.
The hatch stays in place on the sheet when you move the shape, and it saves into the PDF as a real pattern, so other PDF viewers and prints show what you see. The hatch goes with the rest of the look: Copy and Paste Style, Set as Default for Tool, the Tool Chest and your firm's standards keep it, and a legend's swatch shows it.
Make a markup the look for its tool
Style one markup the way you want the rest of the drawing to look, say a callout with your colour, font, size, alignment, box fill, margin and leader end, then right-click it and choose Set as Default for Tool. Every markup you draw with that tool from then on looks the same, in every open window and the next time you open Cella PDF. The same command is in the Markups menu, in the command palette, and as Set as Default at the end of the Style section in Properties.
Only the look is taken: colours, fill, opacity, line width and dash, line ends, font, size, bold, italic, underline and strikethrough, text colour, alignment, margin and line spacing, a text box's border, cloud borders, and a dimension's or radius's style. The markup's text, position, size, author, dates, subject, status and layer are not. With several markups selected, it works when they are all of one kind (all callouts, say); otherwise it is greyed. A firm standard's locked colours still win.
Reset Tool Defaults (the right-click menu, the Markups menu, or Reset Defaults in Properties) puts the tool back to how it starts; with nothing selected it resets the tool you have chosen. If your firm has a standard, its style for that tool stays. A short note in the status bar says "Callout defaults updated" or "Callout defaults reset".
The defaults you set this way are the same ones the app keeps for each tool (on Windows the text on the Tools page of Options, on Linux the Tools page of Settings), and a profile you save carries them.
Right-click a markup for Cut, Copy, Paste, Delete, Duplicate, the order, the status, Lock, Add Link to Markup…, Bookmark This Markup, Add to Tool Chest…, Set as Default for Tool and Reset Tool Defaults.
The basic editing keys: Delete removes; the arrow keys nudge (Shift 10 points, Option or Alt a tenth); Duplicate (⌘D; Ctrl+D) duplicates; Undo (⌘Z; Ctrl+Z) and Redo (⇧⌘Z; Ctrl+Y on Windows, Ctrl+Shift+Z on Linux) step back and forward (Undo reaches back up to 300 steps; older ones are dropped); Select All (⌘A; Ctrl+A) selects every markup on the sheet.
Copying and pasting markups
Select one or more markups and choose Edit ▸ Copy (⌘C; Ctrl+C) or Edit ▸ Cut (⌘X; Ctrl+X), or right-click them. Then go to any sheet, in this document or another one open in a window or tab, and choose Edit ▸ Paste (⌘V; Ctrl+V):
- With the pointer over the sheet, the markups land centred on the pointer.
- From the Edit menu (the pointer is away from the sheet), they land where they were on their sheet; pasted onto the sheet they came from, each paste lands a little below and to the right, so the copy never hides the original.
- The right-click menu's Paste puts them where you right-clicked.
- Edit ▸ Paste in Place (⇧⌘V; Ctrl+Shift+V) puts them exactly where they were on their sheet, measured from its corner: copy a note from one plan and paste it in place on the next.
Pasted markups keep their look, text, leaders, layer and grouping, and they are yours (your name, today's date, no replies). A measurement measures again at the scale of the sheet (or viewport) it lands on. A sheet turned differently from the one they came from turns them with it, so they read the same way on screen. A placed PDF pastes only into the document it was placed in; the rest of the selection still pastes, and the status bar says what was left out. One paste is one Undo step.
When you are typing in a text box, or have text on the sheet selected, the same keys copy and paste text instead.
Statuses, replies and comments
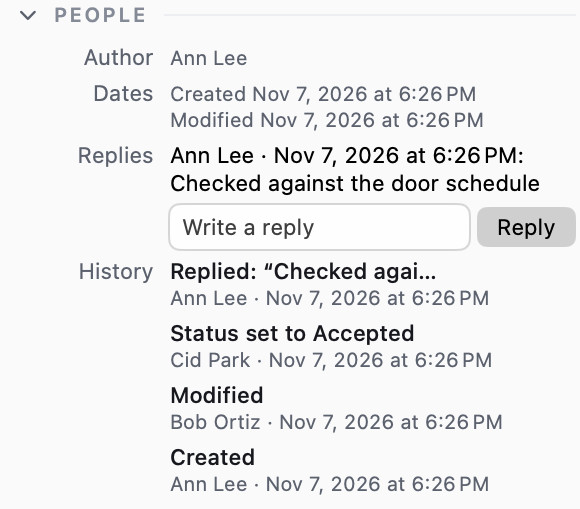
Every markup can carry a status: None, Accepted, Rejected, Cancelled or Completed (a firm profile can add its own, such as For Review). Set it in Properties, with Markups ▸ Set Status ▸, or from the right-click menu. Acrobat and other PDF apps read the same review states.
Replies are written in Properties: type in the field under the replies and click Reply. They are threaded the way Acrobat and other PDF apps show them, with the author and date of each.
Text boxes and callouts
Select a text box or callout and Properties shows Align (left, centre, right), Vertical (top, middle or bottom of the box), Margin (pt) (the space between the box's edge and its text) and Spacing (single, 1.15, the default 1.2, 1.5 or double). Set them with nothing selected and the Text Box or Callout tool uses them from then on. They are saved in the PDF's own text style, so a box made in another markup app opens with its margin, alignment and spacing. That app shows Cella PDF's boxes the same way.
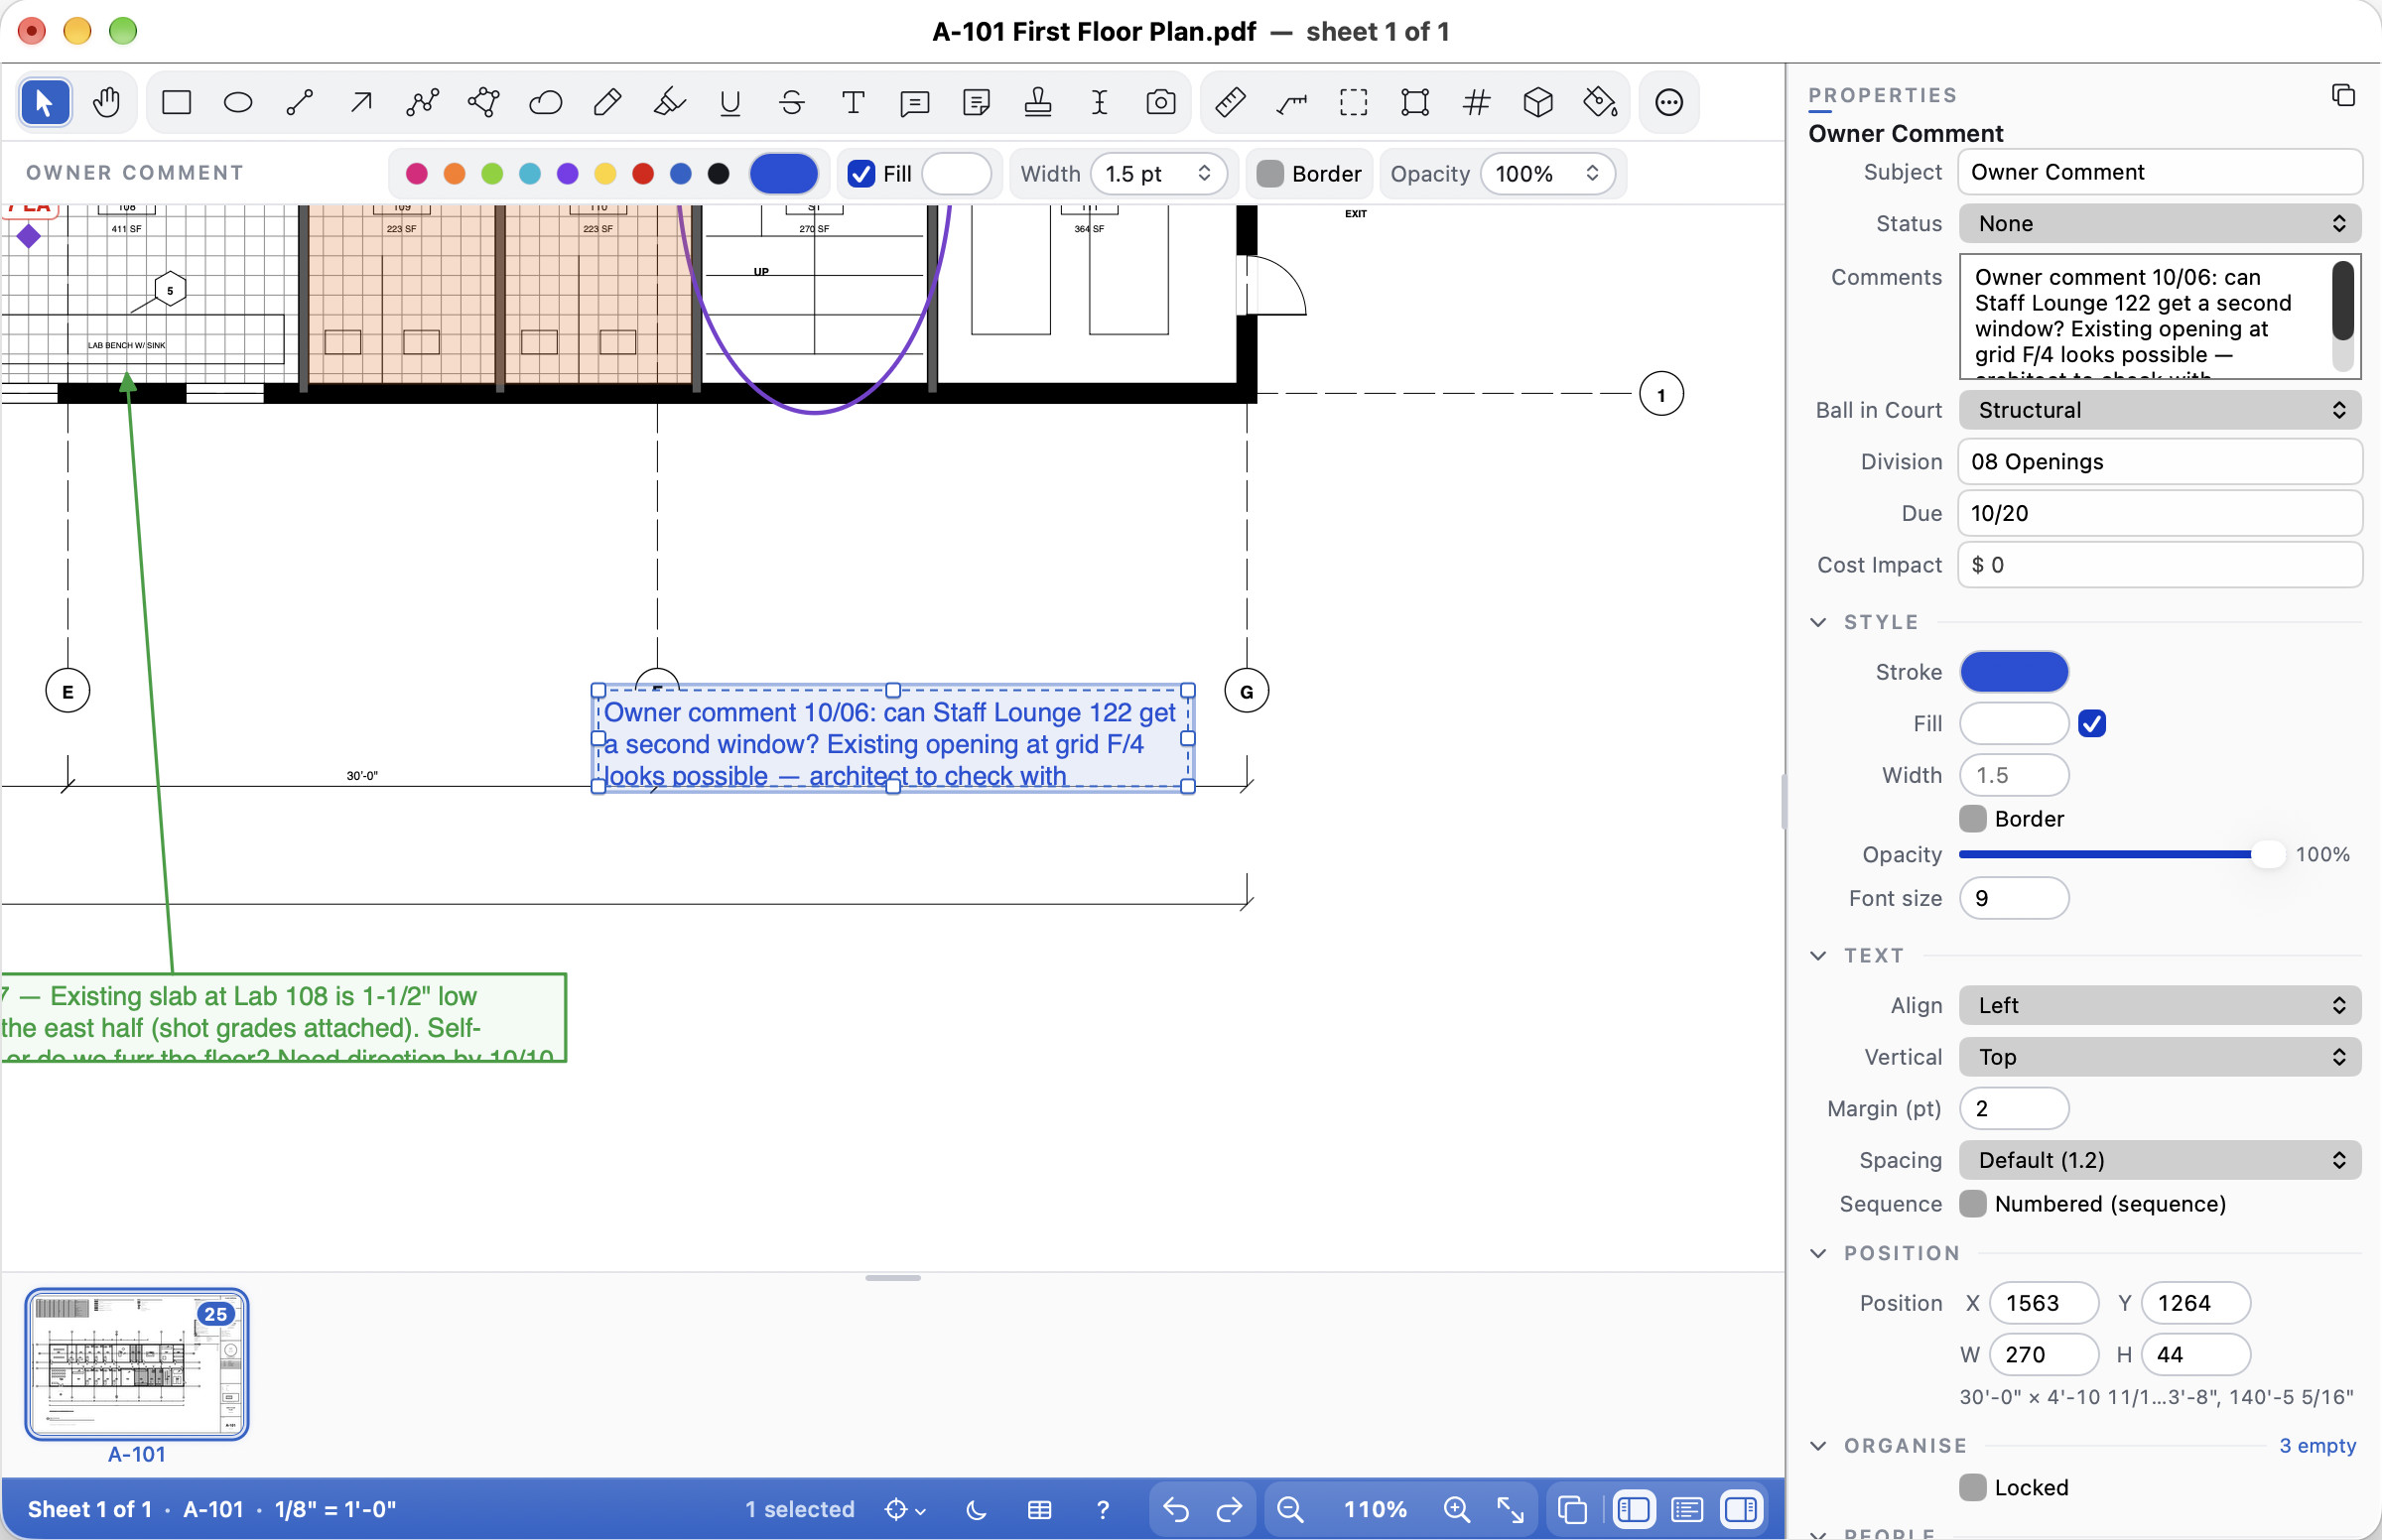
A text box's outline is optional: untick Border (in Properties under Width, and in the options row) and the box is drawn without it, on screen and in the saved PDF; its fill and text stay. While it has no border its Width is greyed. Tick Border again and the outline comes back in the box's colour. Untick it with nothing selected and the Text Box tool makes borderless boxes from then on; a Tool Chest tool made from a borderless box keeps it. Other PDF apps show no border either, and a text box from another app that has none opens with Border off.
A callout always has its border: other PDF apps draw a callout's box with its leader line, so a callout without one would not look the same everywhere. For text without a box, use a text box and an arrow.
Autosize Text Box fits a box to its text. Select one or more text boxes or callouts and choose Markups ▸ Autosize Text Box (⌥⌘Z; Alt+Z on Windows and Linux), or right-click one and choose it there. The box keeps its width and grows or shrinks in height until every line shows, with its top edge where it was (a box aligned to the middle or bottom keeps that instead). A one-line note in a box wider than it needs is pulled in to fit the words. A word longer than the box is never broken: the box widens to it. Text on a turned sheet grows down the sheet as you read it, and a callout's leader follows its box so it still points where it did. It is one step of Undo.
Boxes an AI assistant adds are sized to their text the same way, as are sequence labels: a box the assistant gives a size keeps its width and only grows taller when the text needs more room.
Moving notes without re-aiming them. Drag a callout's box and only the box moves: the arrow's tip stays on what it points at, and the leader re-attaches to the side of the box nearest the tip (left or right, or the top or bottom when the tip is under or over the box), swapping sides as you drag the box past the tip. So you can tidy a sheet's notes into a column without touching their arrows. Hold Option (Mac) or Alt (Windows, Linux) while you drag to move the whole callout, arrow and all. The arrow keys move a selected callout's box the same way. When several markups are selected (or the callout is in a group), they move together, callouts included, arrows and all.
To re-aim a callout, select it and drag the round handle at the tip; it snaps to the drawing's corners and lines when snapping is on. The smaller round handle is the knee, where the leader bends.
More than one leader. One note can point at several things: right-click the callout and choose Add Leader. The new arrow's tip follows the pointer, stretching from the box, and your next click puts it on what it points at: no dragging needed. Press Esc instead to change your mind; the callout stays as it was. Adding a leader this way is one step of Undo. The Add Leader button in the Callout options row does the same for the selected callout. To remove one, right-click on that leader and choose Delete Leader (a callout always keeps at least one). Each leader moves with the box like the first. Other PDF apps show every leader; they keep the first as the callout's own and draw the rest as part of the callout's picture.
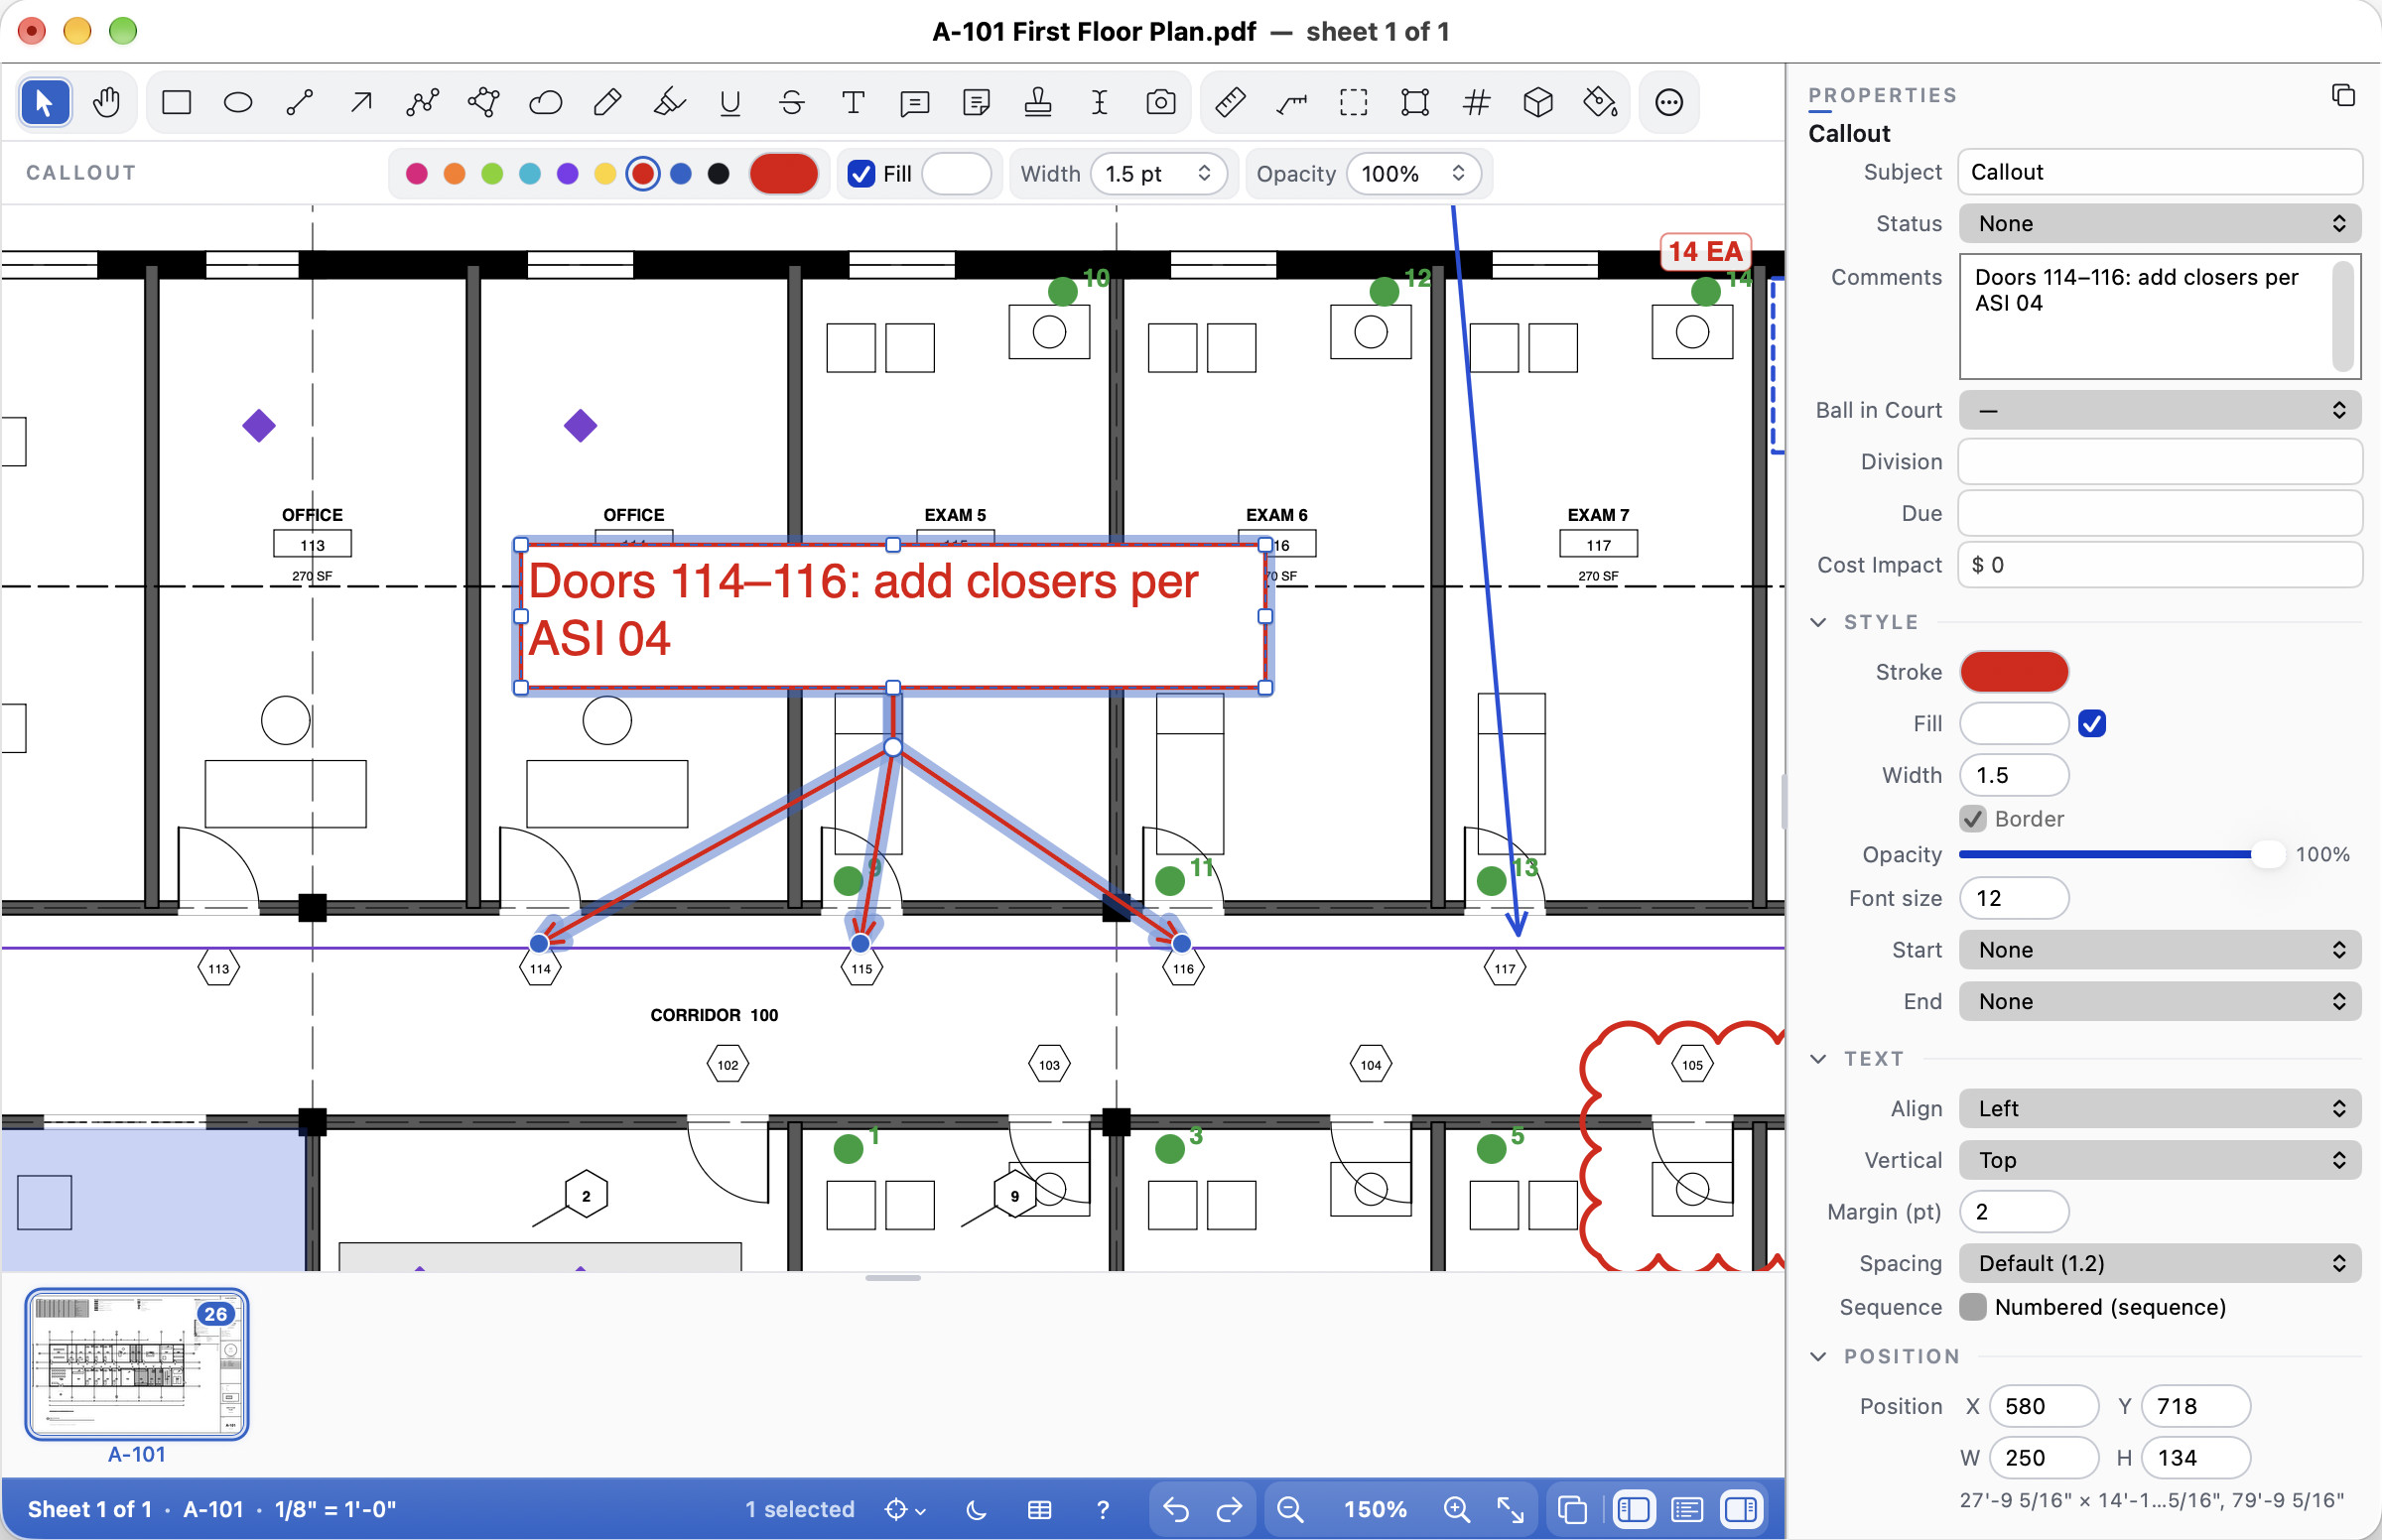
Cloud callouts. A cloud callout is a revision cloud round part of the drawing with a note pointing at it, made and moved as one markup. Choose Cloud Callout in the toolbar, after Callout (⇧Q on the Mac, Shift+Q on Windows and Linux), drag a rectangle round what changed, then click where the note goes and type. A click without a drag makes a small cloud where you clicked. Press Esc part way to start again.
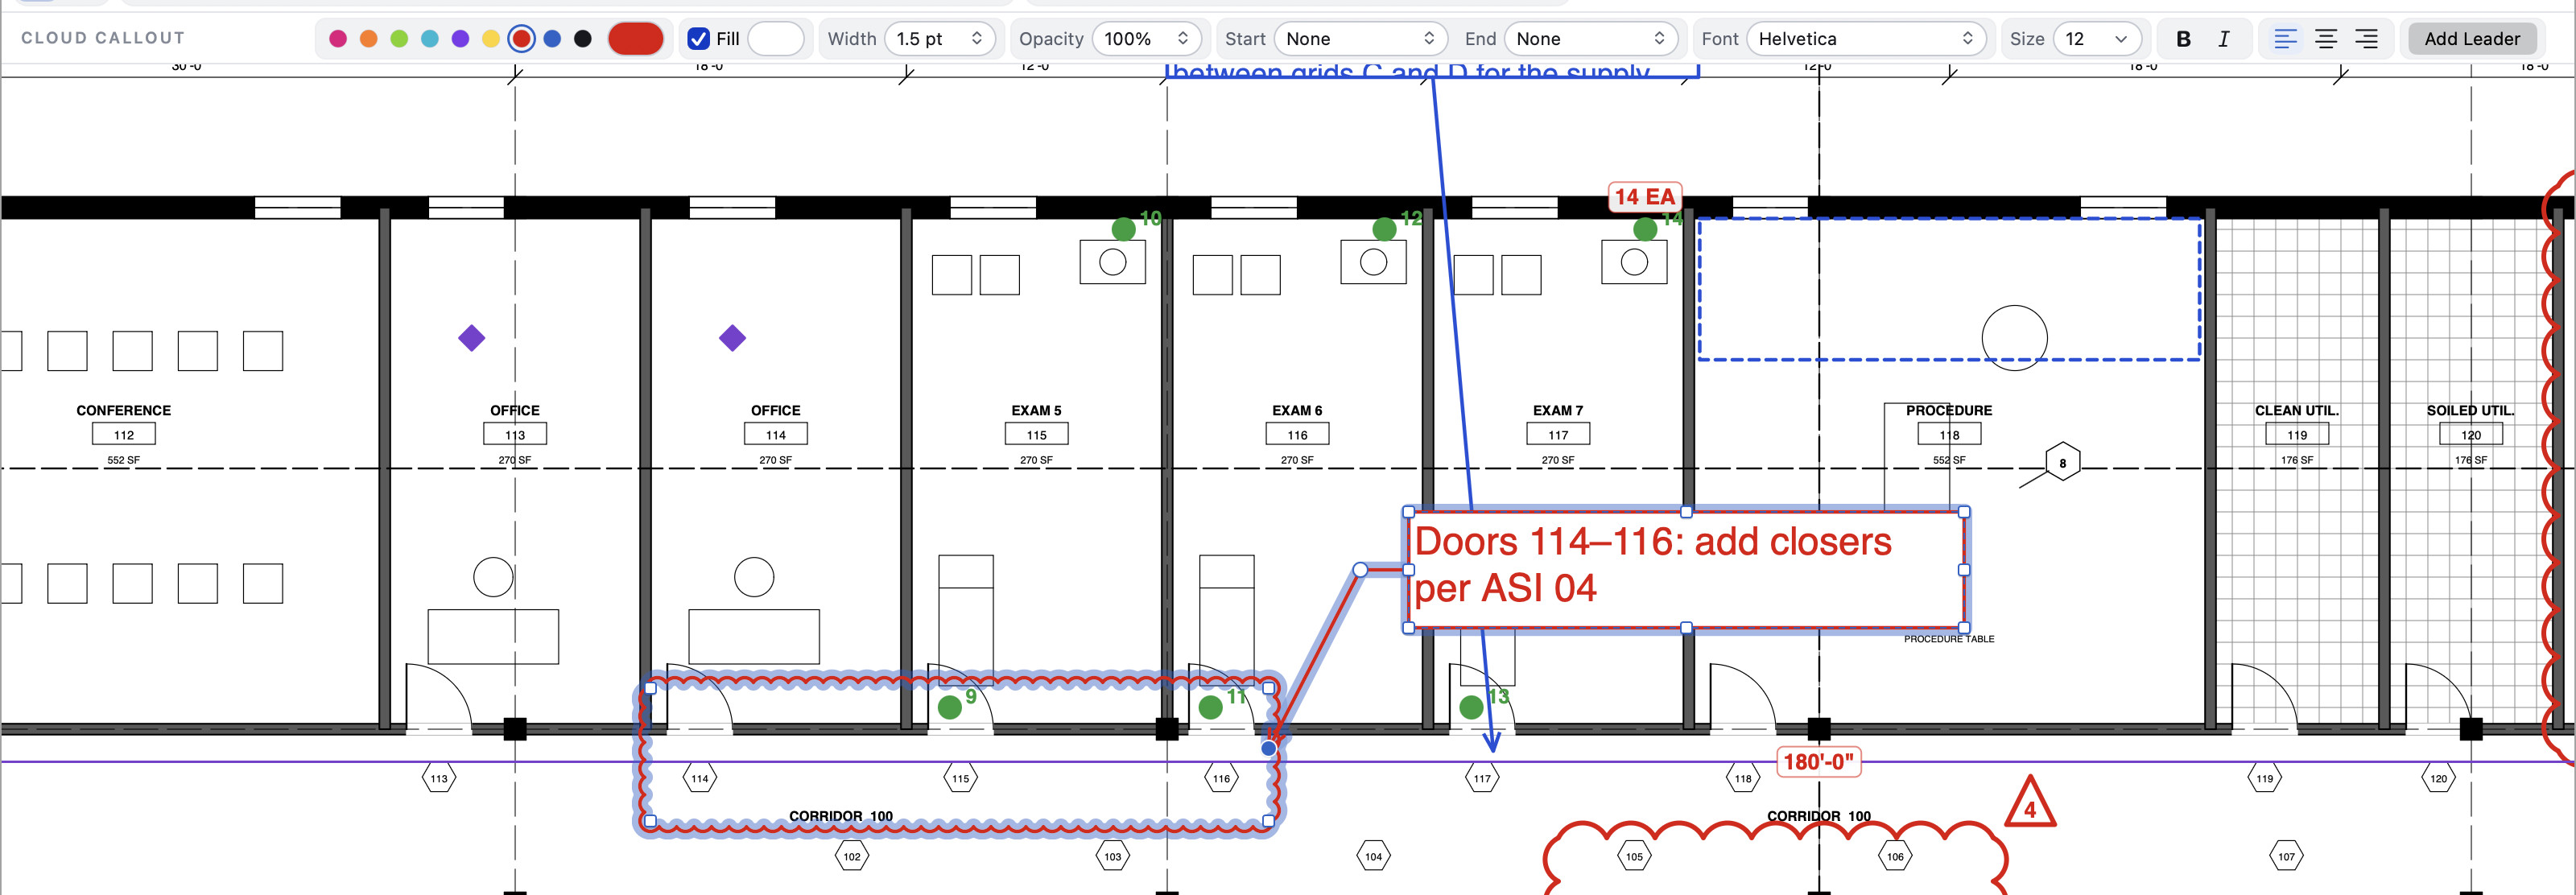
Drag the note's box and only the box moves: the cloud and the arrow's tip stay where they are and the leader follows. Drag the cloud itself to move it, and the arrow's tip goes with it. Drag one of the cloud's corner handles to make it bigger or smaller; it stays a rectangle (hold Shift to move just that corner). Hold Option (Mac) or Alt (Windows, Linux) while you drag to move the whole thing. Add Leader works here too, to point the same note at other places.
In Properties, Cloud intensity sets how big the cloud's scallops are (2 is the size other PDF markup apps use), and Border turns the box's outline off for a note with no box, as many offices draw this kind of note. The Markups Table lists one you make as "Cloud Callout". Other PDF markup apps call this note "Cloud+": theirs open in Cella PDF as cloud callouts, with their cloud at the same scale, and the ones you make or change open there as theirs again.
Bold, italic, underline and strikethrough
Select one or more text boxes or callouts, or double-click one to type in it, and press ⌘B, ⌘I or ⌘U (Ctrl+B, Ctrl+I, Ctrl+U on Windows and Linux) to make its text bold, italic or underlined. Press the same keys again to turn it off. While you are typing, the box stays open and your text takes the new look at once. The same commands are in Markups ▸ Text Style (Bold, Italic, Underline and Strikethrough, with a tick beside the ones that are on), as the B, I, U and S buttons in the options row, and as Style under Text in Properties.
A style applies to all of a box's text. With several boxes selected, the key turns it on for all of them, or off when they all have it already. Each change is one step of Undo. A text stamp takes Bold and Italic. Set a style in the options row with nothing selected and the Text Box or Callout tool uses it from then on; Set as Default for Tool keeps it too.
The underline and the line through are saved in the PDF, so other PDF apps show them, and a box from another app whose text is underlined opens underlined.
Underline Sheet Text and Strike Through Sheet Text (U and D in the toolbar) are something else: they mark text that is printed on the drawing itself. Pick one and drag across words on the sheet; the status band says what the tool does. If you pick one of them while a text box or callout is selected or being typed in, Cella PDF underlines (or strikes through) that box's text instead, and the status band says so.
Arranging and editing markups
The Markups menu has what you need to tidy a sheet. Directions are always as you see the sheet, even on a turned one, and locked markups stay where they are. Each of these is one step of Undo.
- Align ▸ Left, Centre, Right, Top, Middle or Bottom lines two or more markups up with that edge (or centre) of the selection as a whole. Distribute ▸ Horizontally or Vertically spaces three or more evenly. Match ▸ Width, Height or Size makes the others the size of the markup you selected last.
- Group (⌃⌘G; Ctrl+J) makes the selection one group: it selects, moves, copies and deletes as one, and other markup apps read it as a group. Ungroup (⌃⇧⌘G; Ctrl+Shift+J) takes it apart.
- Copy Style (⌥⌘C; Ctrl+Alt+C) and Paste Style (⌥⌘V; Ctrl+Alt+V) copy one markup's colours, line, fill, opacity, dashes, endings, cloud border and text settings onto the selection, in this window or another.
- Rotate ▸ 90° Clockwise, 90° Counter-clockwise or 180°, and Flip Horizontal / Vertical (text isn't mirrored).
- Offset… (⌥⌘O; Ctrl+Alt+O) copies the selected lines, polylines, lengths, shapes and areas a set distance away: a line or polyline parallel to itself, a shape or area grown outward or shrunk inward. The copy follows the pointer: move to the side you want and either type a distance (
6",12'-6",150 mm, as the sheet's scale reads it) and click or press Return, or click through a point to set the distance there (it snaps to the drawing). Esc cancels. The distance you typed last comes back next time, so a run of offsets is a click each. Corners stay sharp, curves stay curves, and an area's cut-outs move the other way. - Bring to Front (⇧⌘]; no key on Windows and Linux), Bring Forward (⌘]; Ctrl+]), Send Backward (⌘[; Ctrl+[) and Send to Back (⇧⌘[; no key on Windows and Linux) change the order; it is saved in the PDF.
- Lock / Unlock (⇧⌘L; no key on Windows and Linux) stops a markup being moved or changed by accident.
- Move to Layer… puts the selection on a markup layer (type a new name to make one).
- Edit ▸ Select All on Sheet of This Type selects every markup of the selected one's kind on the sheet; Select Similar those with the same subject and colour.
- Properties ▸ Position shows the selection's X, Y (from the sheet's top-left corner), W and H in points, and beneath them the same in the sheet's scale. Type a value and press Return or Enter to move or resize exactly: points, or a length such as
12'-6"or3.5 min the sheet's scale. - Hold Shift while dragging a corner handle to keep a box's proportions.
Revision clouds and tags
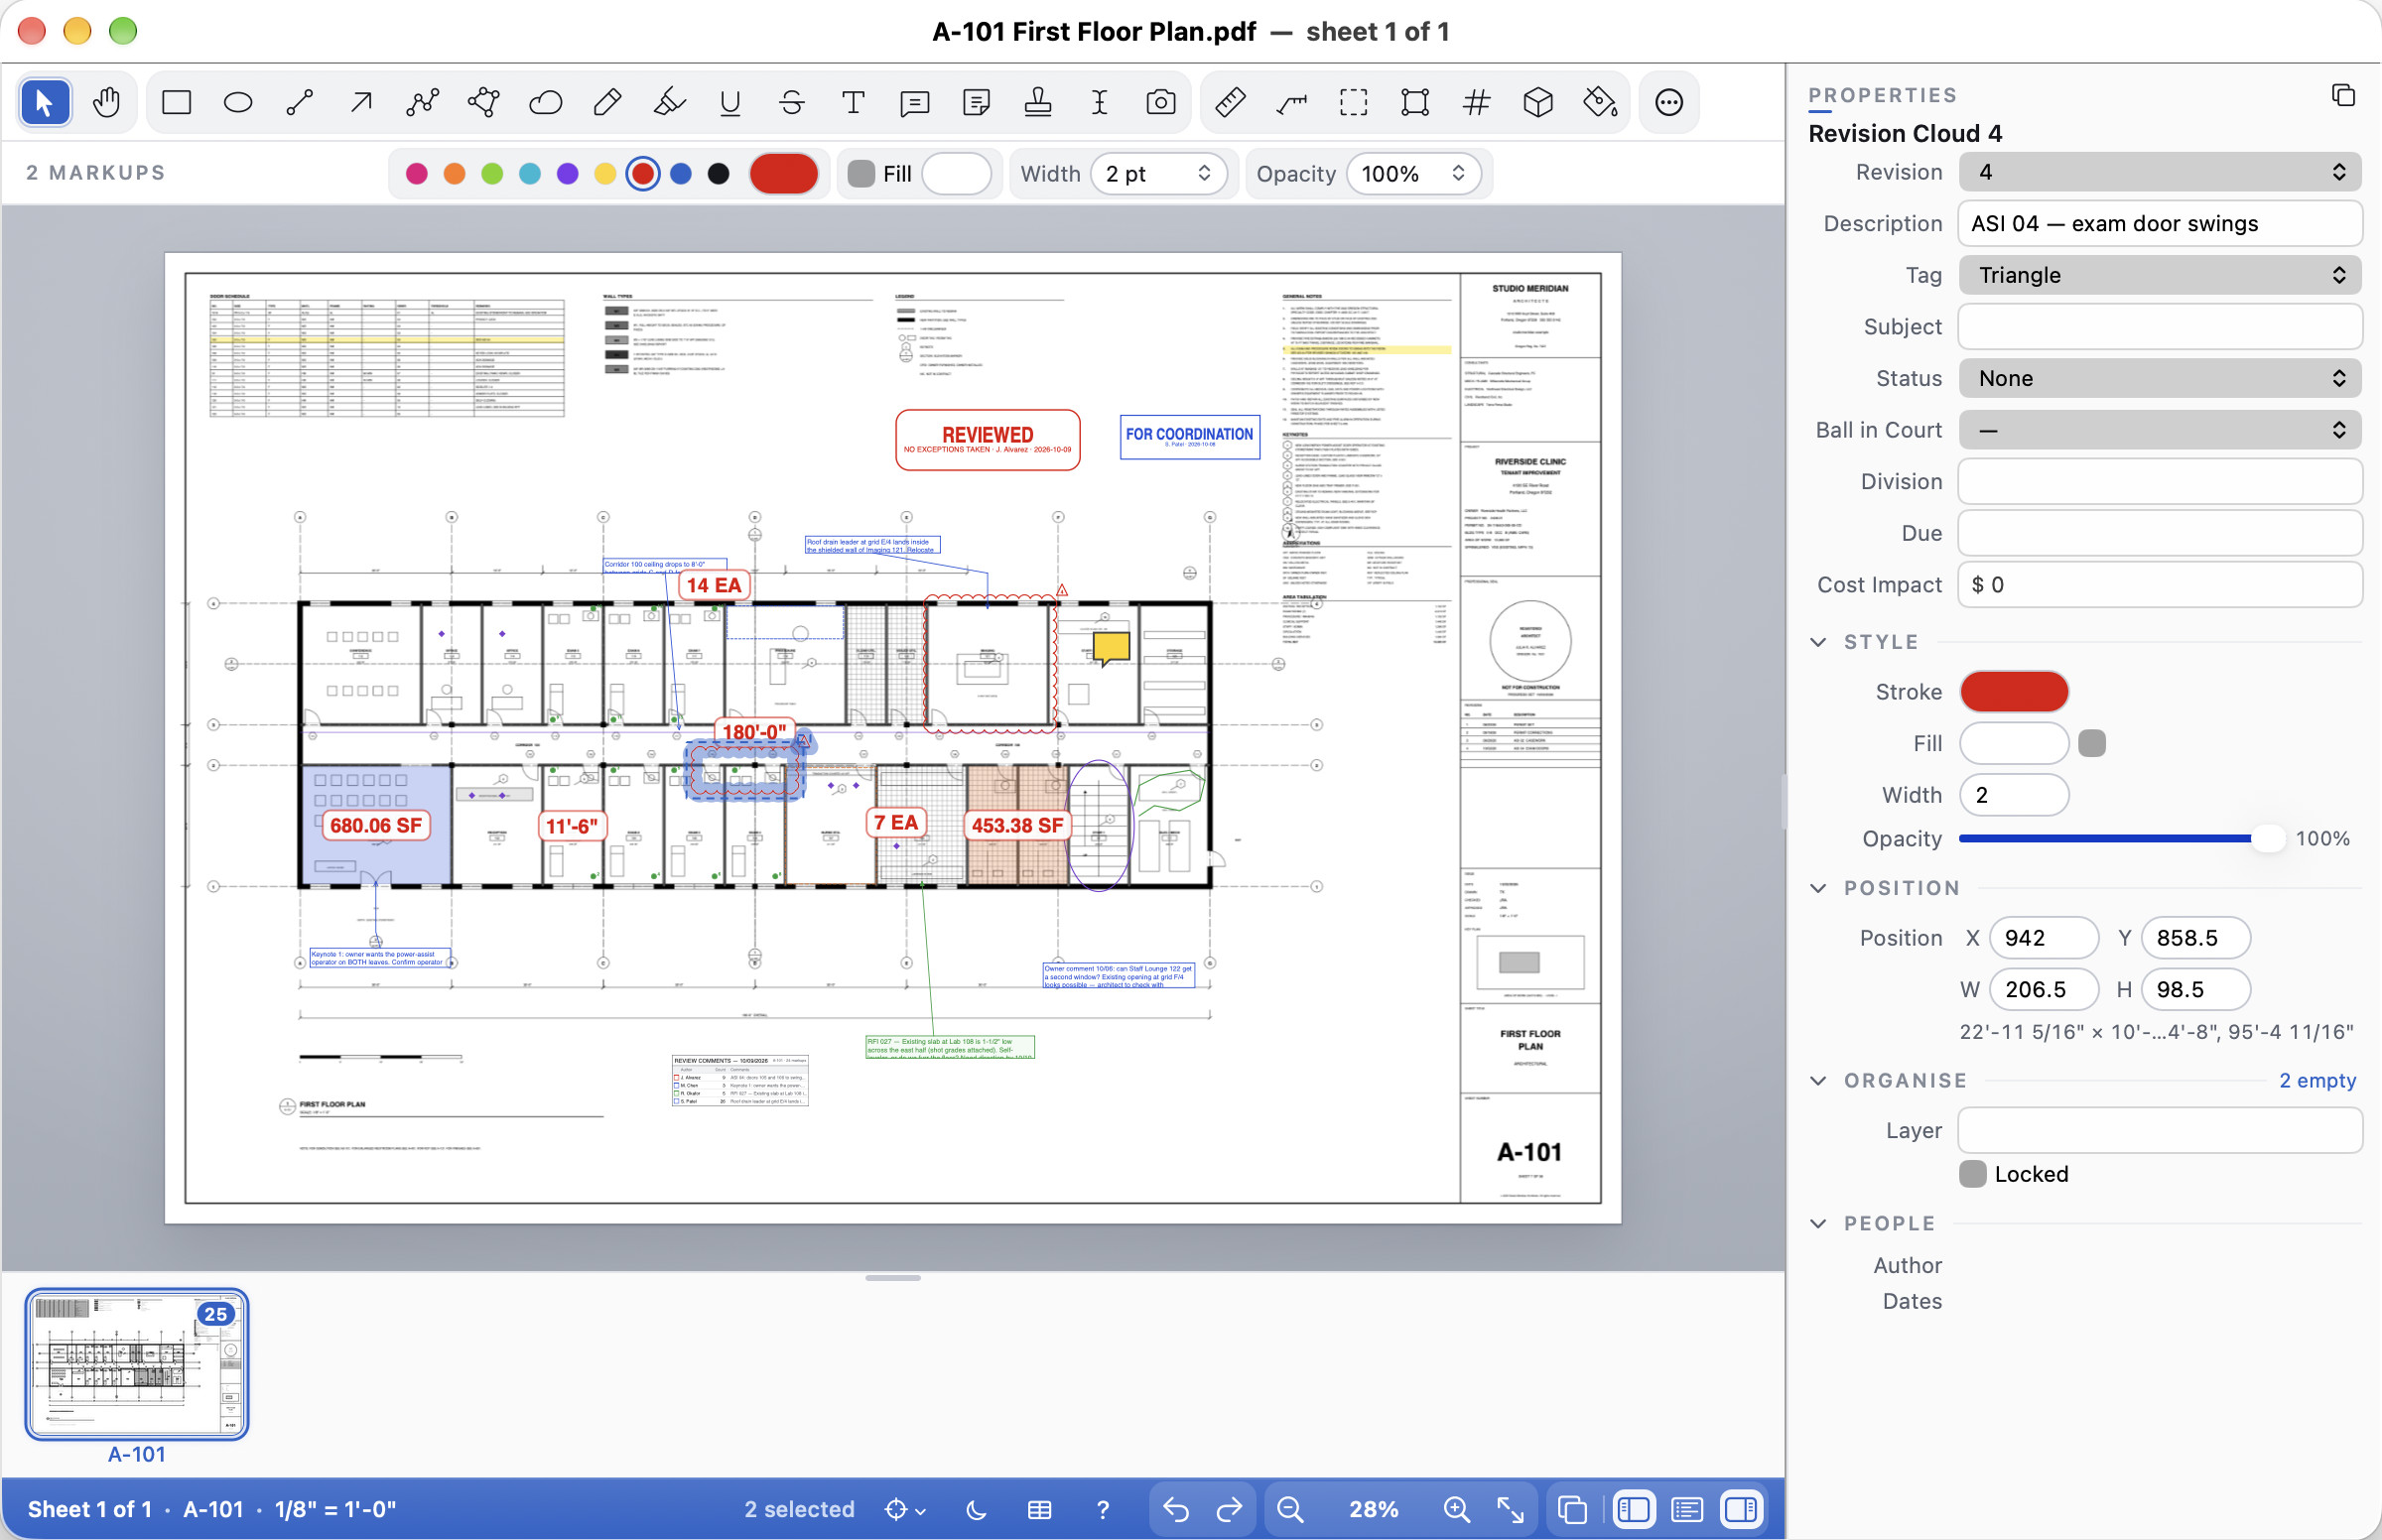
Every change in a revision gets a cloud and a revision delta: a small triangle with the revision number. Tools ▸ Revision Cloud (⇧C; Shift+C), or Markups ▸ Revisions ▸ Revision Cloud, draws both at once. Click round the change as with the Cloud tool, then click the first point again (or double-click, or press Return or Enter) to finish. The cloud gets a triangle at its top-right corner numbered with the current revision. The cloud and its triangle move, copy and delete together. The first revision cloud in a document starts revision 1, dated today.
Select a revision cloud to see its Revision in Properties: pick another revision from the list, or New Revision… to add one. Description says what changed (it is also the comment); Tag turns the triangle into a circle or a hexagon if your office draws them that way.
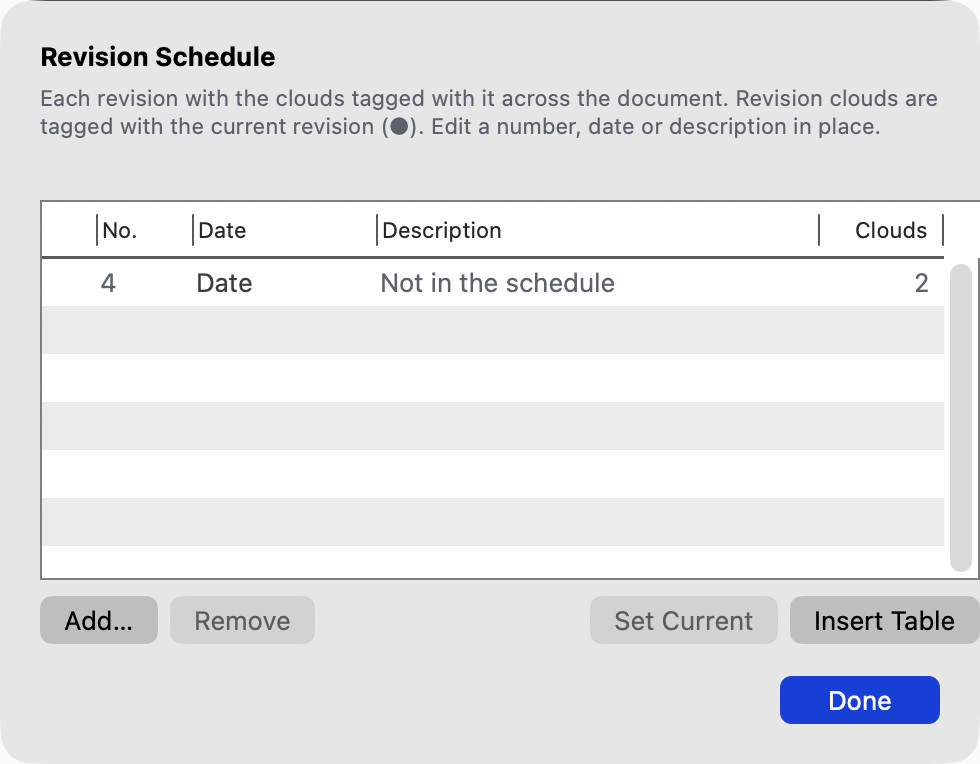
Markups ▸ Revisions ▸ Revision Schedule… lists the document's revisions with their dates, descriptions and how many clouds each has. Add… starts a new revision (it becomes the current one), Set Current (or a double-click) picks another. You can edit a number, date or description in place; renumbering a revision renumbers its triangles too. Remove takes a revision out of the schedule but leaves its triangles alone.
Markups ▸ Revisions ▸ Insert Revision Schedule (or Insert Table in that window) puts the schedule on the sheet as a table (No., Date, Description, Clouds) at the bottom right, where the title block's revision block usually is. It keeps itself up to date as revisions are added.
A set that arrives with its revisions already drawn in the title blocks doesn't need typing in: Document ▸ Detect Revisions… reads the revision table in every sheet's title block (the rows of number, description and date, the number often in a triangle; dates such as 10/15/26, 2026-10-15, 15 Oct 2026 or OCT 15 2026) and proposes the schedule. Untick a row to leave it out, or double-click a number, description or date to correct it; a number that two sheets describe differently is marked in red with what the other sheet says. Apply fills the Revision Schedule and marks each sheet with its latest revision and that revision's date, which the Sheet Index, the transmittal and Rename Files' {rev} use. No clouds are drawn, and Edit ▸ Undo takes it all back. A scanned sheet is read from its recognized text, so run Recognize Text (OCR) on it first. The Sheet Index window's Read Revisions… button opens the same window. With a folder set open (File ▸ Set) it reads every sheet of every file, naming each sheet's file beside it, and Apply writes each file's own revisions into it and saves it (a digitally signed file is left as it is and named).
In the Markups List, ⋯ ▸ By Revision groups the clouds and their triangles by revision. In the PDF the triangles are ordinary comments that Acrobat, Preview and other PDF apps show as drawn; revision triangles from other apps whose subject reads "Revision 3" or "Rev 3" group under that revision.
Stamps
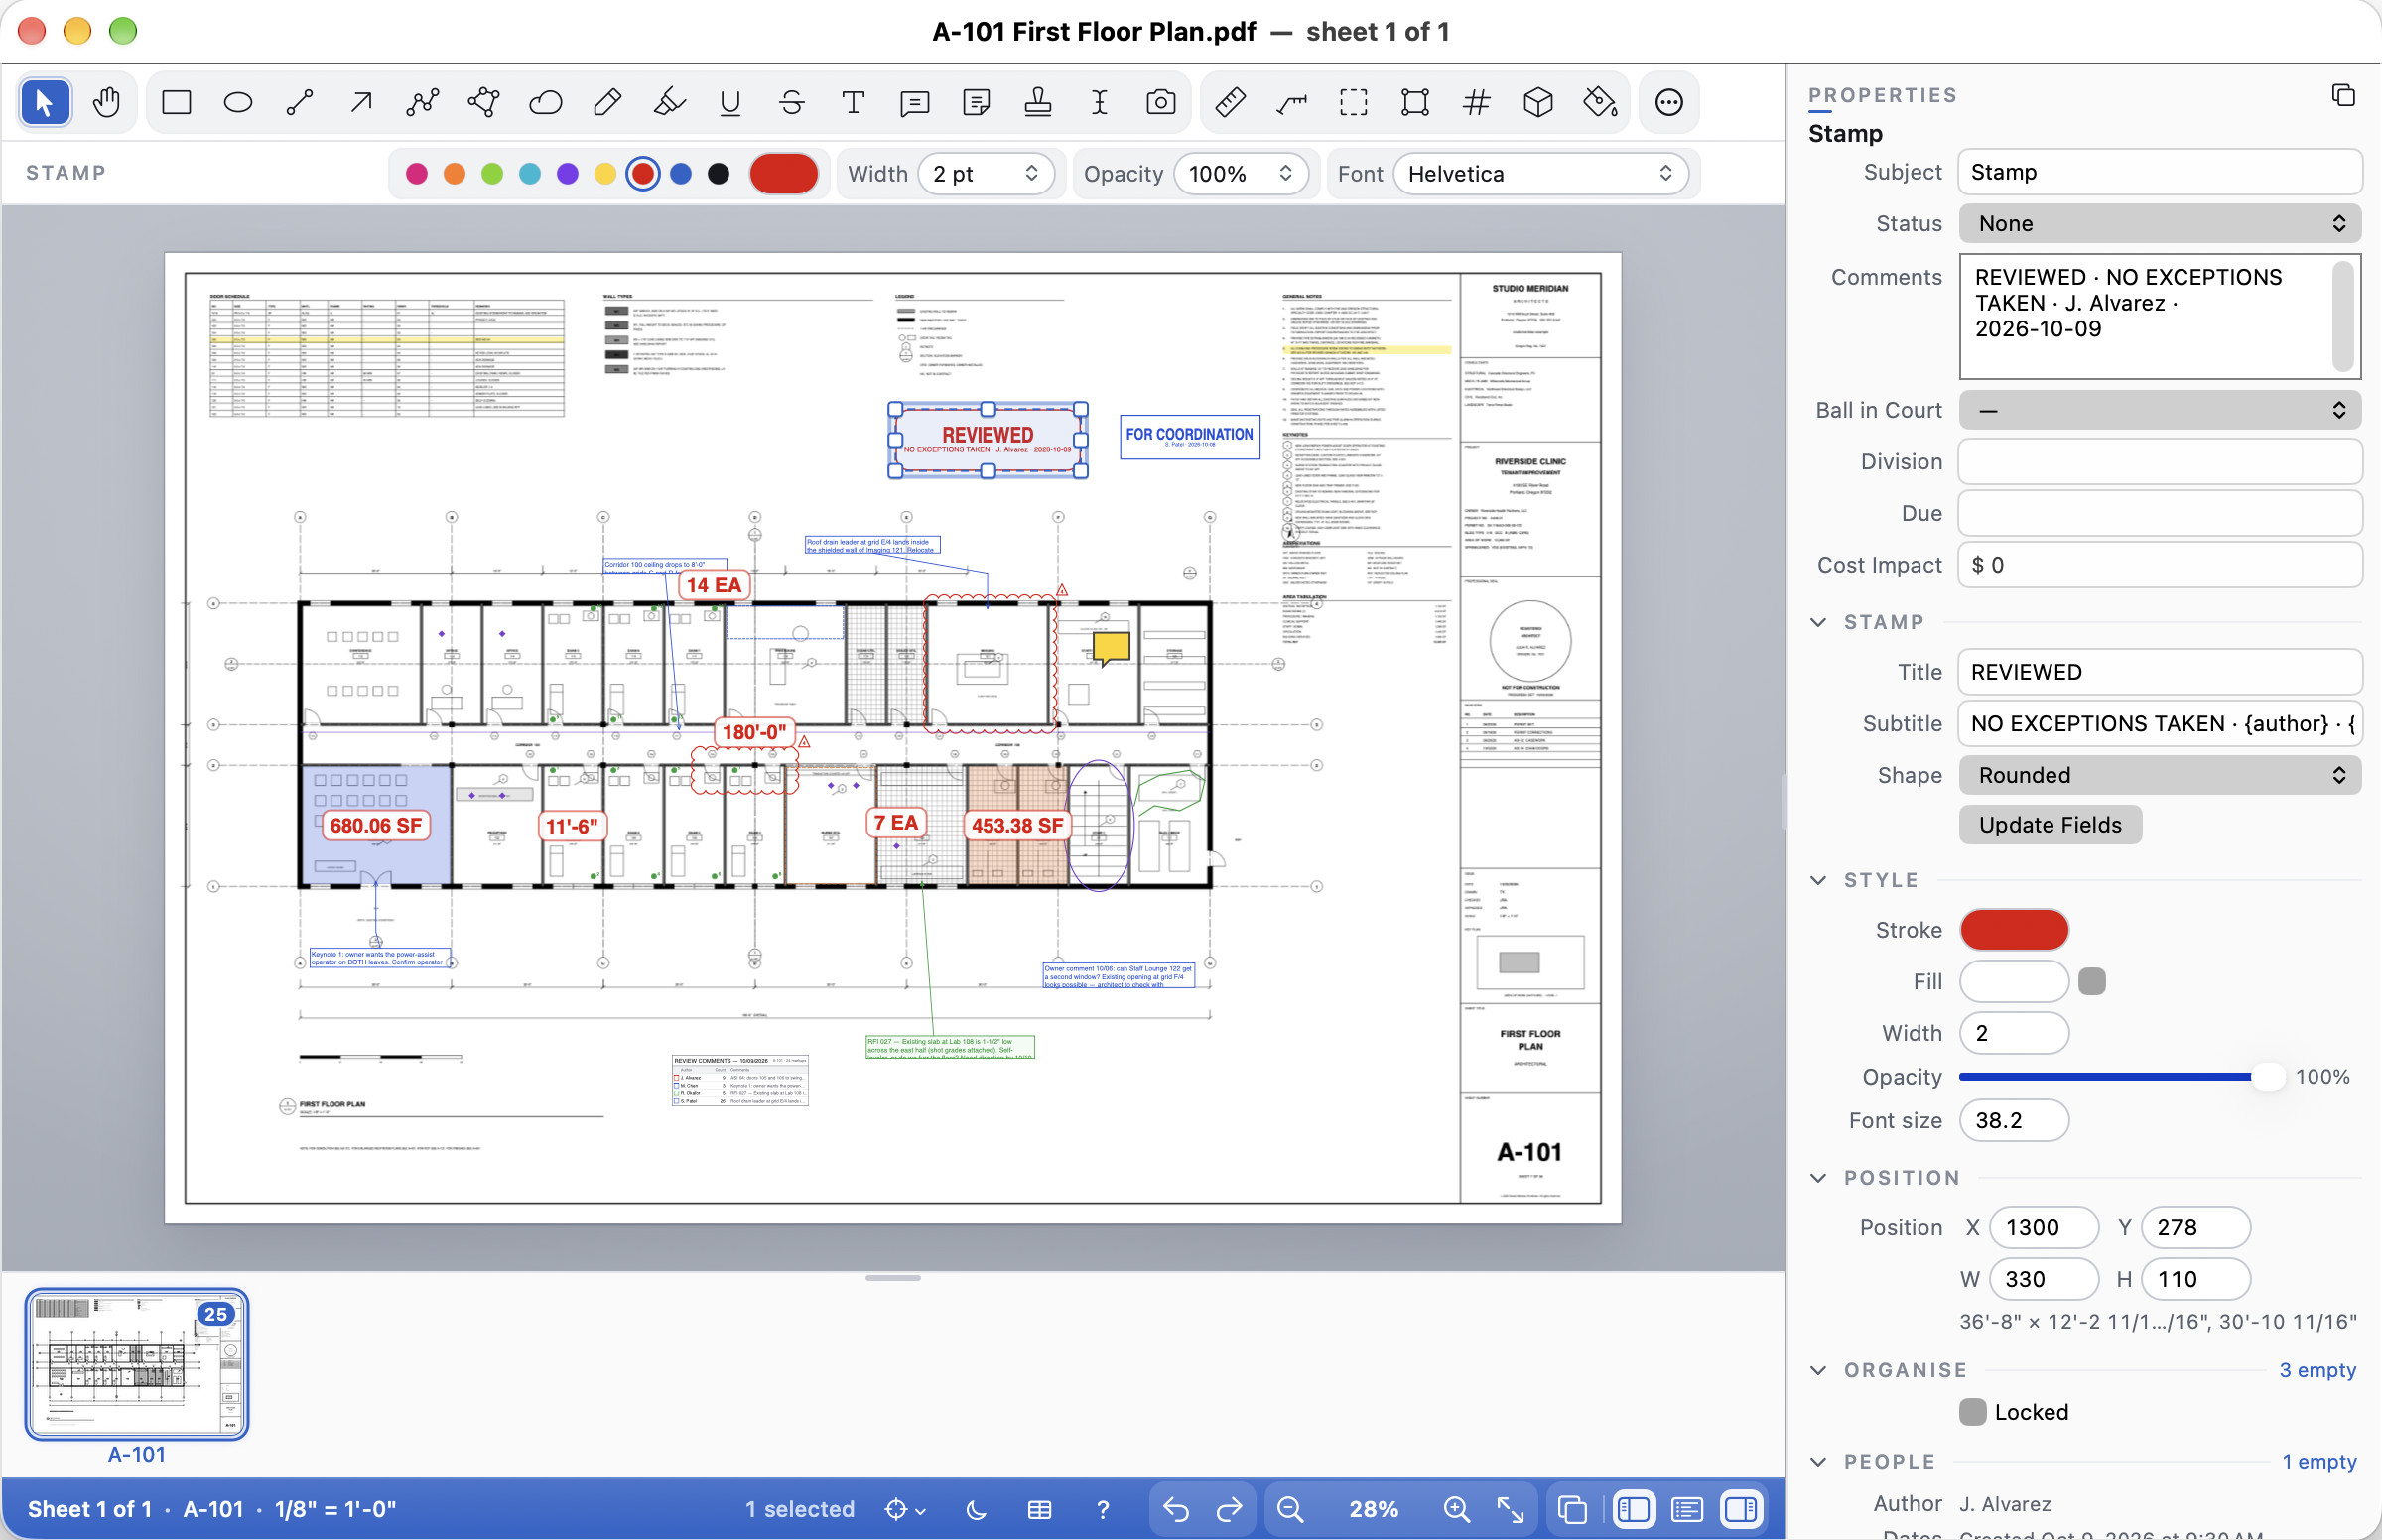
Tools ▸ Stamps ▸ lists the built-in stamps (APPROVED, REVIEWED, NOT FOR CONSTRUCTION and the rest) and, under My Stamps, your own. Pick one and click on the sheet to drop it; drag to size it. Some fill in the date, the time and your name as they are placed.
Changing the stamp as you go. While the Stamp tool is on, the bar under the toolbar starts with the stamp your next click places: a small picture of it and its name. Click it to choose another: the stamps you used last come first, then the built-in stamps and your own (picture and PDF stamps too), and More Stamps… opens Tools ▸ Stamps, with Create Stamp…. Press [ or ] to go to the previous or next stamp without leaving the drawing; the stamp under the pointer changes as you press (Tools ▸ Stamps ▸ Previous Stamp and Next Stamp do the same). With nothing selected, Properties shows the same choice. The stamp you used last is remembered: the Stamp tool starts with it next time, even after you quit (APPROVED until you have used another).
Tools ▸ Stamps ▸ Create Stamp… makes your own: a Title (CHECKED), an optional Subtitle ("by {author} on {date}"), the Fields to fill in each time it is placed (Date, Time, Author, File, Sheet, Page), the Shape (Rectangle, Rounded, Oval or None) and the Colour. It joins Tools ▸ Stamps and the Tool Chest.
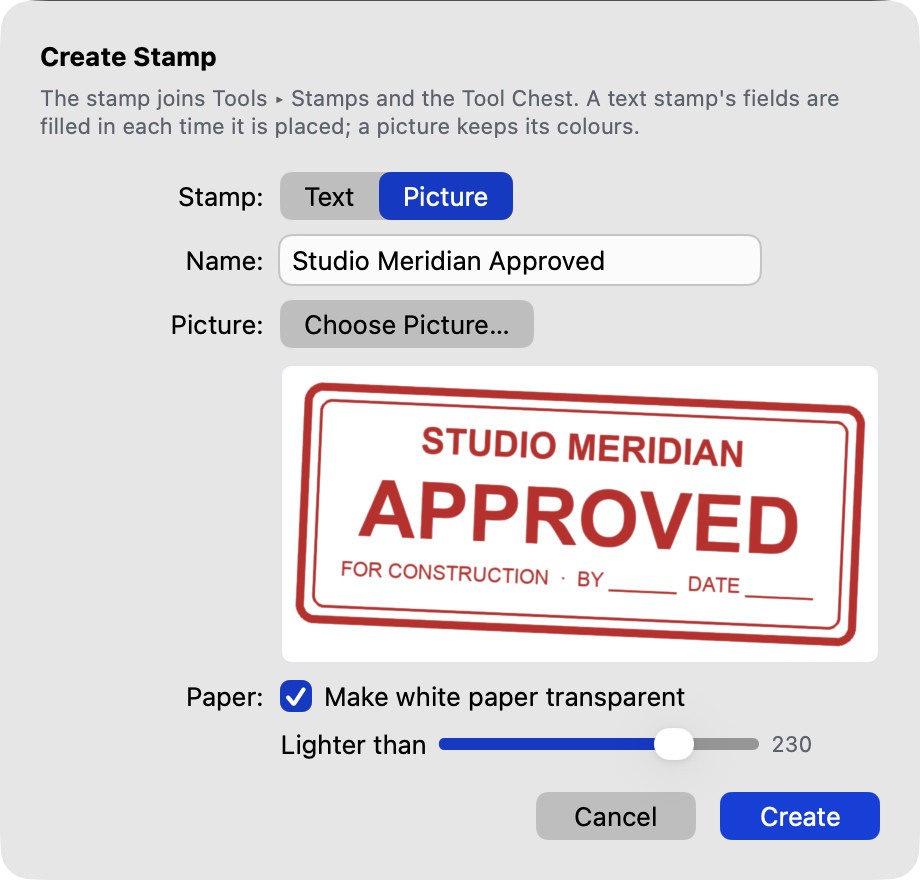
To use your firm's own approval stamp or logo, switch Stamp to Picture or PDF, give it a Name and Choose File… (a PDF, or a PNG or JPEG picture). It keeps its colours.
A stamp from a PDF. If your stamp or logo is a PDF (exported from your drawing or design program), choose the PDF: the stamp stays sharp at any zoom and when printed, and stays small in your files however many times you place it. For a PDF of several pages, choose the Page. Only what is drawn on the page is kept: the white space around it is cut away, and anything the PDF leaves clear stays clear on your drawing. Links, form fields, attachments and scripts in the PDF are left out. A PDF that needs a password can't be used: save a copy without the password first. A PDF stamp drops at the size it is drawn in the PDF (made smaller if it wouldn't fit the sheet); drag to size it instead. It moves, resizes in proportion, turns, fades with Opacity, flattens and copies like your other stamps, and other PDF apps show it as a standard stamp. A PDF stamp has no date or name fields: use a text stamp for those.
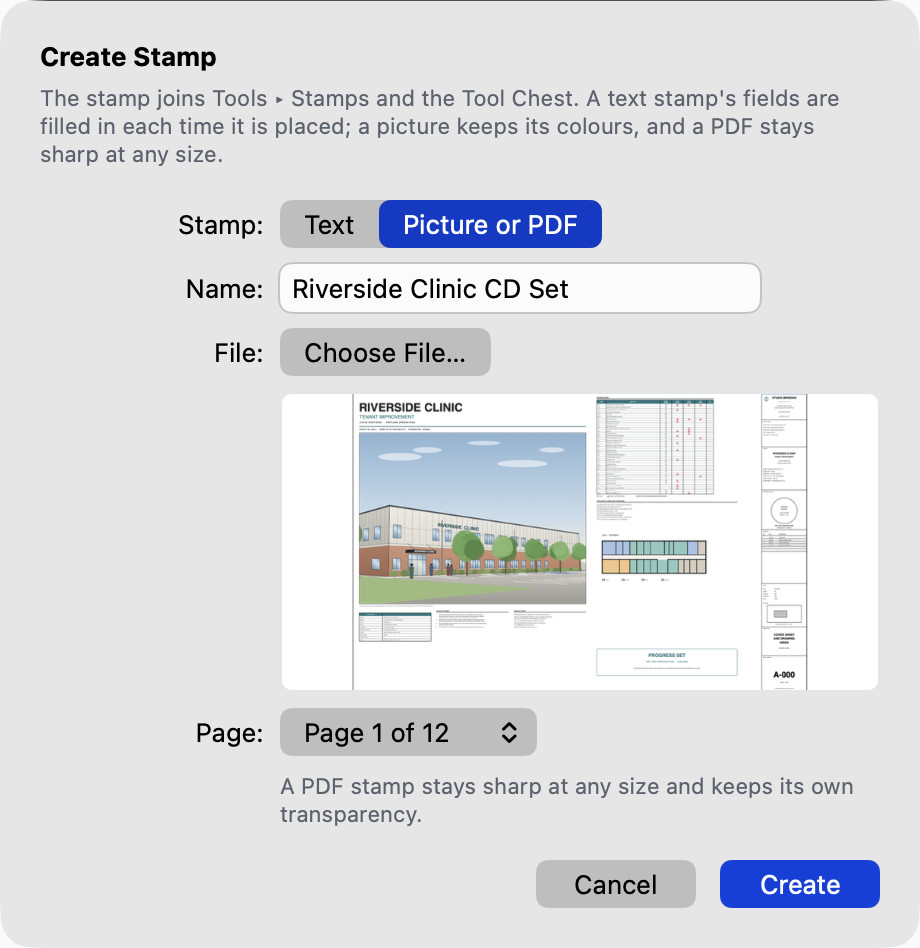
For a picture: Make white paper transparent (on at first) clears the white around a scanned stamp so the drawing shows through. If a pale background is left, move Lighter than to the left. Turn it off for a picture that already has a transparent background, or to keep a white box behind the stamp. Very large pictures are scaled to 2048 pixels across, which is still sharp at any size you place them. Choose File… opens in the folder you last chose a stamp or signature picture from. A picture stamp drops at its own shape: click to place it about as wide as a text stamp, or drag to size it (it keeps its proportions). Like your other stamps it is listed under My Stamps, travels with exported profiles and Tool Chest files, and works with Apply Stamp to Every Sheet. In the PDF it is a standard stamp holding the picture.
Select a placed stamp to change its Title, Subtitle and Shape in Properties; Update Fields fills in its date and name again. Stamps are saved as standard PDF stamps that Acrobat and other PDF apps show as drawn.
The options row under the toolbar sets a stamp's Font, Size and Bold / Italic. The title is bold until you turn Bold off, and Italic slants both lines. Size is the size of the title: type a new one and the stamp grows or shrinks about its centre (Properties' Font size is the same). Times and Courier are saved as they look; a Mac font the PDF doesn't name shows in Cella PDF and saves in Helvetica. Picture stamps have no font.
Stencils
Stencils are ready-made symbols you drop on a plan at their real size: people, trees, furniture, fixtures, doors, cars, north arrows and the like. A 7' sofa placed on a sheet at 1/4" = 1'-0" is 1 3/4" long on the paper, as it would be if you drew it.
Choose the Stencil tool (⇧B on the Mac, Shift+B on Windows and Linux, or Tools ▸ Stencil). The options row shows the stencil it places; click it, or choose Tools ▸ Choose Stencil…, to open the stencils over the drawing. Pick a category on the left, or type in the search field ("queen bed", "north", "30'"), and click a stencil. Recent at the top of the list holds the ones you used last.
While the tool is out, the stencil follows the pointer at its true size. Click to place it; the tool stays, so you can place another and another. Press Esc when you're done.
| Key | What it does while placing |
|---|---|
| R | Turn the stencil 90° clockwise |
| ⇧R (Shift+R) | Turn it 15° |
| F | Flip it left to right |
| [ and ] | The previous or next stencil in its category |
The stencils that come with Cella PDF:
| Category | What's in it |
|---|---|
| People | A person standing and seated in plan, a 60" wheelchair turning circle, and three scale figures for elevations and sections |
| Trees and planting | Four tree canopies (deciduous, evergreen, canopy, ornamental) at 10', 15', 20' and 30', a shrub, a hedge, and three trees in elevation |
| Furniture | Sofa, loveseat, armchair, coffee table, dining chair, dining tables for 4, 6 and 8 with chairs, a round table for 4, a desk with chair, a conference table, twin, full, queen and king beds, nightstand, wardrobe, bookshelf and a grand piano |
| Kitchen and bath | Single and double sinks, range, refrigerator, dishwasher, toilet, lavatory, bathtub, 36" and 60" showers, washer, dryer and an accessible toilet clearance |
| Doors and windows | 30", 32" and 36" swing doors, a double door, pocket, sliding and bifold doors, and a window |
| Vehicles | Car, compact car, van, an accessible parking space with its aisle, a bicycle, and a car in side elevation |
| Drafting symbols | Three north arrows, graphic scales for 1/8" and 1/4" = 1'-0" and 1:100, section and elevation markers, detail and grid bubbles, a level datum, a revision triangle, a break line, a centre line symbol and a slope arrow |
True size needs a scale. A stencil takes the scale of the sheet, or of the scale region it lands in when a sheet has several. On a sheet with no scale it lands at a size that suits most plans, and the status bar says once: "Set the sheet's scale to place stencils at true size." North arrows, markers and bubbles are always the same size on the paper. The graphic scales are drawn to real lengths, so they read true on any sheet that has its scale set.
After placing, a stencil is a markup like any other: move it, resize it from a corner (it keeps its shape, and Properties' Real size shows its new size), turn or flip it with Markups ▸ Rotate, and change its colour, line weight and opacity in the options row. Its subject is the stencil's name, so the Markups List can total them ("12 × Dining chair").
Your own stencils. Select some markups (lines, rectangles, polylines, pen strokes and the like) and choose Markups ▸ Save Selection as Stencil… or right-click and choose it there. Give it a name; it joins My Stencils at the foot of the categories, its real size taken from the sheet's scale. A PDF stamp selected on the sheet becomes a stencil of its page. Your stencils live in the Tool Chest, so they travel with your profile and with an exported tool set: export them to share a set with the rest of the office.
In the saved PDF each stencil is a stamp that draws the symbol's linework, so it looks the same in other PDF apps and in print. Cella PDF reads it back as a stencil.
Signatures
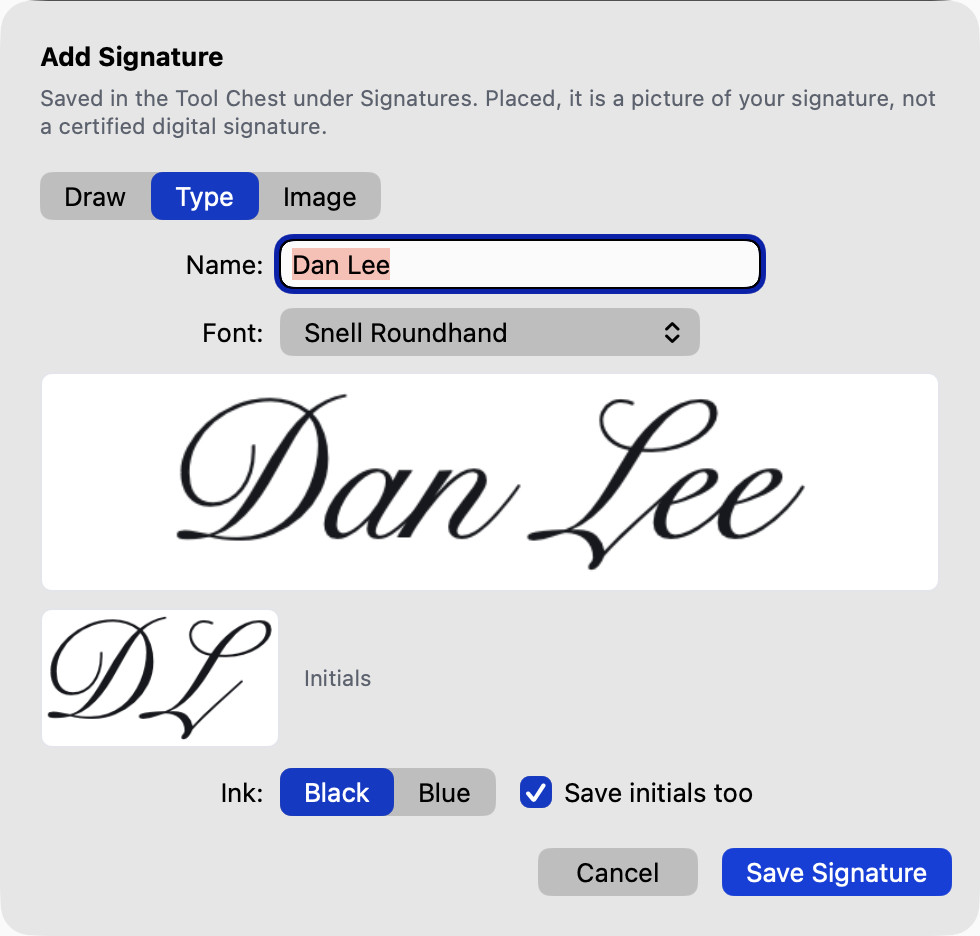
Tools ▸ Signatures ▸ Add Signature… makes a picture of your signature, three ways:
- Draw it on the pad with the trackpad or mouse (and your initials on the small pad, if you like). Clear starts again.
- Type your name and pick a font: the script faces come first, then every font on the computer. Your initials are made from the first letters.
- Image: choose a scan or photo of your signature on white paper (PNG or JPEG). The paper turns transparent; move Remove paper lighter than until only the ink is left.
Choose black or blue ink and Save Signature. It is kept in the Tool Chest under Signatures (with an "(Initials)" entry when you saved initials), ready to place. Click on the sheet to drop it about 1.5 inches wide, or drag to size it. Later, pick it from Tools ▸ Signatures or the Tool Chest. Turn on Tools ▸ Signatures ▸ Date Beside Signature to put today's date next to it; the two move together.
A placed signature is a picture, like a snapshot: other PDF viewers show it, and Flatten makes it part of the drawing. It is not a digital signature. It does not prove who placed it or that the drawing hasn't changed since, and it doesn't fill a PDF's signature fields. Your signatures are kept with your other Tool Chest tools in Cella PDF's settings on this computer, encrypted with a key only your account can use (your login keychain on a Mac, Windows' own data protection, your desktop's keyring on Linux). They never go to a sync project's Project Tools. Exporting a tool set that holds them warns you first, because the exported file keeps them as plain pictures.
To sign a drawing digitally, choose Document ▸ Sign Digitally…. Pick a certificate from your keychain (on Windows, your certificate store; on Linux, a .pfx file), where it goes (over a signature picture you have selected, a box at the bottom right of the sheet, or invisible), and a reason and location if you like. Sign saves the file with the signature. Turn on Lock the document after signing to certify it with no further changes allowed. Document ▸ Signatures… lists a file's signatures, who signed and whether each is still valid.
Getting a certificate. Cella PDF signs with a certificate you already have; it doesn't make one. - For drawings that leave the office, buy a document-signing certificate from a certificate authority that Adobe trusts (IdenTrust, GlobalSign, DigiCert and Sectigo all sell them, usually by the year). Acrobat and other PDF readers then show your signature as valid with nothing to set up on their side. If your licensing board accepts digitally signed and sealed drawings, check which certificates it asks for before you buy. The certificate comes as a .pfx or .p12 file or on a USB token: double-click the file to add it to your keychain (on Windows, your certificate store); on Linux, pick the file itself. - For use inside the firm, you can make your own (a self-signed certificate). On a Mac, open Keychain Access and choose Keychain Access ▸ Certificate Assistant ▸ Create a Certificate…: enter your name, choose Identity Type Self-Signed Root and Certificate Type S/MIME (Email), and click Create. It appears in Sign Digitally… straight away. A signature made with a self-signed certificate shows as not trusted in Document ▸ Signatures… and in other PDF readers until the reader chooses to trust it, so ask your IT for one for anything you issue.
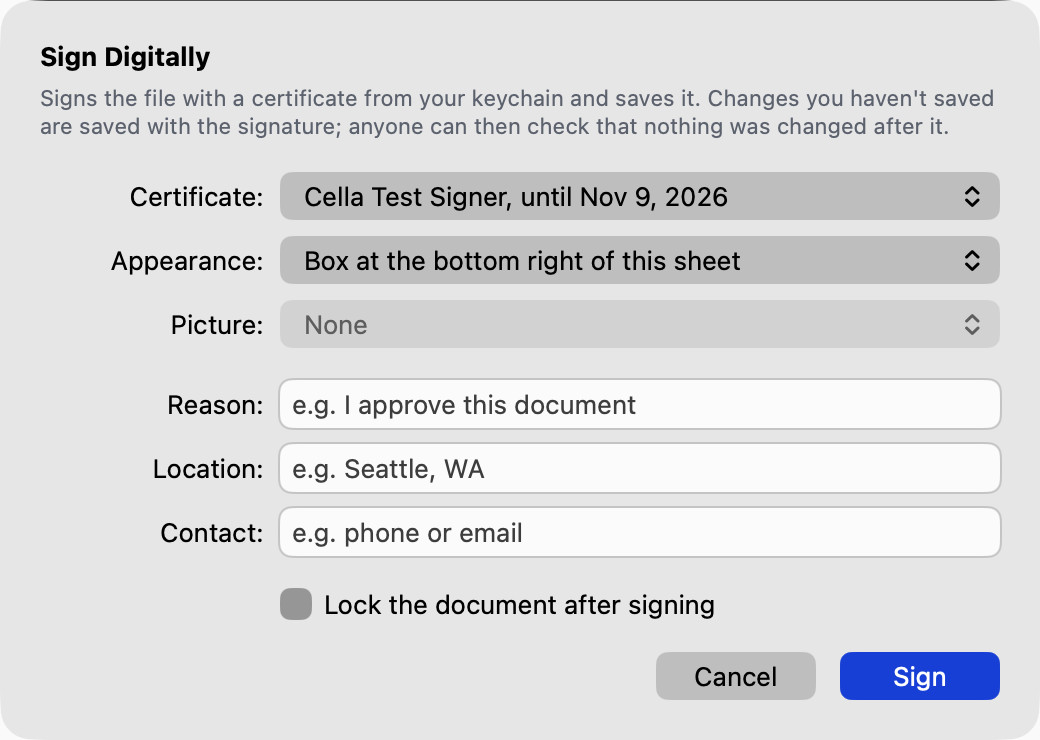
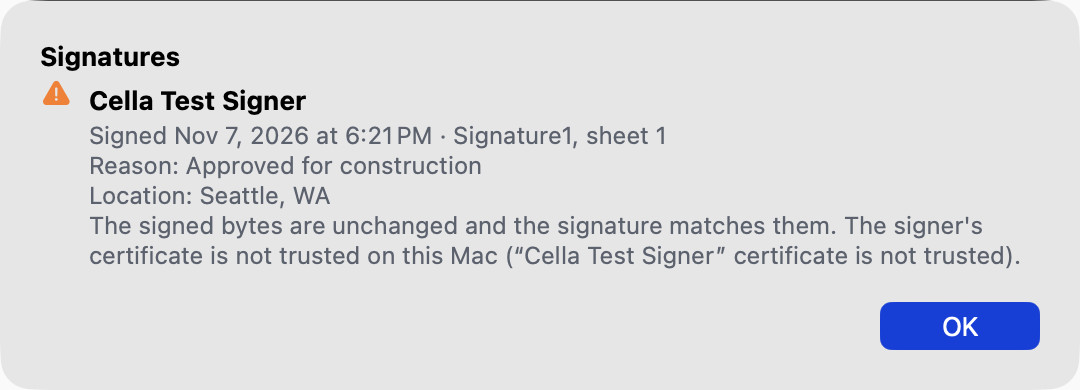
The Tool Chest
The Tool Chest keeps markups you use again and again. Right-click a markup ▸ Add to Tool Chest…, name it, and it appears under Tools ▸ Tool Chest with its colours, text, stamp, subject and layer. Picking it draws more of the same; a grouped markup (a punch key: a circle with its letter) becomes a one-click tool.
Tools ▸ Manage Tool Chest… lists every tool by set. Drag a tool to reorder it or onto another set; drag sets to reorder the menu. Select a tool to rename it or change its subject and default comment (the text each new markup starts with), and see a preview. Duplicate, Delete and Move to Set work on the selection. Importing and exporting tool sets is under Tool sets and markup exchange.
Project Tools (with a synced document): share tools with everyone on the project. In Manage Tool Chest…, select a tool or a set and choose Project Tools ▸ Share with Project…. The tools appear under Tools ▸ Tool Chest ▸ Project Tools for every member while a document of the project is open, and stay there when you are offline. Anyone on the project can share more or choose Remove from Project Tools. If two people change them at once, the later change is kept and the other person is told. Your Atrium server needs the October 2026 release; an older one shows no Project Tools.
Legends
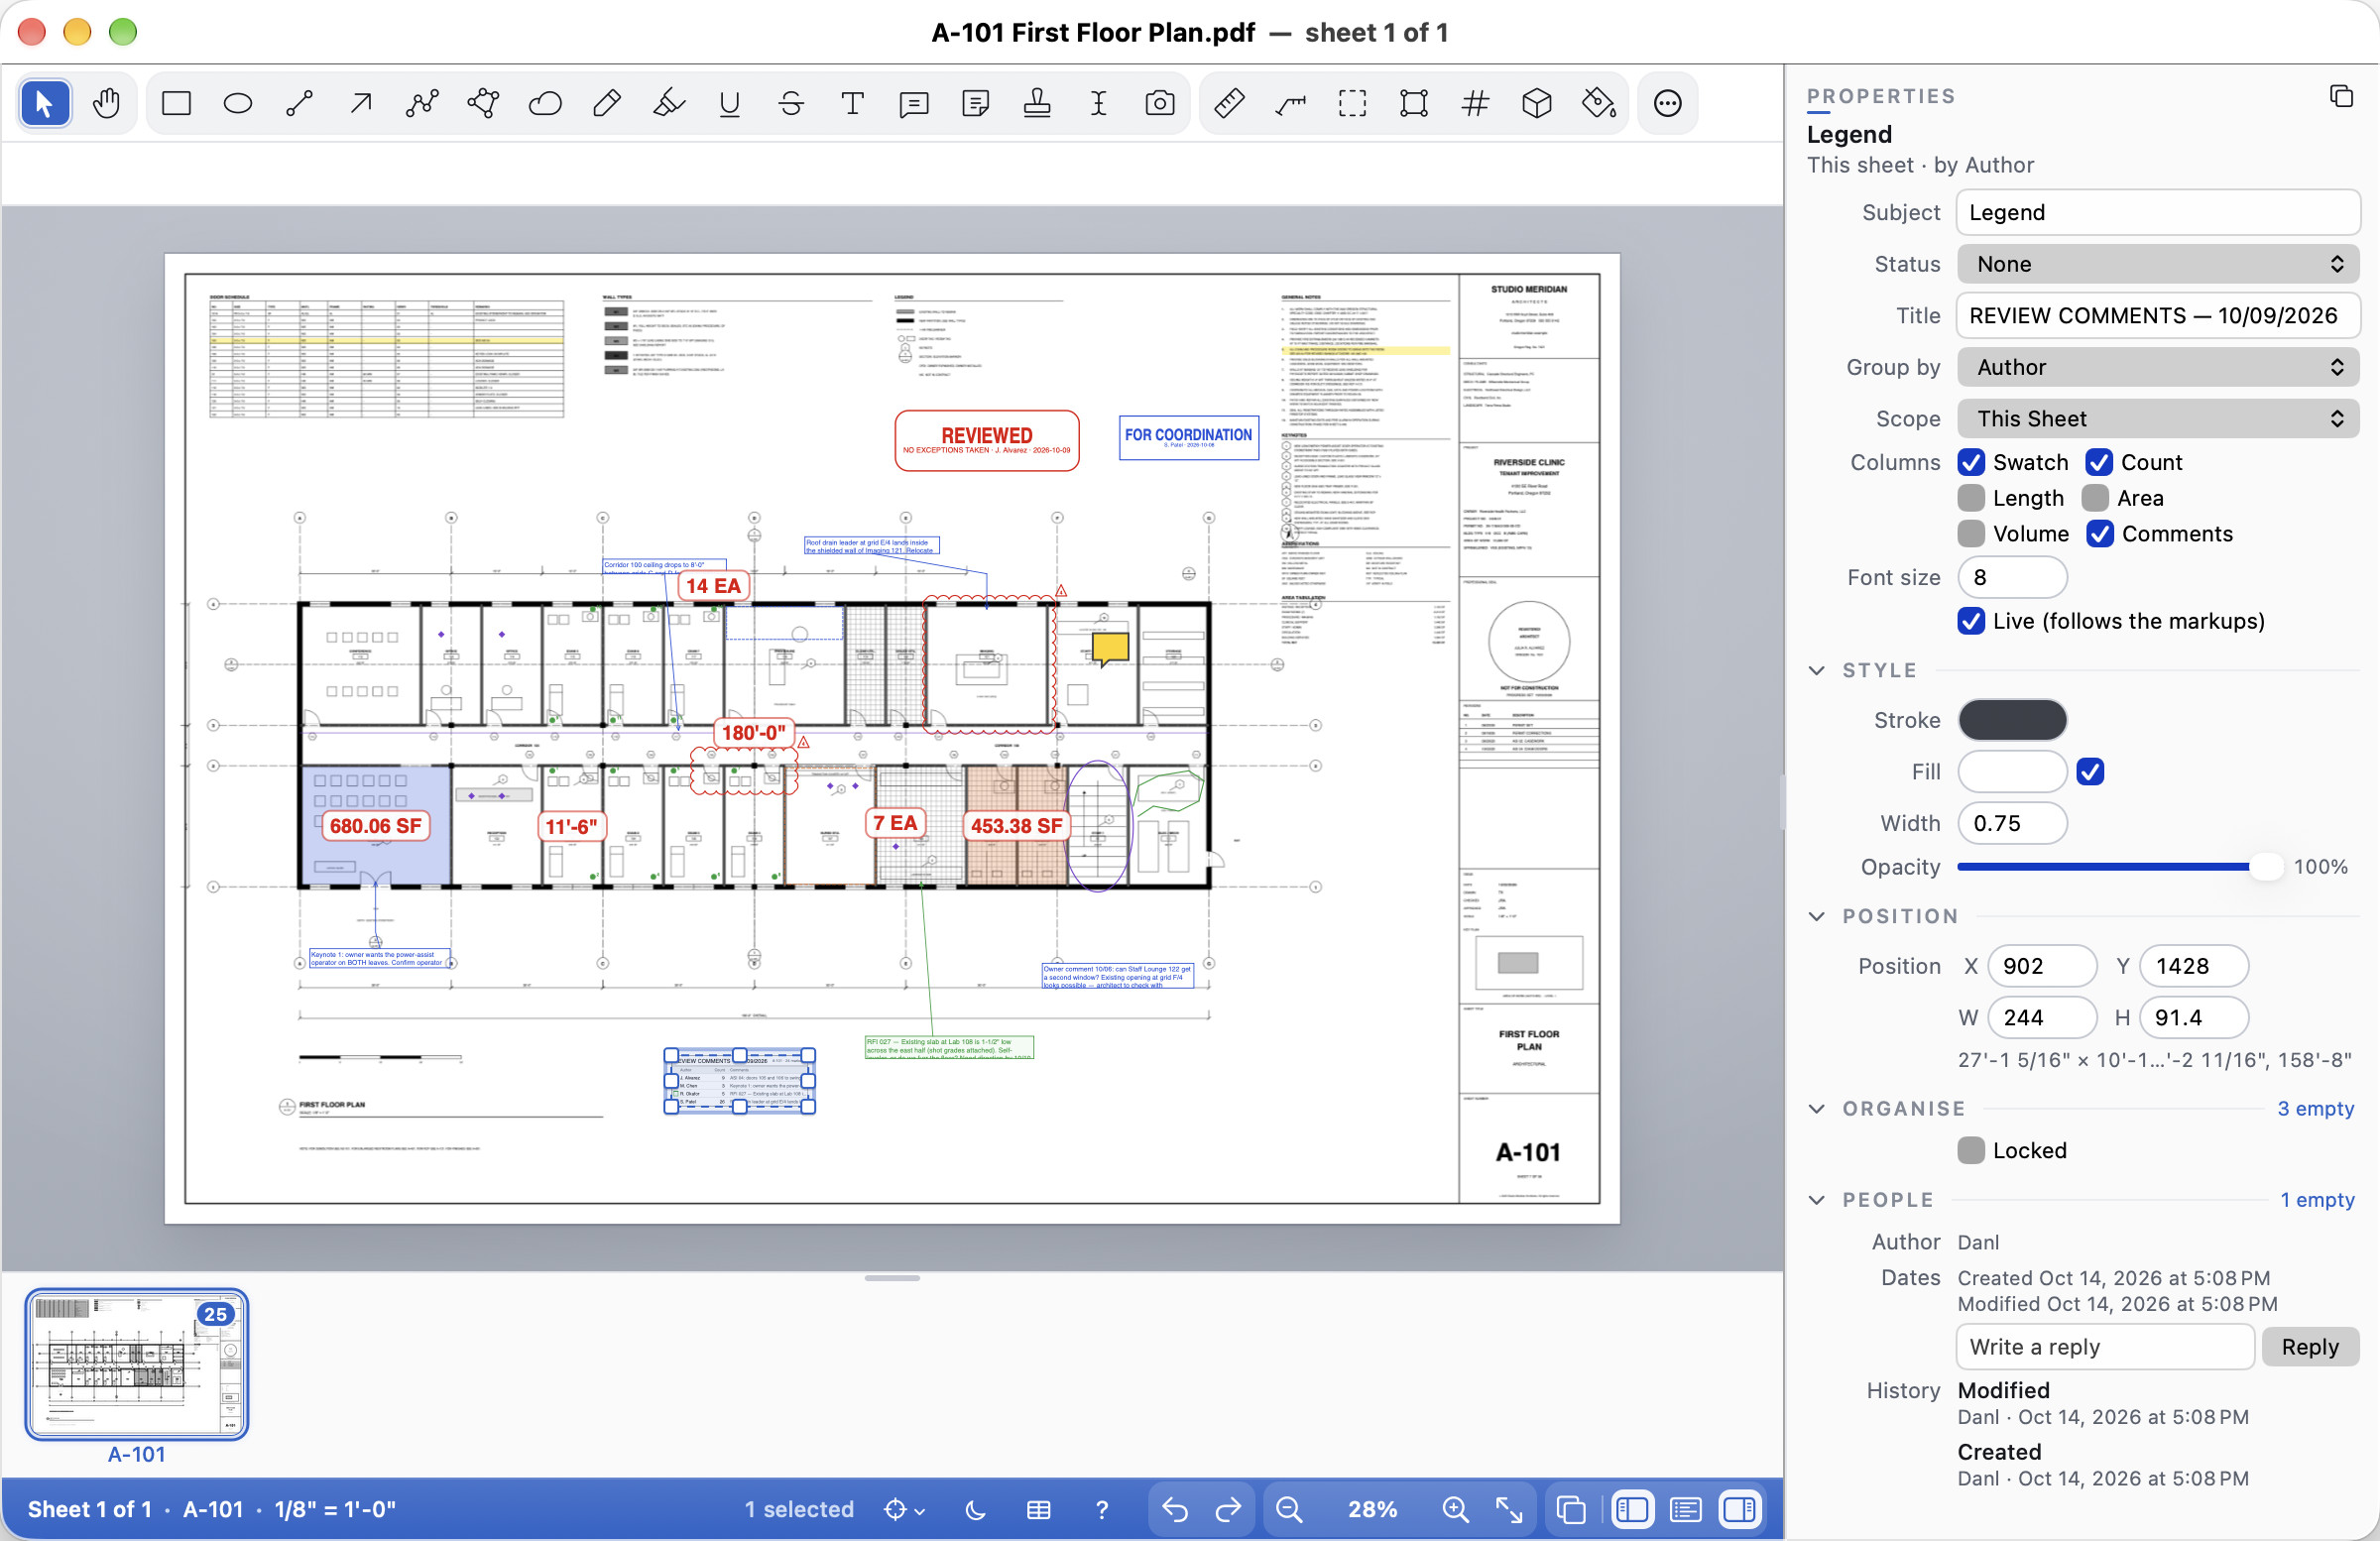
Markups ▸ Insert Legend… puts a table on the sheet that sums up its markups: a swatch in each subject's colours, the subject, how many there are and their length, area and volume totals.
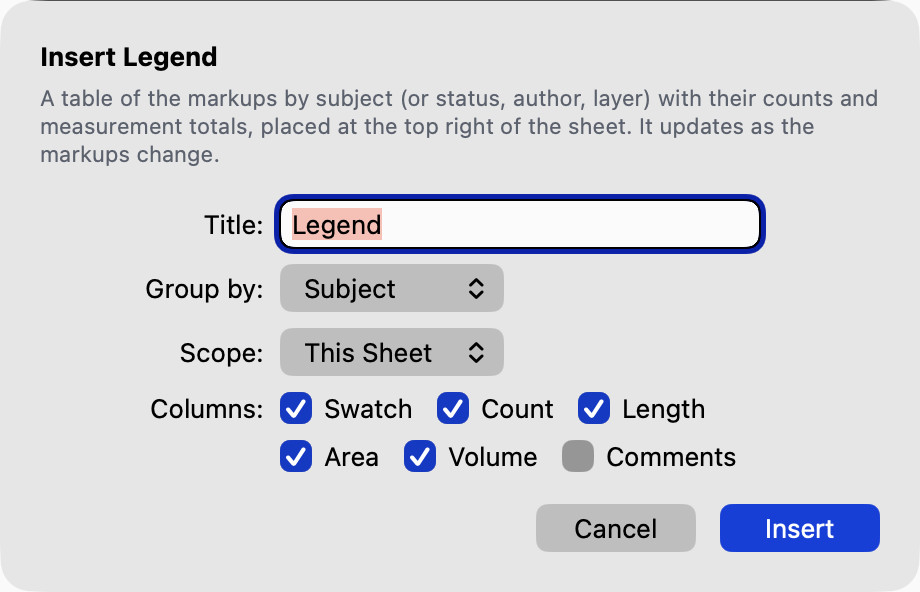
Choose a title, what to group by (subject, status, author or layer), whether it covers this sheet or every sheet, and which columns to show. The legend keeps itself up to date as you draw, move and delete markups, so it prints right with the sheet.
Select it to change its options in Properties. Untick Live to freeze it as it is (for an issued set) and press Refresh when you want it brought up to date. Drag it anywhere; drag a handle to give it a fixed size, and rows that don't fit end in "n more…". It is saved as an ordinary PDF text annotation, so Acrobat, Preview and other PDF apps show the table too. On a rotated sheet the legend reads upright, at the sheet's top right as you see it, like text you add there.
Sequences
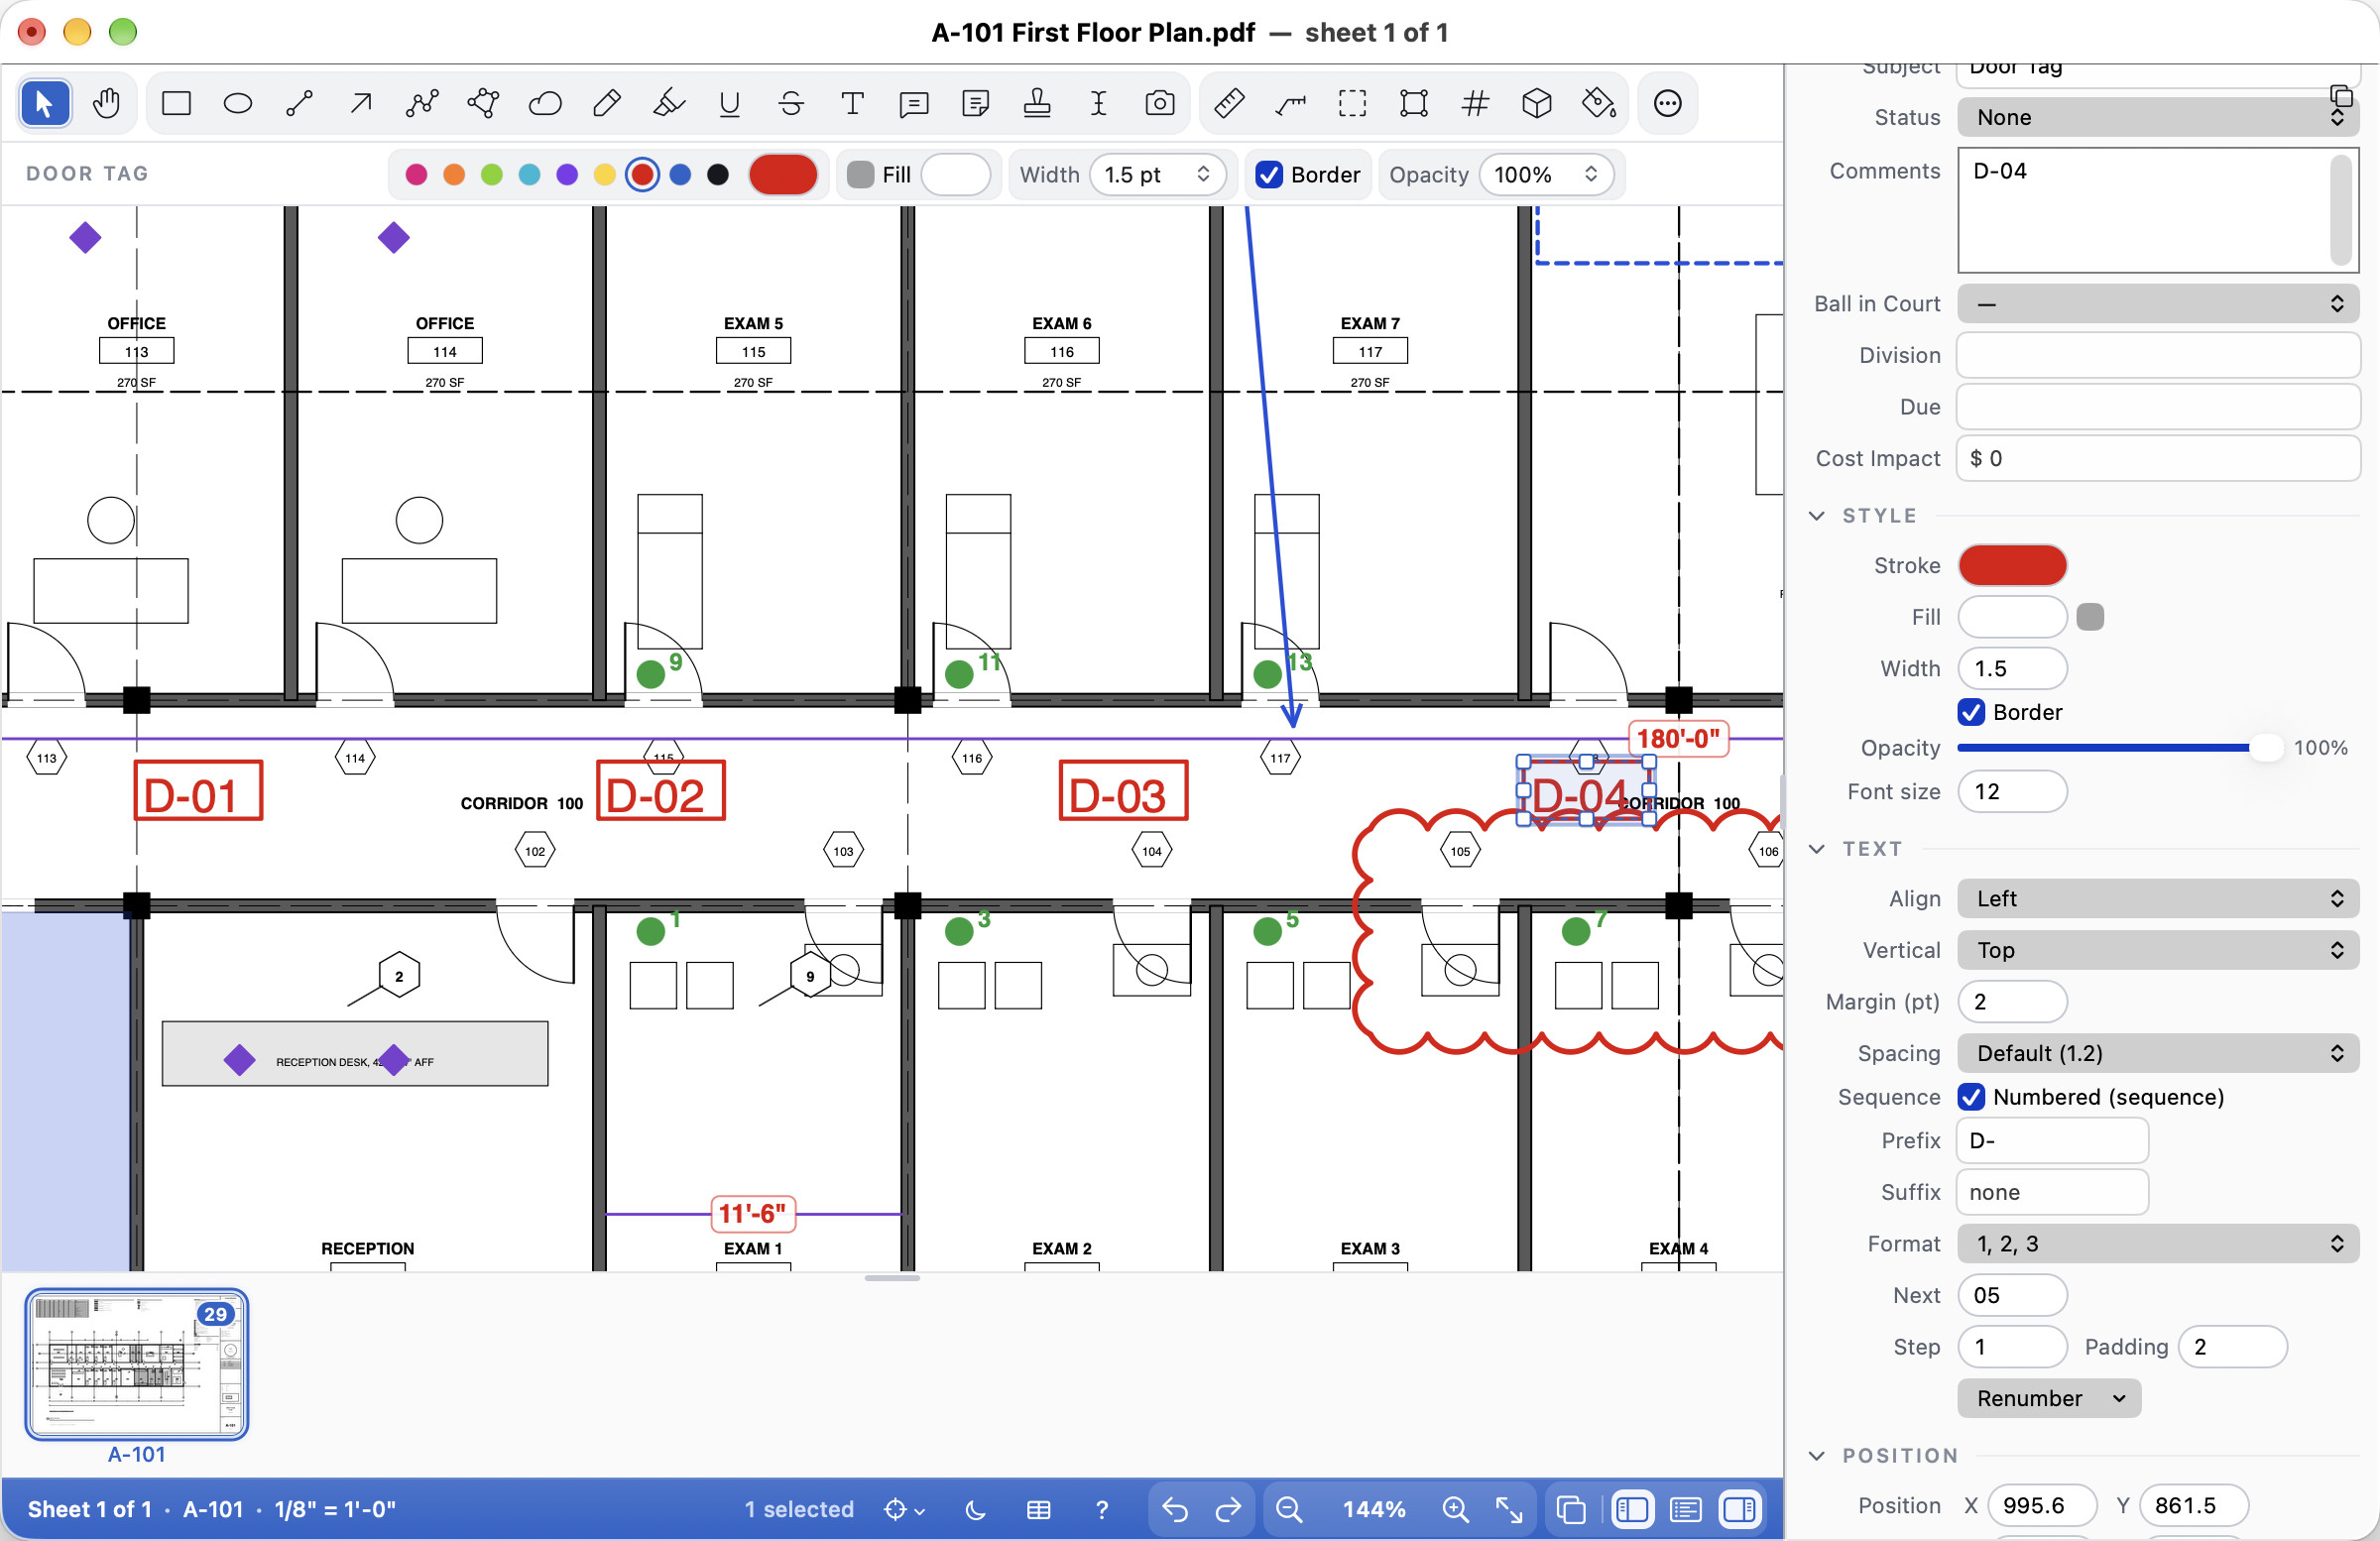
A sequence numbers boxes as you place them: door tags D-01, D-02, D-03; grid letters A, B, C; RFI 007, RFI 008. Choose Tools ▸ Sequence… and give it a name (Door Tag), a prefix (D-), the start, the step, the padding (2 gives 01, 02) and the format (1, 2, 3 or A, B, C). Then choose whether the boxes are text boxes or callouts. Every click then drops a box with the next value, sized to fit; press Esc when you are done. Keep in Tool Chest saves the tool, so it is one click next time.
The document remembers where each sequence has got to. After a save and reopen the next box carries on (D-05 after D-04), and so it does in both panes of Split View. Boxes a colleague places on a synced document move yours on too. Select a box to see its sequence in Properties: Prefix, Suffix, Format, Next (type a value to jump), Step and Padding. Untick Numbered (sequence) to keep the text as plain text, or tick it on ordinary text boxes to make them a sequence. Renumber ▾ puts a sequence back in order: In Order numbers the boxes in the order they were placed, By Position in reading order across the sheet. If you delete a box from the middle, Cella PDF offers to renumber the ones left.
Counts
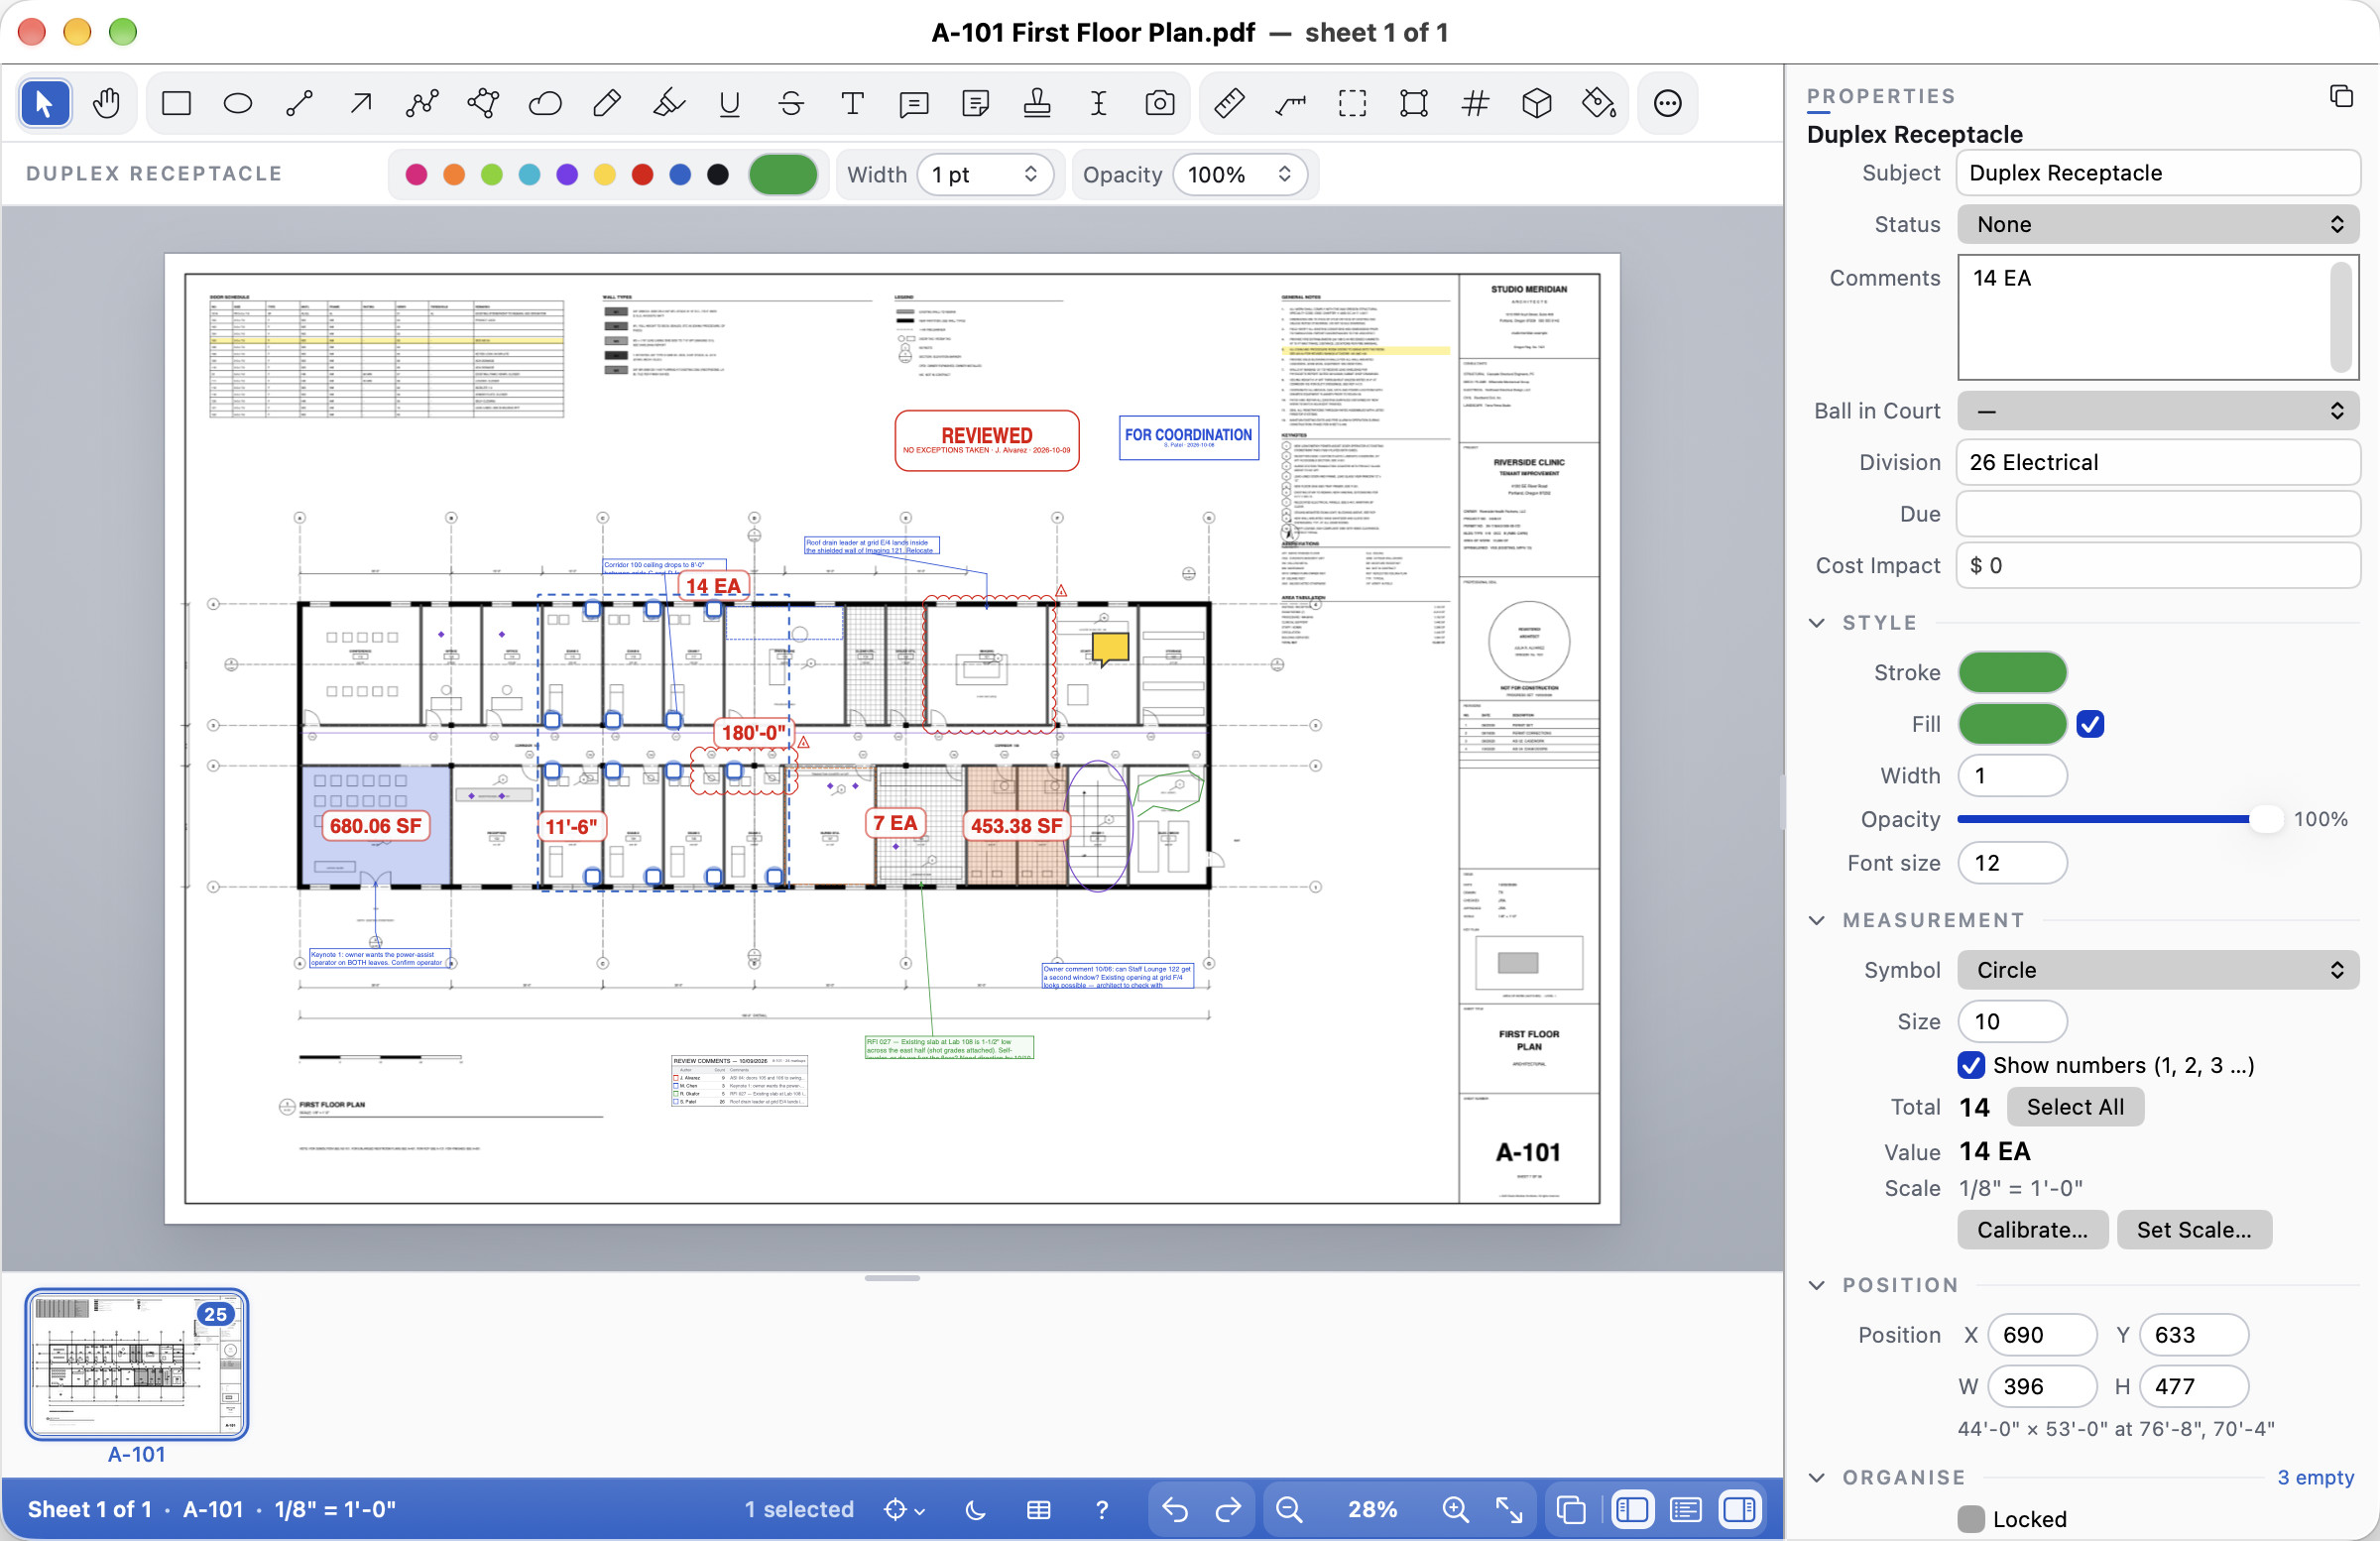
The Count tool (⇧⌥C; Shift+Alt+C) places a symbol at every click and keeps a running total: one count per run of the tool, so start it again for the next kind of thing. Name the count in Subject (Duplex Receptacle) and the Markups List row reads "Duplex Receptacle · Total 14 EA"; legends count it the same way.
In Properties, Symbol chooses what marks each point (a dot, circle, check, cross, square, triangle, diamond, a numbered disc, or a symbol from a tool set), Size sets it in points, and Show numbers writes each point's number beside it. Total shows how many there are, with Select All. To take one point out, select the count, click that point (a ring marks it) and press Delete; the points after it renumber. Option-click or Alt-click a point removes it too.
To add more points to a count you made earlier, right-click it and choose Add to Count. The Count tool comes out and each click adds a point to that count, with its symbol and the next number, instead of starting a new one; choose another tool when you are done. One Undo takes back one point.
Photos on a markup
A note, callout, cloud, shape, stamp, count or measurement can carry photos of what it is about, so the picture and the comment stay together. The photos don't cover the drawing: the markup shows a small camera with the number of photos at its top right corner, on screen and in the saved file alike.
- Adding photos. Select the markup and choose Markups ▸ Add Photo…, or right-click it and choose Add Photo…, then pick one or more pictures (JPEG, PNG, HEIC and the other usual kinds). You can also drag pictures from the Finder (Explorer or Files on Windows and Linux) onto the markup or onto Properties ▸ Photos, or copy a picture and press Paste in that section. One Undo takes them off again.
- Size. The first time you add photos, Cella PDF asks whether to make them smaller. Smaller (the choice we suggest) keeps them at 2,000 pixels on the long side, plenty for a report and small enough that a drawing with fifty photos is still easy to send. Keep Full Size keeps every pixel. Change it later in Settings ▸ General ▸ Photos on markups (Options ▸ General on Windows, Settings on Linux). Photos are turned the right way up, and nothing about the camera, when or where they were taken goes into the drawing.
- Properties ▸ Photos shows them as thumbnails. Click one to open it full size. Type a caption under each, move a photo earlier or later, or remove it. A markup carries up to 24 photos.
- The Markups List has a Photos column with the count, and Filter ▸ Has Photos shows only the markups with photos. The CSV and Excel exports carry the column too.
- Copying. Copy and paste, Duplicate and pasting into another document keep the photos. The same photo on two markups is kept in the file once.
- In the file. Each photo is kept inside the PDF as an attachment, so other PDF readers list the photos with the document's attachments (Acrobat's paper-clip panel, for example) and show the camera on the markup. Sending the drawing sends the photos with it.
- Sending it on. Send to Client… sends photos only with Include comments; without it the markups go without their photos. Flatten draws the camera into the sheet and keeps the photos as attachments. A PDF/A-2b copy can't hold attachments, so it leaves the photos out and says so; keep attachments to make a PDF/A-3 copy with them.
- Working together. On a shared project the photos go to the others with the markup.
Site items
On a site visit the usual job is to stand somewhere, note a problem where it is on the drawing, take a photo or two, and afterwards send the contractor a numbered list. The Site Item tool (I) does the first part in one go.
- Choose Tools ▸ Site Item (or press I) and click where the problem is. A red pin with the next number appears there.
- Choose Choose Photos… to add pictures (or No Photos).
- Type a short Note and pick a Status (Open to start with), then Add Item.
The item is an ordinary markup: a numbered box with the subject Site Item, its note, its status and its photos, made in one step, so one Undo takes it all back. The numbers carry on through the document (the Site Items sequence, see Sequences), and Renumber puts them back in order. The note shows as Note in Properties and in the Markups List's Label column. Filter the list by subject to see only the site items, and change their status as work is done.
Site Report
File ▸ Export ▸ Site Report… makes a PDF report to send to the contractor. It never changes the drawing.
- Items: the Site Items (the default), what the Markups List shows with its filter, or the Selection. Each choice says how many items it holds.
- Title, Project, Weather, Attendees and Notes go on the cover with the date, your name and your firm (from your profile). The document remembers what you typed for next time.
- Group by sheet or by status; untick Include resolved items to leave out Completed, Accepted and Cancelled items; Page size Letter or A4; Photo size Small (three to a row), Medium (two) or Large.
The report starts with the cover, then has one block per item: its number and status, the sheet, the note, who made it and when, a location picture of the sheet around the item with the item ringed (and a small plan of the whole sheet showing where it is), and its photos with their captions. A summary table at the end lists every item with its sheet, note and status, and the totals by status. Photos are sized for printing, so a report of a whole visit stays small enough to email.
Redaction
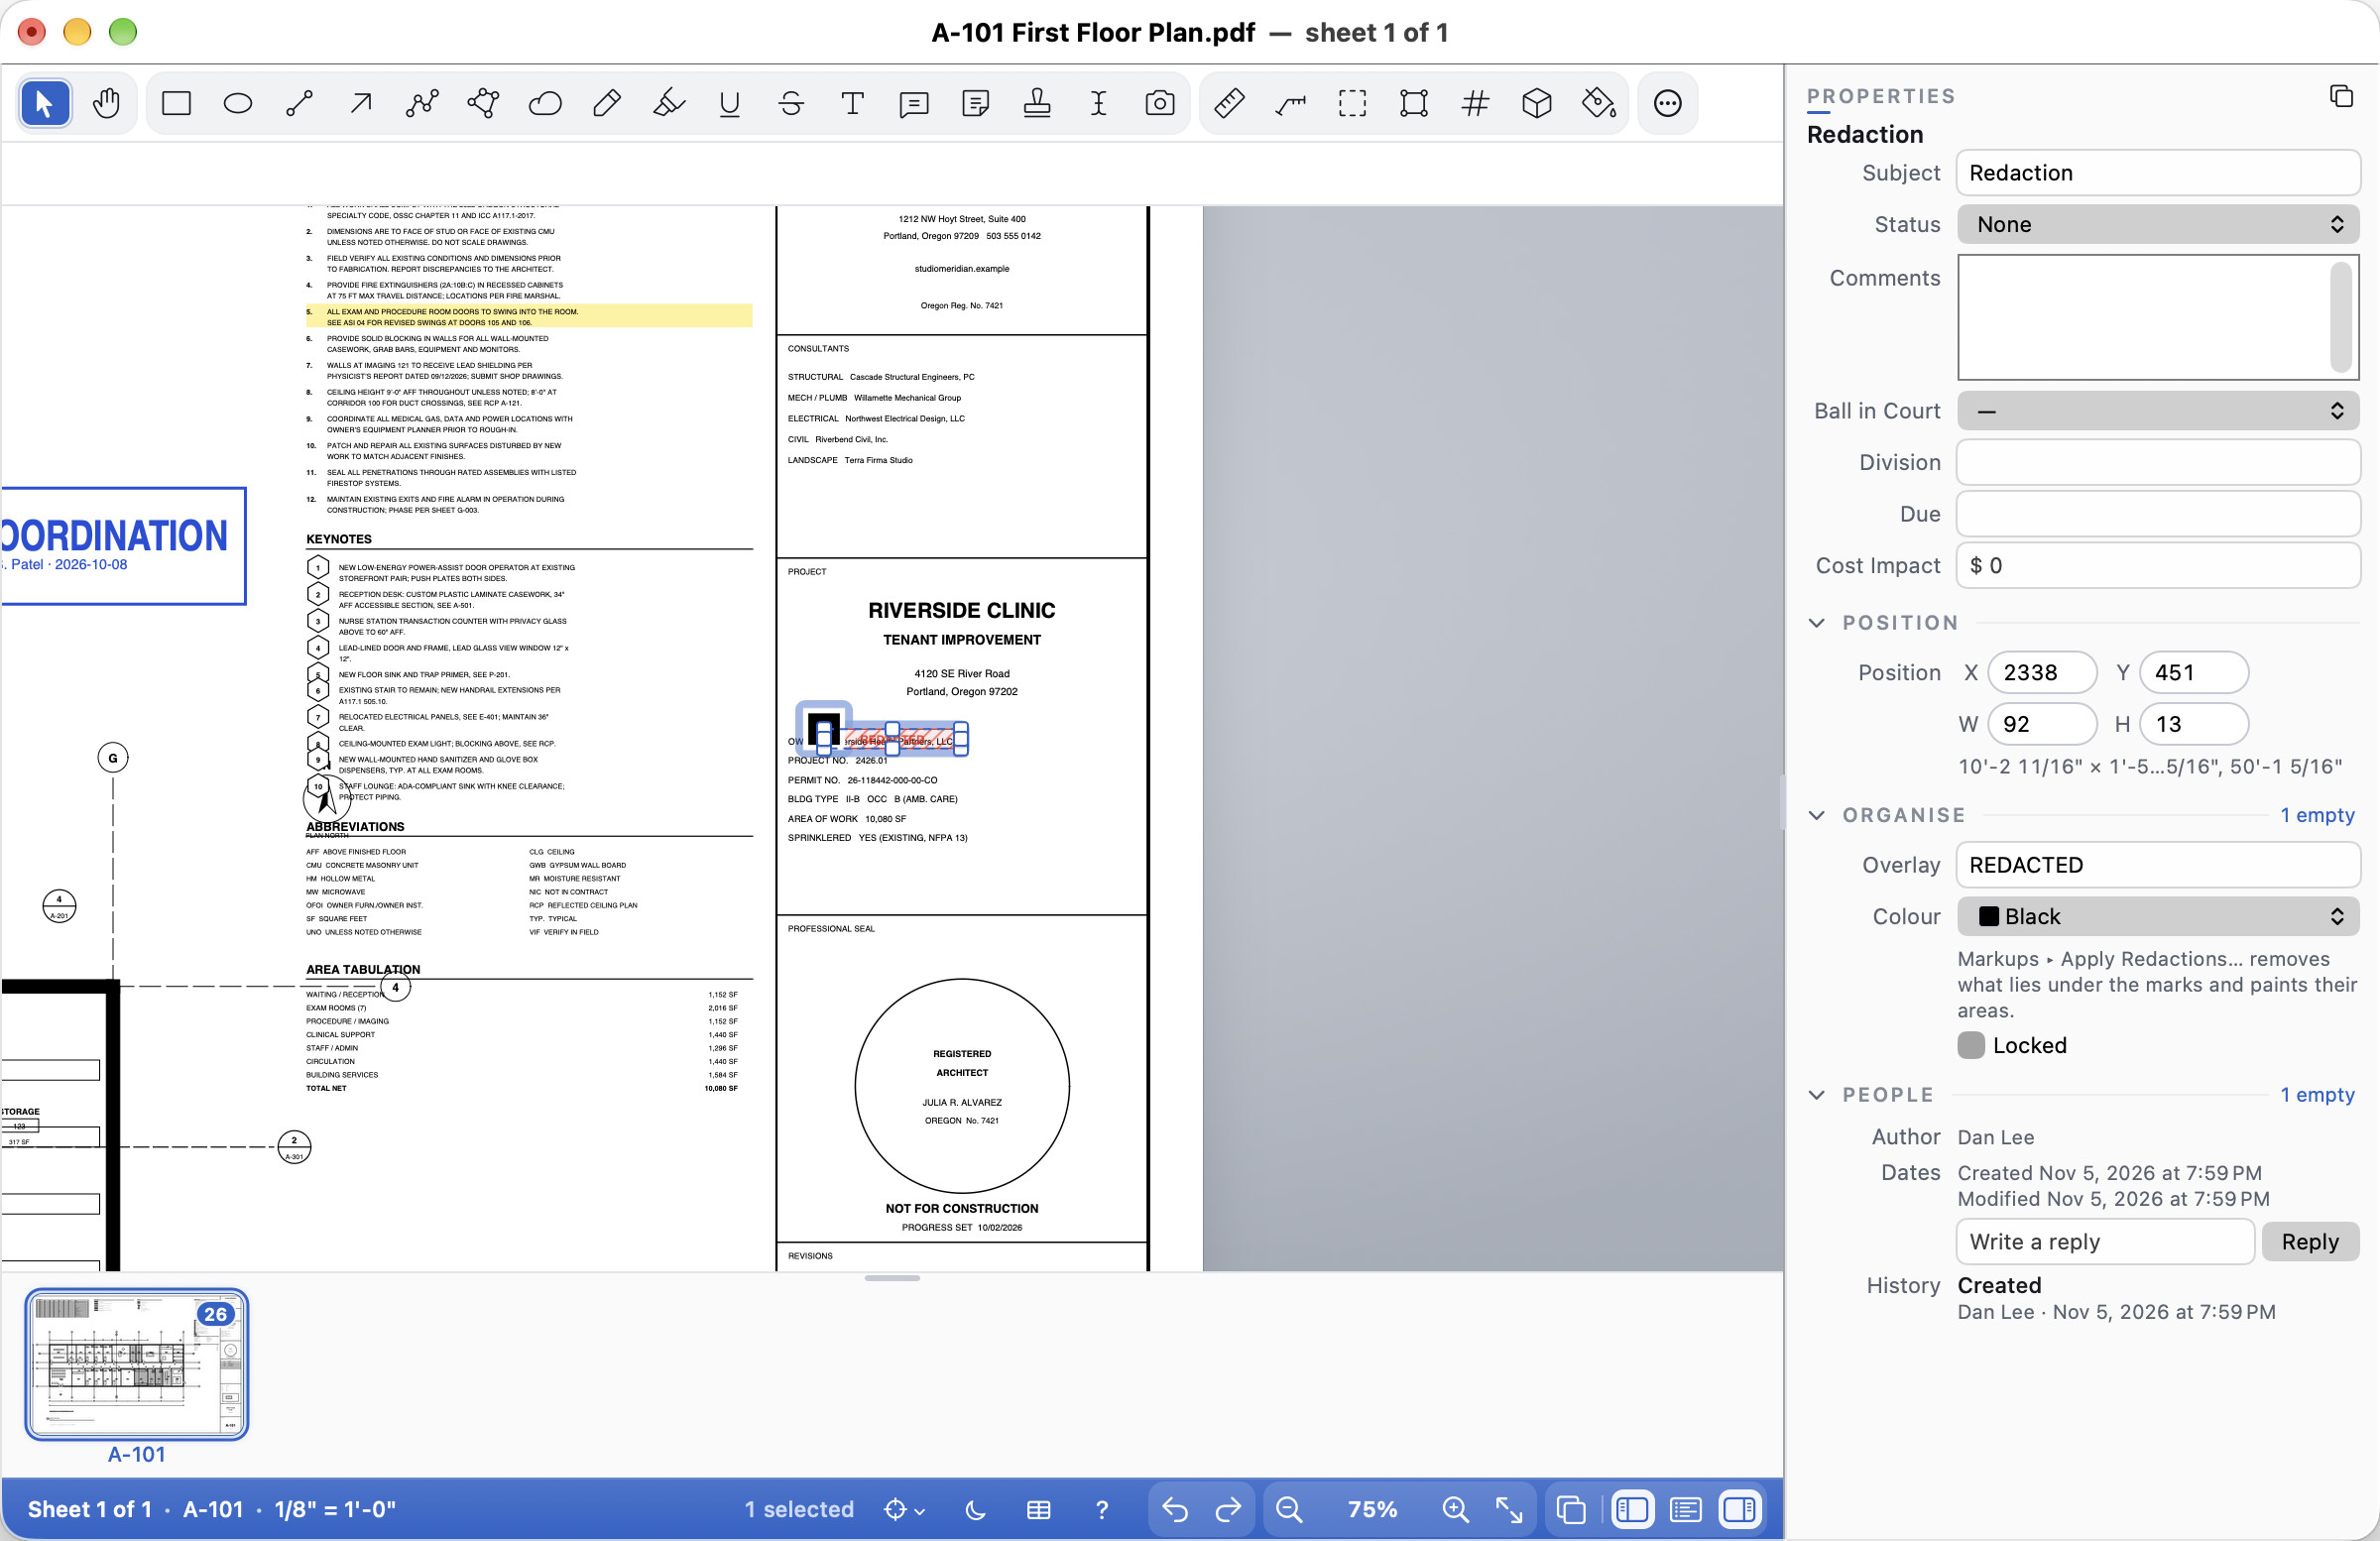
Bid amounts, personnel notes and client names can be taken out of a set for good, the way Acrobat Pro does it: mark first, then apply.
- Mark text: select it with the Select tool (drag, double-click a word, triple-click a line), then Markups ▸ Redaction ▸ Mark Text for Redaction (or right-click ▸ Mark for Redaction).
- Mark every place a word appears: search for it in the sidebar, then Markups ▸ Redaction ▸ Mark Search Results for Redaction. Applying these marks also removes bookmarks whose titles contain it.
- Mark an area: Markups ▸ Redaction ▸ Mark Area for Redaction, then drag a rectangle over a drawing, a picture, a stamp or a signature block.
- Marks show as red outlines with hatching; nothing is removed yet. Move, resize, delete or undo them like any markup. In Properties give a mark an Overlay text ("REDACTED") and a Colour. They save as standard redaction marks that Acrobat and other PDF apps understand.
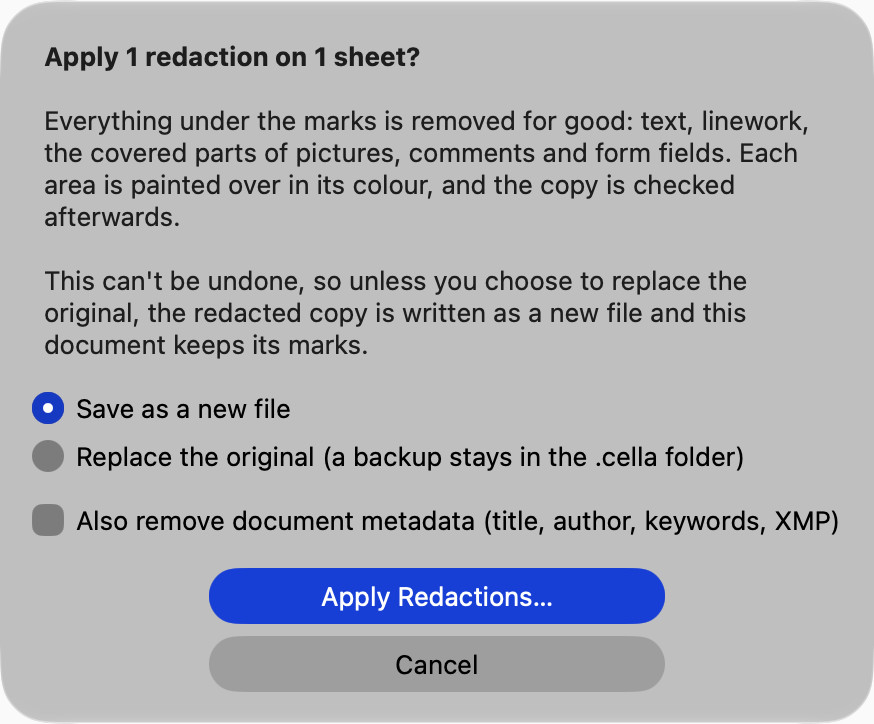
Markups ▸ Redaction ▸ Apply Redactions… removes, under every mark:
- text, letter by letter, so the rest of the line stays exactly where it was;
- linework: a line, hatch, fill or curve that crosses a mark's edge is cut at the edge, so the part outside looks as before and nothing of it is left inside (this includes text the drawing program turned into linework, and dashed lines, whose dashes don't shift);
- the letters' shapes in the fonts: when a letter appears only under marks, its outline is taken out of the font embedded in the file, so it can't be recovered from there;
- shadings and gradients, cut out of the mark;
- pictures: the covered pixels are painted in the mark's colour. A JPEG photo partly under a mark is stored again without compression loss (the copy of that picture is larger);
- comments and form fields over a mark.
Each area is painted in its colour with its overlay text. It can't be undone, so it writes a new file ("A-101 redacted.pdf") and your document keeps its marks. Choose Replace the original to rewrite the file itself (the original stays in the .cella folder). Tick Also remove document metadata to drop the title, author and keywords too. When the file has embedded files (attachments: a spreadsheet, a model), the sheet lists them with Also remove the embedded files, ticked.
When it is done, Cella PDF reads the copy back and looks under every mark again. The summary ends with Verified: nothing remains under 7 marks, or says what is still there and on which sheet.
What is not removed: a letter that only just touches a mark (less than about a sixth of it under the mark) stays, visible beside it; a line much thicker than the mark is narrow stays under the paint; bookmarks are only removed for marks made from a search; link targets, page labels and form-field values elsewhere are not searched. Check the copy before you send it (search it for the words you removed).
Flattening
Markups ▸ Flatten ▸ Flatten Selected and Flatten All draw markups into the sheet itself, so nobody can move or change them; Unflatten takes back what Cella PDF flattened. File ▸ Export ▸ Flattened Copy… (File ▸ Export ▸ Flattened Copy… on Windows and Linux) writes a flattened copy for a contractor and leaves your working file editable.
File ▸ Export ▸ PDF/A-2b Copy… (File ▸ Export ▸ PDF/A-2b Copy… on Windows and Linux) writes an archive copy for record sets: the markups flattened, every font embedded (Helvetica, Times, Courier, Symbol and Dingbats are replaced by matching fonts Cella PDF ships), an sRGB colour profile and the archive metadata. Before anything is saved it lists what it changed and what it left out: links that open programs, scripts, and attached files (tick Keep attachments as PDF/A-3 to keep them; the copy is then PDF/A-3b). A drawing that uses a font which isn't embedded and that Cella PDF has no replacement for (Calibri, say) can't be archived. Cella PDF names the font, and exporting the drawing again with its fonts embedded fixes it. If your archive asks for a validation report, check the copy with a PDF/A validator such as veraPDF.
For a copy that leaves out the internal notes, statuses and authors before it goes outside the firm, see Sending a client-safe copy (File ▸ Send to Client…).
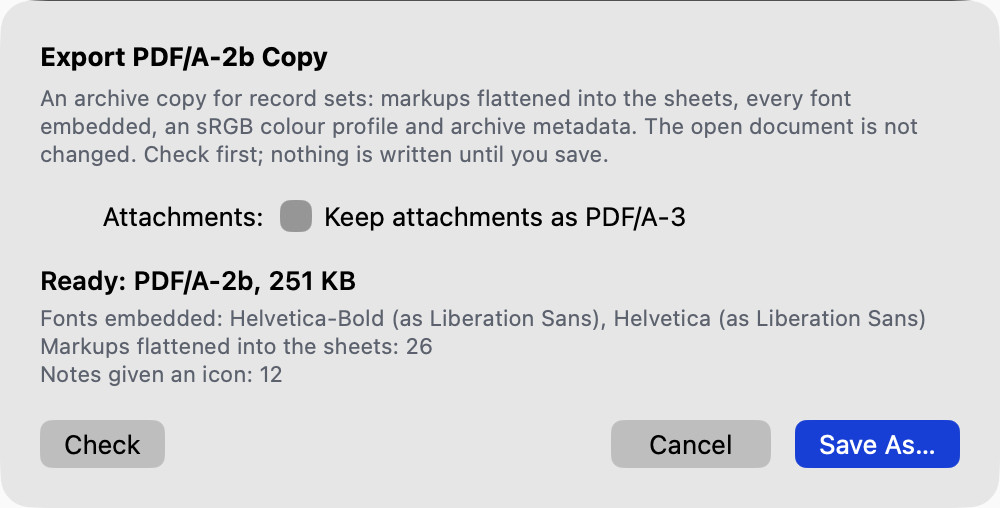
Forms
Transmittals, RFIs, submittal cover sheets and inspection checklists that arrive as PDF forms fill in place. The status band says how many fields a form has.
- Click a field and type. Tab moves to the next field (and on to the next sheet), Return or Enter commits, Esc puts back what the field had. Check boxes and radio buttons toggle with a click or Space; list boxes take ⌘-click (Mac) or Ctrl-click (Windows and Linux) for several choices.
- Forms ▸ Highlight Fields tints every field (required ones outlined in red).
- Forms ▸ Clear Form… empties the form; Flatten Form… makes the values part of the sheets.
- Forms ▸ Export Form Data… saves the values as JSON or FDF (Acrobat reads FDF); Import Form Data… fills a form from either.
- Calculated and formatted fields work as in Acrobat. Totals, products, averages and simple formulas (Quantity × Rate) fill themselves in as you type, in the order the form sets. Amounts show as currency ("$1,250.00"), percentages as "8.0%", dates, times, zip codes, phone and Social Security numbers in the form's format. A field shows its plain value while you type in it.
- A date field opens a small calendar when you click into it: click a day, or type the date (10/15/2026, 2026-10-15 or Oct 15 2026 all work; it is written in the form's format).
- A value the form doesn't accept (a percentage over its limit, a date that doesn't exist, letters in an amount) is refused with the form's own message, and the field keeps what it had.
- Forms can carry other scripts Cella PDF doesn't run (pop-up messages, custom code). Those fields still fill in; the status band says "(1 script not run)" after the field count, and Properties marks the field.
- Save writes the values into the PDF, so Acrobat, Preview and other PDF apps show them. View-only Cella PDF shows filled-in values but can't change them.
Measuring
Measuring needs a key or the trial. Measurements are written into the PDF as real measurement annotations, so Acrobat and other PDF apps show the same values.
Setting the scale
Set the sheet's scale first: Tools ▸ Set Scale…, or click the scale in the status band, and pick a preset (architectural, engineering or metric) or Custom. Or calibrate from the drawing: Tools ▸ Measure ▸ Calibrate (⇧⌥K; Shift+Alt+K), click two points a known distance apart and type the distance (12'-6" works).
Both end with Apply to: this sheet, every sheet of the same paper size (handy when the plans are one size and the details another), or all sheets. Each sheet keeps its own scale; the status band, the sidebar and Properties show the one you are on. A sheet without a scale says "No scale", and the first measuring tool you pick on it asks for one.
For a detail sheet with several scales, Tools ▸ Measure ▸ Scale Region (⇧⌥R; Shift+Alt+R): drag round the detail and pick its scale; measurements that start inside it use that scale. Tools ▸ Remove Scale Regions on This Sheet takes them off.
The measuring tools
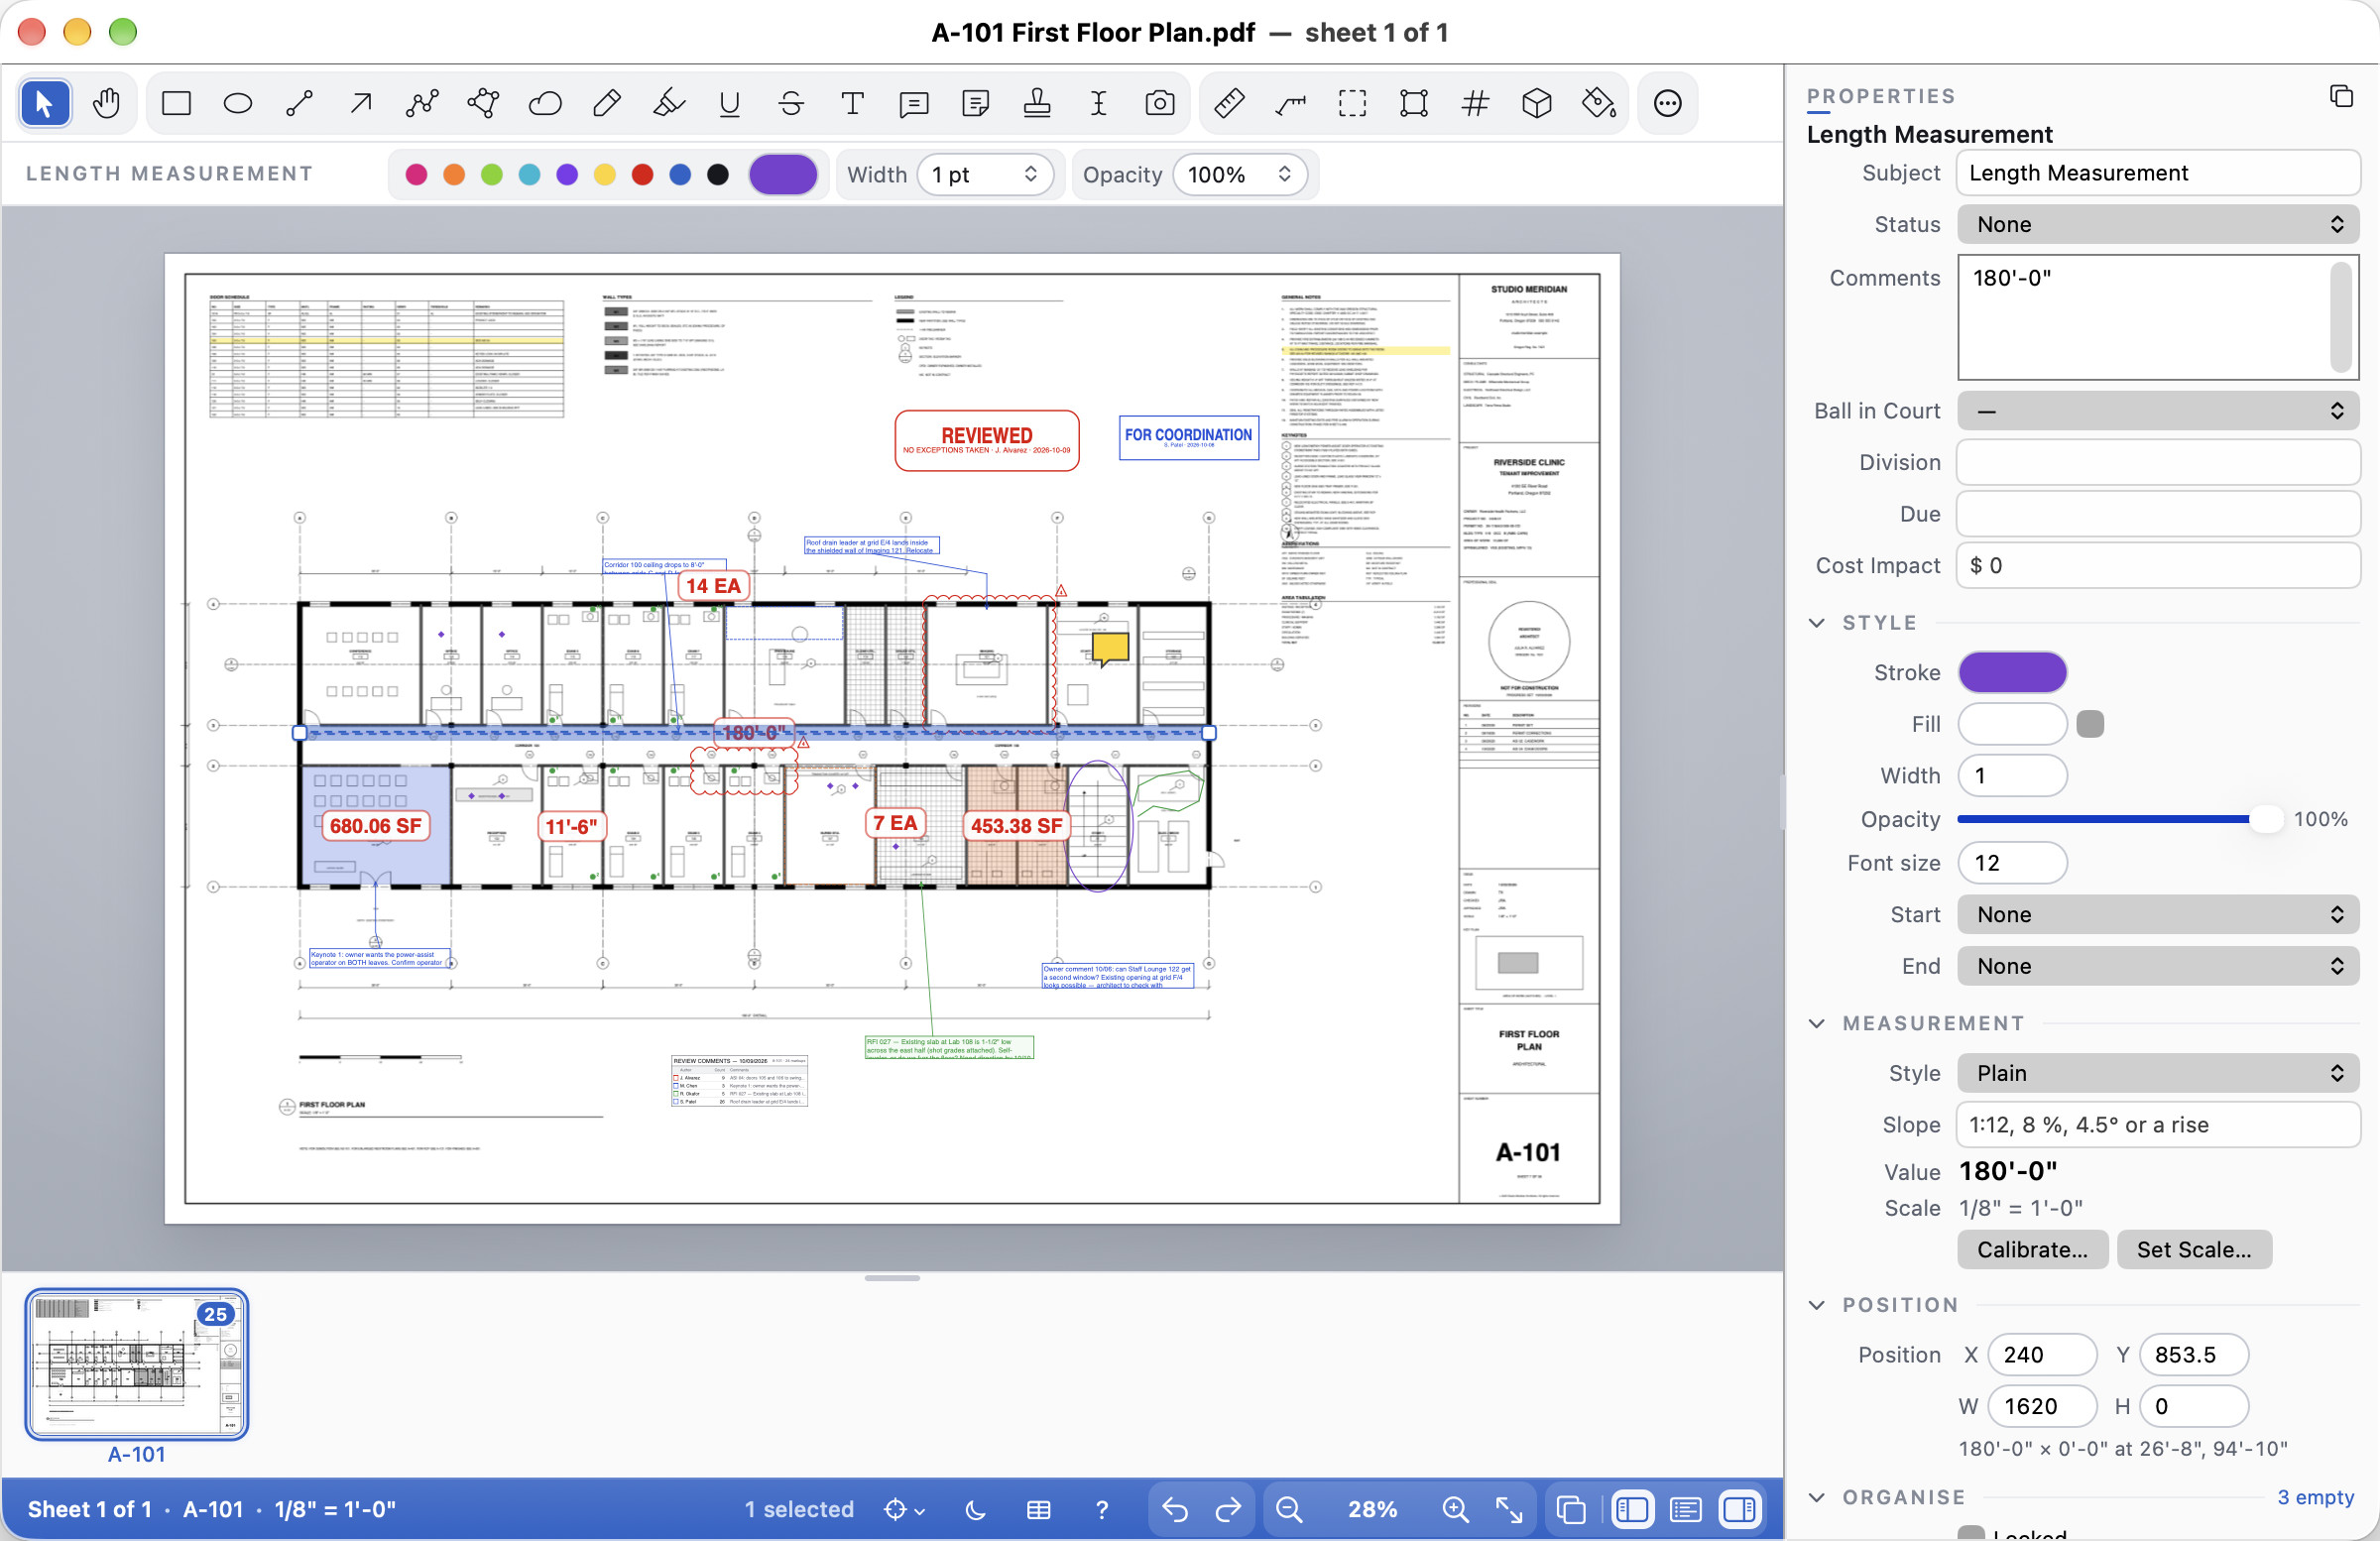
| Tool | Mac | Windows and Linux | Shows |
|---|---|---|---|
| Length | ⇧⌥L | Shift+Alt+L | Feet and inches (or the scale's unit) along a line |
| Polylength | ⇧⌥Y | Shift+Alt+Y | The total along a polyline |
| Area / Perimeter | ⇧⌥A / ⇧⌥P | Shift+Alt+A / Shift+Alt+P | Square feet (or m²) and linear feet of a polygon |
| Count | ⇧⌥C | Shift+Alt+C | A symbol at each click and the total; see Counts |
| Volume | ⇧⌥V | Shift+Alt+V | Area × depth: the Depth field in Properties (a number and a unit) sets it, and new volumes start with the last depth you set |
| Angle | ⇧⌥G | Shift+Alt+G | Click a point on one side, the corner, then a point on the other side: the angle in degrees |
| Radius | ⇧⌥D | Shift+Alt+D | Click the centre, then a point on the circle (or three points along an arc): R 2'-6", or Ø 5'-0" with Show: Diameter |
Dynamic Fill (⇧⌥F; Shift+Alt+F) measures a room with one click. Hover inside it and Cella PDF tints the region its walls enclose, with the area by the pointer. Click, and it becomes an ordinary Area measurement (cut-outs, Properties and totals as for one you drew). Fill gap in the options row (0–12 pt, 4 by default) closes door openings narrower than that. If the fill would run out of the room, Cella PDF says the area isn't closed: raise Fill gap, or draw the room with the Area tool. Esc puts the tool down.
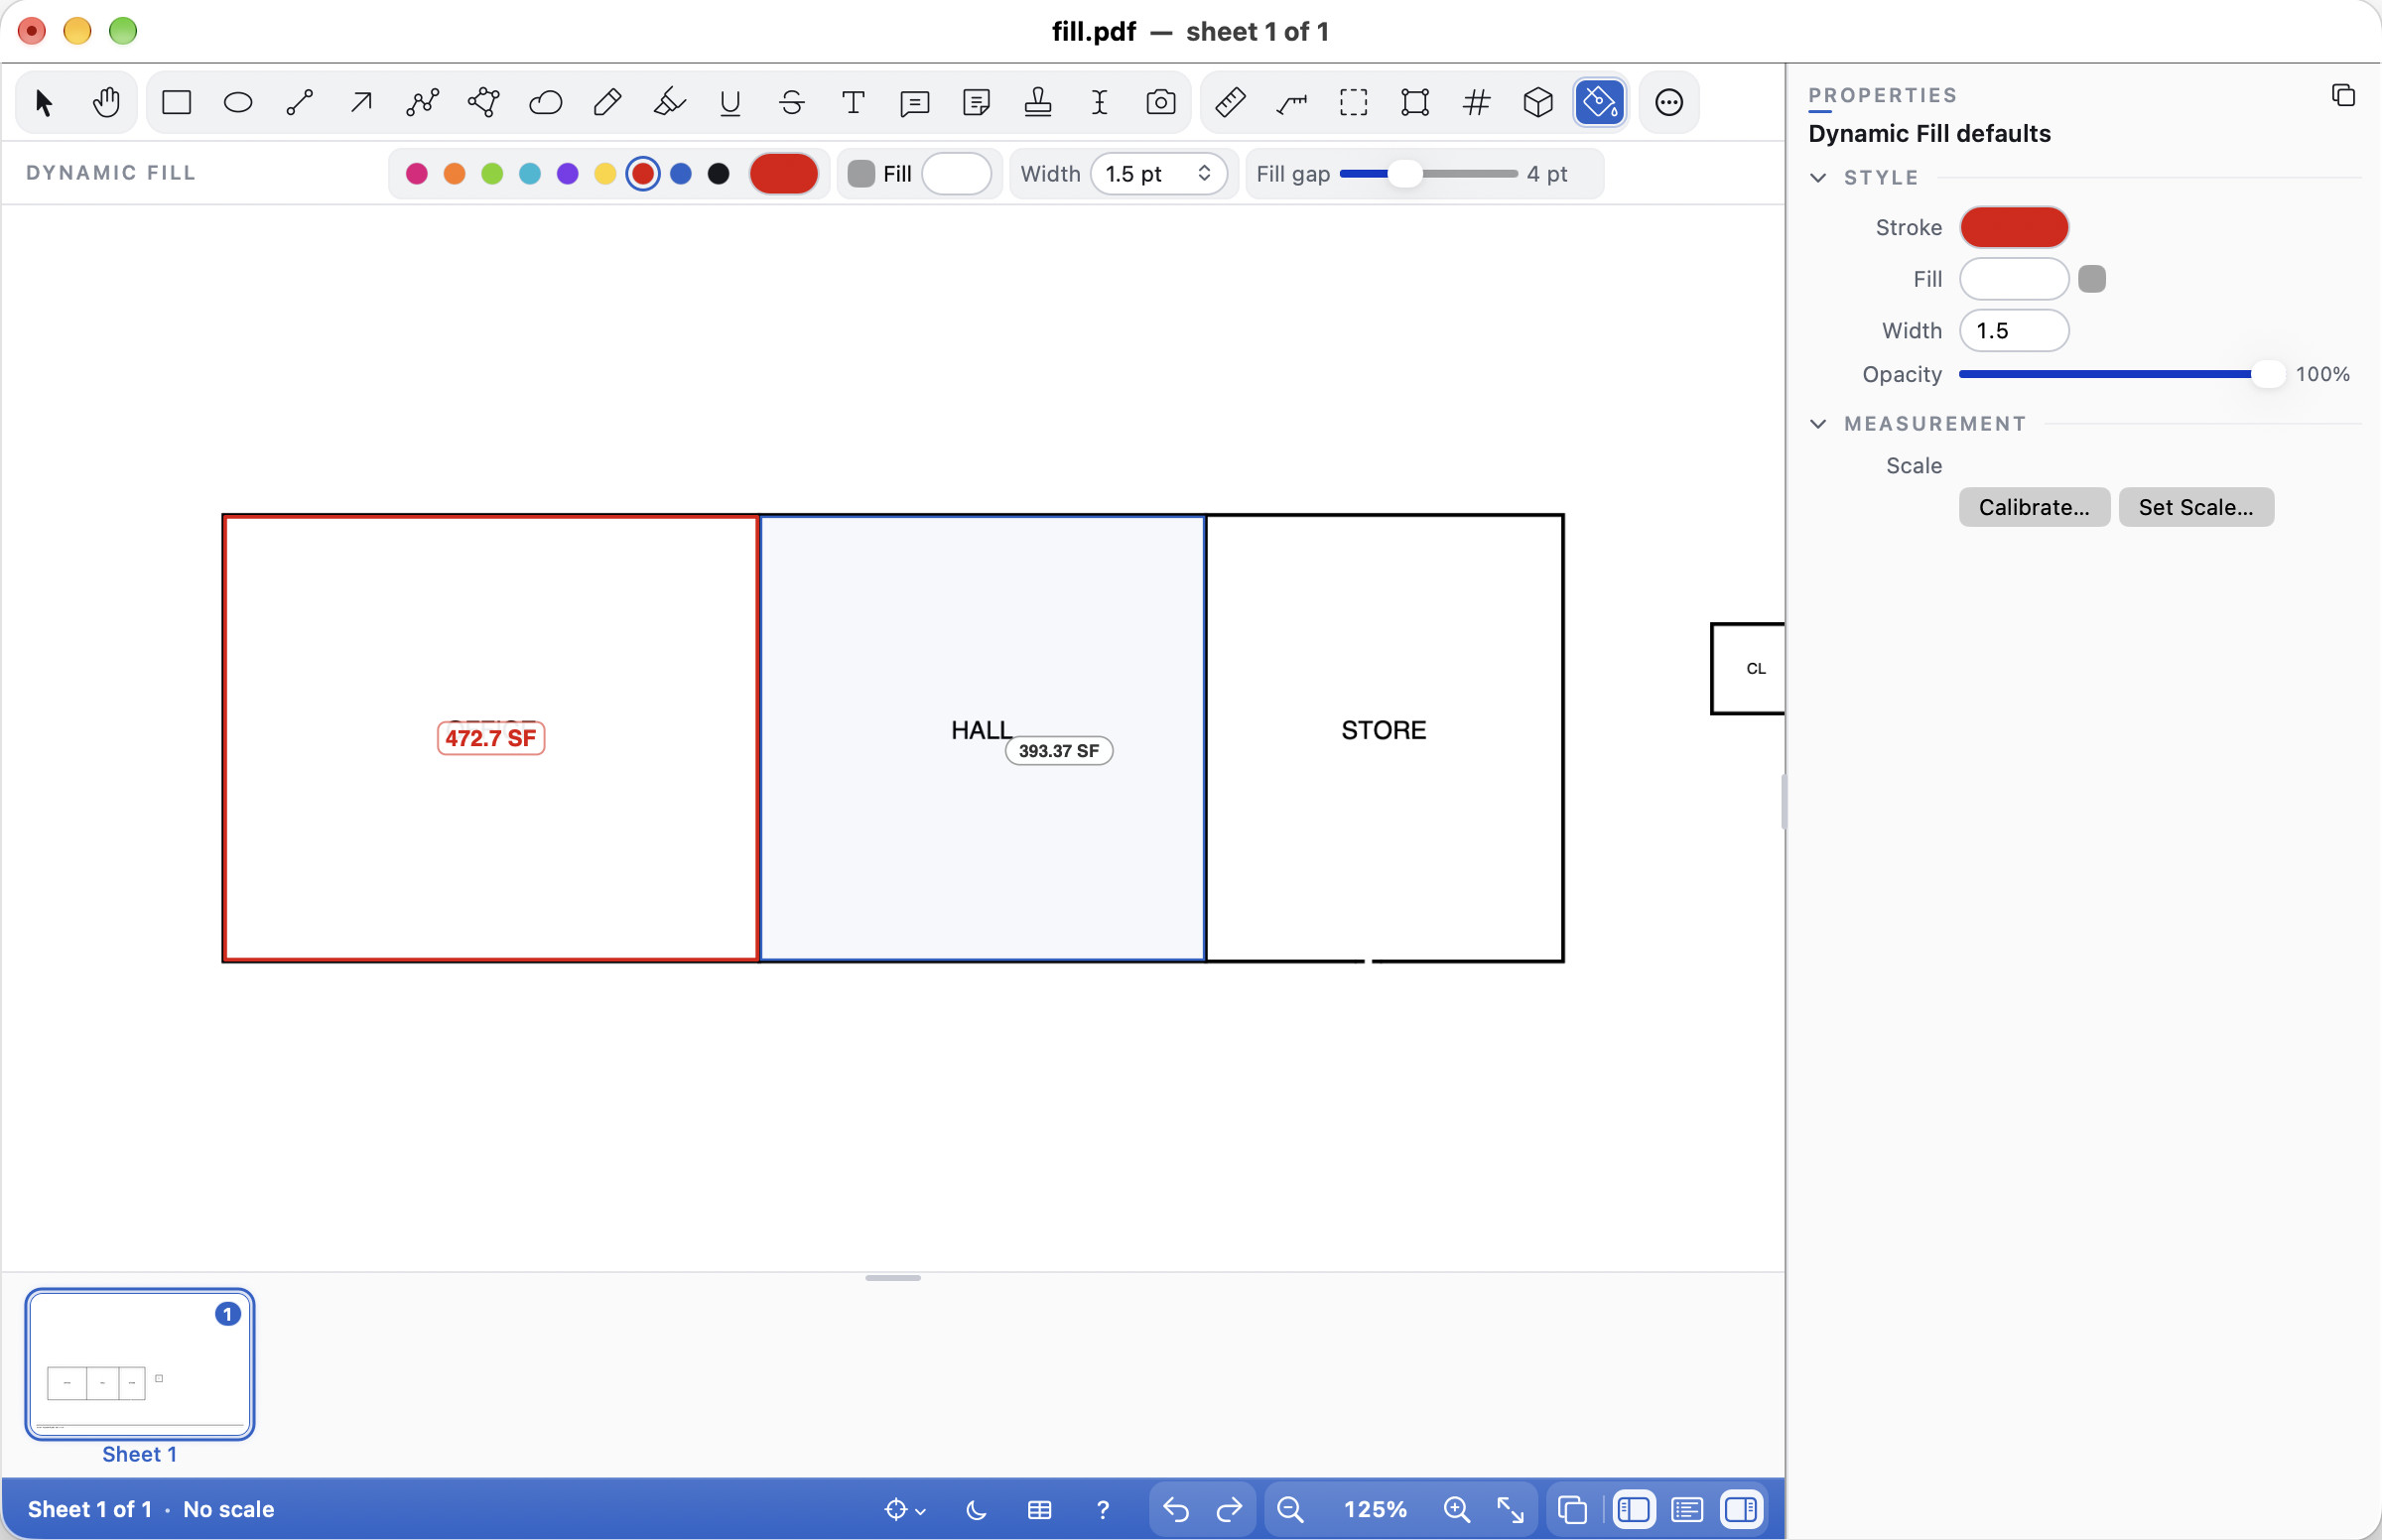
Drawing measurements precisely
- While you draw, a readout by the pointer shows the length and angle of the segment you are drawing and the total so far.
- Hold Shift to keep the segment at 0°, 45°, 90° and so on.
- Points snap to the linework, text and other markups as you draw (see Snapping); hold ⌘ (Mac) or Ctrl (Windows and Linux) to place one free.
- Type a length while drawing a length, polylength, area, perimeter or volume:
12'6,12'-6 1/2",6",3.5mor350mm, then Return or Enter. The segment is fixed at that length in the direction you are pointing, and you carry on drawing. A plain number is in the sheet's unit. Delete corrects; Esc drops it. - The Length tool works by dragging, or by clicking at one end and then the other.
- Arcs: with the Polylength, Area, Perimeter or Volume tool, hold Option or Alt and click a point the next segment should curve through, then click where it ends. Select the measurement to bend an arc by its middle handle; Properties' Arcs row has Straighten. Lengths and areas count the true curve.
Placing points with a finger
On a touch screen (a Windows or Linux computer with a touch screen) your fingertip covers the very point you are placing. Cella PDF helps in three ways:
- The loupe. While your finger places a point (the ends of a line or a length, the corners of an area, an angle's points, a count, a calibration) or drags one (a vertex, an end, a callout's tip, a label, the Scale Ruler's zero or marker, the Protractor's centre), a round loupe appears above your finger. It shows the drawing under the point at twice the zoom (three times when you are zoomed out below 50 %), a fine crosshair at the exact point, the snap it caught in the same shape and colour as on the sheet, and the length or angle so far. Near the top of the screen it moves to the side, away from your hand.
- Loupe and offset (a choice in Settings; as it comes, points land under your finger as they always have and the loupe shows them). With it on, the point sits a little above your fingertip, marked by a small crosshair, so your finger never covers it. Move it into place, watching the loupe, and lift your finger to place it there. A line, an arrow, a length or a viewport takes two touches: one for its start, one for its end. Dragging a handle that is already there works as before; the loupe shows where it is going.
- Touch and hold empty paper with the Select tool for a quick magnified look at small text, without zooming. Lift where you started and the menu opens, as before.
Where two markups lie close together, a tap selects the top one and shows a small 2 here button beside it (or 3, or more). Tap it to select the next one down, or touch and hold it for a list by name ("Cloud: RFI 12", "Area: 453 SF") and choose one. With a mouse, Option-click (Mac) or Alt-click (Windows and Linux) the same place again to select the next one down.
Choose how it works in Touch screen in Options (Windows) or Settings (Linux): Place points above the finger is Off, Loupe only (as it comes), or Loupe and offset. A pen's tip doesn't hide the point, so it gets the loupe only if you turn that on there.
Moving a measurement's value
The value of an area, perimeter, length, polylength, angle, radius, volume or count can go wherever it reads best, outside the shape too: handy in a small room or when values crowd each other.
- Click a value to select its measurement, even when the value sits outside the shape.
- With the measurement selected, its value is outlined, with a round grip at its left end. Drag the value (or the grip) to move it. One drag is one step of Undo.
- Moved outside its shape, or away from its line, the value gets a thin leader back to it, so it is clear what it measures. Inside the shape there is no leader.
- The value keeps its place beside the measurement when you move, resize, rotate or reshape it, copy and paste it, or duplicate it, and it stays upright when you turn the sheet.
- To put it back, double-click the grip, or choose Reset Label Position in the Markups menu or the right-click menu. It works on every selected measurement at once.
- The measured value itself never changes: the Markups List, totals, legends and exports read the measurement, not where its value sits.
- Saved in the PDF, the value is drawn where you put it, so other PDF apps and prints show it there too.
A dimension's value moves differently: drag the handle at the value to slide it along the line (see Dimensions).
Dimensions
Set a length's Style to Dimension in Properties for a drafted dimension: extension lines at both ends, ticks (Slash), dots (Circle) or arrows at the ends, and the value on the line (Text: On the line) or above it (Above the line). Offset moves the dimension line away from what you measured (negative: the other side). Selected, drag the handle at the value to slide it along the line, and the other handle to move the line itself. Acrobat and other PDF apps show the dimension as drawn.
Slope and 3D length. For a pipe run or a roof, type a Slope in Properties for a length or polylength: a ratio (1:12), a percentage (8 %), degrees (4.5°), or a rise as a length (3'-6"). The value then shows the plan length and the true length with the slope, such as 12'-4" (3D 12'-9", 1:12). The Markups List, its CSV and Excel export gain 3D Length and Slope columns (the plan length stays under Measurement), and the totals add the 3D lengths. A rise is the whole run's; one slope or rise applies to every segment of a polylength. Clear the field to make it flat again. When a polylength's legs change grade, select it alone and use the Segments table in its place: give each leg its own slope or rise (blank is flat), or Apply to all. The 3D length is the sum of the legs', and the value says mixed, such as 32'-0" (3D 32'-7 5/8", mixed). Acrobat and other PDF apps still measure the plan length.
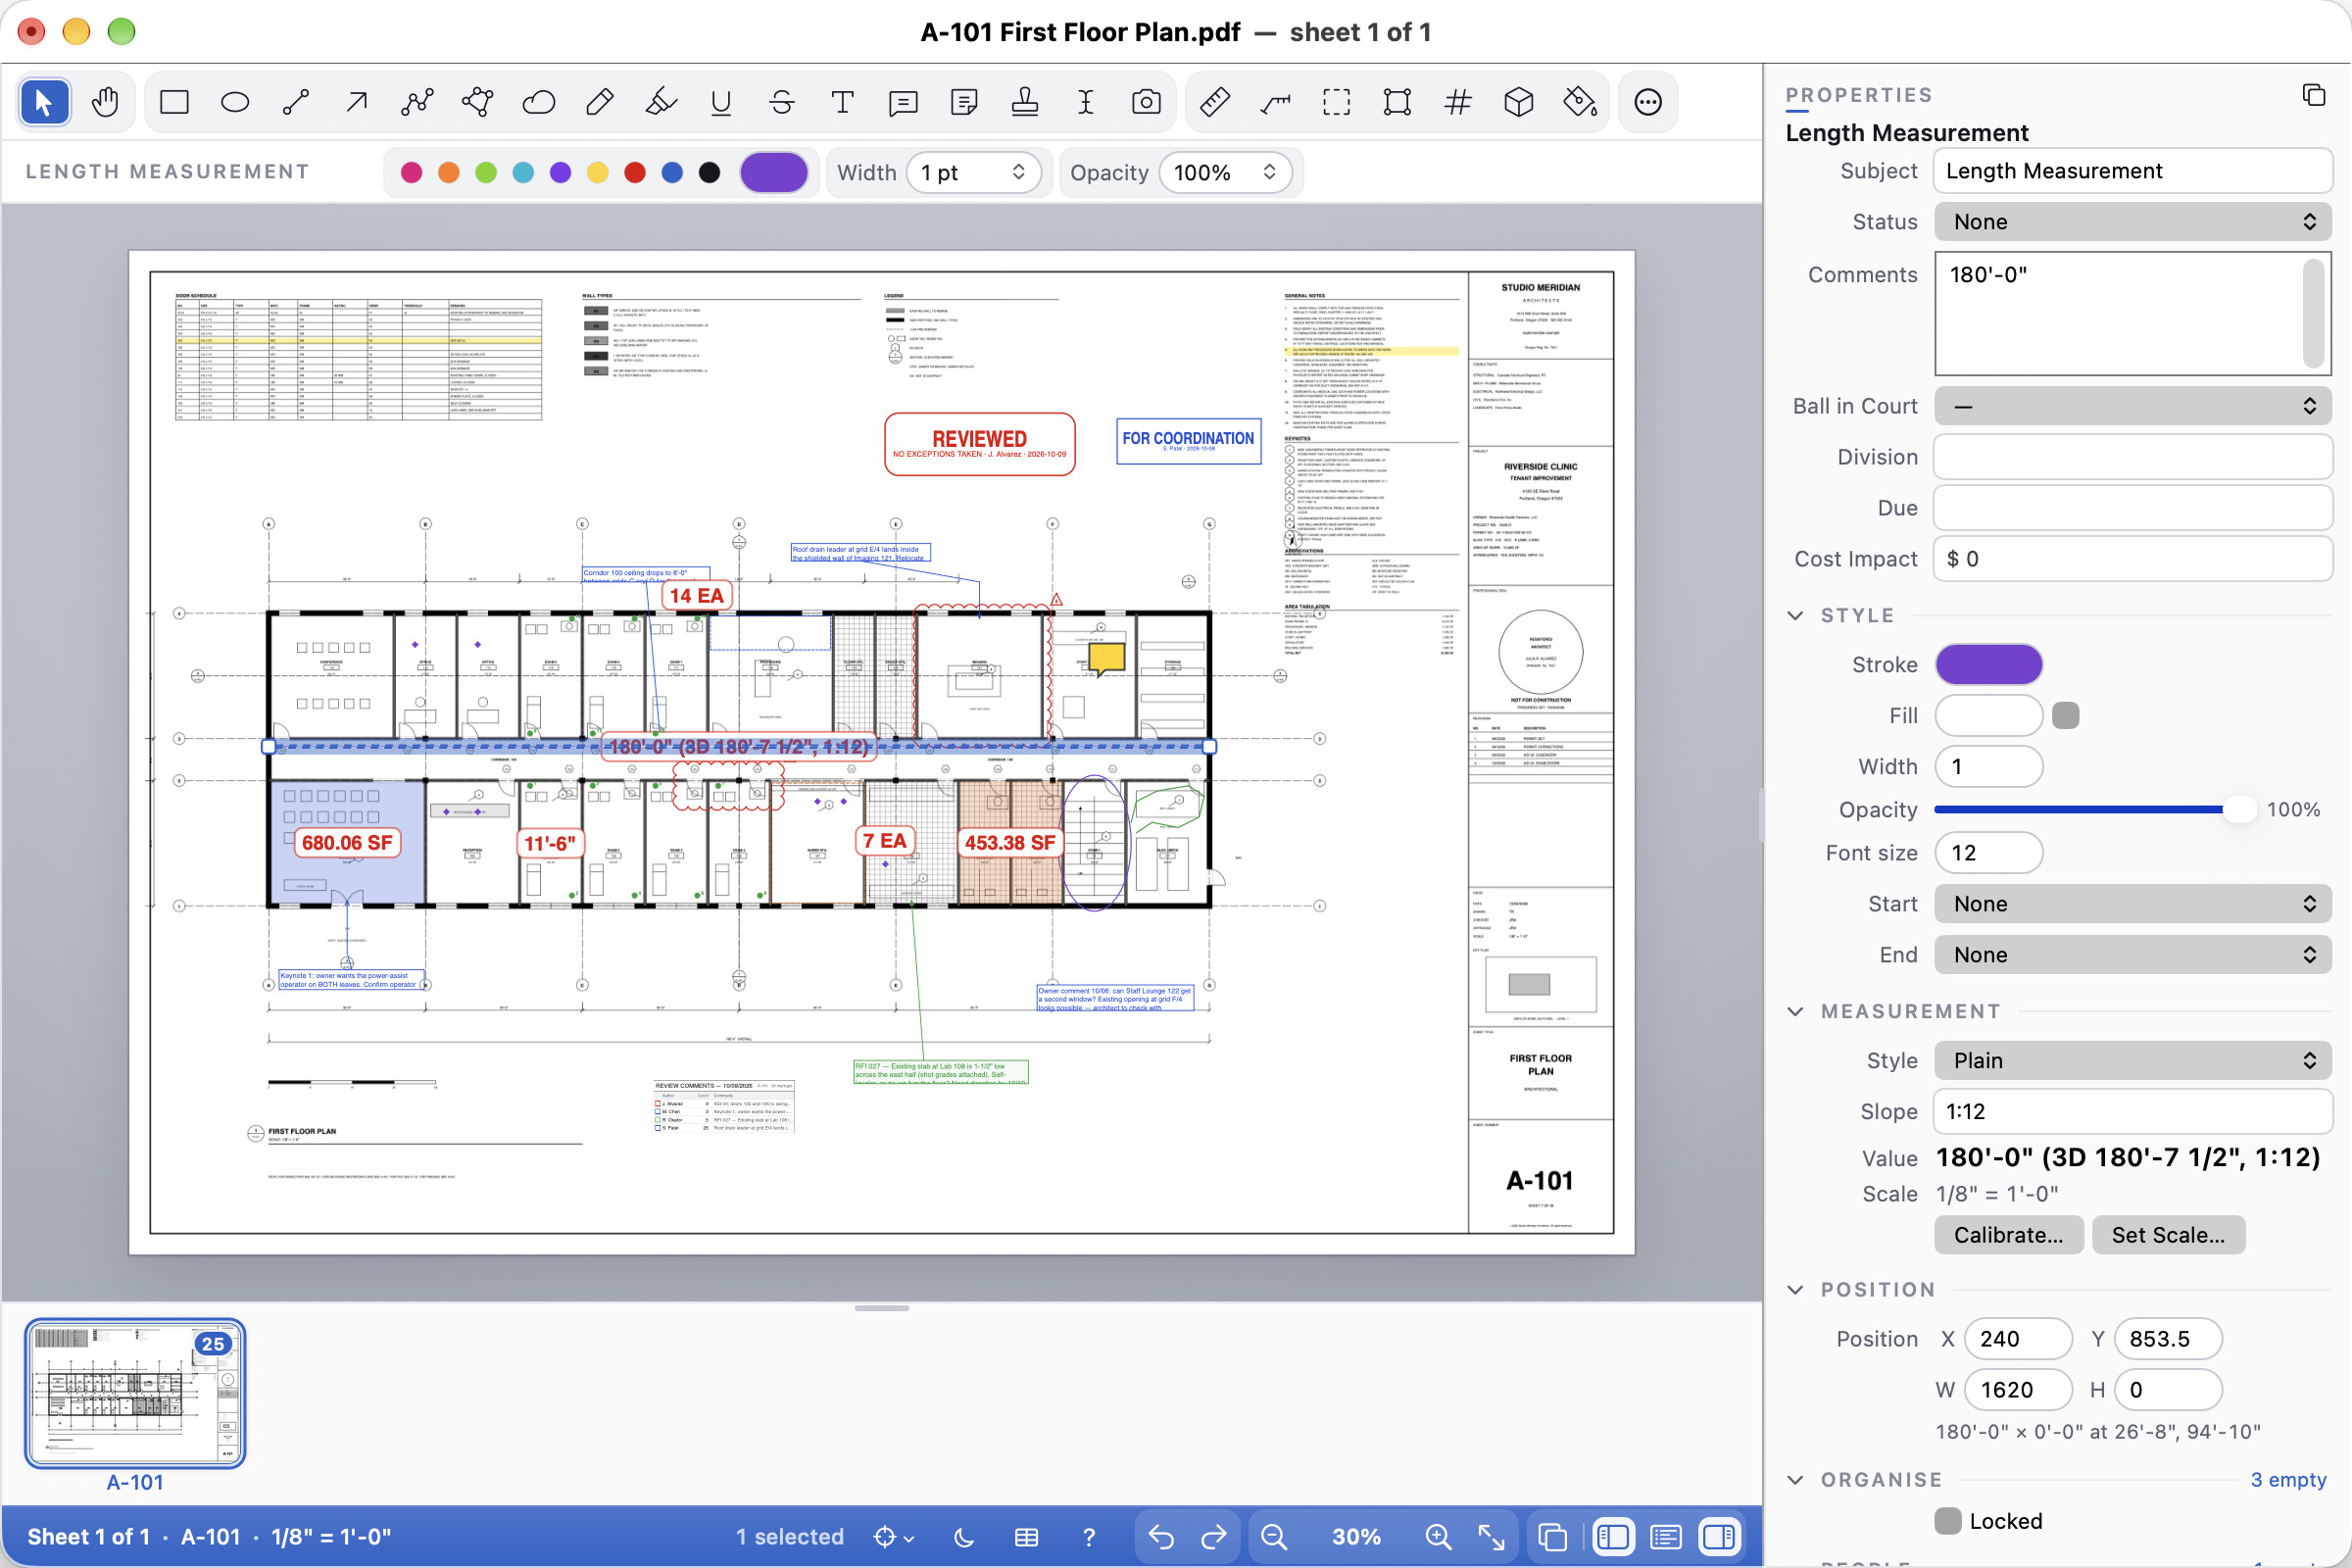
Areas and cut-outs
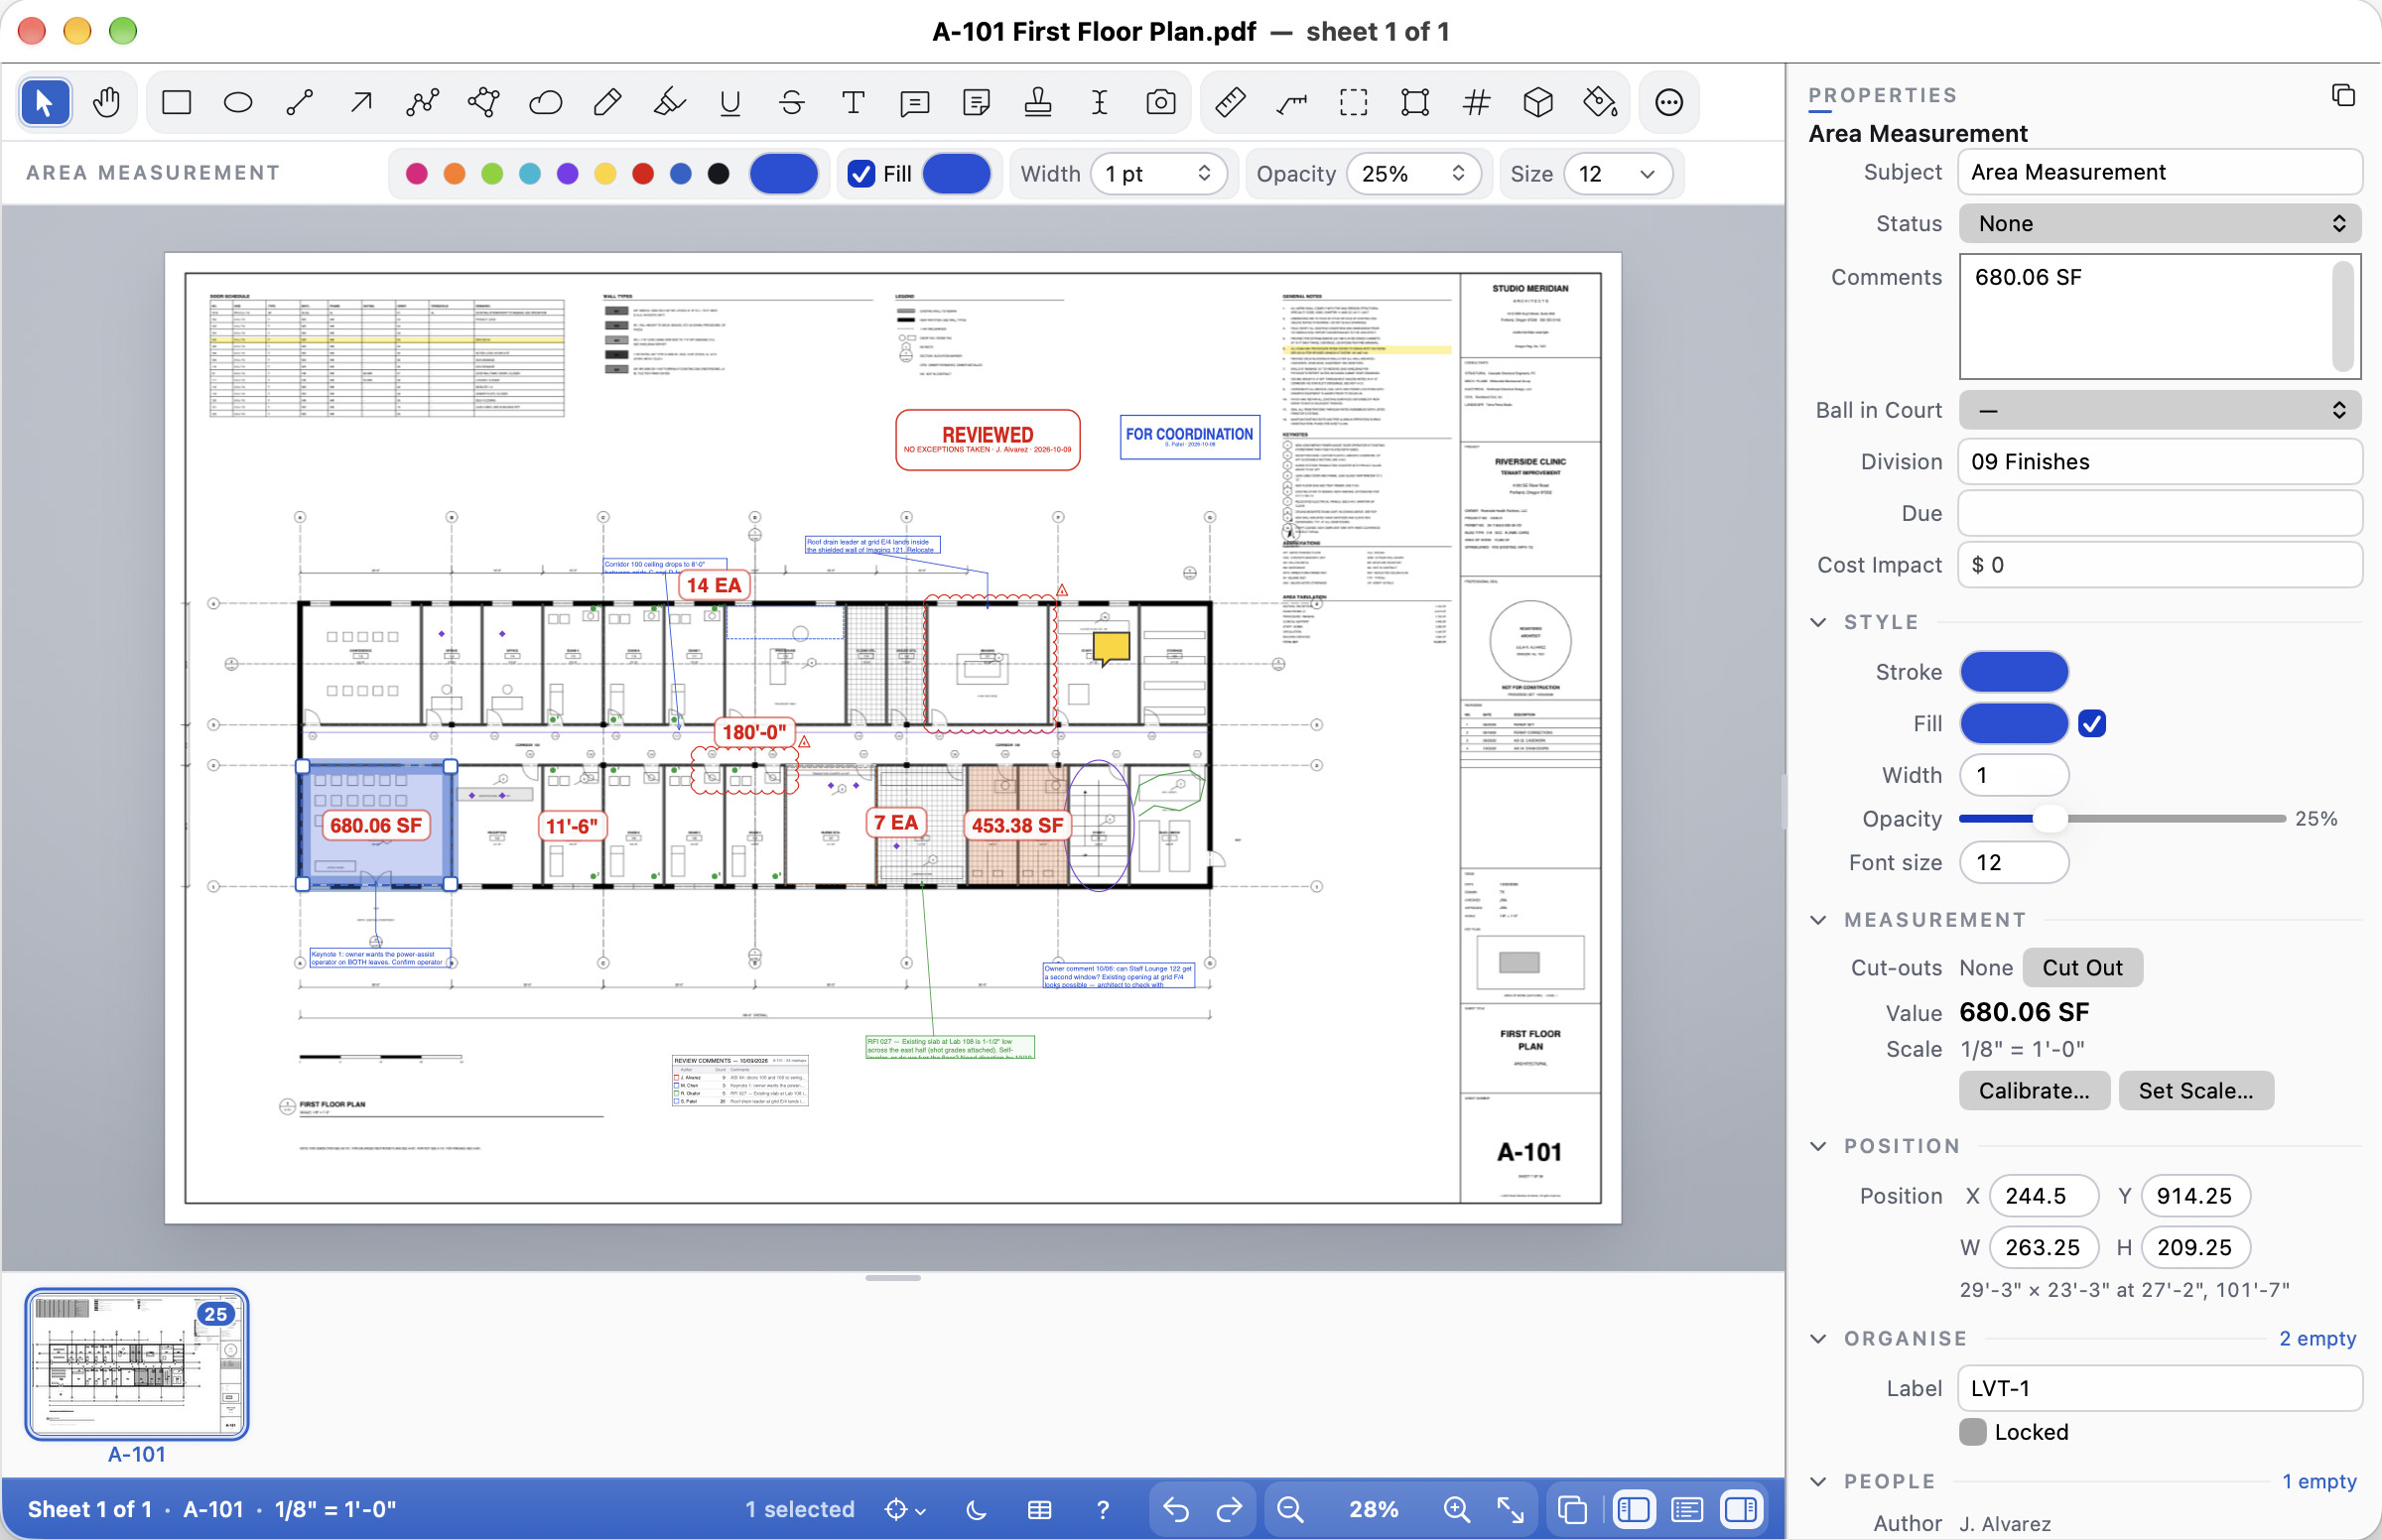
A stairwell, a shaft or a courtyard shouldn't count in the floor area. Select the area (or volume) and choose Markups ▸ Cut Out from Area, then draw the opening as a polygon: click each vertex and finish by clicking the first or last point again, double-clicking or pressing Return or Enter. With the Area or Volume tool you can also hold Option or Alt on the first click while one area is selected. The hole's area comes off the area (a volume is the cut area times the depth). The cut-out has to lie inside the outline; Cella PDF says so if it doesn't. Cut as many openings as you need.
Properties shows a Cut-outs row with the count, Cut Out and Remove (which gives the area back whole). The perimeter stays the outline's alone; tick Cut-out edges in perimeter to add the openings' edges. The Markups List, totals, legends and the CSV all use the reduced value, and Acrobat, Preview and other PDF apps show the openings. An area with openings from another markup app opens with its cut-outs.
Custom columns and formulas
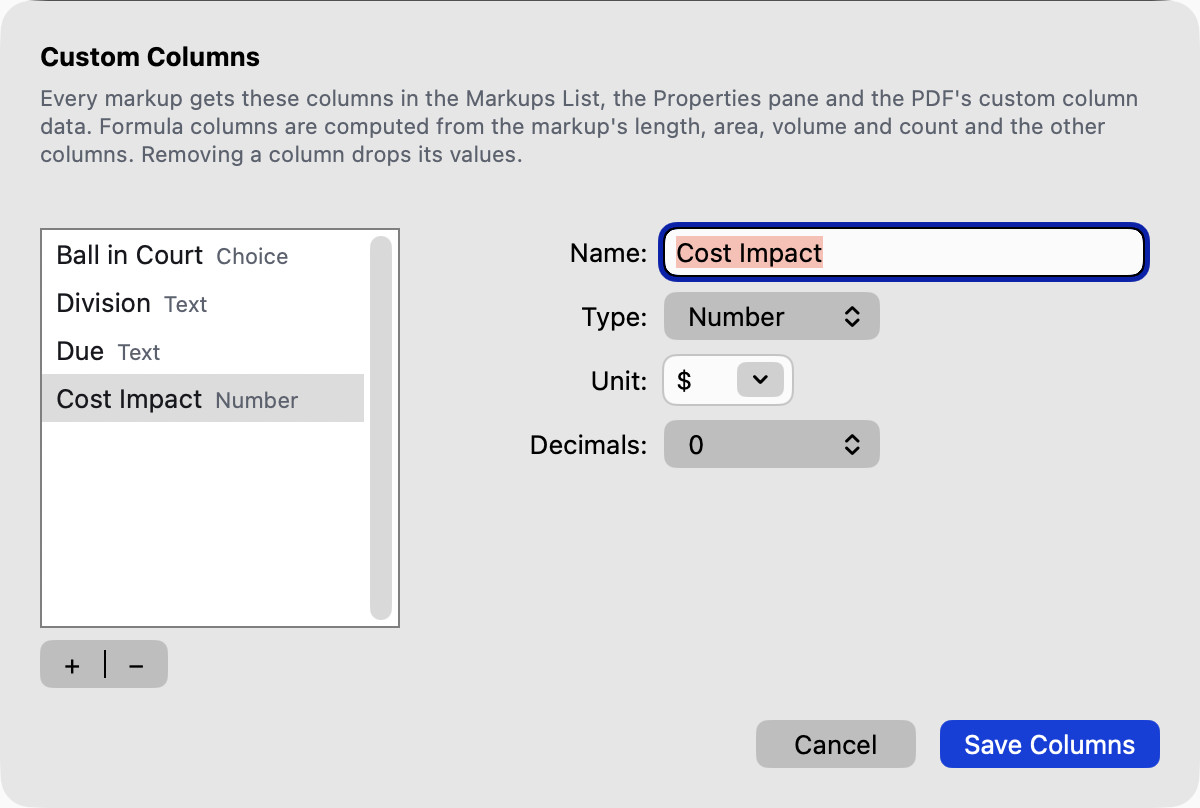
Markups List ⋯ ▸ Custom Columns… is the list of columns your office adds to every markup (Ball in Court, Division, Due, Cost Impact). Each column has a name and a type:
- Text; Number, with a Unit (a currency sign shows before the number,
LForSFafter it) and Decimals; Choice, a pop-up of the options you list, separated by commas; Checkbox; and Formula. - A Formula column works its value out from the markup's measurement and its other columns, so a take-off prices itself:
area * [Unit Cost]. A formula can uselength,area,volumeandcount(in the units the sheet's scale shows: feet, SF, CY, each), the other columns by name in square brackets,+ - * / ^and brackets, comparisons, andround(x, 2),if(cond, a, b),min,max,abs,ceilandfloor. The Insert menu offers them all, and under the formula Cella PDF says at once whether it reads ("✓ The formula reads") or what it can't find. A markup the formula can't be worked out for shows#ERR.
Use + to add a column and − to remove one (its values go when you save). A column keeps its values when you rename or retype it. The columns travel with the file, in the PDF's custom column data that other markup apps read. Fill them in in Properties, or double-click a row of the Markups List. File ▸ Set ▸ Apply Columns to Set… gives every file of a set the same columns.
Scale Ruler
The Scale Ruler is a see-through ruler you lay over the drawing and drag about, for quick measurements while you sketch. Choose View ▸ Scale Ruler (⌃⌘R; Ctrl+Alt+R on Windows and Linux) to show or hide it. It is only a viewing aid: it is never saved in the PDF, printed or exported, and it starts hidden.
- Reading it. The ruler reads in the sheet's scale, the one set for the sheet or the scale region its zero end is in, and its marks change as you zoom so they stay readable. The scale's name is at the bottom of the ruler. On a sheet with no scale it reads in paper inches (millimetres if your default scale is metric) and says "No scale set". Set the sheet's scale first (see Setting the scale) to read real lengths.
- Measuring. Drag the ruler so its zero end sits where you want to measure from: it snaps to the lines, corners and text of the drawing, as the measuring tools do (hold ⌘, or Ctrl, to place it freely). Then slide the blue marker along the edge: the label above it shows the distance from zero, and the marker clicks to the round numbers of the marks as it passes them. Drag the marker off the ruler onto the drawing and it snaps to the drawing's points and lines instead: a dashed line joins it to the ruler, and the label reads that point's distance from zero measured along the ruler. Hold ⌘ (Ctrl on Windows and Linux) for no snapping either way.
- Moving, turning and stretching. Drag the middle to move it. Drag either end to turn it about the other end and stretch it to any length at the same time (the marks and numbers run the whole way); hold ⌥ (Alt) to turn it without changing its length. It clicks to level, 45° and upright, and to the sheet's Ortho angle when the sheet has one. The ruler keeps the length you stretched it to, in every document, until you stretch it again.
- Quick turns. Tap (or click) the ruler twice to turn it a quarter turn about its zero end. Tap it three times to turn it end for end, so the zero is at the other end and it reads the other way. Taps only count when the ruler doesn't move; a drag never turns it.
- Drawing along it. Start a Pen stroke, a Line, an Arrow or a Length on the ruler or just beside one of its long edges and it runs straight along that edge, as a pencil does along a real straightedge.
- Constrain. Turn on the ruler's ⊥ button (or View ▸ Constrain to Ruler, ⌃⌥⌘R; Ctrl+Shift+Alt+R on Windows and Linux) and, while the ruler shows, every Pen stroke, Line, Arrow and Length you draw anywhere on the sheet is held parallel or square to the ruler, whichever way you first move. The polyline and area tools and Shift click to the ruler's directions too. While Constrain is on the ruler takes the place of Ortho: its angle is the one your lines follow, in steps of 90°. Constrain is remembered; hiding the ruler sets it aside until you show the ruler again.
- Switching a line as you draw. While you are drawing a Pen stroke or a line with the ruler showing, press Tab, click the ruler's Switch button (the slanted line beside ⊥). A line held to the ruler becomes a free straight line that follows the pen like a rubber band; switch again and it is held to the ruler once more. A freehand Pen stroke switched becomes a straight line held to the ruler. Tab also switches a line Ortho is holding when the ruler is hidden.
Triangle and protractor
Beside the ruler there are two more drafting aids, for drawing the way you do on paper with a scale, a set square and a protractor. Choose View ▸ Triangle (⌃⌘T; Ctrl+Alt+Shift+T on Windows and Linux) or View ▸ Protractor (⌃⌘A; Ctrl+Alt+Shift+A). Like the ruler they are only viewing aids: never saved in the PDF, printed or exported. Each stays where you left it while the document is open, and remembers its shape and size for next time.
- The triangle. A see-through set square, 45° or 30°/60°: tap the button in its middle to switch. Drag it by its body to move it; its right-angle corner snaps to the drawing as the ruler's zero does. Drag the corner at the end of the long leg to turn it about the right angle and size it (hold ⌥, or Alt, to turn only); drag the other corner to size it. Turns click to level, 45° and upright and to the sheet's Ortho angle; hold Shift to turn it in Ortho's steps. Tap (or click) it twice to turn it over, as you would flip a set square on the desk. Its two legs carry marks in the sheet's scale, measured from the right angle.
- Sliding along the ruler. With the Scale Ruler showing, bring one of the triangle's edges up to one of the ruler's long edges and it clicks onto it. It then slides along the ruler wherever you drag it, without turning, so you can draw parallel lines and lines square to the ruler one after another. Pull it well away from the ruler to free it. Turned over while it lies on the ruler, it stays on the ruler.
- The protractor. A see-through half circle (the Full button makes it a whole circle) with a centre mark and an arm. Drag it so its centre sits on a corner or point: it snaps to the drawing. Dropped on a line, its straight edge takes that line's angle; brought up to the ruler, it lies along the ruler's edge and slides along it. Drag either end of its straight edge to turn and size it. Drag the arm (or its round knob) and the label reads the angle from the straight edge; the arm clicks to whole degrees, more firmly to 5° and 15° (hold ⌘, or Ctrl, to set it to a tenth). Tap the label to type an angle. Ortho makes the arm's direction the sheet's Ortho angle, so lines you draw with Ortho or Shift follow it; Copy puts the angle on the clipboard.
- Drawing along them. Start a Pen stroke, a Line, an Arrow or a Length beside any edge of the triangle, or beside the protractor's straight edge or its arm, and it runs straight along that edge. Click the points of a polyline or an area beside an edge and they land on it. Constrain to Ruler stays the ruler's own; the triangle's and protractor's edges guide a stroke whenever it starts beside them.
Take-offs and the CSV
Sort the Markups List by subject and it becomes a take-off: each subject a group with its count and totals, and number and formula columns summed too (Area 1,133.44 SF · Count 21 EA · Cost Impact $7,000). Filter to total one subject or one sheet. ⋯ ▸ Export CSV… (⇧⌘E; no key on Windows and Linux; the same as File ▸ Export Markups as CSV… on the Mac and File ▸ Export ▸ Markups as CSV… on Windows and Linux) writes every column, with a heading line and subtotals per group and the totals at the end, ready for a spreadsheet. ⋯ ▸ Export to Excel… writes the same take-off as an Excel workbook, with the numbers as numbers and a Totals row that adds up. See The Markups List.
For an estimator's summary, choose File ▸ Export ▸ Take-off Summary… (File ▸ Set ▸ Export Set Take-off Summary… for the whole set). It pivots the listed measurements: a row per subject (or per tool when a markup has no subject) and a column per space, layer, sheet or status (Group columns by; by file too for a set). Each cell is the quantity summed in the units the list shows (LF, SF, CY, EA, or metric). The table adds a Units column, a Total for each row, your number and formula columns (a cost column, say) summed beside it, and a bold Totals row per unit. Save it as an Excel workbook or a CSV. Export to Excel can add the same table as a second worksheet, Take-off, after the markups: pick the grouping under Take-off sheet by in its save panel, or None to leave it out.
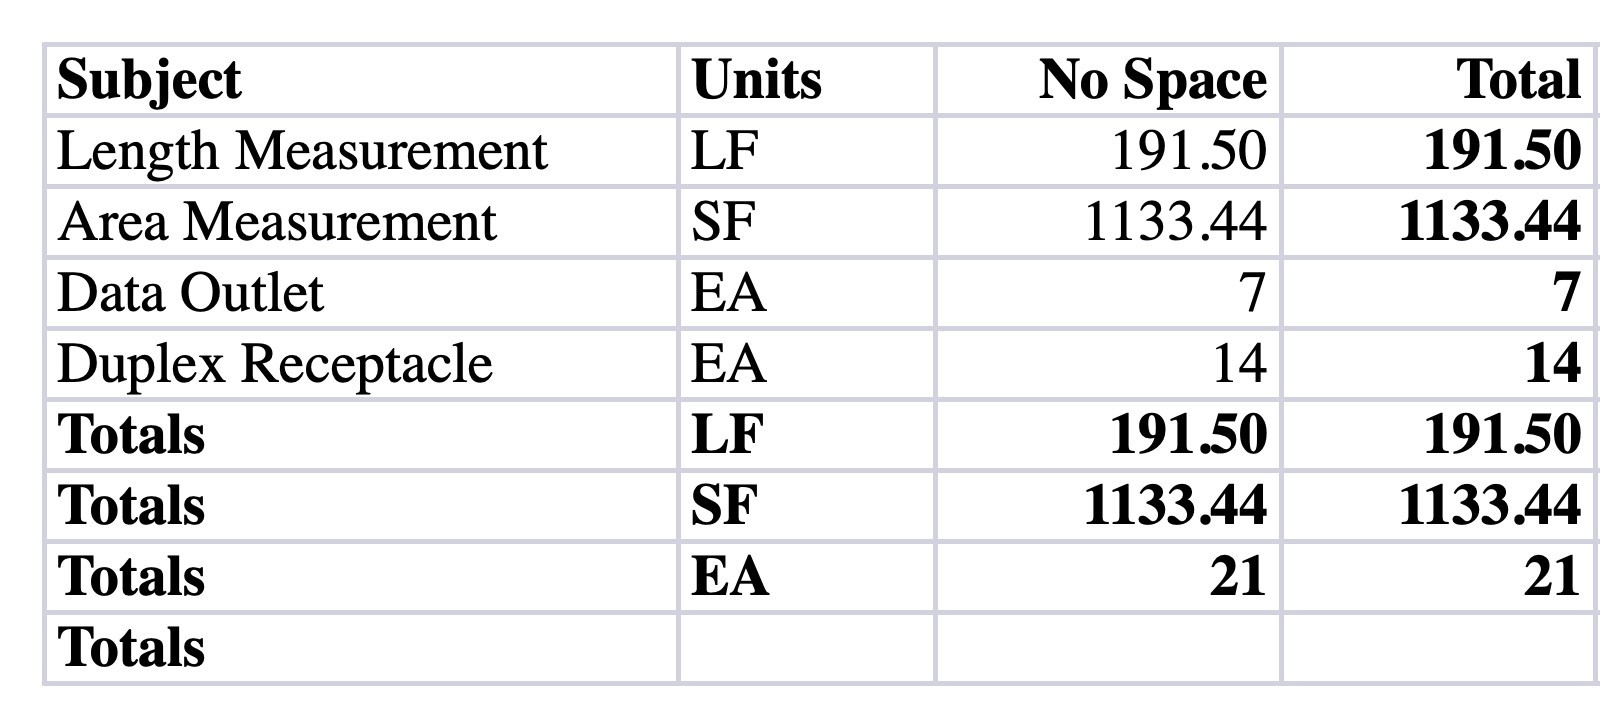
The Markups List
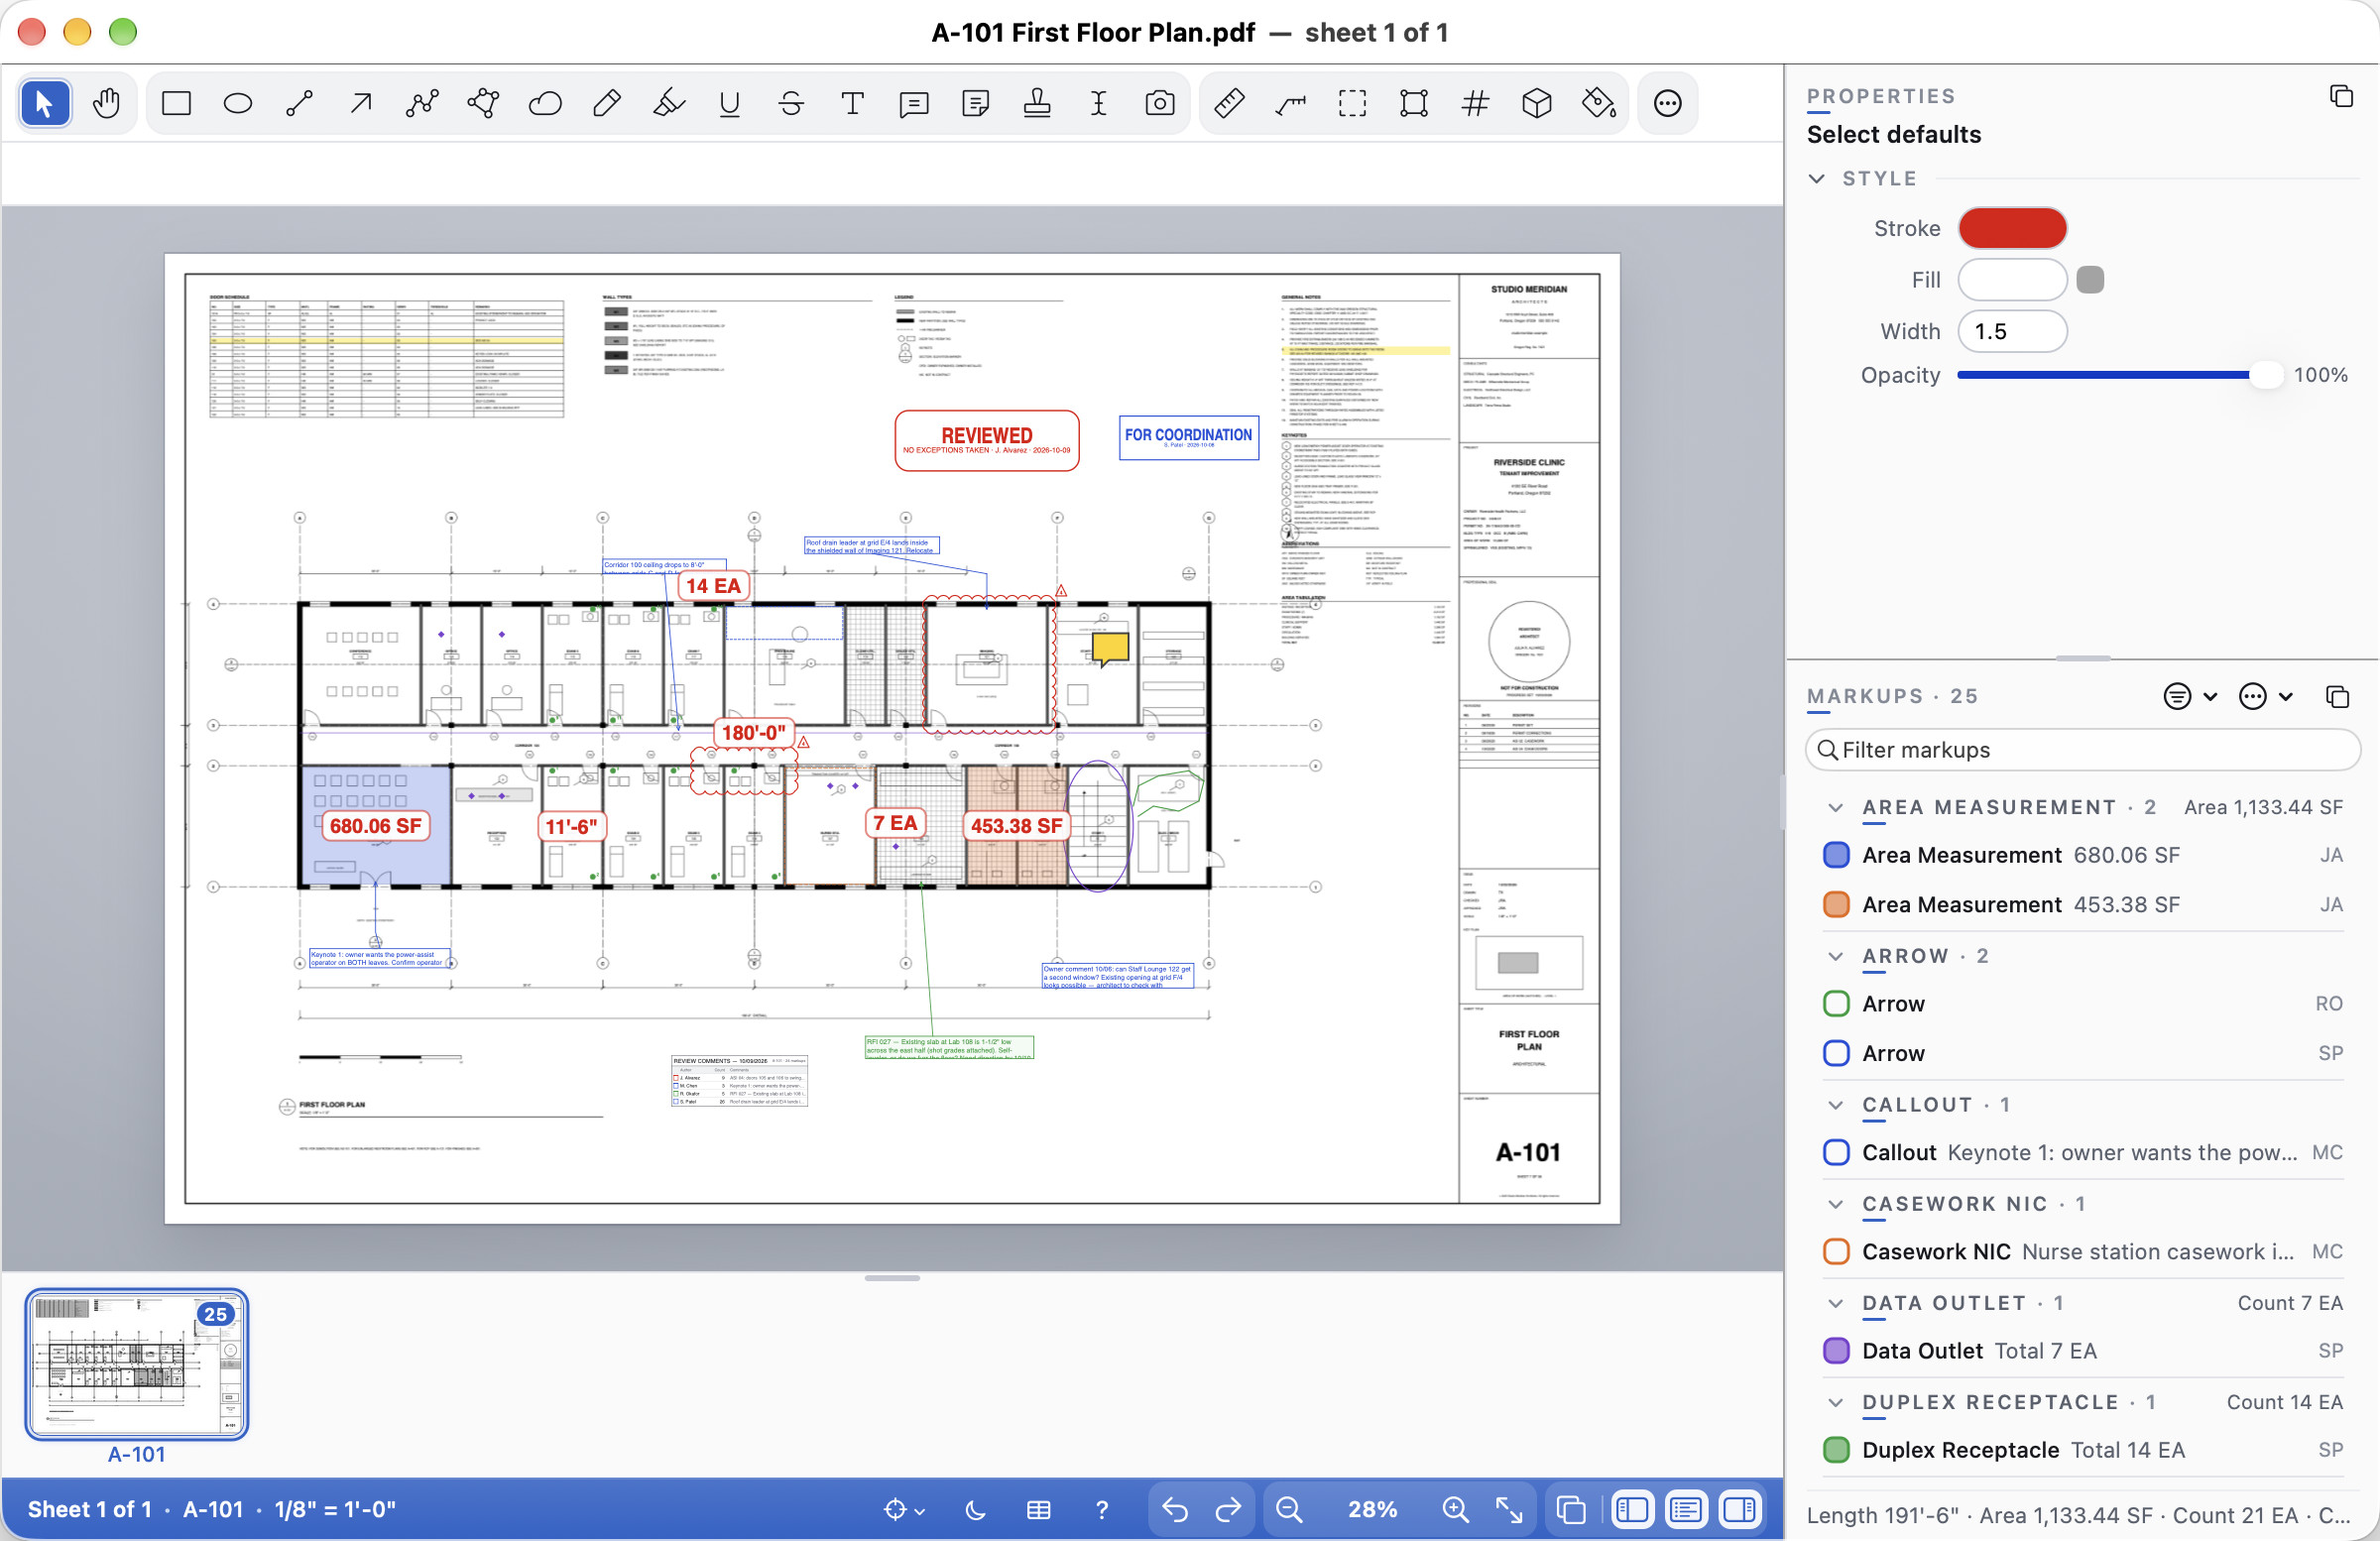
View ▸ Show Markups List (⌥⌘M; Ctrl+Alt+M) shows every markup in the document, under Properties: a swatch in its colours, the subject, then its measurement, comment and status, with the sheet and the author's initials at the right. Click a row to go to the markup and select it; double-click to edit its subject, comments and custom columns. View-only Cella PDF shows the list read-only. The pop-out button at the right of its caption (or ⌥⇧⌘M; Ctrl+Shift+Alt+M) floats the list in a panel of its own, for a second display, laid out as the Markups Table; see The window.
Sorting and grouping
The ⋯ menu sorts the list As Drawn, By Subject, By Sheet, By Author, By Date, By Status, By Revision or By Space. Sorted by subject, sheet, author, status, revision or space, the markups run in groups, each under a header with its name, its count and, when it holds measurements, its totals (AREA MEASUREMENT · 2 Area 1,133.44 SF). Click a header to fold its group away and again to open it. Click the count to select every markup in the group, for instance to restyle a whole subject at once. Turn Show Group Headers off for a plain sorted list.
A group of markups (a punch key) is one row with "Group of 3" under it; the totals and the CSV still count every markup.
Filtering and totals
Type in the filter field to show only the markups whose text matches; group names match too ("no author", "revision 3"). The line under the list totals everything listed (Length 191'-6" · Area 1,133.44 SF · Count 21 EA), so filter to total one subject or one sheet. The Filter button beside the field narrows the list by Status, Author, Sheet (pick several, or This Sheet) or Layer (or No layer), to Measurements Only, or to what changed since a time. The caption then reads "12 of 40", and Clear Filters shows everything again.
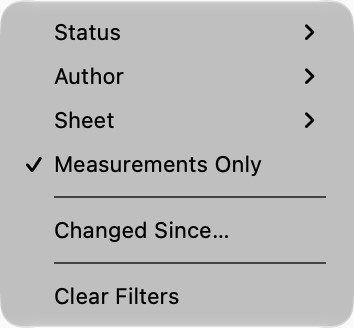
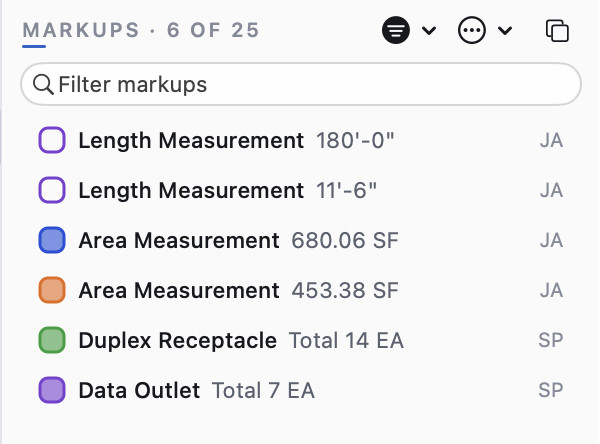
Views. Once the list is sorted, grouped and filtered the way you like, ⋯ ▸ Views ▸ Save View… keeps that arrangement under a name: the sort and grouping, the filter, Changed Since, Show Modified By, Whole Set and the columns. Pick it from ⋯ ▸ Views later, in any document, to put the list back that way. The view in use has a tick. Three come with Cella PDF: Default, Review (grouped by status, with the author and date) and Take-off (only the measurements, grouped by subject with their totals). Save over a view, or a built-in, with Update “Review”. Reset puts a built-in back, and Manage Views… renames and deletes your own. Views travel in profiles, so an office can hand everyone the same ones.
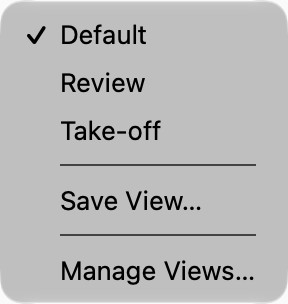
With the keyboard
Return or Enter shows the selected markups on the drawing. Delete (Del) deletes them (asking first when there are several). Jump between groups with (⌘↑ and ⌘↓; Ctrl+Up and Ctrl+Down); ↑ and ↓ step over the headers. On Windows and Linux F2 edits a row.
The whole set
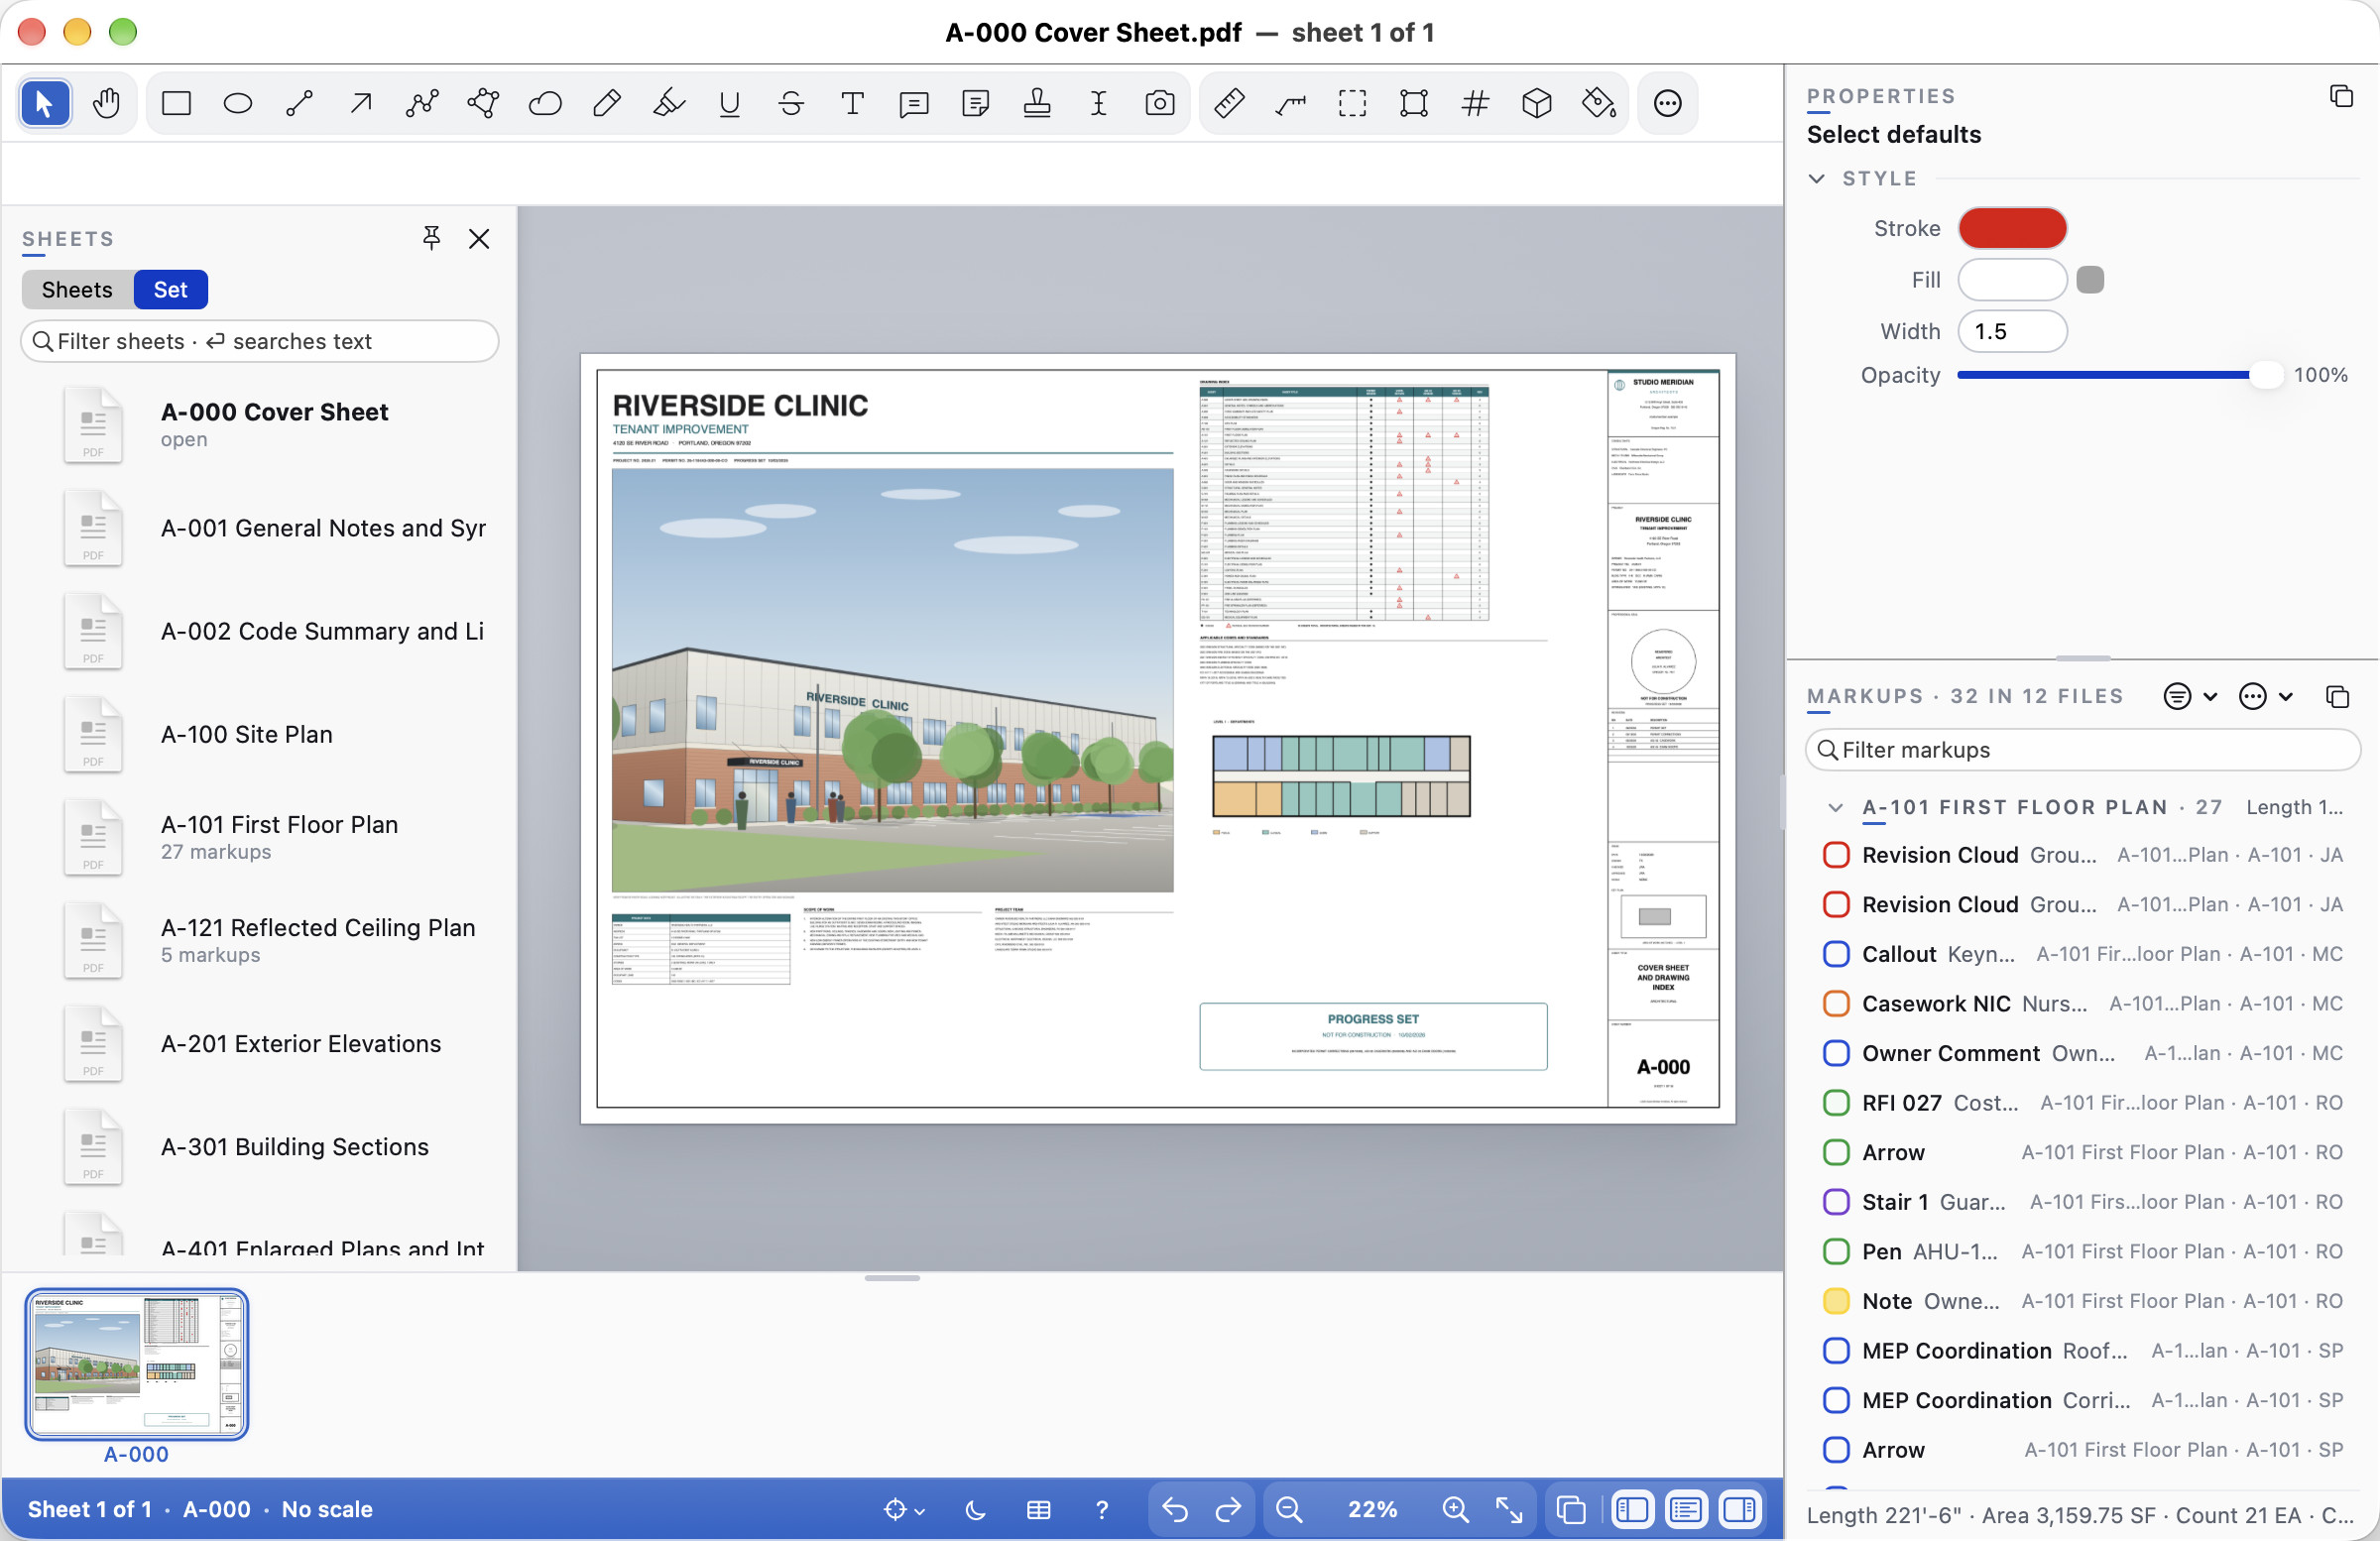
With a folder set open, the ⋯ menu starts with This File and Whole Set. Whole Set lists every file's markups at once, with the file name at the right of each row. Sort By Sheet (By File) to group them by file; the totals, group totals and the CSV run across the whole set, each measurement in its own file's scale. Double-click a markup of another file to open that file and go to it.
Summary PDF, CSV and Excel
- ⋯ ▸ Export CSV… (⇧⌘E; no key on Windows and Linux): every column, grouped as the list is, with subtotals and totals. In Whole Set the CSV starts with a File column.
- ⋯ ▸ Export to Excel… (also File ▸ Export ▸ Markups to Excel…, and File ▸ Set ▸ Export Set to Excel… for the whole set) saves an Excel workbook (
.xlsx) of the markups listed, after the filter, with the CSV's columns. Unlike the CSV, its cells are typed. Dates are dates; lengths, areas, volumes and counts get number columns of their own (Length (LF), Area (SF), Volume (CY), Count (EA)); number and formula columns are numbers in their units; and checkboxes are TRUE or FALSE. Excel can then sort, filter and add them up. The header row stays in view as you scroll, the columns are sized to their contents, and a last Totals row sums the number columns with formulas. When the list is grouped, the first column names each markup's group. One worksheet per group in the save dialog adds a worksheet for each group (each subject, sheet, author, status, revision or space) after an All markups sheet, each with its own totals. In Whole Set the workbook starts with a File column. Numbers and LibreOffice open it too. - File ▸ Export ▸ Markups to DXF… (File ▸ Export ▸ Export Markups to DXF… on Windows and Linux) hands the markups to a CAD program as a
.dxfdrawing. Choose This Sheet or Every Sheet (one file per sheet, named after the sheet) and whether each Cella PDF layer or each subject becomes a CAD layer. The drawing is in the sheet's real units from its scale, with its origin at the sheet's lower-left corner, so a wall measured 10'-0" is 10 feet long in AutoCAD. A sheet with no scale is written in points, and Cella PDF says so. Lines, polylines, clouds, rectangles and ellipses keep their shapes (arcs as arcs). Text boxes and callouts become text with their leaders, measurements become their lines with their values as text, counts a point and a number at each spot, and stamps and snapshots a box with their name. Colours, line weights and dashes come along; hidden and flattened markups stay out. Each piece carries the markup's id, subject and custom columns as Cella PDF data, and the Spaces come in as outlines on a layer of their own. - File ▸ Export ▸ Markups Summary PDF… (File ▸ Export ▸ Markups Summary PDF… on Windows and Linux) makes a report with a picture of each markup and its details, comments, custom columns and replies. File ▸ Set ▸ Export Set Summary PDF… does one for the whole set, with a contents page.
- File ▸ Export ▸ Site Report… makes a report for the contractor of your site items with their photos, location and status; see Site Report.
History and Changed Since
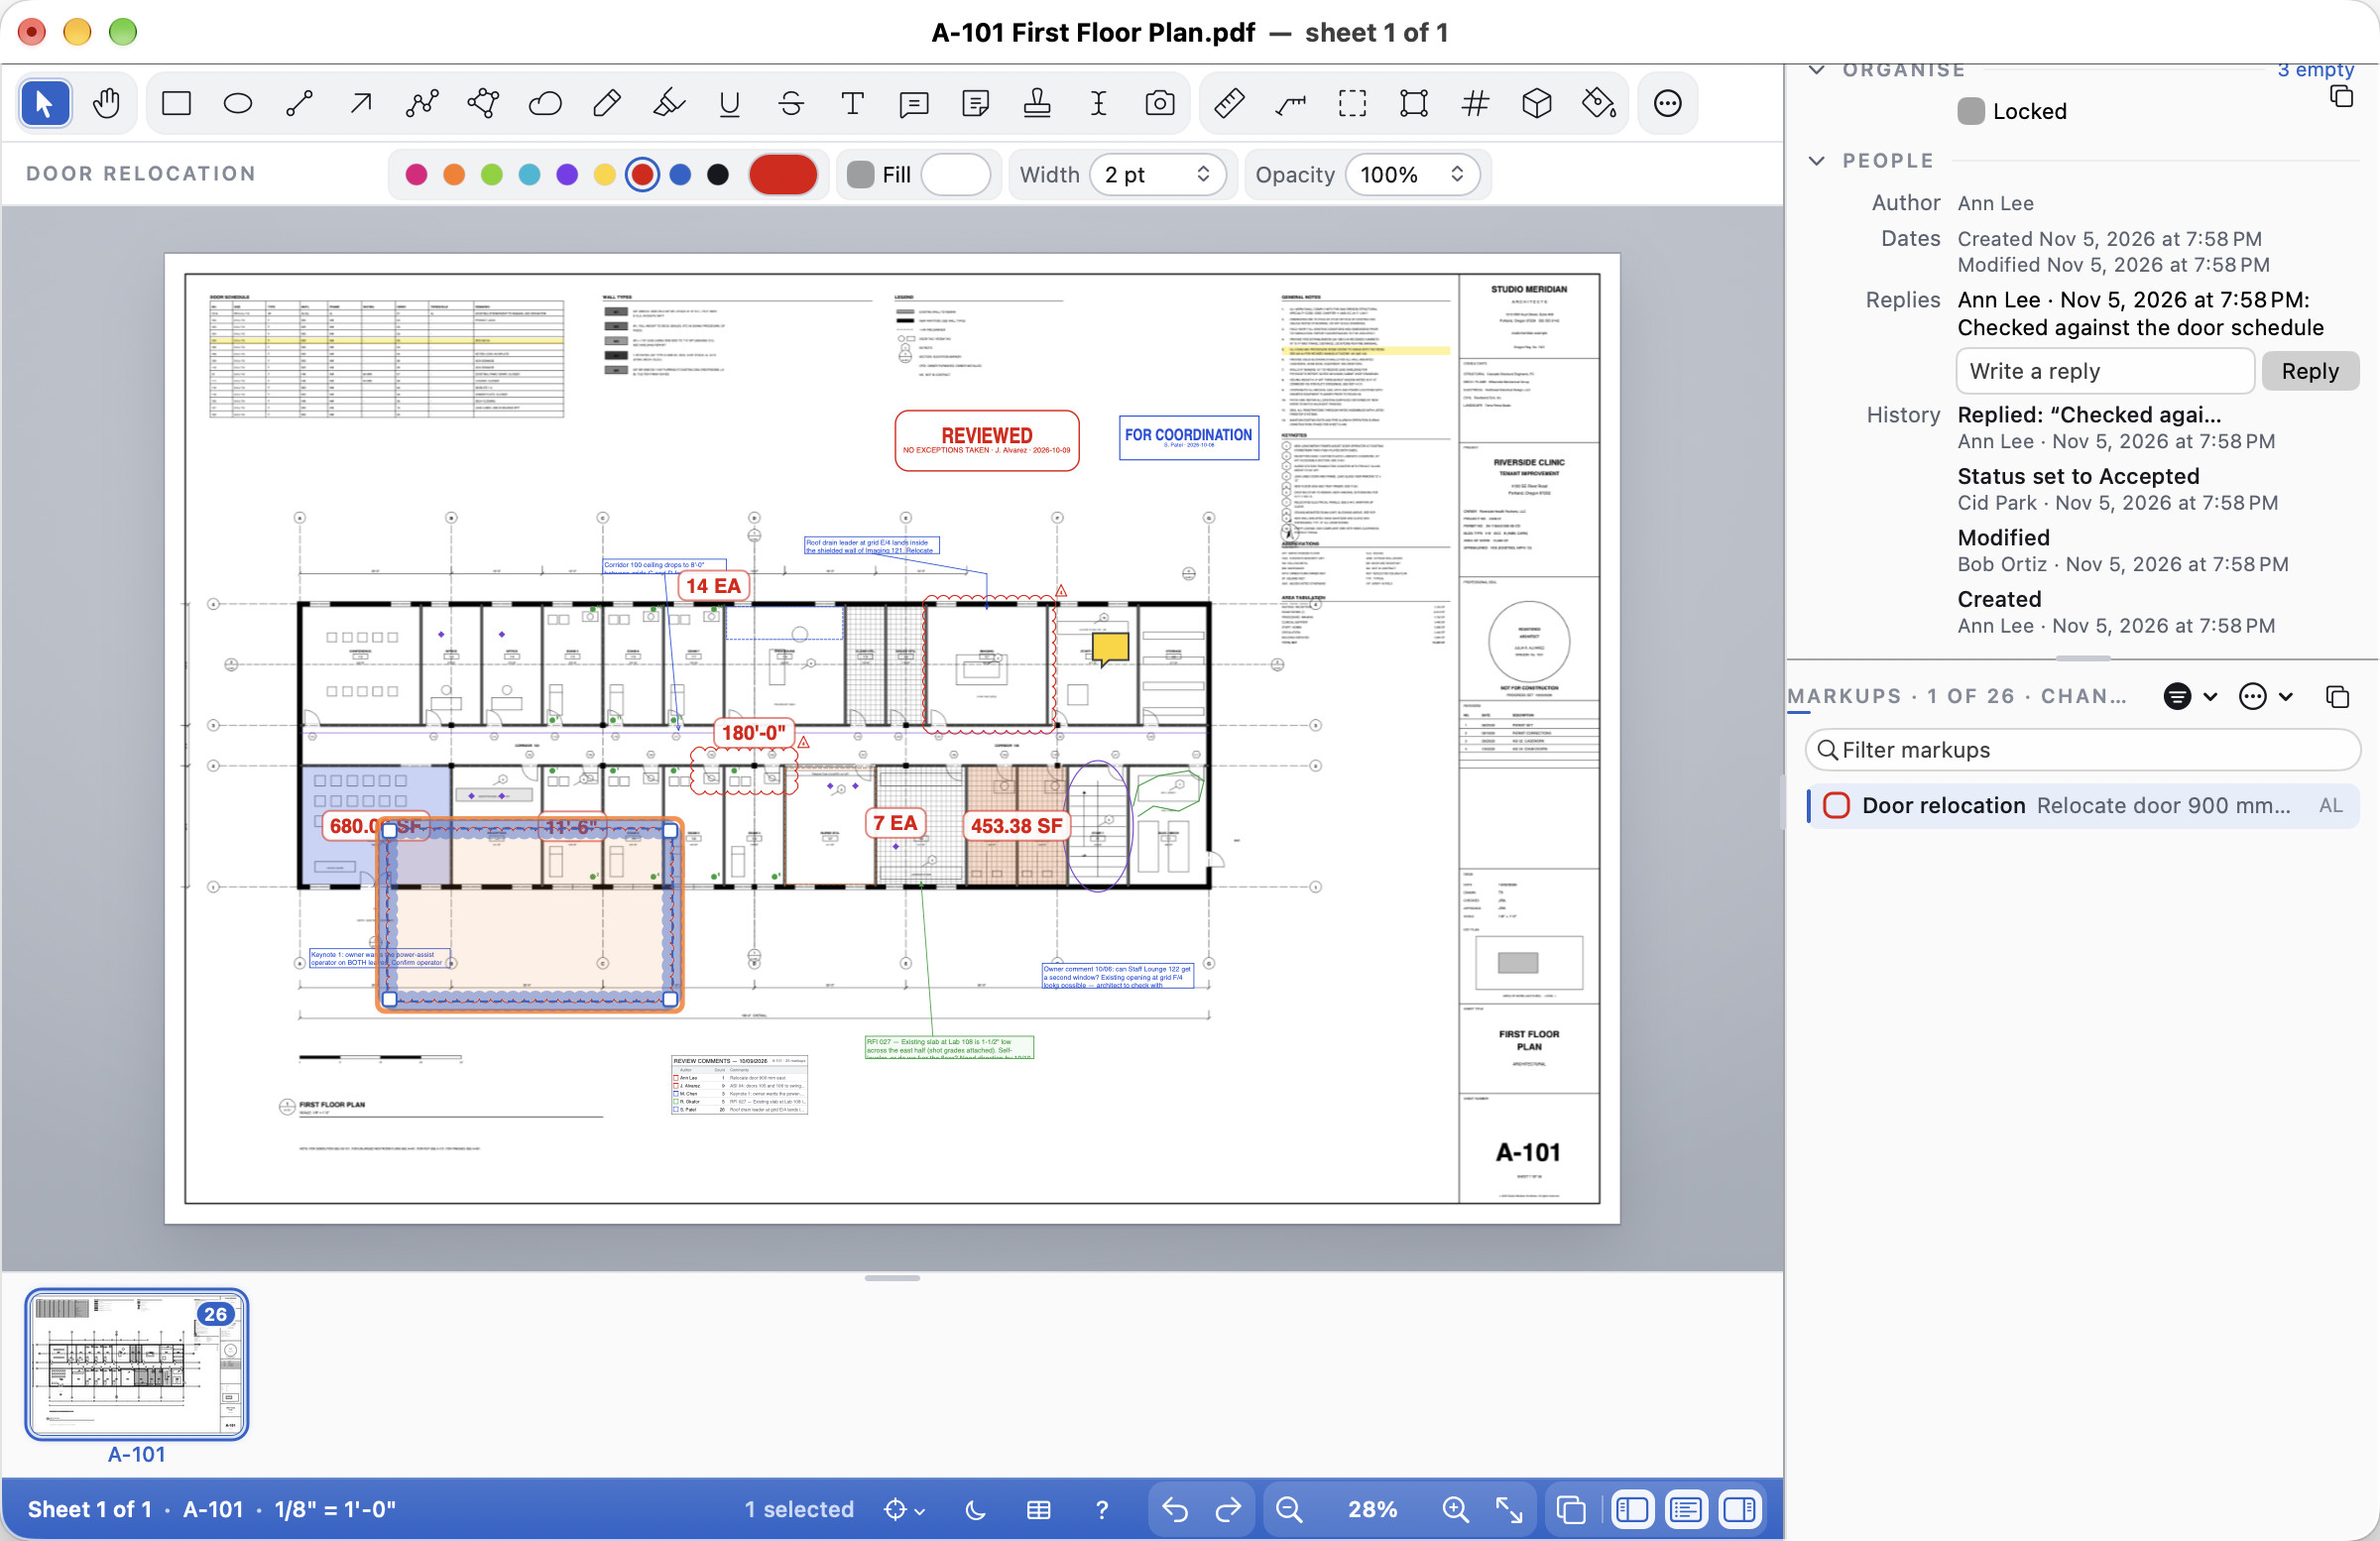
Select a markup and Properties ▸ History tells its story: who created it, who changed it and when, each status it went through ("Status set to Accepted"), who replied, and when it moved to another sheet. Cella PDF keeps this in the PDF itself (up to 50 events per markup), so it travels with the file and needs no server. On a synced document the server's record is added (marked ⇅). Markups from other programs show what their own dates and replies say.
In the ⋯ menu, Show Modified By adds who last changed each markup to its row, and a Modified By column to the CSV. Changed Since… lists only the markups created or changed after a date and time, or since the last revision. Markups ▸ Changes ▸ Show Changes Since… does the same and outlines every changed markup on the sheet in orange, so a reviewer sees at a glance what is new since the last issue. Markups ▸ Changes ▸ Clear Changes takes the outlines away.
The Markups Table
View ▸ Markups Table (⌃⌘M on the Mac), or the table button in the status band, opens every markup as a wide table along the bottom of the window: a column each for Subject, Page Label, Comments, Author, Date, Status, Colour, Layer and Space, then your custom columns. Drag the line at its top to make it taller or shorter (double-click it for the usual height); the × in its bar or the same menu item hides it. Popping the Markups List out puts this table in its panel, so a second display can hold the whole take-off.
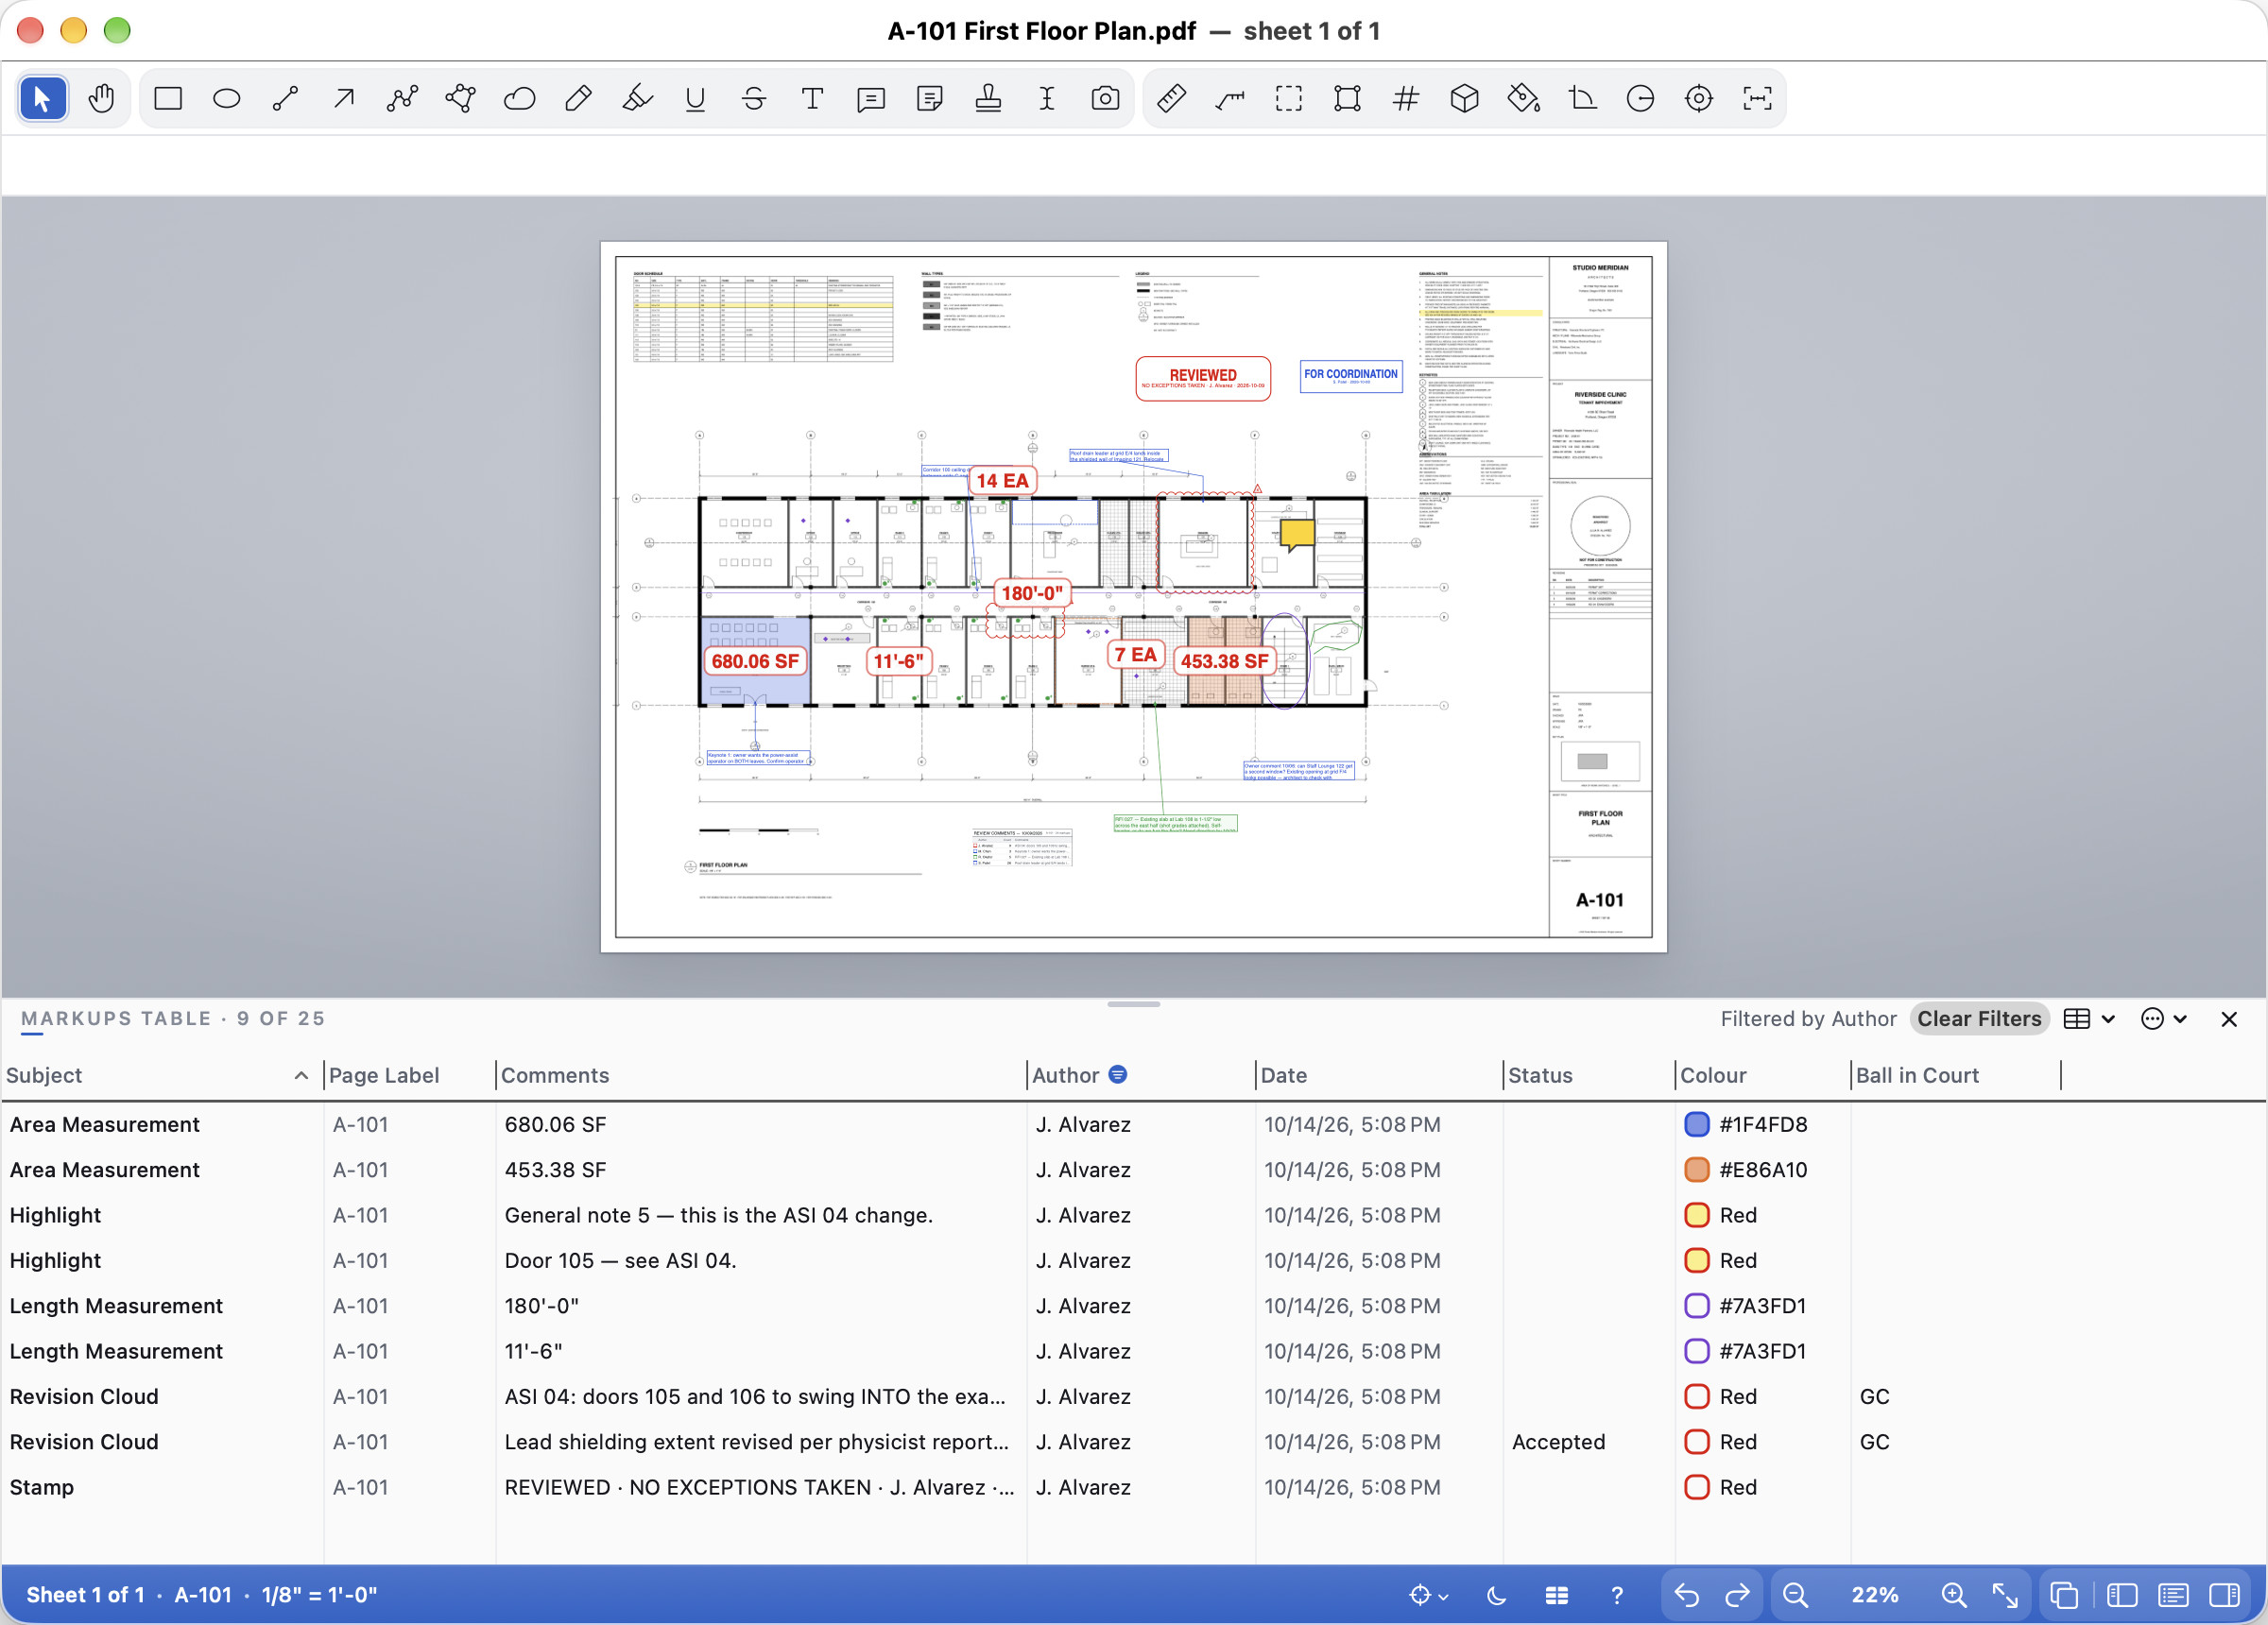
- Sort. Click a column's heading to sort by it, again to sort the other way, and a third time to go back to the order the markups were drawn in. Sheets sort the way you read them (A-2 before A-10); markups that tie stay in drawing order.
- Filter. Control-click (or right-click) a heading and choose Filter “Status”…: type in the box to keep only the rows whose cell contains the text, or pick one of the column's values. A filtered heading shows a small funnel, and the bar above the table says which columns are filtered, with Clear Filters beside it. The Markups List's Filter menu (status, author, sheet, measurements only) and Changed Since… narrow the table as well.
- Columns. Drag a heading's edge to widen it and drag the heading itself to move the column. Control-click a heading to hide it, or to tick the columns you want; Reset Columns brings back every column at its usual width. The table button at the top right of the table has the same choices.
- Select and edit. Click a row to go to the markup and select it; Shift- or ⌘-click to select several. Selecting markups on the drawing selects their rows. Double-click a Comments cell to type a new comment (Return saves, Esc puts it back) and a Status cell to choose a status for that row, or for every selected row. Delete deletes the selected markups. Editing needs a key or the trial.
- Views. The table's columns, widths, sort and filters are saved with the list's views (⋯ ▸ Views ▸ Save View…), so a "Review" view can bring back a table sorted by Status with only open items showing. Views saved before the table existed leave the table as it is.
On Windows and Linux, View ▸ Markups Table is Ctrl+Shift+M. The table opens between the drawing and the Sheets strip; drag the bar above it to make it taller or shorter. Each column has its own filter field (on Windows under the headings, on Linux above them): type to keep only the rows whose cell contains the text. Right-click a heading to sort, filter, hide or show columns, clear the filters or reset the columns. Cells are not edited in place: double-click a row (or press F2 on Windows) to edit its subject, comments and custom columns in the list's dialog.
Sets and documents
Folder sets
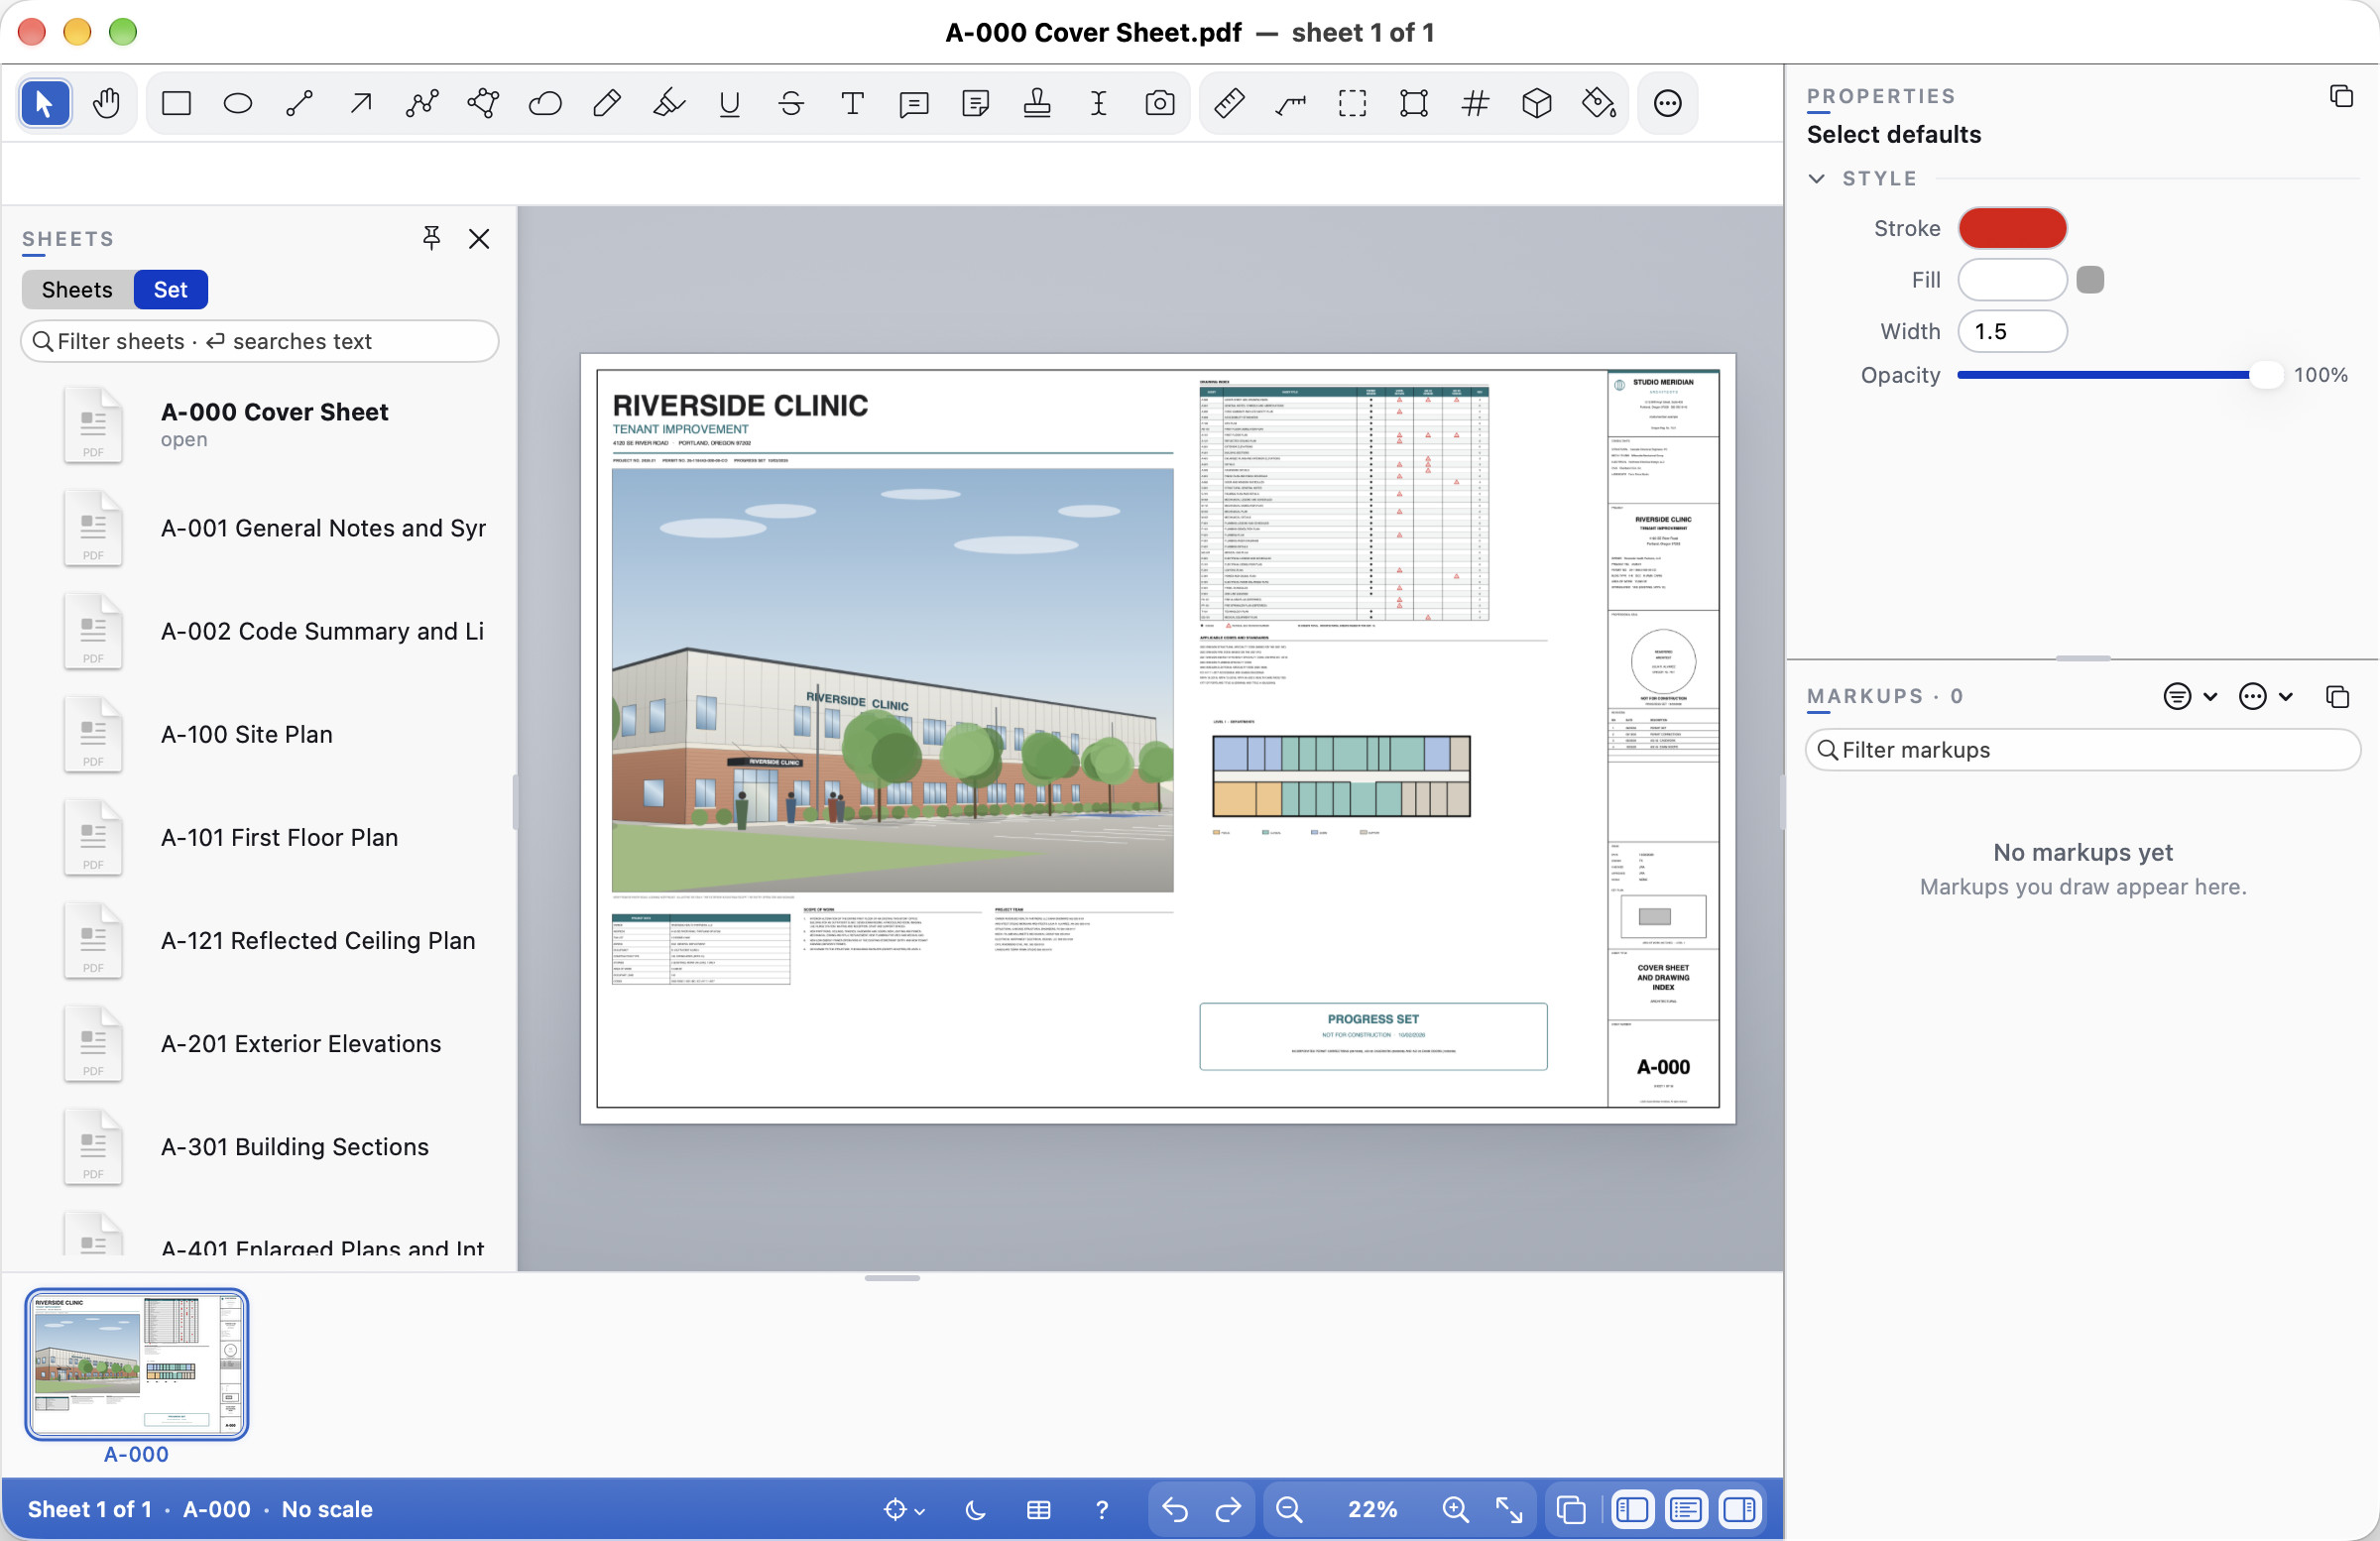
File ▸ Open Folder as Set… (⇧⌘O; Ctrl+Shift+O) opens a folder of PDFs as a set. The Set tab of the sidebar lists the files with their markup counts (kept in the .cella folder inside the set's folder, so they show before any file is opened). Click a file to open it in the same window; a file with unsaved changes is saved first.
File ▸ Set ▸ works on every file of the set, with a progress sheet you can cancel. The open file is saved first if it has changes.
- Print Set… and Export Transmittal…: see Printing and Transmittals.
- Export Set Summary PDF…: one report with a contents page and a section per file.
- Export Set CSV…: the Whole Set list as CSV, with a File column.
- Flatten Set…: flattened copies of every file into another folder; your files stay editable.
- Set Status for Selection…: select markups in the Whole Set list (across files), then set their status in one go; each file is saved, nothing else in it changes.
- Apply Columns to Set…: gives every file this file's custom columns (matched by name, so values a file already has stay put).
- Compare Set with Folder…: compares each file with the file of the same name in the other issue's folder (revision suffixes such as
_R2ignored) and clouds the changes on layer Compare.
File ▸ Set ▸ Rename Files from Sheets… names each PDF of the set after its first sheet: its number and title from the Sheet Index, Detect Sheet Numbers or the sheet names. Type a pattern with {number}, {title}, {rev} (the revision from the file's revision schedule, if it has one) and {file} (the name now). The default is {number} - {title}, and characters a file name can't hold become "-". The preview lists every file's current and new name before anything moves. Names in red would collide (two sheets with the same number, or a name already in the folder), and those files stay as they are. Rename moves the files with everything Cella PDF keeps beside them (markup logs, backups, search indexes, sync links) and keeps the Set list's order. An open file stays open under its new name. File ▸ Set ▸ Undo Rename puts the last rename's names back.
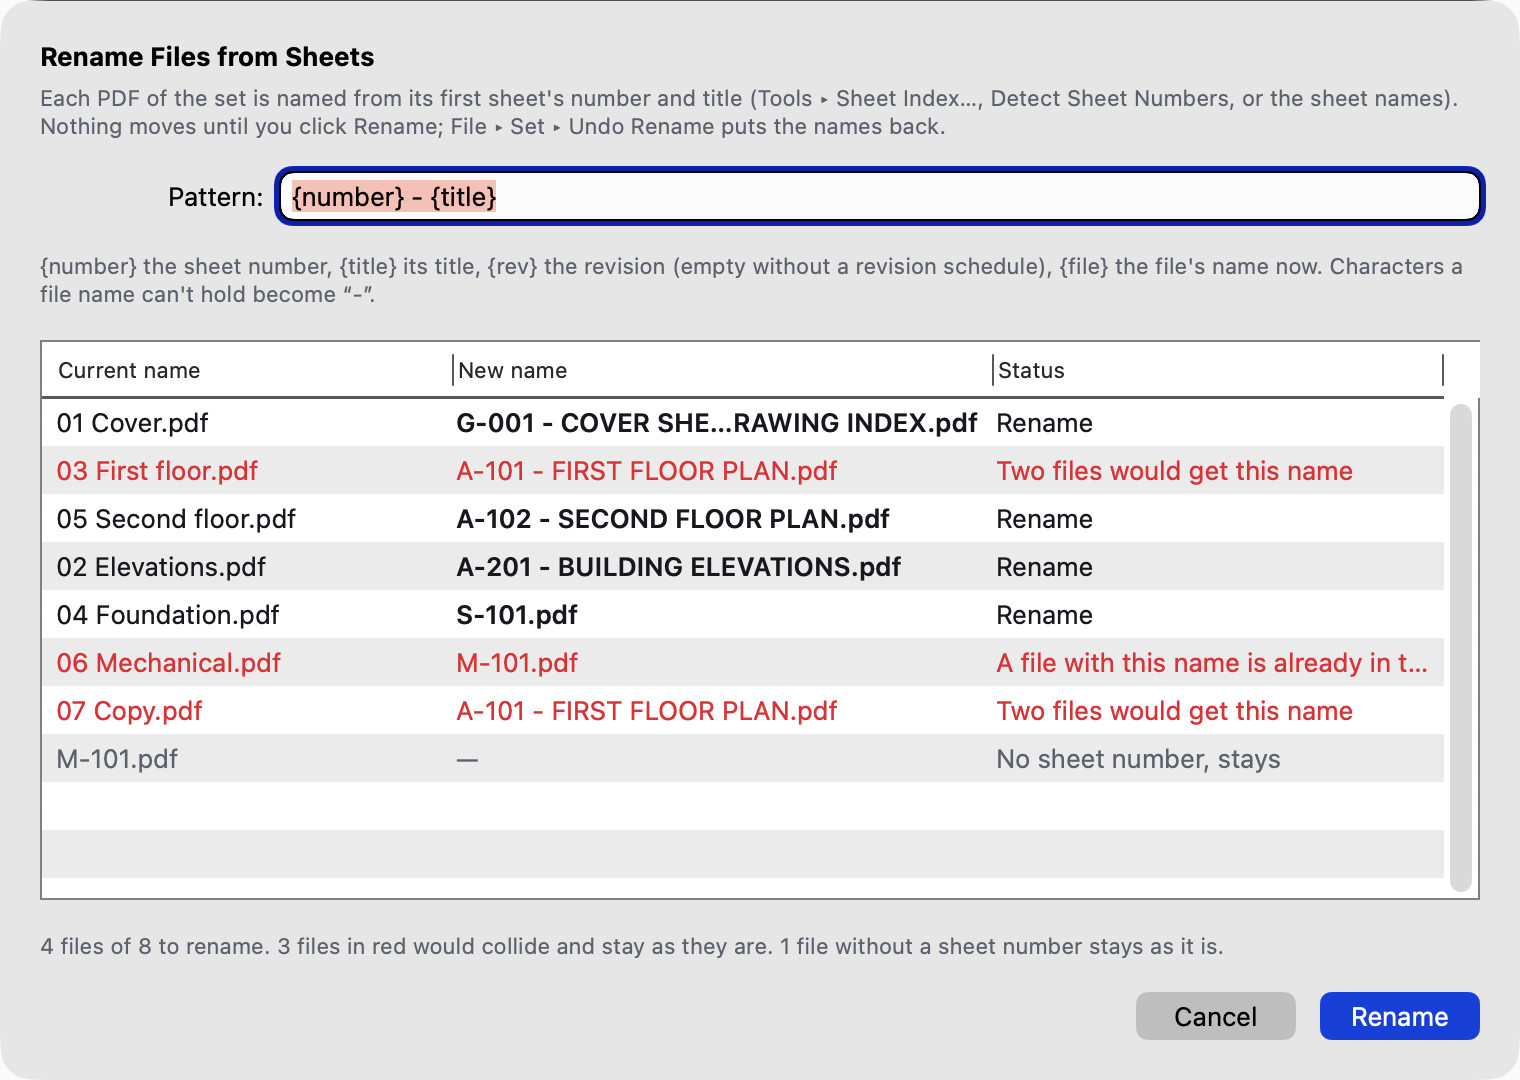
Sheet index
Many sets list their drawings in a table on the cover ("SHEET NO. / SHEET TITLE / REV"). Tools ▸ Sheet Index… reads that table from the first sheets of the open file and shows each row with the sheet it matches by number (in a folder set: any file of the set). Double-click a misread number or title to fix it, and untick rows to leave out (Cella PDF can take another table on the sheet, such as a wall-type schedule, for an index: untick its rows). Then click Apply. Each matched sheet is named by its number and keeps its title, which the Sheets list, the strip and the status band show. Tick Move the sheets into index order to reorder them (in a set, the Set list follows the index). The report lists index rows with no sheet and sheets the index doesn't list. Save to write the numbers and titles into the PDF. In a set, each changed file is saved for you.
Slip-sheeting
When a new issue arrives, slip-sheet it in and keep every markup:
- File ▸ Slip-Sheet from Newer Issue… replaces sheets with the newer PDF's, matched by sheet number, keeping every markup in place. A one-page PDF with no match offers to replace the sheet on screen.
- File ▸ Slip-Sheet Set from Folder… does it for a whole folder set, pairing each file with the file of the same name in the folder you choose (revision suffixes like
_R2orrev 3ignored), and reports what it replaced and skipped.
Page operations
The Sheets menu and a right-click on a thumbnail in the strip or a row of the Sheets list work on the selected sheets, or on the sheet on screen. To select several, in the strip or the list:
- Shift-click selects every sheet from the one you clicked last to this one.
- ⌘-click (Mac) or Ctrl-click (Windows and Linux) adds a sheet or takes it away, so the sheets needn't be next to each other.
- ⌘A (Ctrl+A) selects every sheet while the strip or the list has the keyboard; Shift with the arrow keys, Home or End stretches the selection.
- Esc, or a plain click, goes back to one sheet.
Selected sheets are tinted; the sheet on screen keeps its ring in the strip and its accent bar in the list. Right-click one of the selected sheets and the menu counts them ("Delete 5 Sheets…"); right-click another sheet and the menu works on that sheet alone. Delete (⌫ on the Mac) asks to delete the selected sheets; a document always keeps at least one sheet. Drag the selected sheets along the strip or the list to move them all to the gap the accent marker shows, in their order, even when they were scattered; they stay selected in their new place. Each of the commands below is one step of Undo, however many sheets it takes.
- Rotate Right and Rotate Left (⌘R, ⌘L; Ctrl+R, Ctrl+L) turn sheets a quarter turn. Markups and measurements turn with the drawing and keep their values; text you add to a turned sheet reads upright.
- Move Sheet Up / Down, Move Sheet To…, or drag thumbnails in the strip or rows in the Sheets list to reorder.
- Insert Pages… adds every page of another PDF after the selected sheet, with its markups, scales and links.
- Extract Sheets… saves the selected sheets as a new PDF with their markups, scales, custom columns and bookmarks; this document stays as it is.
- Insert Blank Page… adds empty sheets; see Blank pages below.
- Insert Image Pages… (also in Document) makes a sheet of each picture you choose; see Blank pages below.
- Delete Sheet… removes sheets and their markups after asking.
Every one of these is undone with Undo (⌘Z; Ctrl+Z) until you close the document, even after saving, within Undo's last 300 steps. On a document connected to a sync project they go to everyone in the project as you make them, and so does their undo: Undo turns, moves, deletes or brings the sheet back for everyone; see Sharing and sync. Blank pages, cropping and resizing travel the same way: everyone gets the blank sheet, the crop or the new paper size, with the sheet's markups, scale, links and Spaces moved with its drawing, and undo takes it back for everyone. Cropping and resizing need an up-to-date Atrium; with an older one a synced document refuses them until you disconnect it (Sync ▸ Disconnect Document). Extract, Split Document and Export Sheets as Images work either way.
Combining files
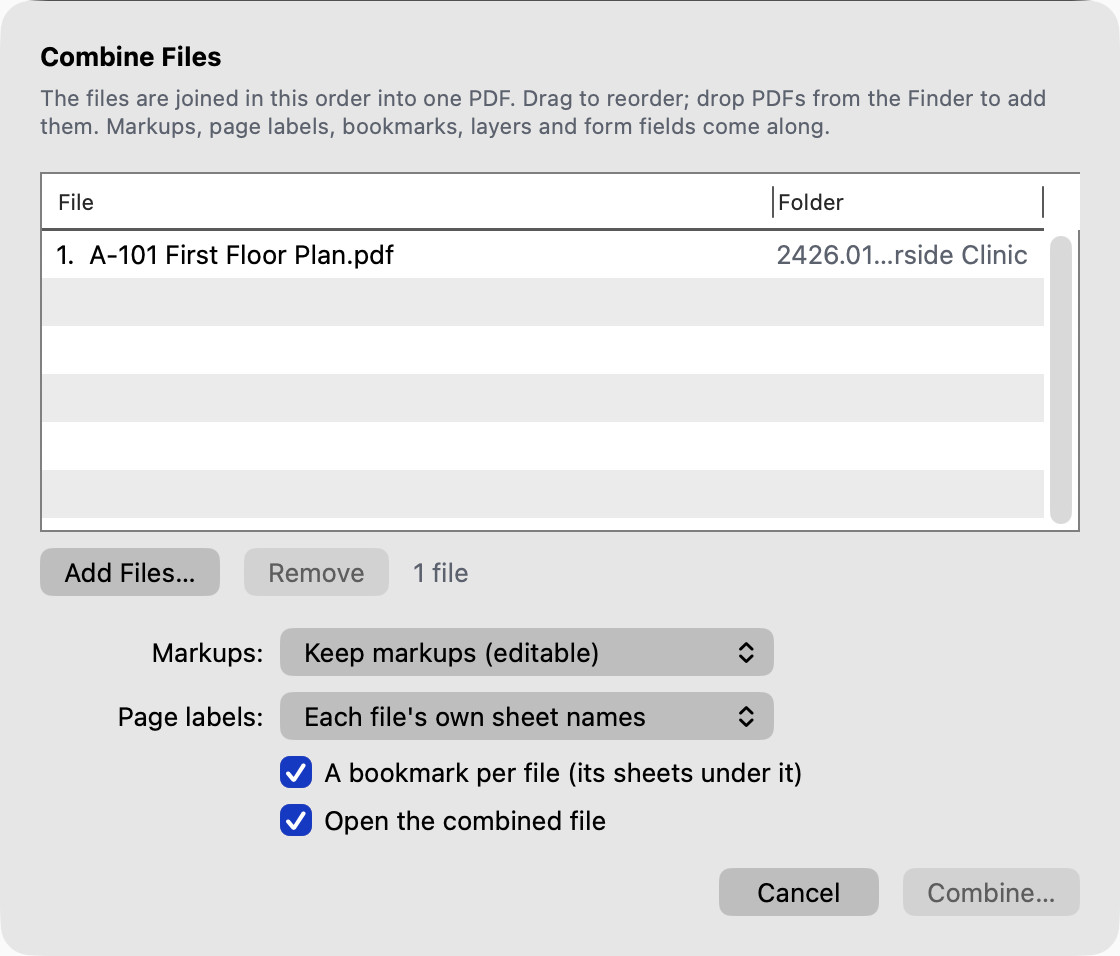
File ▸ File Tools ▸ Combine Files… joins several PDFs into one, in the order you set. Add files with Add Files…, drop PDFs onto the list, drag rows to reorder them and Remove the ones you don't want. With a folder set open, Combine the Set lists every file of the set in order.
To use documents you already have open, click Add Open Document and pick one, or All Open Documents. The menu lists the PDFs open in this window's tabs and in your other windows; a document already in the list is ticked. Documents go in after the rows you've selected, or at the end. A new document that has never been saved isn't listed: save it first.
Choose:
- Markups: keep them as markups you can still edit, or flatten them into the sheets.
- Page labels: each file's own sheet names (from the file, or read from each title block), or names made from the file names.
- A bookmark per file, with the file's own bookmarks under it, or a bookmark per sheet when it has none.
Combining uses each file as it is saved. If a document in the list is open with changes you haven't saved, Combine… asks first: Save and Combine saves it and includes the changes, Combine As Saved leaves them out.
Combine… asks where to save ("A-101 combined.pdf") and opens the new file. Every markup comes along exactly as it was, data other apps keep on it included. Layers with the same name become one layer, and form fields with the same name are renamed ("Date_2") so both keep their values. The files themselves are never changed.
Reducing file size
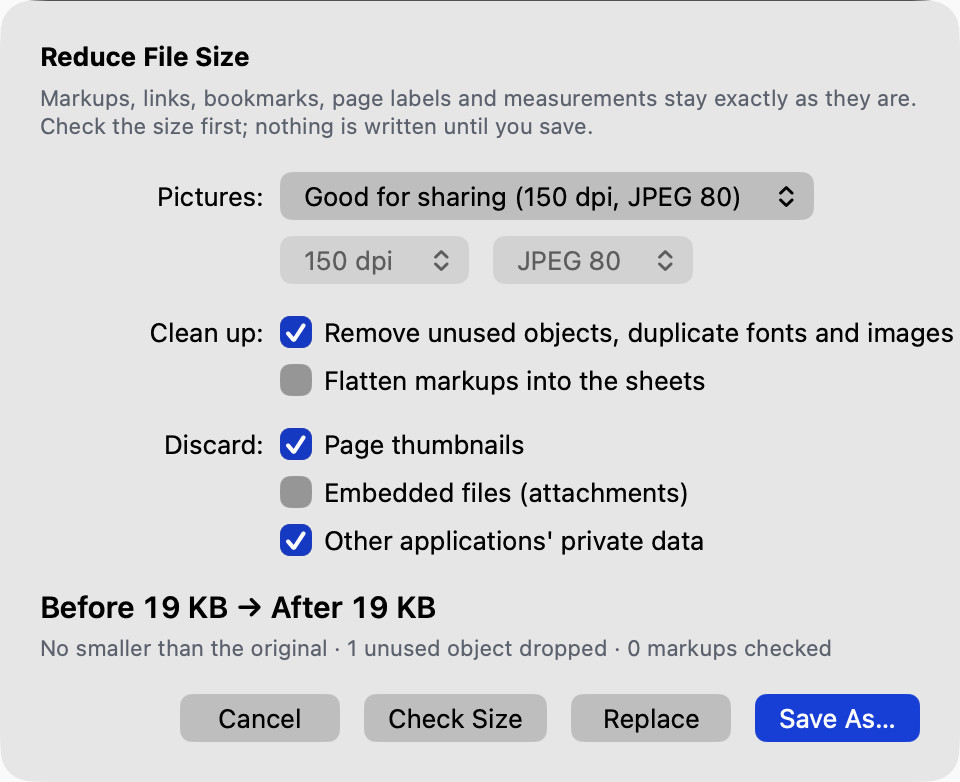
File ▸ File Tools ▸ Reduce File Size… makes a smaller copy of the document:
- Pictures: Good for sharing (150 dpi, JPEG 80), Small for email (100 dpi, JPEG 65), Custom, or Keep as they are. Scans and photos drawn finer than that, measured by how large they appear on the sheet, are averaged down and stored as JPEG (grey scans stay grey). A scanned set of 90 MB typically comes down to a tenth, and the summary says how much ("31 pictures recompressed: 92.4 MB → 11.8 MB"). Black-and-white (1-bit) scans are stored the way fax machines store them (CCITT Group 4), at their own resolution, or at 200 dpi when they were scanned at more than 400 dpi. They never go below 200 dpi, so linework and small lettering stay legible ("4 black-and-white scans recompressed: 9.6 MB → 1.2 MB"). Drawings made of lines are not pictures and are never touched, nor are pictures with transparency, pictures under 150 KB and JBIG2 scans.
- Clean up stores fonts and pictures that appear several times once, and drops what earlier edits left behind. Flatten markups draws them into the sheets.
- Discard page thumbnails, attached files and other programs' private data (Illustrator keeps a second copy of its artwork in exported PDFs). Cella PDF's own data always stays.
Press Check Size to see "Before 48.2 MB → After 9.1 MB" before anything is written. Then choose Save As… for a copy ("A-101 reduced.pdf") or Replace to make this file the smaller one (a copy of the original is kept in the .cella folder beside it). Markups, links, bookmarks, page labels and measurements stay exactly as they were. Cella PDF reads the smaller file back and refuses to write it if anything is missing.
Reduce File Size never makes a file larger. When the file can't be made any smaller (a drawing made only of lines, already stored compactly), the result says can't be made smaller and the file is kept as it is; there is nothing to save.
Rasterizing heavy sheets
Some sheets are so dense that every viewer is slow to show them: presentation elevations with surface and texture fills, renderings exported as thousands of hatch lines and fills. Each time the sheet is shown or zoomed, the viewer draws every line and fill again. File ▸ File Tools ▸ Rasterize Sheets… turns the drawing of such sheets into a picture, so they open and pan at once in Cella PDF and in any other viewer.
- Sheets: this sheet, the sheets selected in the Sheets panel, all sheets, or sheet numbers you type (
1-2, 5). Find Heavy Sheets picks the sheets with very dense drawing for you. - Area: the Whole sheet, or A region I drag: press Draw Region… and drag a rectangle around the elevation on the sheet. Only that area becomes a picture; the title block, notes and everything else outside it stay as they are. The same area is used on each chosen sheet.
- Resolution: 150, 300 or 600 dpi; 300 dpi is the default and keeps lines crisp when zoomed in. The dialog says how large the picture will be ("A4.0 becomes 10,800 × 7,200 pixels") and says so when it would be too large; choose a lower resolution or a smaller area then.
- Quality: Sharp lines stores the picture without loss (photographs on the sheet as high-quality JPEG); Smaller file also lets areas of many colours be JPEG. Blank paper takes no space, black-and-white linework is stored the way fax machines store it, and sheets of a few colours as a picture of those colours, so a rasterized sheet is usually far smaller than a PNG exported and placed back in the drawing.
- Result: Save a rasterized copy (the default: "A4.0 rasterized.pdf", this document stays as it is) or Replace the sheets in this document. Replacing is one step: Edit ▸ Undo brings the drawing back.
The text of the sheet stays under the picture, so you can still search it and select it. Markups stay live on top, and links, bookmarks, sheet names, scales and viewports stay as they were. Layers inside the rasterized area are merged as they are shown when you rasterize: turn layers on or off first.
When a sheet takes very long to draw, Cella PDF says once in the status bar: "This sheet is slow to draw. Rasterize Sheets… can speed it up." Click it for Rasterize Sheets… or Don't Show Again.
On Windows and Linux the menu and the dialog are the same; the copy is shown in Explorer or Files.
Headers and footers
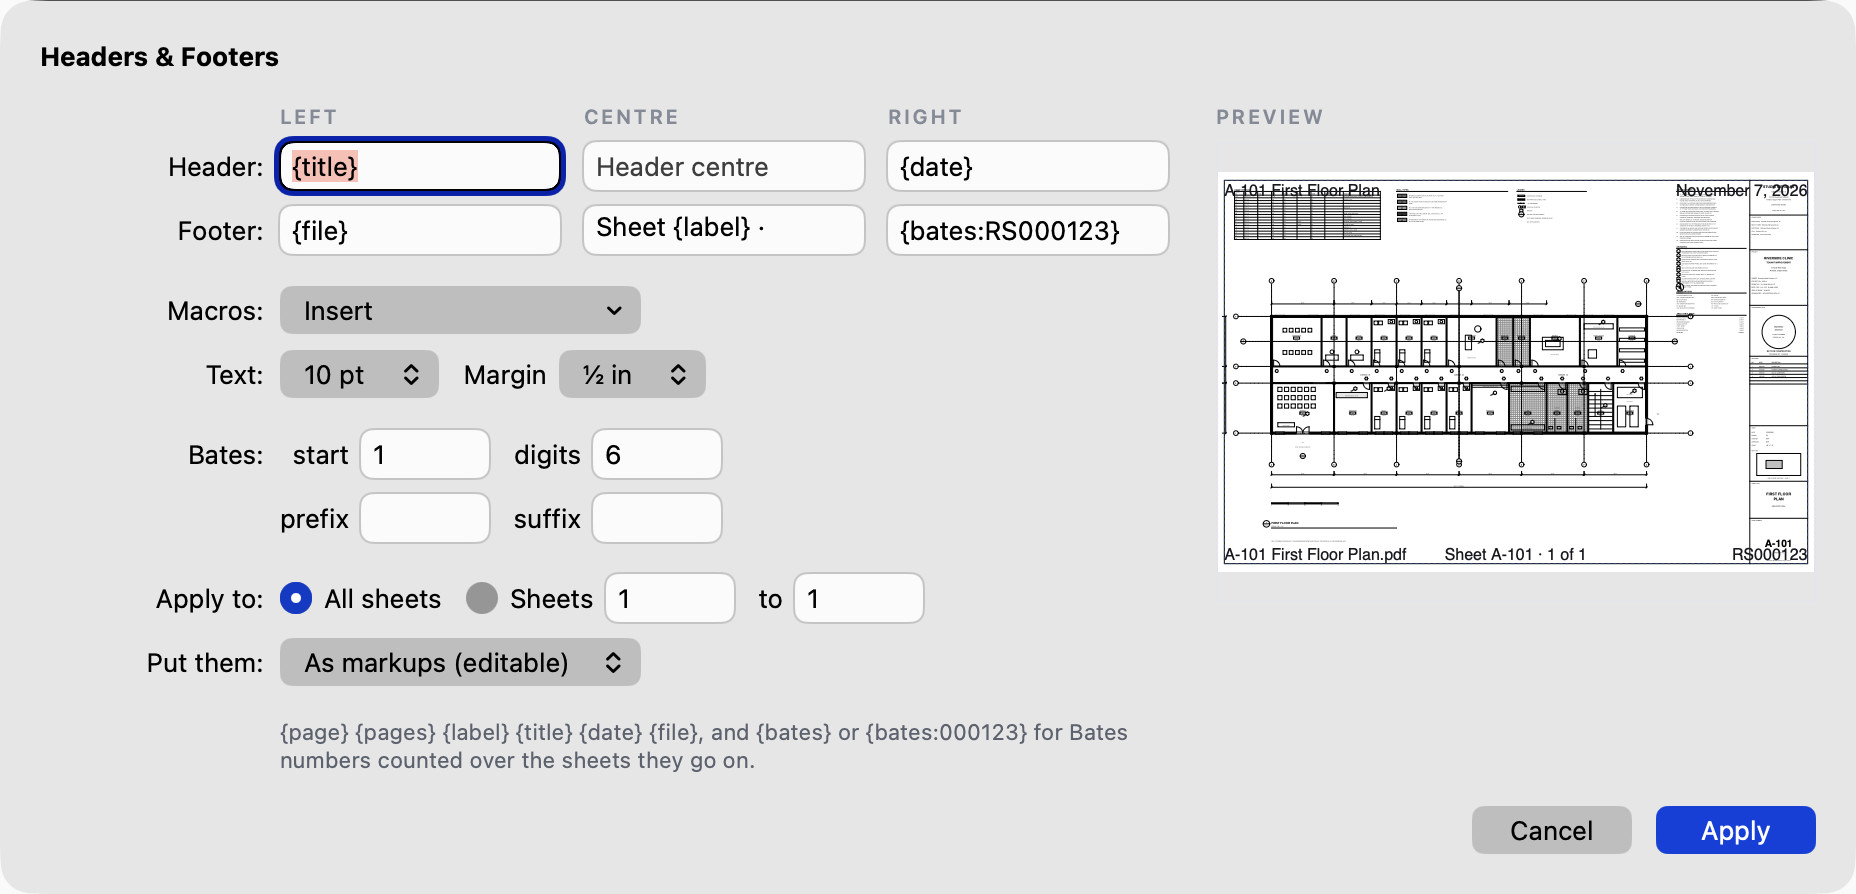
Document ▸ Headers & Footers… puts text at the top and bottom of every sheet, or of a range of sheets: left, centre and right in the header and in the footer. Type text and add these from Insert:
| Macro | Becomes |
|---|---|
{page}, {pages} | the sheet's number in the document, the number of sheets |
{label} | the sheet's name (A-101), else its number |
{title}, {file} | the document's title (else its file name), the file name |
{date} | today's date |
{bates}, {bates:ABC000123} | a Bates number: from the Bates start, digits, prefix and suffix fields, or the ones written in (ABC, then 000123 counting up from 123 with six digits) |
Bates numbers count on from sheet to sheet. Choose the text size and the margin; the preview shows the first sheet. Put them as markups (on the layer Header/Footer: edit, move or delete them like any text box, or hide the layer) or into the page content (they print and show in every viewer like the drawing itself). Applying again replaces the earlier ones. Document ▸ Remove Headers & Footers takes off every header and footer Cella PDF added.
Splitting a document
File ▸ File Tools ▸ Split Document… makes several PDFs out of the open one. Split by:
- Sheet ranges: type them, such as
1-3, 4-6, 7-(each range is a file;7-runs to the last sheet). - Every N sheets: files of 2, 5, 10 sheets.
- Top-level bookmarks: each top-level bookmark starts a file, named after the bookmark.
- Sheet-name prefix: the discipline letters, so A-101, A-102 … go into one file, S-201 … into another, M-301 … into a third.
The list shows every file it will make ("Tower - A.pdf", with its sheets) before anything is written. Choose the folder and what the names start with, then Split. Each file keeps its sheets' markups, bookmarks, scales and custom columns, as Extract Sheets does; the open document stays as it is.
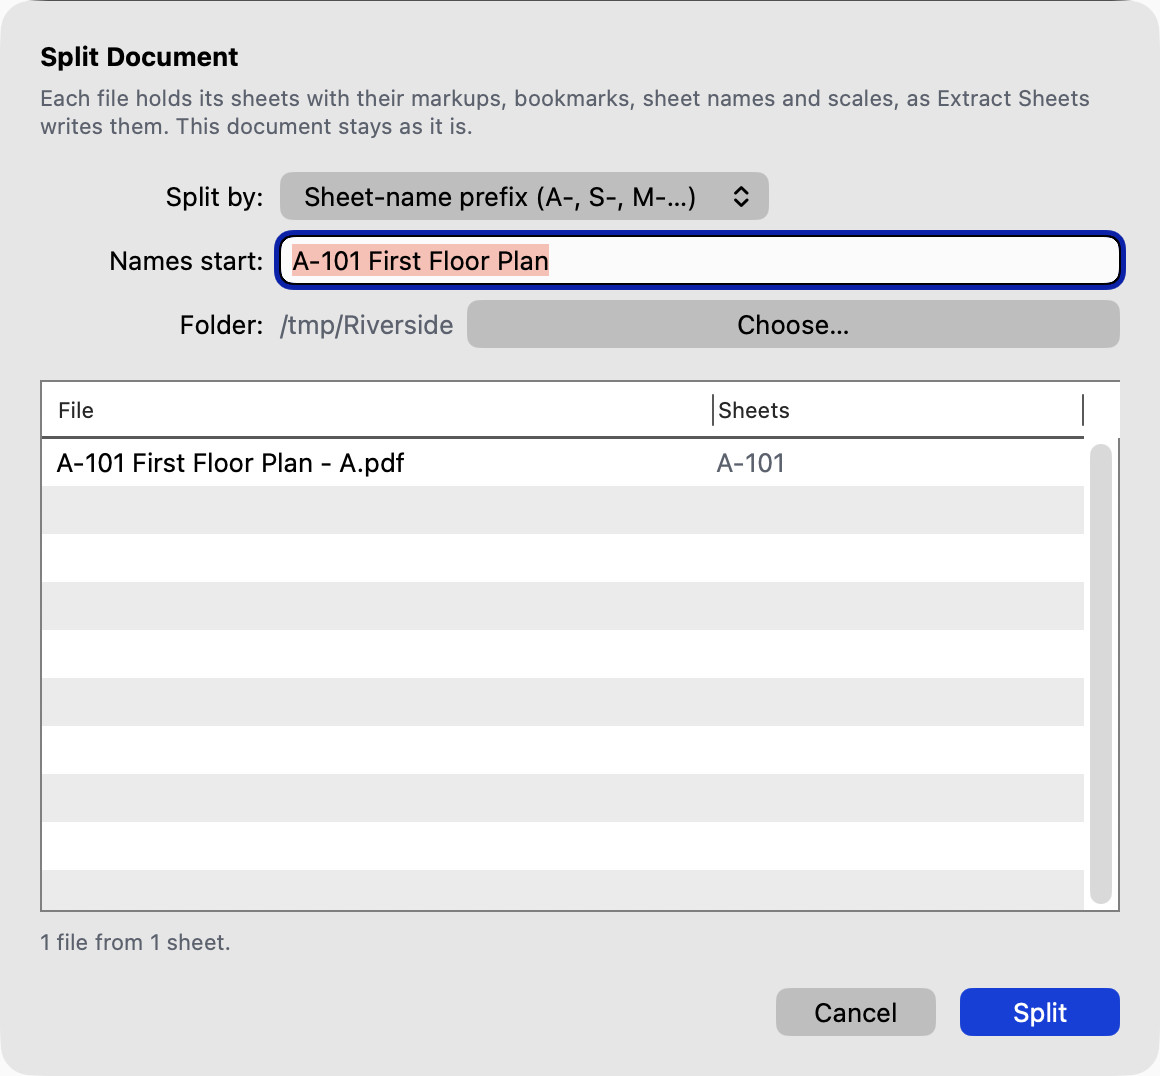
Blank pages
Sheets ▸ Another Sheet Like This adds a sheet like the one on screen, right after it: the same size and the same drawing, without its markups. Use it for the next page of a letterhead, a form, graph paper or whatever you draw over, in one click. A right-click on a sheet in the Sheets list or strip has it too, for that sheet. Undo takes it out again. Comments, markups, form entries and trace paper stay on the original; headers and footers and flattened markups aren't repeated.
Sheets ▸ Insert Blank Page… adds empty sheets after the sheet on screen (or before it, at the start, at the end). The size is the sheet on screen's, or any of Arch A–E, ANSI A–E and A4–A0, portrait or landscape. Undo (⌘Z; Ctrl+Z) takes them out again.
Paper gives the new sheets something to write on: Blank, Grid (graph paper: ¼ in squares with a heavier line every inch), Lined (lines 9/32 in apart with a margin line) or Dot grid (a dot where the grid's lines would cross). On A4, A3 and the other A sizes the paper is in millimetres instead: 5 mm squares with a heavier line every centimetre, lines 8 mm apart. The lines are light blue and grey, part of the sheet itself, so they print and export with it and a markup can't move them. Cella PDF remembers the paper you chose for next time. For another sheet of the paper you're on, Another Sheet Like This (above) is quicker. To start sheets from your firm's letterhead, use Sheets ▸ Insert Pages… with the letterhead's PDF.
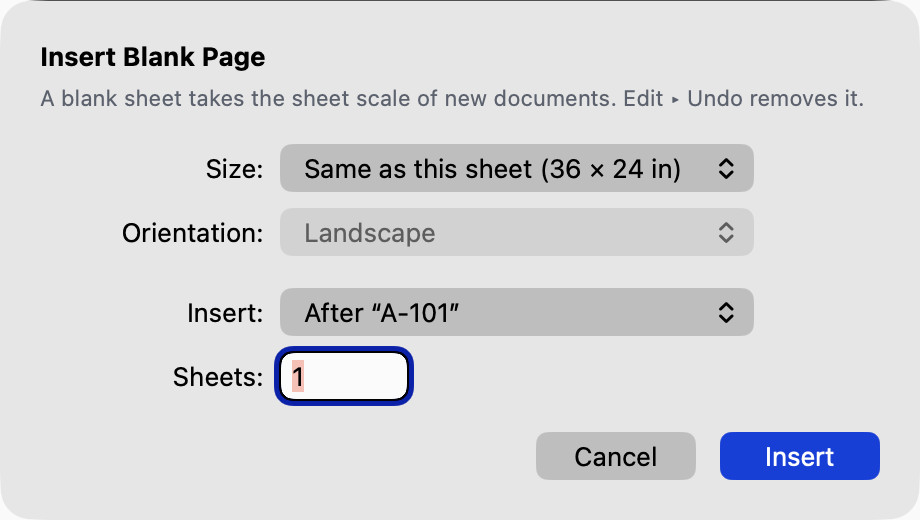
Sheets ▸ Insert Image Pages… turns pictures into sheets: choose one or more JPEG, PNG, HEIC (not on Windows) or TIFF files and each becomes a sheet after the sheet on screen (or at the end), named after its file. Each sheet is the picture's own size at the resolution the file gives (a 300-dpi letter scan comes in at 8½ × 11 in; a picture that gives none is taken at 150 dpi, which you can change). You can also choose This sheet's size or a paper such as Arch D, with the picture scaled to fit and centred on white. JPEGs go in exactly as they are, with no loss; a PNG's transparent parts become white. On the Mac you can also drop pictures on the Sheets filmstrip or the Sheets list. Undo (⌘Z; Ctrl+Z) takes them all out again. On a synced document the new sheets reach everyone in the project.
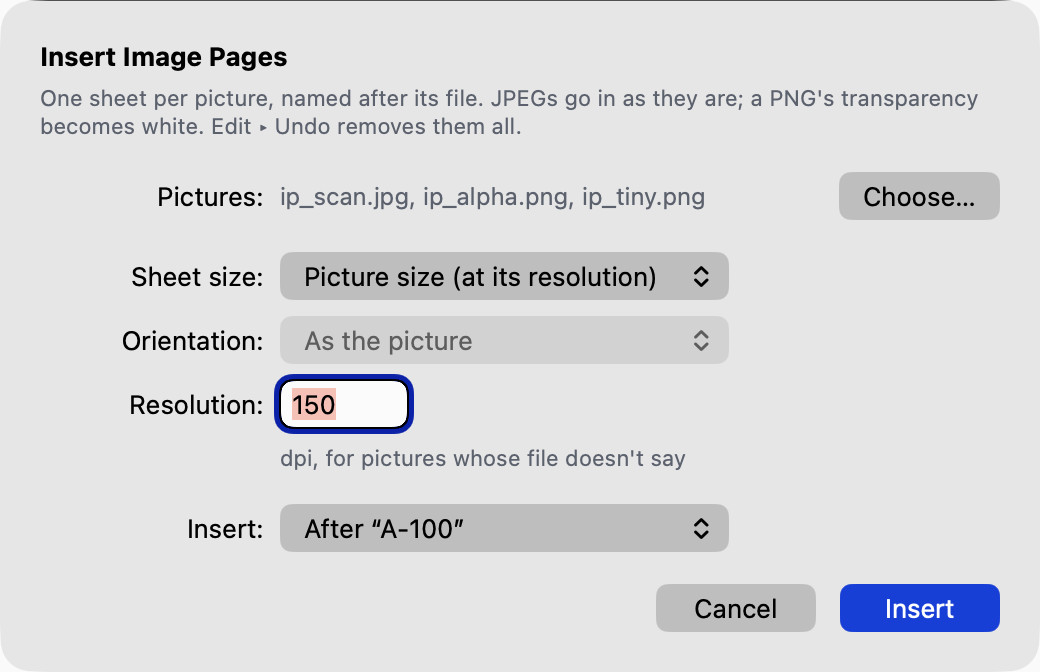
Cropping and resizing pages
Document ▸ Crop Pages… sets what a sheet shows and prints: trim its margins (top, bottom, left, right, in inches, millimetres or points), crop it to a size, or Remove the crop. Apply it to this sheet, the sheets selected in the Sheets list, or all of them. To draw the crop instead, choose Document ▸ Draw Crop Box (or Draw on Sheet in the sheet) and drag a rectangle over the drawing. Crop Pages opens with the margins it leaves, ready for that sheet or the others (coming from Draw on Sheet, with the units and sheets you had chosen). It works in either pane of Split View showing this document. Markups stay exactly where they are on the drawing; one cut off by the crop comes back when the crop is removed.
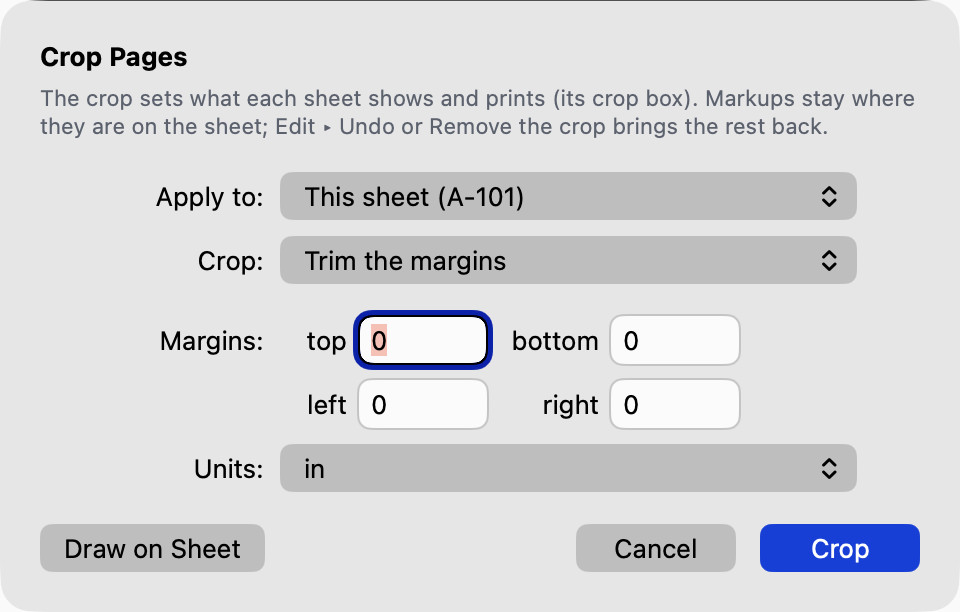
Document ▸ Resize Pages… puts sheets on another paper. Scale to fit the paper shrinks or enlarges the drawing (its hatching and fills too) with its markups, and changes the sheet's scale with it, so a wall that measured 12'-6" still does. Keep its size leaves the drawing as it is and grows (or trims) the paper around it, centred or from the top-left corner. Both are undone with Undo (⌘Z; Ctrl+Z).
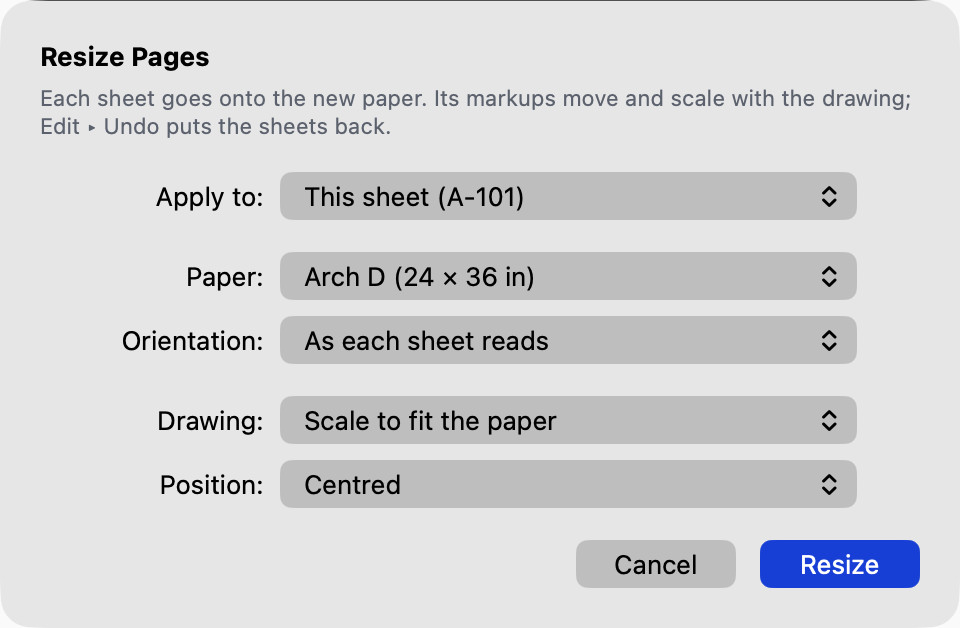
Sheets as pictures
File ▸ Export ▸ Sheets as Images… (File ▸ Export ▸ Sheets as Images… on Windows and Linux) saves one PNG or JPEG per sheet, at 72 to 600 dpi, with or without the markups, into a folder you choose: "Tower - A-101.png", "Tower - A-102.png" … Each picture is the sheet as it reads on screen (turned sheets upright, crops applied). A very large sheet at a high resolution is made as large as Cella PDF can draw it (about 15,000 pixels across at most); the sheet says so before you export.
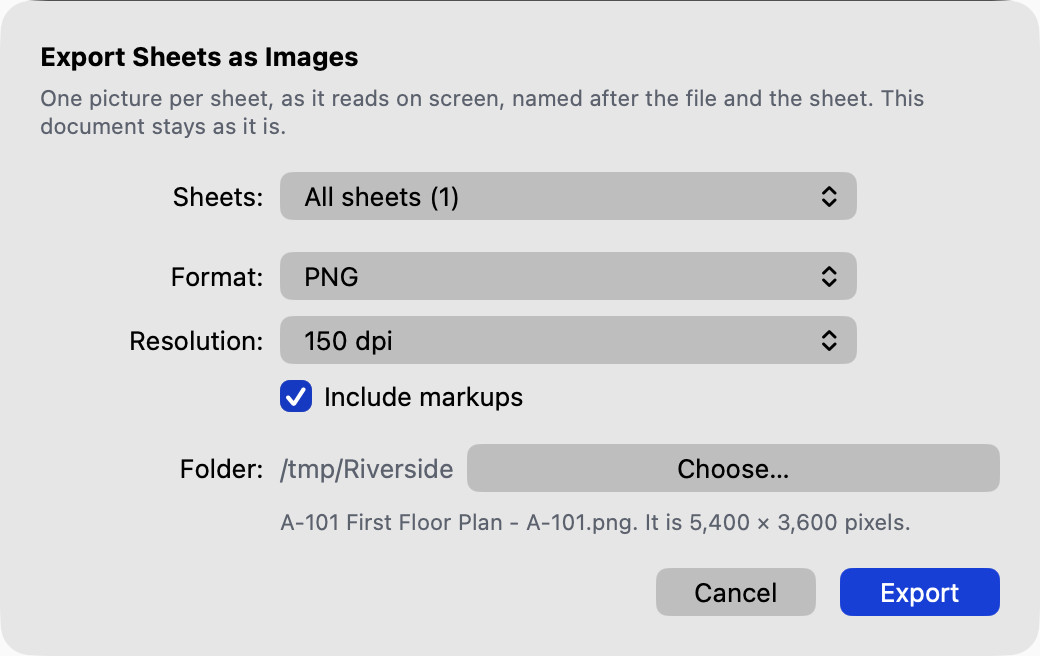
A stamp on every sheet
Document ▸ Apply Stamp to Every Sheet… puts a copy of a stamp on every sheet, or on the sheets selected in the Sheets list. Select a stamp you have placed first to copy it to the same spot on every sheet (the same distance from the same corner, so one in the title block lands in each title block), or pick a stamp from the list and a corner. A stamp you turned (Markups ▸ Rotate) is copied turned. Each copy is an ordinary stamp you can move or delete, with its own sheet's name and number filled in. One Undo (⌘Z; Ctrl+Z) takes them all away.
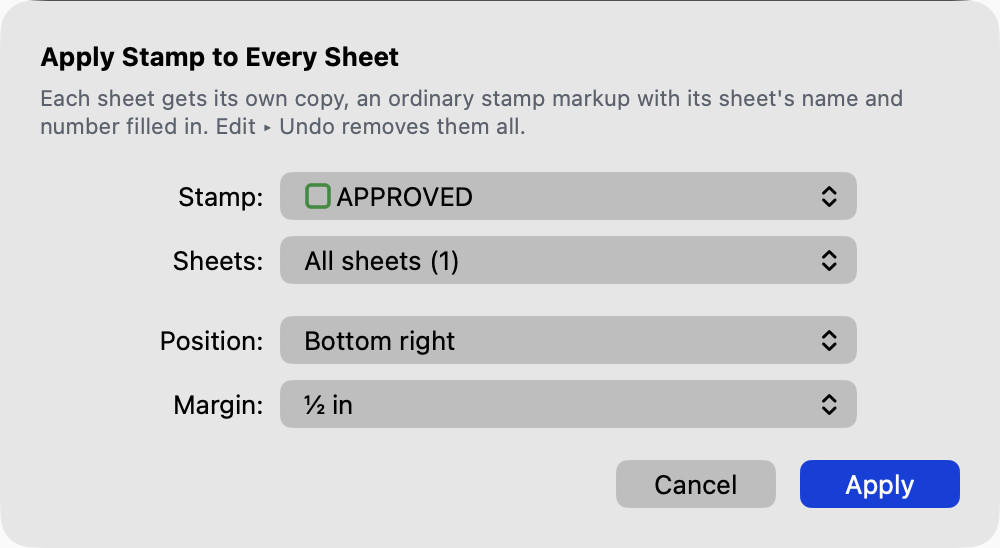
Sealing and signing a set
An issued set is sealed and signed on every sheet, and each board has its own wording. Document ▸ Seal Presets… keeps that as a preset: the seal picture (a picture stamp or signature from the Tool Chest, or Choose File… for a PNG, JPEG or PDF of your seal, which joins the Tool Chest as a picture stamp), your signature picture (Tools ▸ Signatures), the licensee's name, licence number, state and firm, the statement (pick a template and edit it; {name}, {license}, {state}, {firm}, {date}, {sheet} and {file} are filled in on each sheet, and the preview under the box shows the result), where the block goes (a corner of the sheet, how far in, how wide the seal is, the statement's type size), and whether to sign each file digitally with which certificate (Reason, Location, Lock the document after signing, invisible or a box). The templates are generic wording to start from, not any board's rule: check your jurisdiction's requirements.
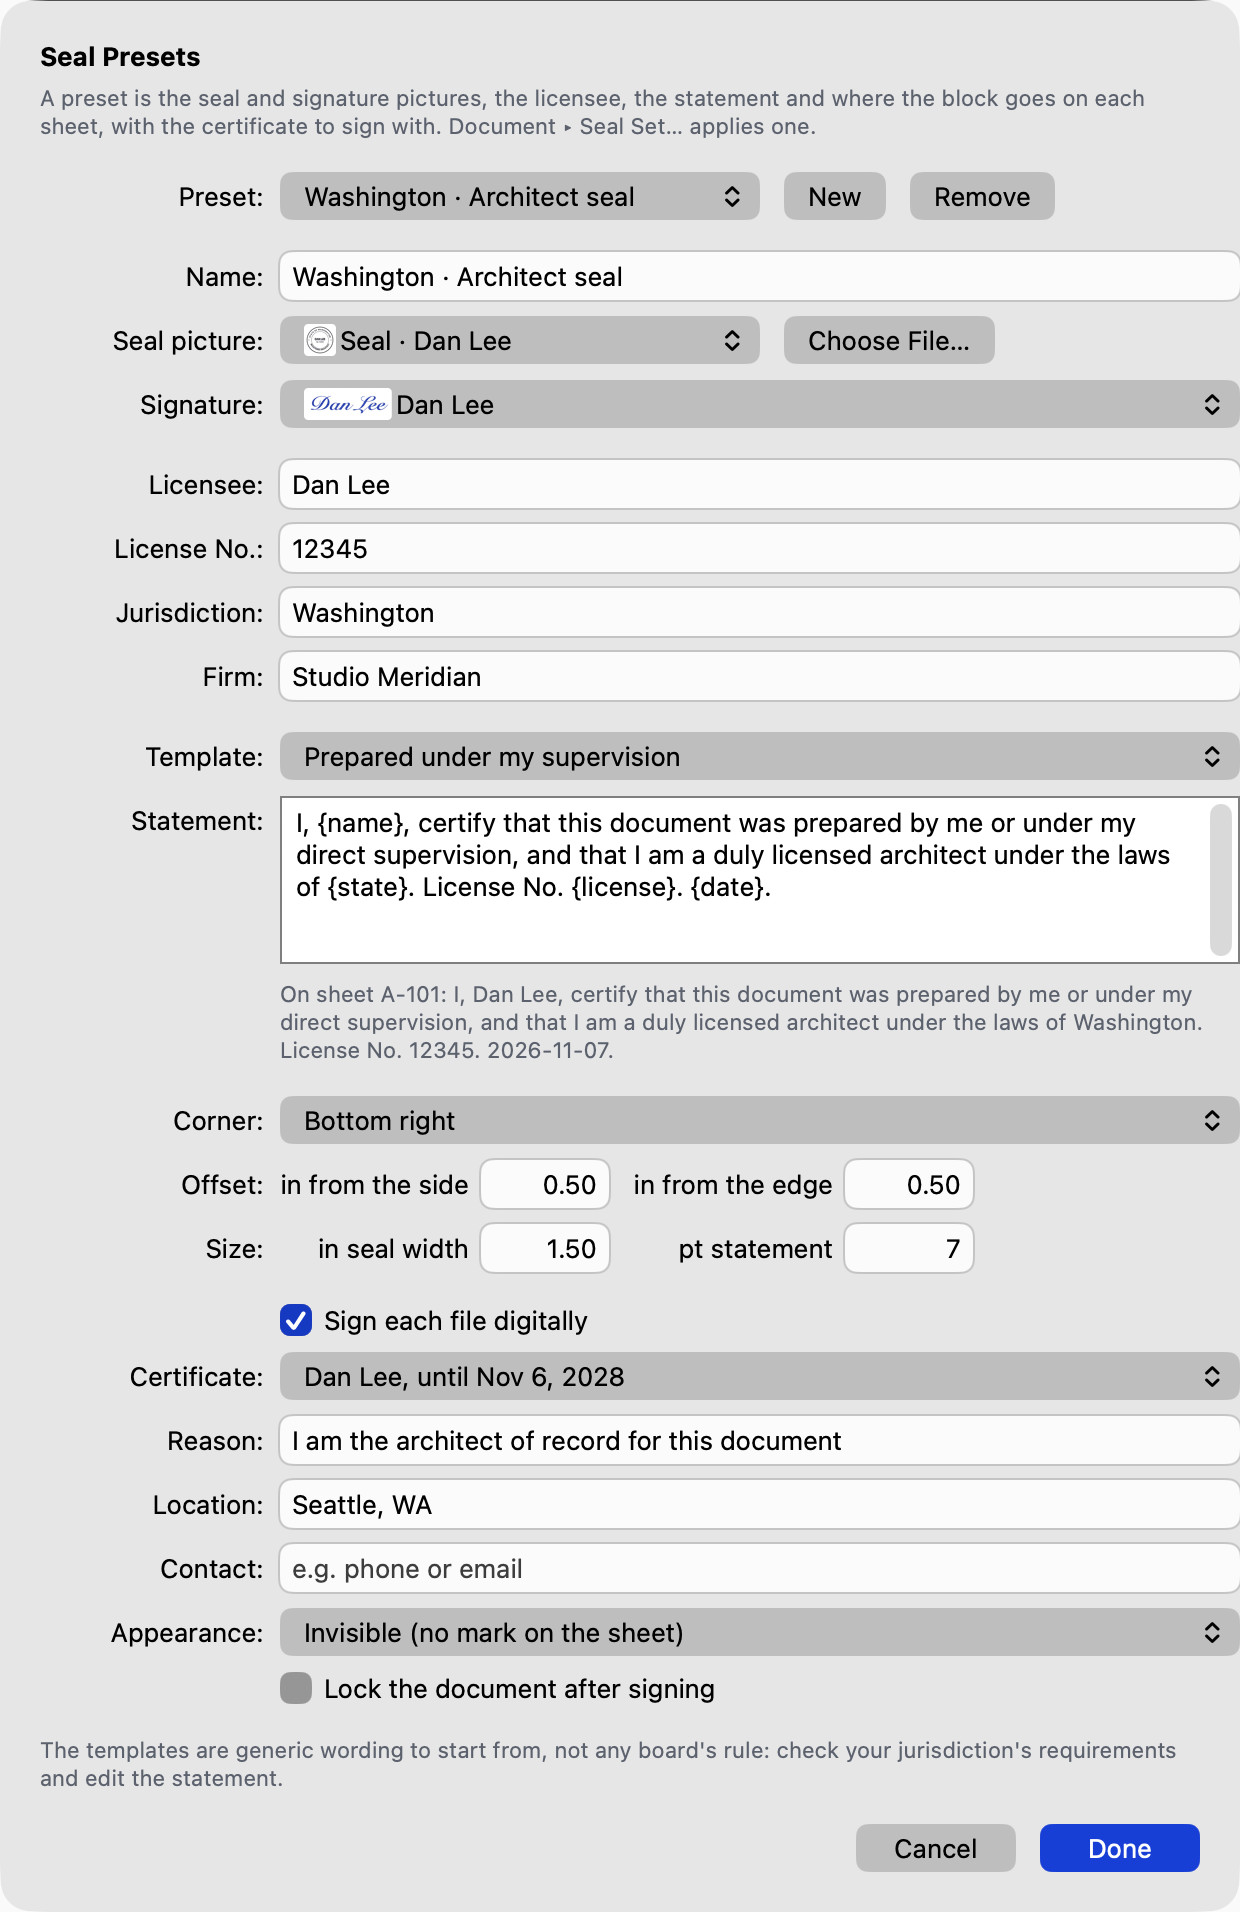
Document ▸ Seal Set… applies a preset. Choose the preset, whether to seal this document or the folder set, and which sheets: all of them, sheets by number or name (1-3, 7 or A-101), or sheets whose number matches a pattern (A-*, S-1??); Skip cover and general sheets leaves out G, T, CS and 00 sheets and anything titled a cover. Write in place or as copies (a folder for a set, a file for a document; the originals are not changed). Tick Sign each file digitally to sign with the preset's certificate once the seals are on, and Add a verification page to list what was sealed, the licensee and the signature: on the open document it becomes the last sheet, before the signature; for a set or a copy it is written beside the files as Seal Verification.pdf, signed too.
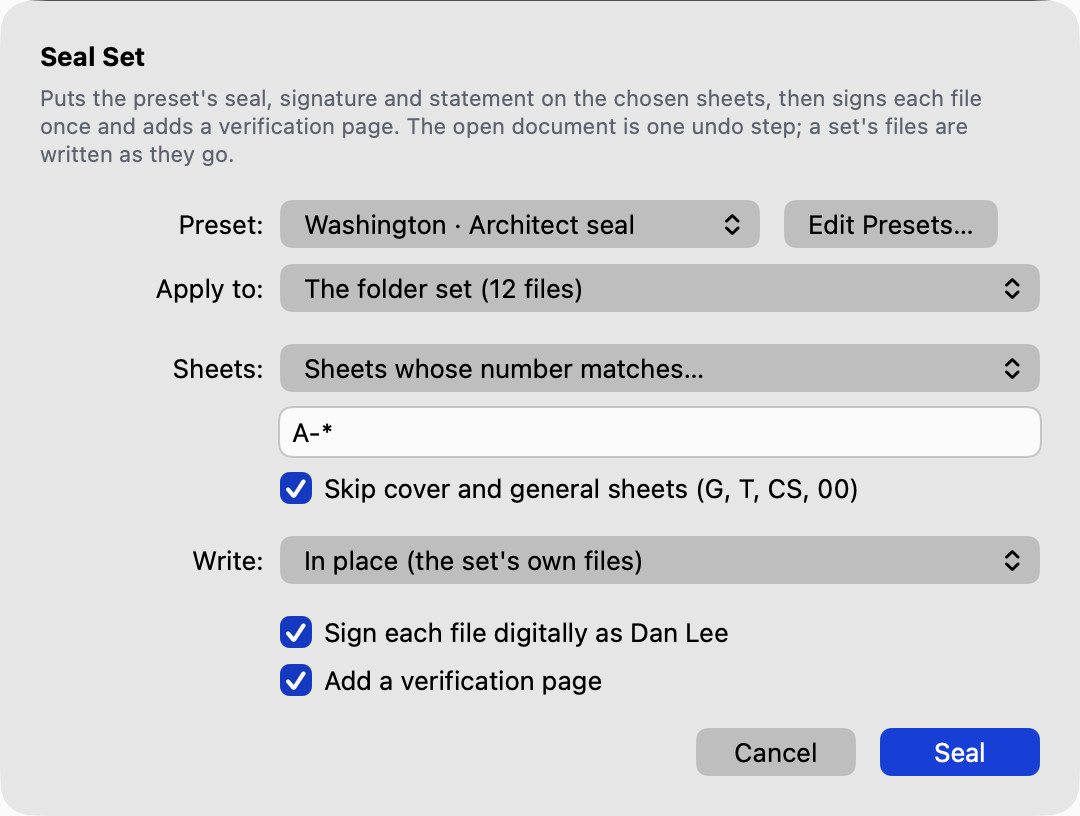
On each sheet the seal sits in the chosen corner (the title block by default), your signature beside it and the statement under both, turned with a turned sheet. On the open document they are ordinary markups in one undo step (⌘Z; Ctrl+Z takes them all off) until you save or sign; a set's files are written as the run goes, with the usual progress and Cancel. Signing is the same as Document ▸ Sign Digitally…: a file that is already signed takes the new signature as an appended update, so the earlier ones stay valid, and a signed file whose changes would need a rewrite is left alone and reported. A preset names its pictures; if one is removed from the Tool Chest, Seal Set says which and Seal Presets… lets you pick another.
Printing
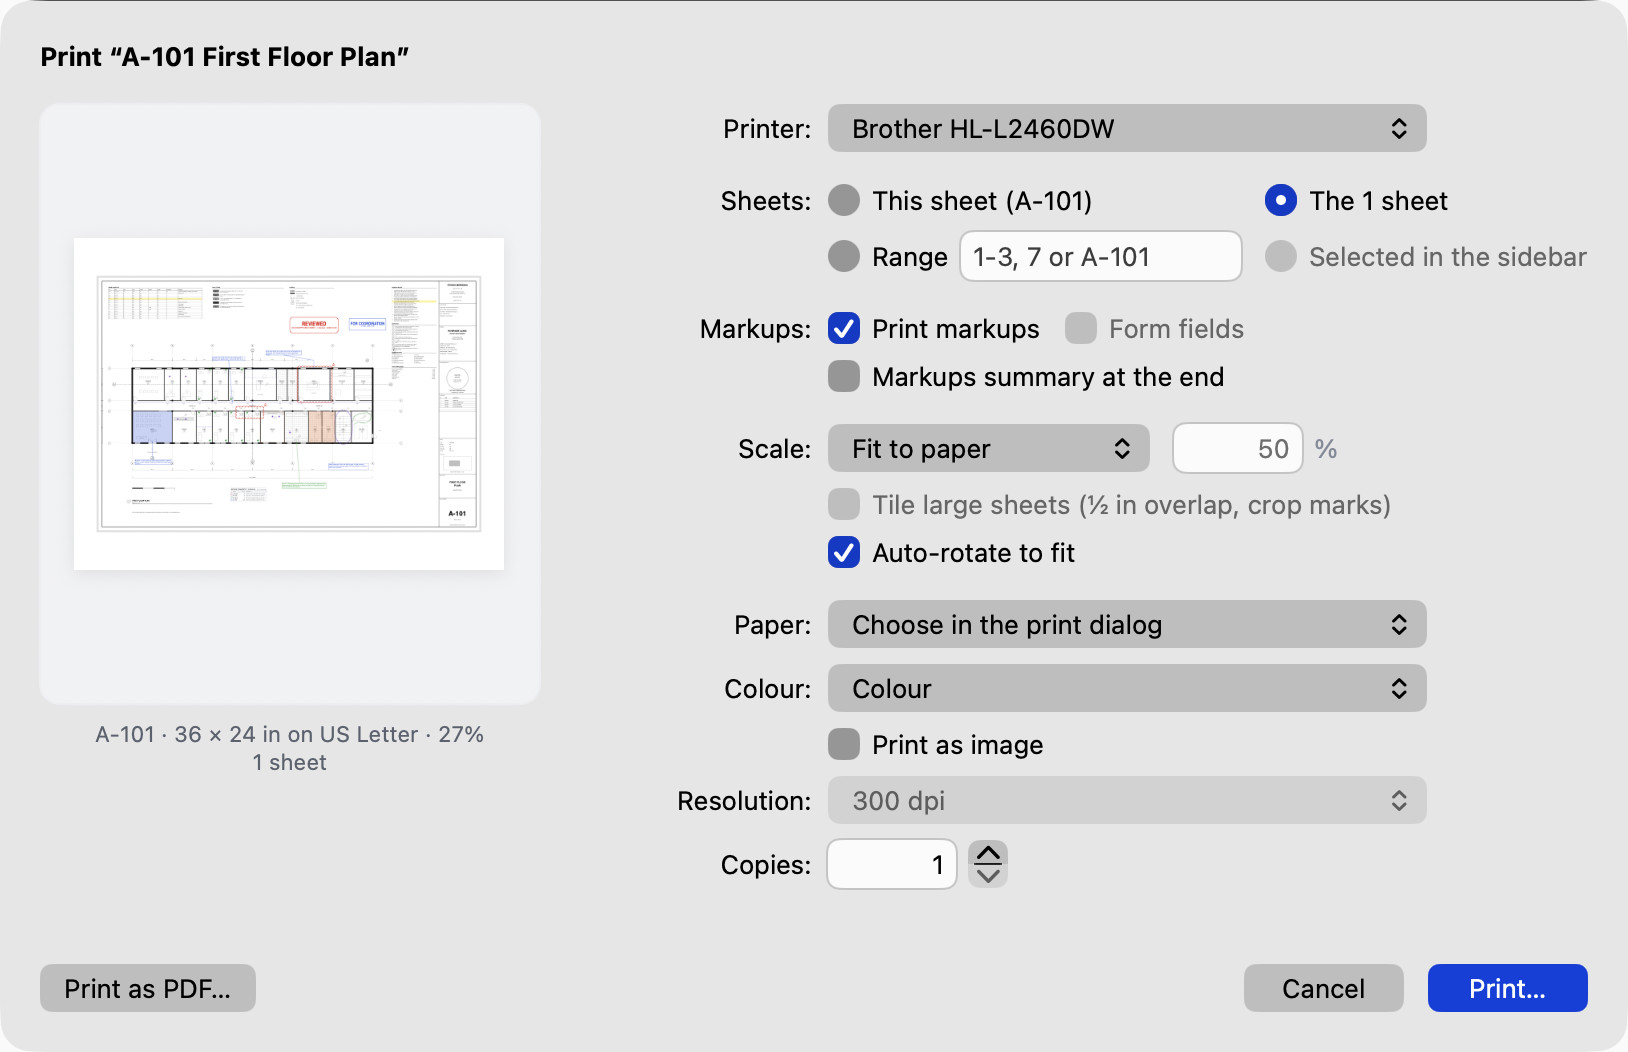
File ▸ Print… (⌘P; Ctrl+P) opens the Print sheet, also when the trial has ended:
- Printer: your printers; the choices below are remembered for each.
- Sheets: this sheet, all of them, a Range (
1-3, 7orA-101), or the Selected sheets (selected in the sheets strip or the Sheets list). - Markups: Print markups (in colour), Form fields, and a Markups summary at the end.
- Scale: Fit to paper (a half-size set on 11×17), Actual size (100%) or Custom %; Tile large sheets prints a full-size sheet across several smaller pages with a ½" overlap and crop marks; Auto-rotate to fit.
- Paper: the printer's choice, or Letter, Tabloid, Arch C, D or E when the printer offers them.
- Colour: Colour, Grayscale, or Markups in colour, drawing in grayscale, the review set where red marks stand out on a grey drawing. Print as image under it sends each page as one picture at 150, 300 or 600 dpi, for printers and print shops that stumble on transparency, unusual fonts or very large CAD drawings (in grayscale, black-and-white pages go as crisp fax-style images).
- Copies.
The preview shows the first sheet on its paper. Print… continues to the usual print dialog; Print as PDF… saves exactly what would print. Unsaved markups print without saving the file.
On Windows and Linux the dialog is the same without the preview. On Windows, the print dialog that follows chooses the printer, copies and paper, and its own scale setting decides Fit to paper and Actual size. On Linux the printer, paper, copies and scale go straight to the printer (CUPS).
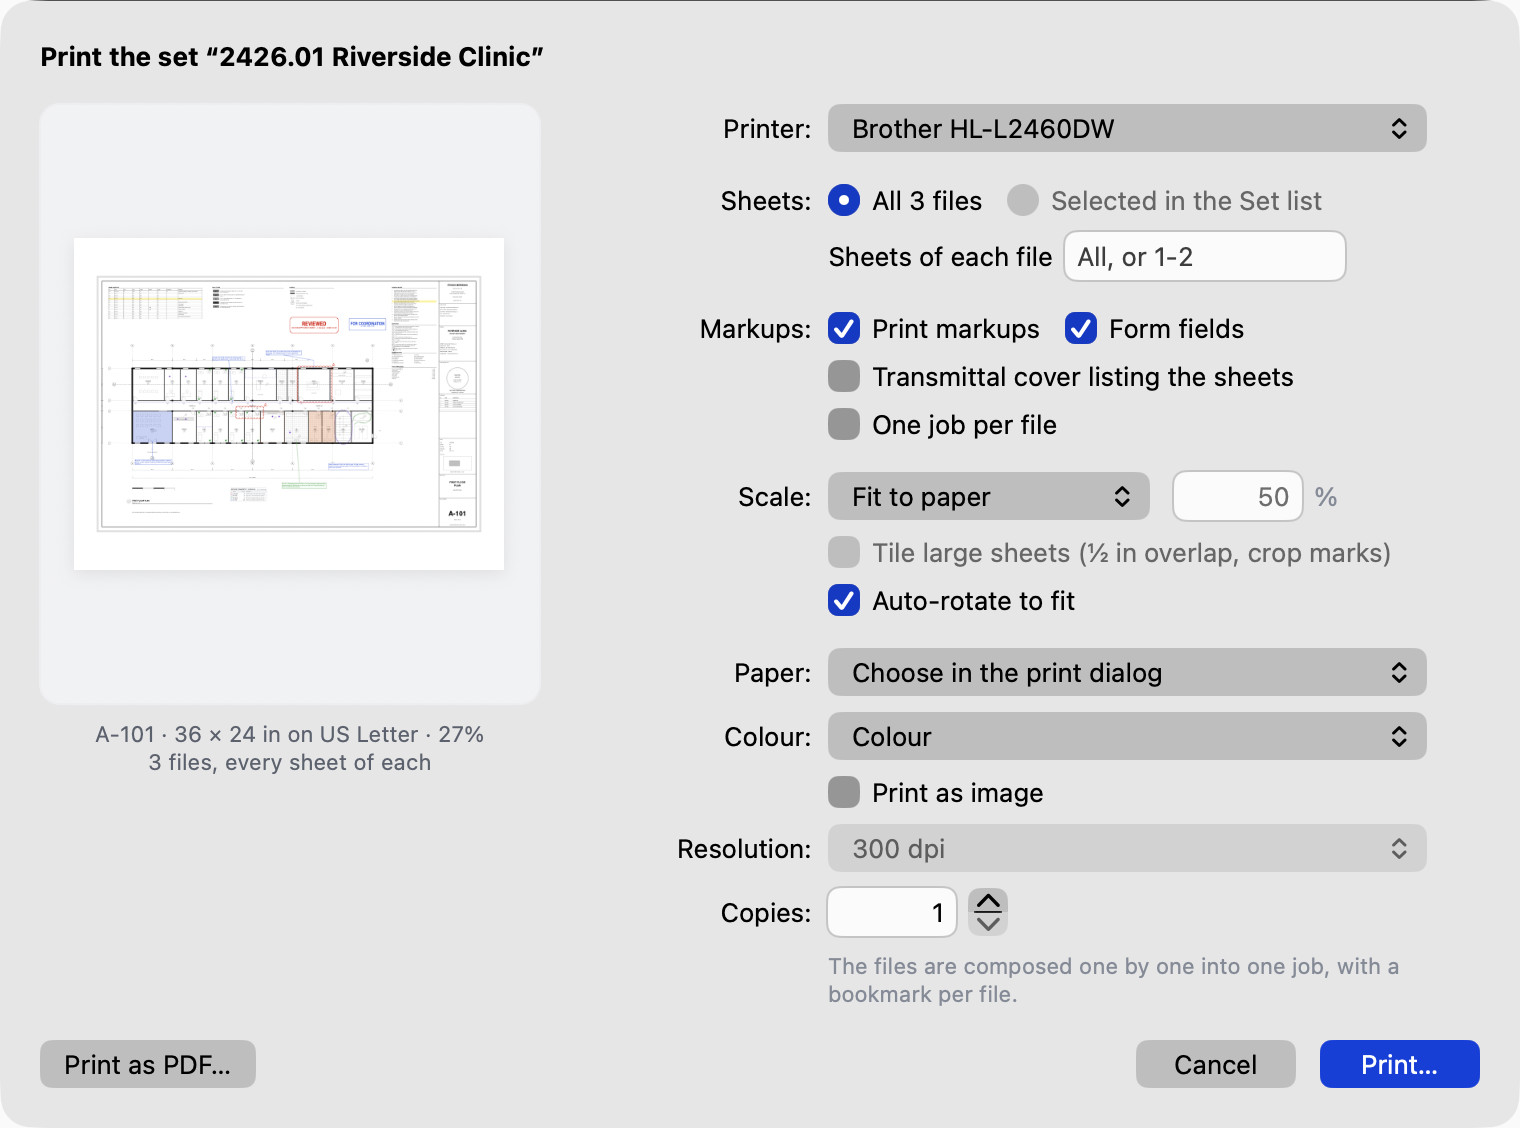
File ▸ Set ▸ Print Set… is the Print sheet for the whole set (or the files selected in the Set list). The same choices apply to every file, and Sheets of each file (empty for all, or 1 for each file's first sheet) picks the sheets. The files print as one job with a bookmark per file, or tick One job per file. Transmittal cover listing the sheets puts a page first that lists every sheet printed (number, title, revision, file). Print as PDF… saves the whole set as one PDF with the same bookmarks.
Transmittals
File ▸ Set ▸ Export Transmittal… writes a one-page transmittal: the project (the folder's name), today's date and the drawing index (from Tools ▸ Sheet Setup ▸ Sheet Index…, or the cover of the open file). The index shows which sheets this set includes, in which file and at which revision. Sheets the index doesn't list are added at the end.
Checking a set before issue
Document ▸ Check Set… reads every sheet and lists what would embarrass you at the contractor's: a detail or section callout that points at a sheet that isn't in the set ("SEE 2/A-502" with no A-502), a detail number its sheet has no bubble for, the same sheet number used twice, a number skipped inside an otherwise consecutive run, a sheet with no number in its title block, sheets the drawing index doesn't list and index rows with no sheet, an index revision that disagrees with the sheet's title block, a revision triangle with no entry in the revision schedule or missing from the sheet's own revision table, a keynote tag the sheet's keynote legend doesn't list, and the unresolved markups left on each sheet (anything whose status is none or Rejected; measurements, stamps, legends, signatures and revision clouds don't count). With a folder set open (File ▸ Set) it reads every file of the set; on its own it reads the open document.
Each finding is an Error (fix it before issue) or a Check (it may be fine: a numbering gap, a reference to a sheet another discipline issues, open markups), with its sheet and one plain sentence. Double-click a row (or Go To) to see it on its sheet, with the markups selected where it has some; in a set the right file opens first. Ignore keeps a finding out of the report for good (it is remembered with the document when you save, or in the set's .cella folder); Show Again brings it back, and the Show pop-up lists the ignored ones. Run Again reads the sheets again after you fix things. Export writes the report as a PDF, an Excel workbook or a CSV file, for the issue record or the QA manager.
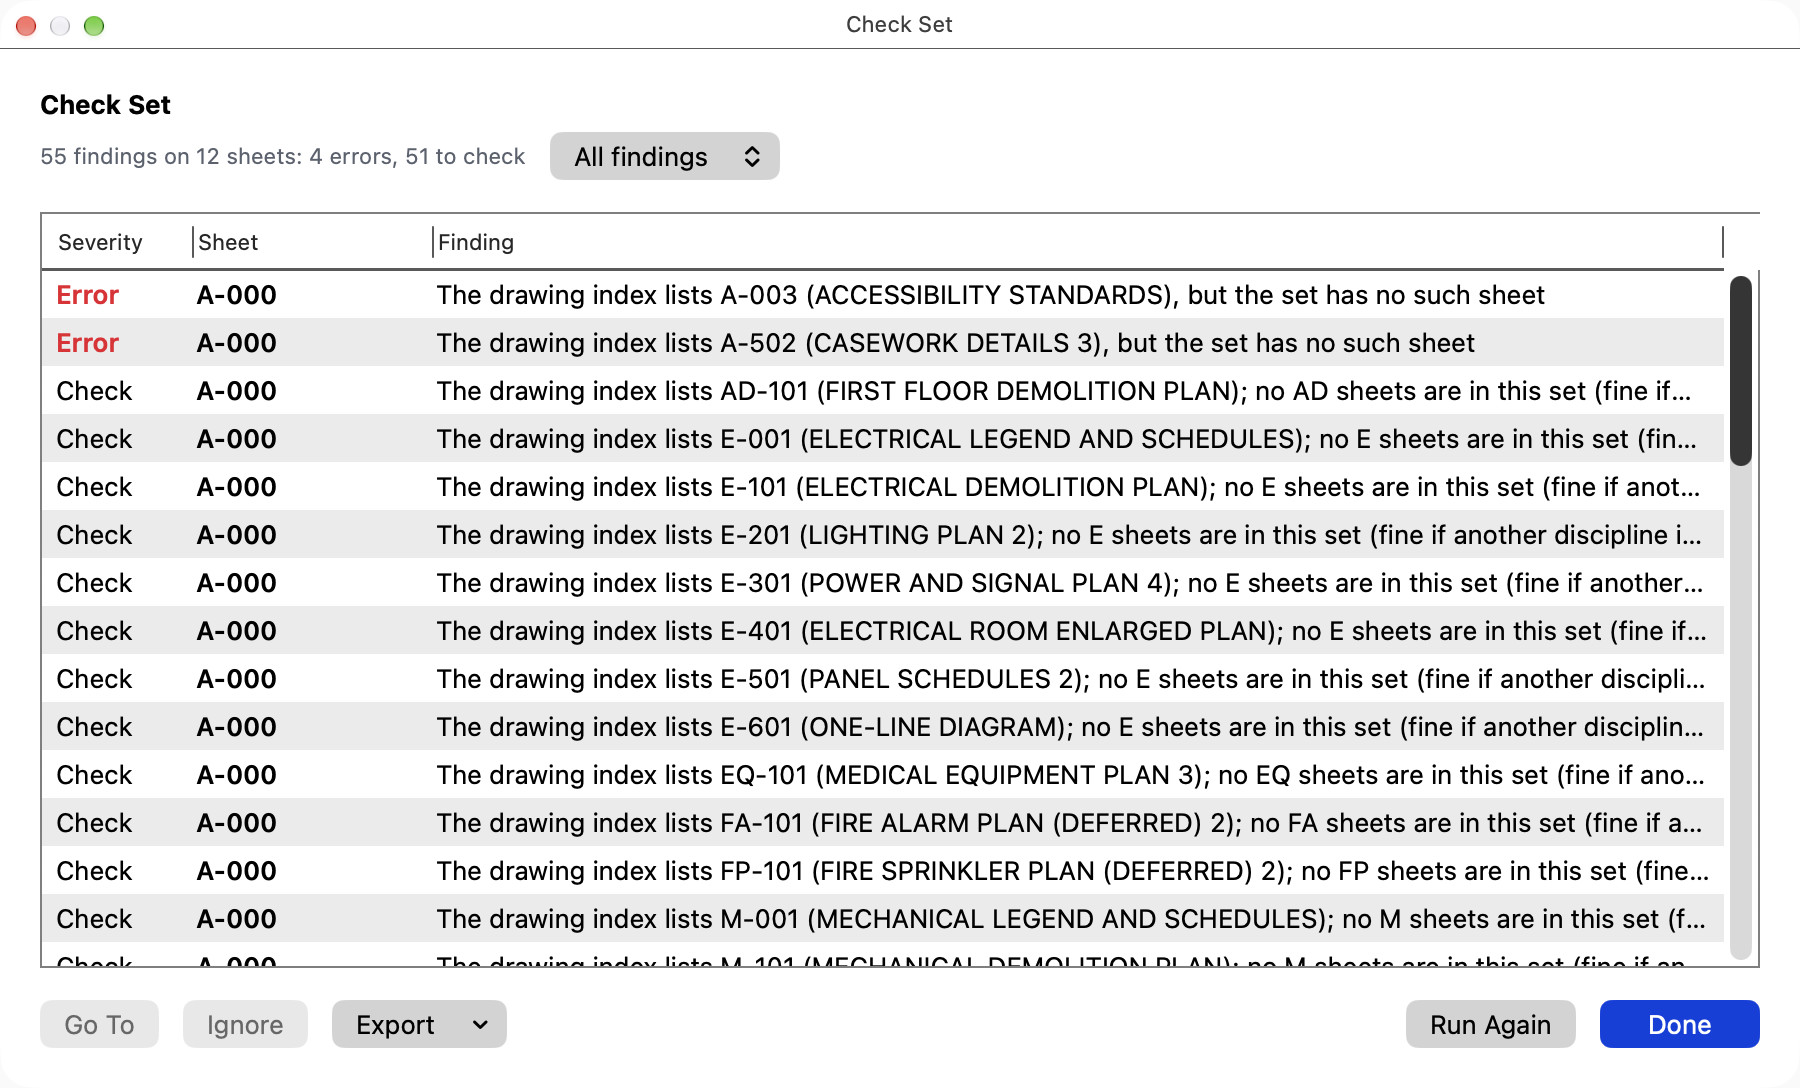
The reader is deliberately careful: a sheet number only counts as a reference when the set has sheets with those letters and that many digits, written the way the set writes them (A-101, A1.01), or when it follows a detail number or a word like SEE, DETAIL or SECTION; room numbers, grid lines, wall types and standards (ASTM C150, ANSI A117.1) are left alone, and text read by OCR is marked Check rather than Error. It still can't read everything: a scanned set with no recognized text gives it nothing to check, and a detail bubble drawn as linework rather than text isn't seen (then the detail check stays quiet). Keynotes are checked when they are coded by specification section, such as 08 71 00.A1, and the sheet has a legend titled KEYNOTES or KEYED NOTES; keynotes numbered 1, 2, 3 look too much like window types and grid bubbles to check from the text alone.
Batch operations
Everything under File ▸ Set ▸ runs file by file across a folder set: summaries, CSV, flattening, statuses, columns, comparing and printing. Each shows a progress sheet ("Summarising 3 of 25…") with Cancel, which stops after the file in hand, and ends with a report of what it did and any files that failed. Slip-Sheet Set from Folder… and Combine Files… with Combine the Set work across the set too.
Tool sets and markup exchange
Cella PDF works beside the other markup apps your consultants and contractors use: the PDFs it saves are standard PDFs they read, and PDFs marked up elsewhere open in Cella PDF with everything in them. Tool sets travel as .btx files and markups on their own as .bax files.
What round-trips
- Markups are standard PDF annotations. The private data other markup apps keep on each markup (custom columns, spaces, labels, groups, review states, measurement data) is read and kept, and a markup you didn't touch is saved byte for byte as it was, appearance included.
- Measurements carry the PDF's measurement dictionaries and the sheet's scale (viewports), so other measuring apps read Cella PDF's scales, lengths, areas, counts and volumes, and Cella PDF reads theirs.
- Custom columns are written in the PDF's custom column data, where other markup apps look for them.
- Groups (punch keys) are written as standard grouped annotations and come back as groups.
- Text boxes keep their margin, alignment and line spacing both ways.
- Statuses and replies are the standard review states and threaded replies that Acrobat and other PDF apps show.
- Sheet names are written as page labels, bookmarks as the PDF's outline, links as standard link annotations, stamps as standard stamps.
Tool sets
Tools ▸ Import Bluebeam Tool Set… reads a tool set file (.btx), or a .zip holding some, as community tool set libraries hand them out. The tools arrive as a set under its name with their colours, line styles, text, stamp names and layers. Punch keys, symbols and other fixed-size tools drop onto the sheet with one click and stay grouped. Picture stamps (trees, people, doors) come in as linework at their size, in their colours (as pictures when they hold text or images). Sequence tools come in as sequences and count tools as Count tools. Tools Cella PDF doesn't draw (file attachments, form fields) are listed as skipped.
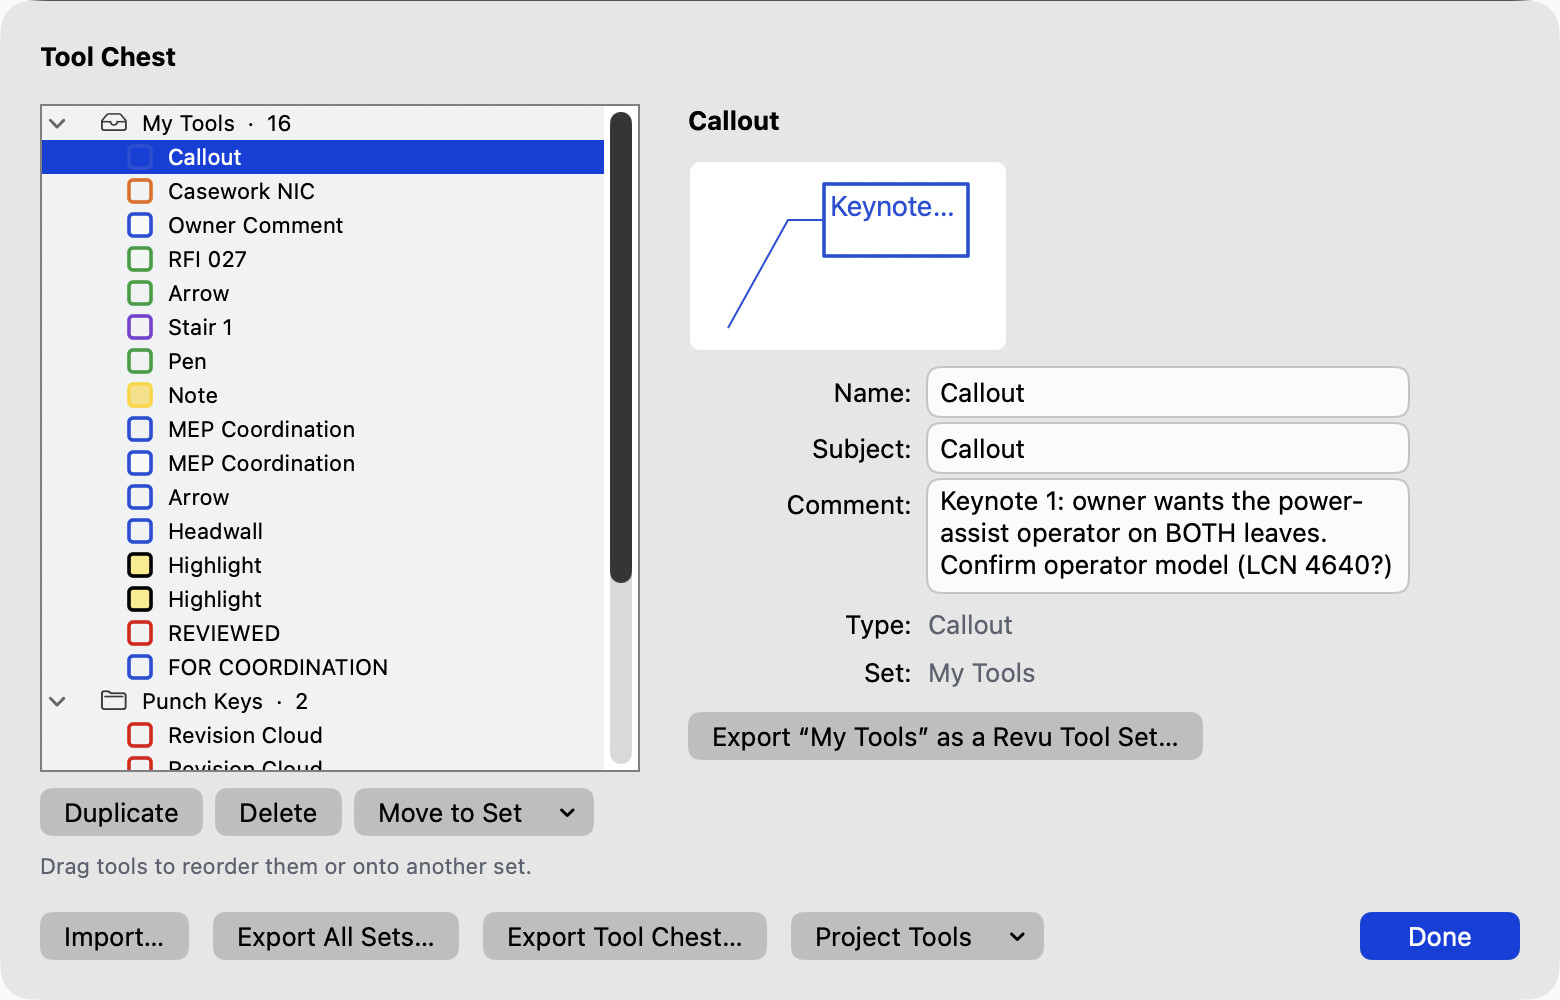
In Tools ▸ Manage Tool Chest…, Export "Set" as a Revu Tool Set… writes the set as a .btx for apps that import tool sets, and Export All Sets… writes one per set into a folder. Export Tool Chest… saves everything as a .cella-tools.json for another Cella PDF user; Import… reads it back (or a .btx, or the tool sets in a .bpx profile), skipping tools you already have.
Exchanging markups (.bax)
Markups ▸ Export Markups… saves the document's markups (or only the selected ones) as a .bax markups file, for apps that import markups, or as a Cella PDF file that keeps everything exactly. Markups ▸ Import Markups… (or dropping a .bax on the drawing) adds markups from either: they land on the same sheets, keep their authors, dates, status, replies and groups, and Undo takes them all back out. When a sheet is a different size (a new issue of the drawing), its markups go to the sheet with the same number.
What doesn't come across
- Image stamps in a
.baxcome in as pictures you can move, and file attachments come in as they were (shown in the Markups List, not editable); both keep the picture or file exactly. A turned image stamp shows at the nearest quarter turn in Cella PDF. - Another app's cloud review sessions and cloud projects don't come across: in Cella PDF, an Atrium server does the sharing (see Sharing and sync).
- Hatch patterns on measurements come in as plain fills.
Sharing and sync
Sending a client-safe copy
Firms keep two copies of everything to avoid sending a client the internal notes. File ▸ Send to Client… writes one copy with only what the client should see, and leaves the original exactly as it was.
The sheet asks what they see — comments, replies and column values; the markup statuses; who made each markup; when — all off unless you tick them. Under Leave out, tick the statuses, layers and subjects whose markups should not go at all: Rejected markups are left out from the start, and a layer you have switched off in the window starts ticked too. Markups are either flattened into the sheets, so the drawing shows them and nothing about them can be read or changed, or left editable as markups. A line at the bottom says how many markups go.
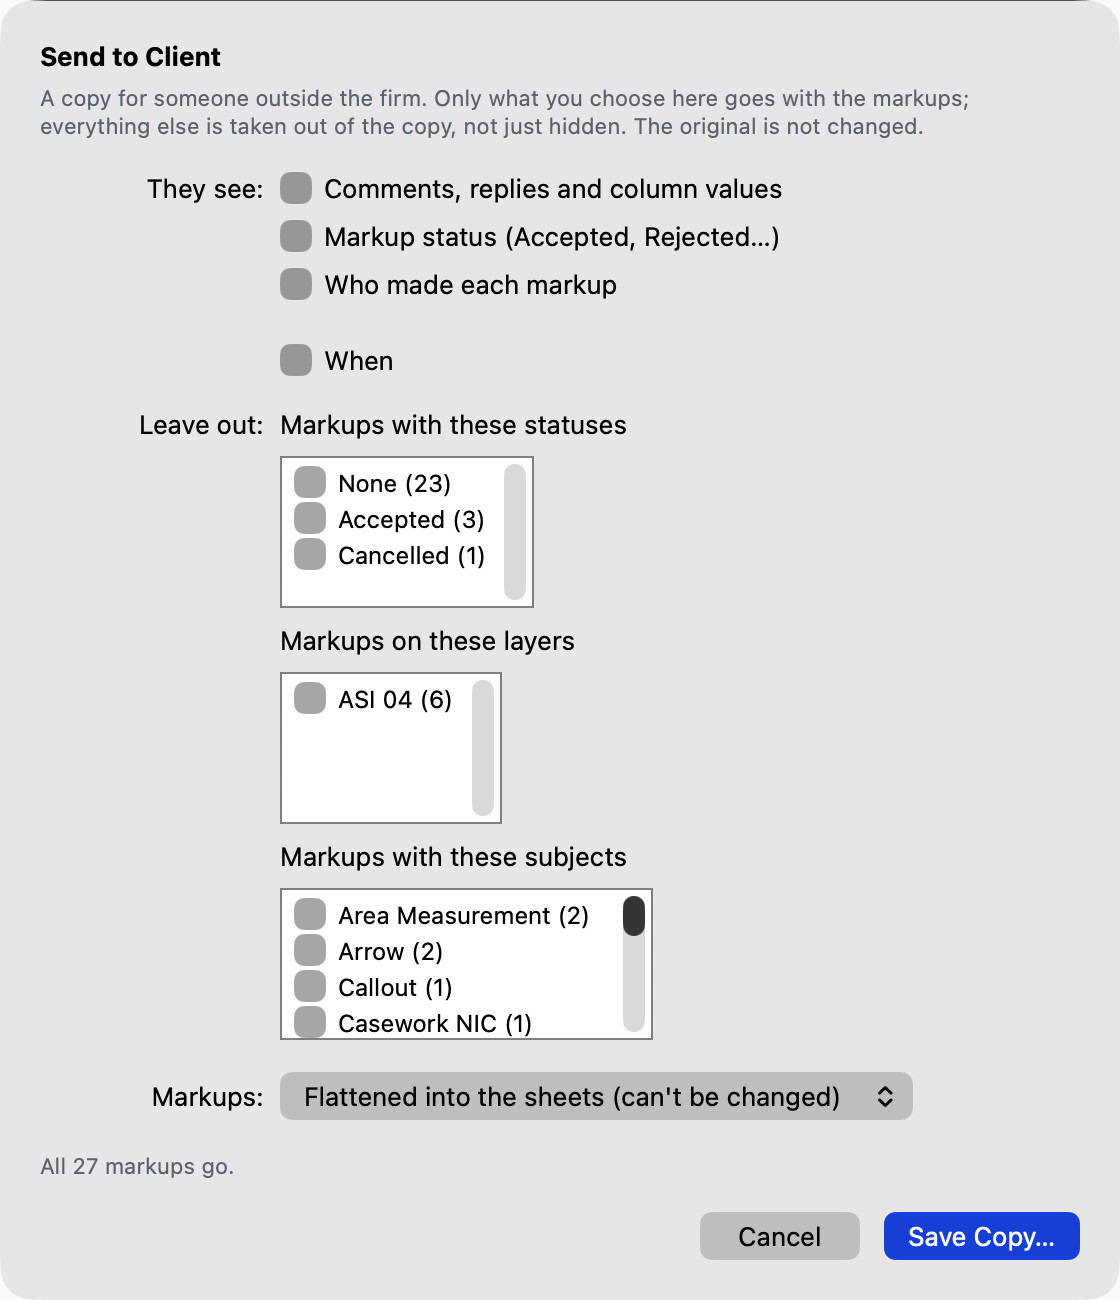
Save Copy… asks where ("A-101 for client.pdf" beside the original), and Cella PDF says what went. What you leave out is taken out of the file, not just hidden: the markups, their notes and replies, the authors and dates, the markup history. A text box's or a measurement's own text always stays, since it is part of the drawing. Your choices are remembered for next time.
Cella PDF's Sync shares a project's drawings and everyone's markups live through an Atrium server: either one your IT runs on the firm's own server or cloud, or one Sorted Solution hosts for your firm. Setting one up, inviting people, backups and the rest are in the IT guide, Atrium: the sync server for Cella PDF. This section is about using it.
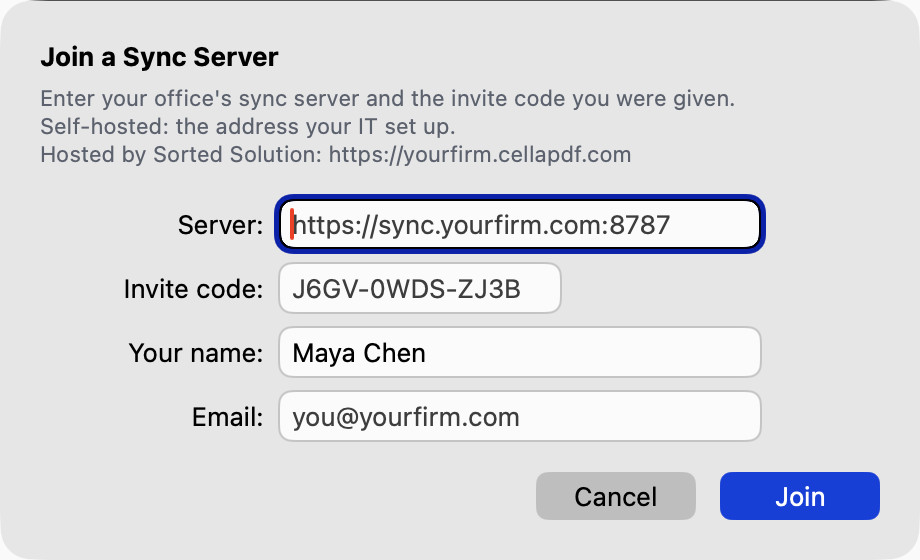
- Sync ▸ Join Server…: the server's address and the invite code you were given, your name and email. The token is kept in your Keychain (on Windows encrypted for your account, on Linux in the keyring).
- Open a document and Sync ▸ Connect Document to Project…: pick the project. If it doesn't have this document yet, Cella PDF uploads it.
From then on, every markup you make reaches the others in the project, and theirs reach you. The status band shows ● project. Work offline freely: changes queue and send when the server is reachable (○ … offline · 3 pending).
What syncs: markups and their replies and statuses; sheets turned, moved, inserted, deleted or renamed (and sheet titles), with their markups going wherever their sheet goes; the custom columns, the sequences and where they have got to, the revision schedule, the bookmarks, and each sheet's scales, hyperlinks and Spaces. A sheet change arrives on everyone's copy as it is made, and their sheets list and thumbnails follow. Undo (⌘Z; Ctrl+Z) undoes a sheet change of yours for everyone too: the sheet turns or moves back, a deleted sheet comes back with its markups and their history, an inserted one goes again, and Redo (⇧⌘Z; Ctrl+Y on Windows, Ctrl+Shift+Z on Linux) does it again. Your undo history (up to 300 steps) stays as sheets move, arrive or go, yours or someone else's. Each step finds its sheet wherever it is now. If someone else deleted the sheet a step was for, that step is skipped and Cella PDF says so ("Can't undo: that sheet was deleted by Sam."). A markup you are still drawing (an area or polyline half clicked out) when sheets move is dropped. If an inserted sheet can't be downloaded at once (the network dropped), Cella PDF keeps trying, and its markups appear with it.
When two people change the same thing at once (both turn the same sheet, rename it, reorder the sheets, or edit the custom columns), the change that reaches the server last stands everywhere, and the person whose change was replaced is told: "Sam turned “A-101” at the same time as you; their turn stands. The sheets were reloaded." If someone uploads a newer issue of the document, sheet changes made on the older one aren't sent ("Your sheet change wasn't sent"): use Sync ▸ Update Sheets from Project, then make the change again. An older Atrium server keeps only markups. On one of those, sheets can't be changed while the document is synced (Cella PDF says so). An older Cella PDF on any server syncs markups only.
- Who else is here: while a document is connected you see the people working in it: each person's pointer on the sheet, with their name in their colour, and a dashed outline round the markups they have selected. In the status band a circle with their initials shows each person who has the document open; click one to go to their sheet. View ▸ Show ▸ Collaborators hides it all.
- Sync ▸ Update Sheets from Project pulls a newer issue someone uploaded and slip-sheets it in.
- Sync ▸ Show Markup History… lists who changed the selected markup and when (Properties ▸ History shows the same with the local record).
- Sync ▸ Disconnect Document stops syncing this document; Forget This Mac's Servers (Forget This Computer's Servers) removes the tokens.
If a hosted server's subscription runs out, the server becomes read-only: Cella PDF says so, your markups stay in your PDF, and nothing more is sent until it is renewed.
Cella PDF also sends your document's markups to the server when you connect and after each save, so the server holds the current state, not only the changes made while synced.
The server sees only markup data, sheet changes and document settings (columns, sequences, the revision schedule, bookmarks), the PDFs you choose to upload and pages you insert into a synced document. Without a server, share a file the usual way: the PDF carries every markup, comment, reply, status and its history.
Connecting an AI assistant
Cella PDF can let an assistant you already use, such as Claude Desktop or Claude Code, read the documents you have open and the folders of drawings you choose. Ask it which markups on a sheet are still open, what a set's quantities add up to, or which sheets changed since the last issue. By default it only reads. If you choose, it can also propose changes, which you approve one request at a time (below). It is off until you turn it on, and it works with a license or during the trial.
- Open Settings… and click AI Assistants… (see Profiles and settings below), then choose Read only in the Assistants menu.
- Click Add to Claude Desktop…. Cella PDF makes a small connector file and opens it with Claude Desktop, which asks you to confirm the install. For Claude Code, VS Code, Cursor and other assistants, click Copy Setup… instead: it offers the Claude Code command line, the entry for a JSON configuration file and VS Code's entry, each with a Copy button.
- Ask your assistant a question about your drawings. The first time one connects, Cella PDF tells you so; after that the status band shows "Claude connected" (or the assistant's own name) while it is working.
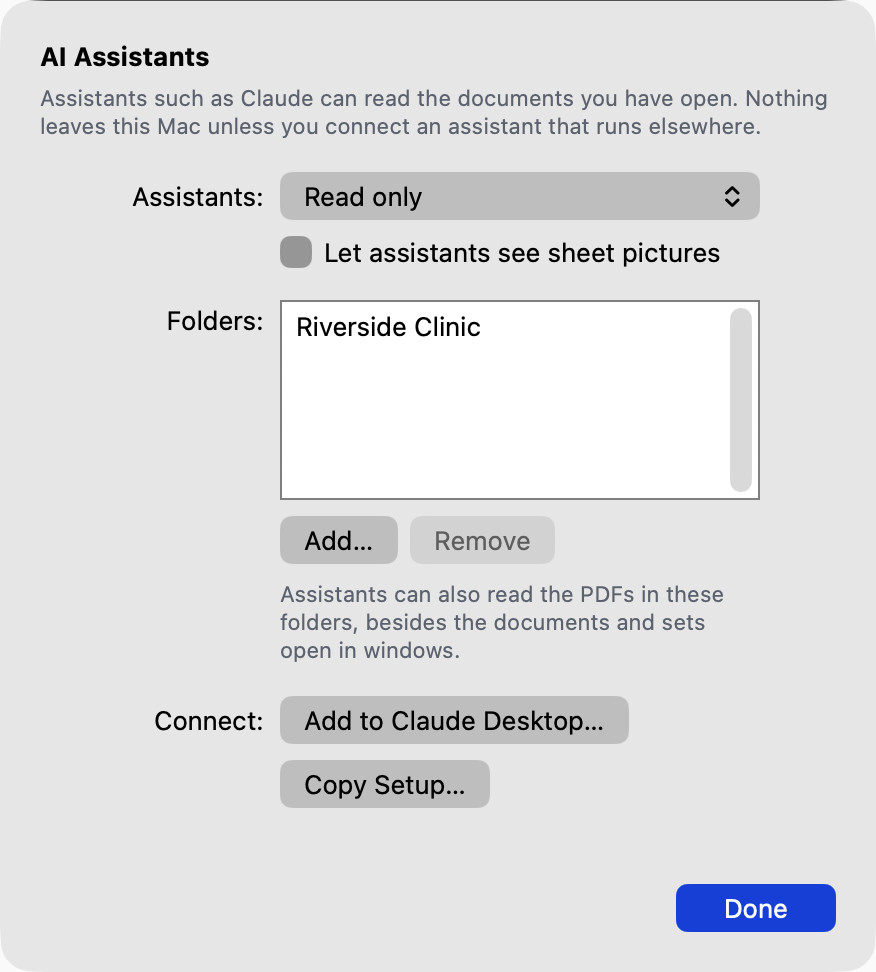
Read and propose changes. Choose Read and propose changes in the Assistants menu and an assistant can also suggest work: clouds, callouts, notes and highlights on a sheet, a status for markups, a reply, values for your custom columns, an Excel or summary export, and a transmittal. It never changes anything on its own. Every change comes to you first in a sheet titled "assistant wants to change document", listing each change with Deny and Allow. Nothing happens until you click Allow; Deny, or no answer within ten minutes, drops the request.
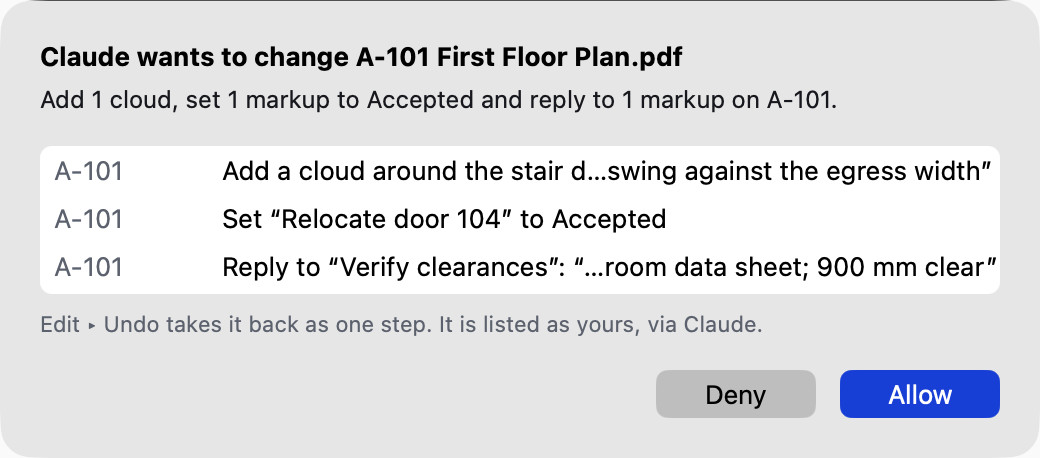
- An allowed change to an open document is one step: Edit ▸ Undo takes it all back. The markup history shows it as "you via assistant".
- A status change across a whole set also saves the files of the set that are not open. Those cannot be undone; as with Set Status, Cella PDF keeps a
.bakbeside each file it changed. - An export lands next to the document (or in the set's folder) as a new file and never overwrites one that is there; a second export gets a number in its name.
- Set-wide requests read a file that is open in a window as you last saved it.
Fixing its own markups. An assistant can also move, resize, restyle and reword markups, change a callout's leader, and delete markups. Each request comes to you in the same sheet, worded change by change ("moved from … to …", the old and new text). A deletion is listed in red. An assistant may only delete markups it made for you; if it asks to delete someone else's, the sheet names who made each one, so you can deny it. Locked markups are never changed or deleted. An assistant can also show or hide a layer in the window for you: that changes only what you see, nothing in the file, so it is not asked.
Its look. An assistant's markups take your tool's look (what you set with Set as Default for Tool) unless it asks for another: a colour, fill, text size, font, line width, dash or arrowhead, or the look of one of your Tool Chest tools by name, such as a "QC blue" callout. Everything it adds is listed in the Markups list with the author "you via assistant", so Filter ▸ Author shows its markups together.
Collecting changes in a draft. A large review can mean many requests. When an assistant adds markups, the sheet has a checkbox, Collect this and later changes from assistant in a draft to review; tick it and the Allow button reads Start Draft. From then on:
- the assistant's markups in that document go on a layer named "Draft: assistant" without asking you each time. You see them on the sheet as they will be, and you can select, move and edit them;
- a band at the top of the window says "Draft from assistant: 34 markups" with Review (the draft's markups selected and the Markups List showing only them), Accept All and Discard. Accept All keeps them as ordinary markups, on the layer the assistant asked for; Discard deletes them. Each is one step that Edit ▸ Undo takes back. To keep or drop only some, select them and choose Markups ▸ Accept Draft Markups or Discard Draft Markups (also on the right-click menu);
- the assistant can change or delete the markups of its draft without asking, and nothing else.
A draft never covers: changing or deleting a markup that is not in the draft (yours, a colleague's, or one you already accepted), statuses, replies, column values, exports, transmittals, changes to files that are not open, or another document. Those always come to you in the sheet. A draft holds at most 500 markups; the assistant is then told to ask you to accept or discard it first.
Draft markups stay in your copy until you accept them: Send to Client leaves them out, Flatten leaves them as markups, the Markups summary, Excel and take-off exports and the totals leave them out, Check Set does not count them, and a document connected to a server does not send them until you accept them. They print when their layer is shown. A draft is saved with the document: close it and the band is back when you open it again. An assistant that reconnects starts a new draft only after you tick the box again. To have the box ticked for you, choose Changes from assistants: Collect in a draft to review in the AI Assistants pane.
What the assistant can see. The documents open in your windows (with edits you have not saved yet), the folder sets open in windows, and the folders you add in the pane. It reads markups, their statuses, comments and replies, quantities, the sheet text, the sheet index and revisions, and can compare two issues of a set. It never reads other files on your computer, and it is never told where on your disk a file lives. Pictures of the sheets are a separate switch, Let assistants see sheet pictures, and it is off.
Help for a QC review. An assistant reviewing a set can do most of its checking without pictures:
- read a sheet's text as plain lines, or the text of every sheet of a set at once, page by page;
- find where text sits on a sheet (every search result says where it is), and list markups with where each one is;
- learn each sheet's size and rotation, and give or take positions measured from the sheet's top-left corner as it reads on screen, rotation allowed for, rather than from the PDF's own corner;
- run Check Set and get its findings, including keynote tags missing from a sheet's legend;
- ask what a markup, or a box it is thinking of adding, would cover: sheet text, drawn lines, pictures, other markups, or the edge of the sheet;
- find clear space near a spot for a note of a given size or text, or for a list of notes lined up in a column clear of the drawing;
- find the nearest drawn line, corner or intersection to a point, so a leader can end exactly on it;
- list the document's layers, shown and hidden.
With Let assistants see sheet pictures on, it can also ask for close-ups of the markups it placed, several at once in one numbered picture, which is the quickest way for it to check its own work.
Watching what it does. Window ▸ AI Assistant Activity lists every request an assistant makes, newest first: when, which assistant, what it asked for and which documents it touched. Setting the menu back to Off ends the connection at once.
What leaves your computer. Cella PDF itself sends nothing anywhere: no account, no upload. But the assistant is a separate app, and what it reads from your drawings it may send to its own service to answer you, under that service's own privacy terms. Turn it on only for assistants and drawings you are comfortable sharing that way. Text on a drawing is handed over as plain data; an assistant is told not to follow instructions that happen to be written in a markup.
Profiles and settings
Settings
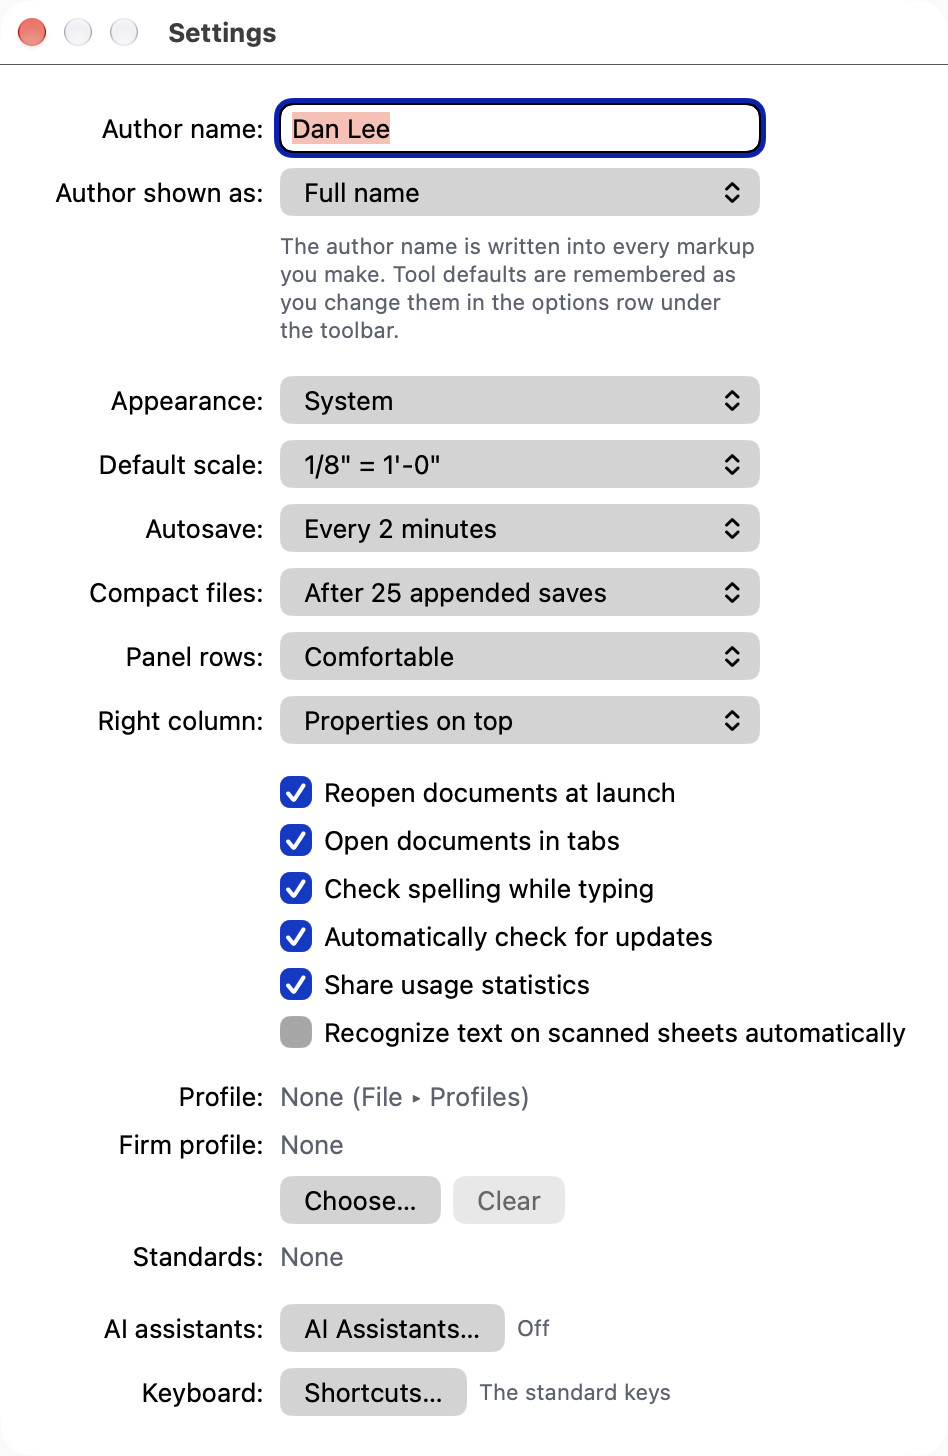
Cella PDF ▸ Settings… (⌘,; Ctrl+, in File ▸ Options… on Windows and File ▸ Settings… on Linux):
- Author name: written into every markup you make.
- Appearance: Match System, Light or Dark, for the interface only (also in View ▸ Appearance).
- Default scale: the scale new sheets start with.
- Autosave: Off, or every 1, 2, 5 or 10 minutes; see Troubleshooting and recovery.
- Author shown as: full name or initials, unless a firm standard locks it.
- Compact files: Never, or after 10, 25 (the default), 50 or 100 appended saves the file is written whole again (see Saving keeps signatures valid).
- Panel rows (Comfortable or Compact) and Right column (Properties on top or Markups List on top).
- Mouse wheel: Scrolls the sheet (the wheel moves the drawing; hold ⌘ or ⌥, Ctrl or Alt on Windows and Linux, to zoom) or Zooms (the wheel zooms; hold ⌥ or Alt to scroll); see Zoom and navigation.
- Reopen documents at launch, Open documents in tabs, Automatically check for updates, Check spelling while typing and Recognize text on scanned sheets automatically.
- Profile and Firm profile: see below.
- Keyboard: Shortcuts…: change any command's keys; see Changing shortcuts.
- Tips: Show tips turns the one-line tips on or off; Reset Tips brings back every tip you have put away and the offer of the tour (see Take the tour).
Tool defaults (colours, widths, fonts) are remembered as you change them in the toolbar. Whether the Welcome window appears at launch is the checkbox on the Welcome window itself; Invert Drawing, Snap to Drawing and the Snap pull-down's checkboxes are remembered from their menus.
AI Assistants
Settings… ▸ AI Assistants… is the pane for connecting assistants (how it is used is under Sharing and sync, above).
- Assistants: Off (the default; no assistant can connect), Read only (assistants read documents, sheets and markups) or Read and propose changes (assistants may also propose changes, each of which you allow or deny in a sheet).
- Let assistants see sheet pictures: off by default. While it is off, an assistant gets text and markups, never an image of a sheet.
- Changes from assistants: Ask each time (the default) or Collect in a draft to review, which ticks the approval sheet's draft box for you (see Collecting changes in a draft). It is available with Read and propose changes.
- Folders: folders of PDFs an assistant may read besides what is open in windows. Add… takes one or several; Remove takes one away.
- Add to Claude Desktop… (Mac only) and Copy Setup… connect an assistant.
If your firm's profile sets AI Assistants, the mode, the pictures switch and the folders show Set by the profile's name and cannot be changed; the connect buttons still work. Without a license or the trial every control is off.
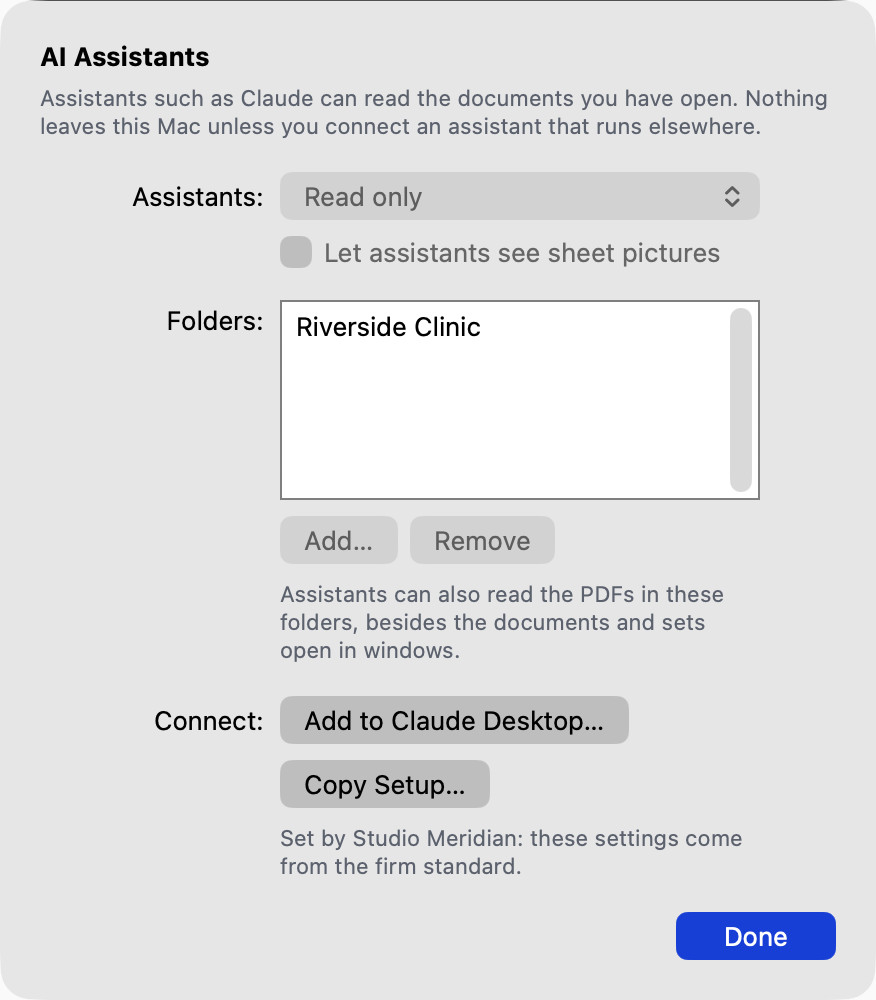
Profiles
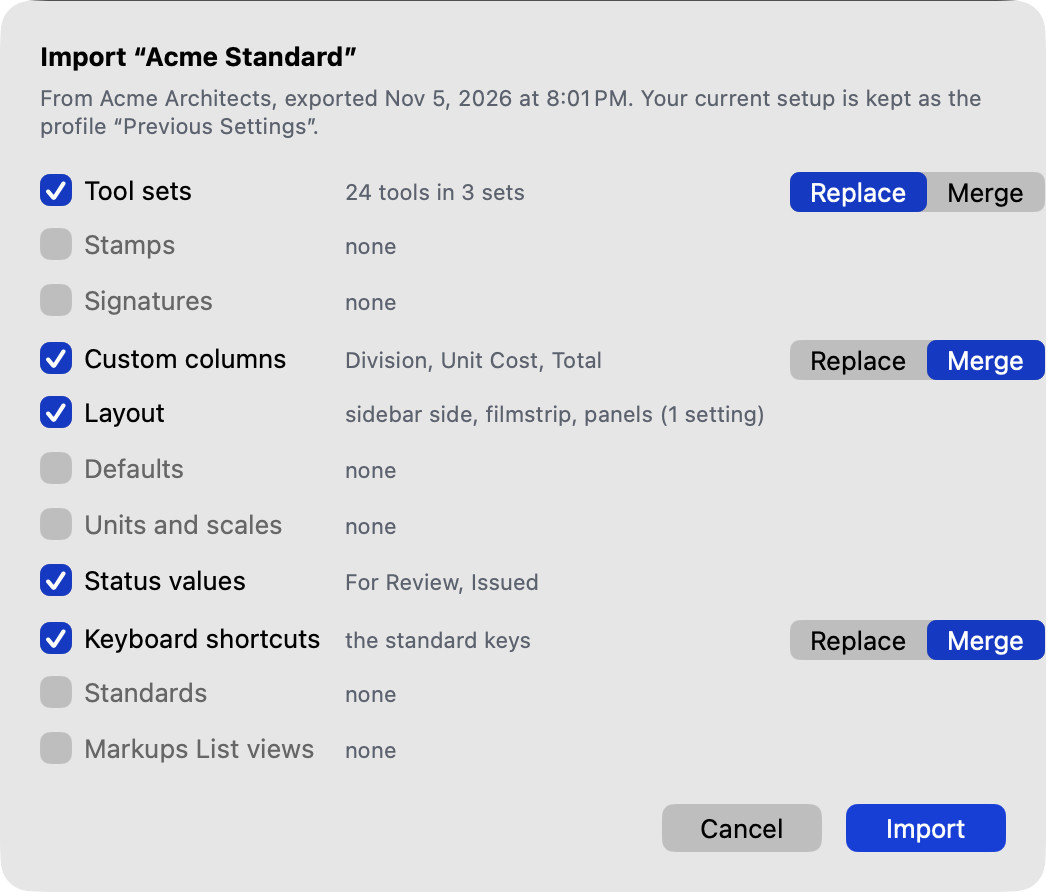
A profile is your setup in one file: your Tool Chest's tool sets, your stamps, custom columns, status values, layout (where the sheets and panels go), defaults (tool styles, autosave, the Welcome window, Invert Drawing), units (default scale and presets) and the keyboard shortcuts you changed. A firm makes one so everyone works the same way.
- File ▸ Profiles ▸ Export Profile… asks for the profile's name and your firm's, and whether to include your signatures' pictures (off unless you tick it: a profile is meant to be shared).
- Import Profile… shows what the file holds with a checkbox for each part. For tool sets, columns and keyboard shortcuts, choose Replace (the profile's instead of yours) or Merge (yours stay, the profile's new ones are added; for a shortcut you both changed, the profile's). Before anything is replaced, your current setup is saved as the profile Previous Settings, so you can switch back. It also reads a
.bpxprofile (with a drawing open): its tool sets, custom columns and Markups List layout, the rest listed as not carried (see Coming from Bluebeam Revu). - Imported profiles are listed in File ▸ Profiles with the active one ticked; choose another to switch to it. Manage Profiles… saves the current setup as a new profile and duplicates, renames, deletes, activates and reveals them. Add Profile Columns to Document gives the open document the profile's custom columns it doesn't have yet.
A firm profile. In Settings, Firm profile ▸ Choose… picks a profile on the office's shared drive. Cella PDF applies it then, and again at launch whenever the file has changed, so the office can push new tools. The firm's tool sets replace the ones of the same name and your own sets stay. Columns and the firm's shortcuts are added (your other shortcut changes stay), and layout, defaults and status values follow the firm's. The active profile shows in Settings and on the Welcome window.
Firm standards
A profile can carry the firm's standards: a style sheet so every seat marks up the same way. They cover each tool's look (colour, fill, width, opacity, line ends, cloud, font, size, bold, italic, underline, strikethrough, alignment), the nine hot colours, the Subject and Status values (and whether other values are allowed), the default scale and depth unit, how measurements read (feet and inches to 1/16", millimetres…), whether authors are written as full names or initials, header & footer presets, the firm's stamps, legend templates, and the profile's tool sets.
Each item can be locked. A locked value is enforced: you see its control, but it is disabled and says "Set by <profile>" (in Properties, the options row under the toolbar and the tool palette's STYLE column); new markups take it whatever you pick. An unlocked value is only the firm's default, which you may change.
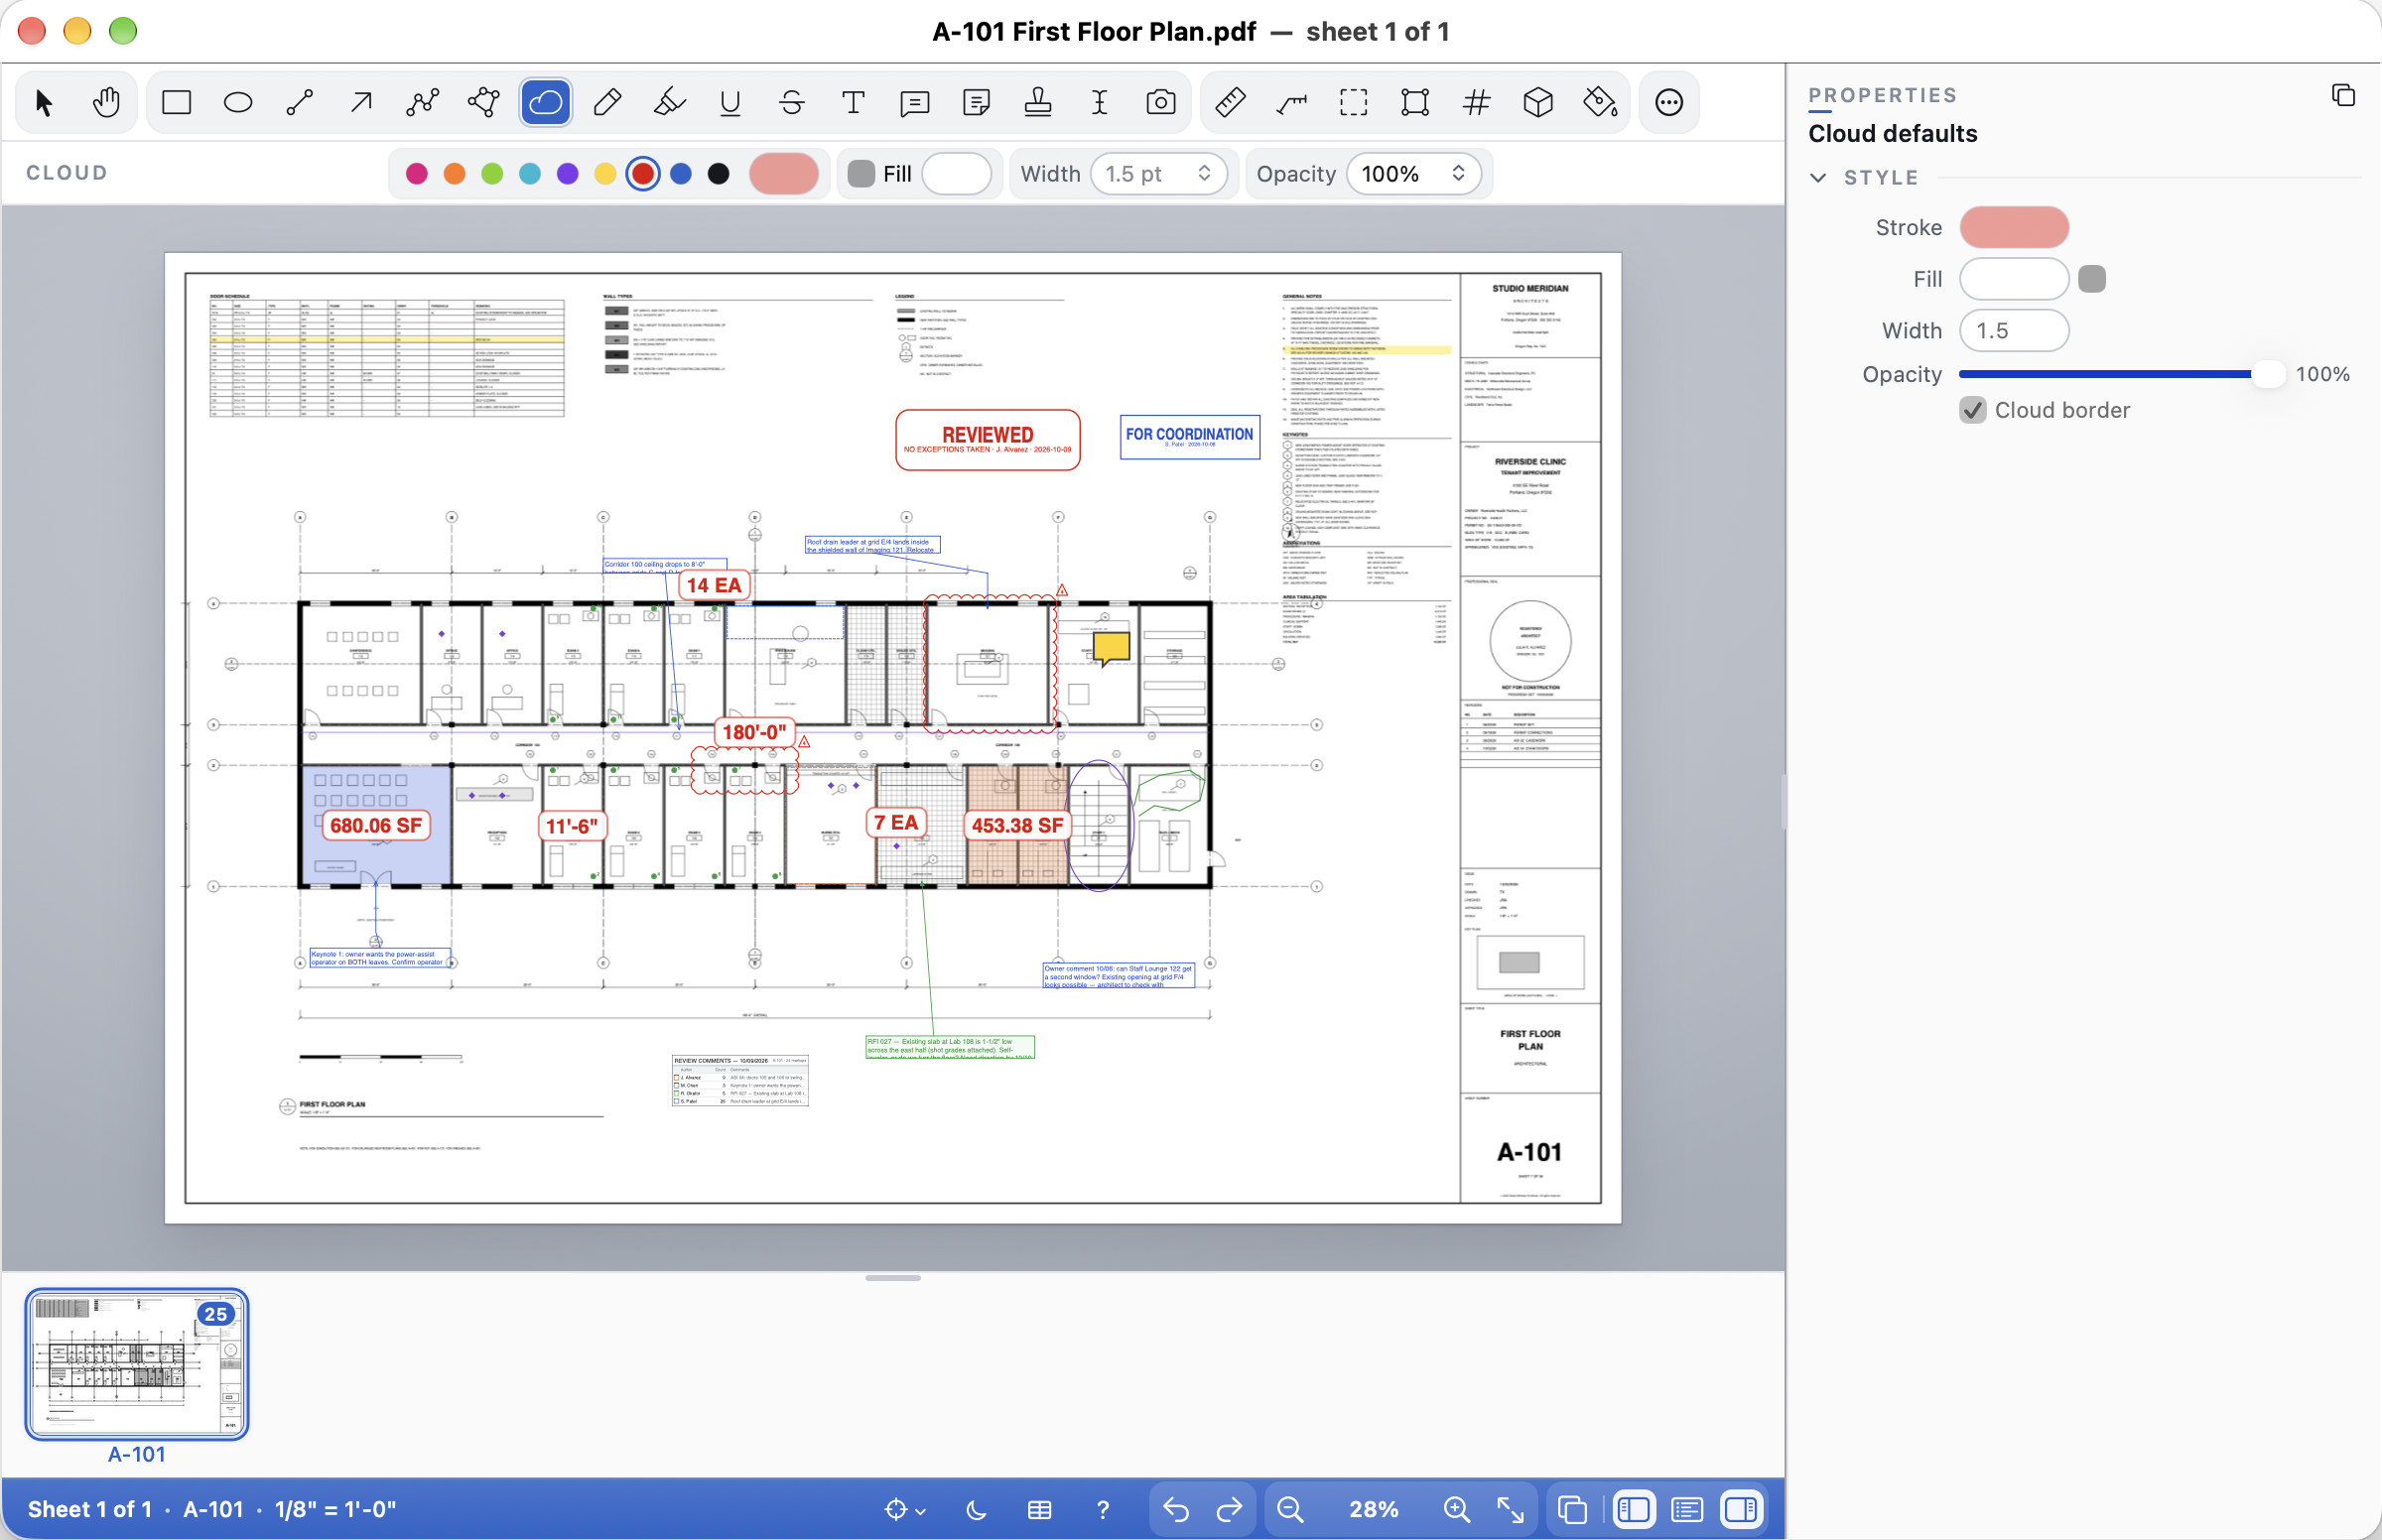
- Making them: File ▸ Profiles ▸ Manage Profiles…, select the profile, and use the Standards table under the list. Capture Current Defaults takes your Mac's tool styles, colours, status values, scale, author rule, stamps and last-used headers and legend into the standard. Edit… (or double-click) changes one item; for a tool's style, pick the tool and set its colour, width, font and so on with the same controls as the options row. Tick Locked for what every seat must follow. Changes are saved to the profile at once; export it or put it on the office drive as the firm profile.
- Using them: importing or switching to a profile that has standards (or the firm profile changing) applies them. Apply to This Mac in the Standards table does it by hand. Each launch puts locked values back. Settings shows Standards: <profile> and the Welcome window's profile line does too. A profile without standards leaves yours as they are.
- Apply to Document gives the open document the profile's custom columns and gives sheets without a scale the default scale. Subject and Status lists stay in the profile: a PDF has no place for them.
- Headers & Footers… and Insert Legend… offer the firm's presets and templates in a popup (locked: only those). With the stamps locked, Create Stamp is off: use the firm's stamps.
- Settings ▸ Author shown as chooses full name or initials, unless the standard locks it.
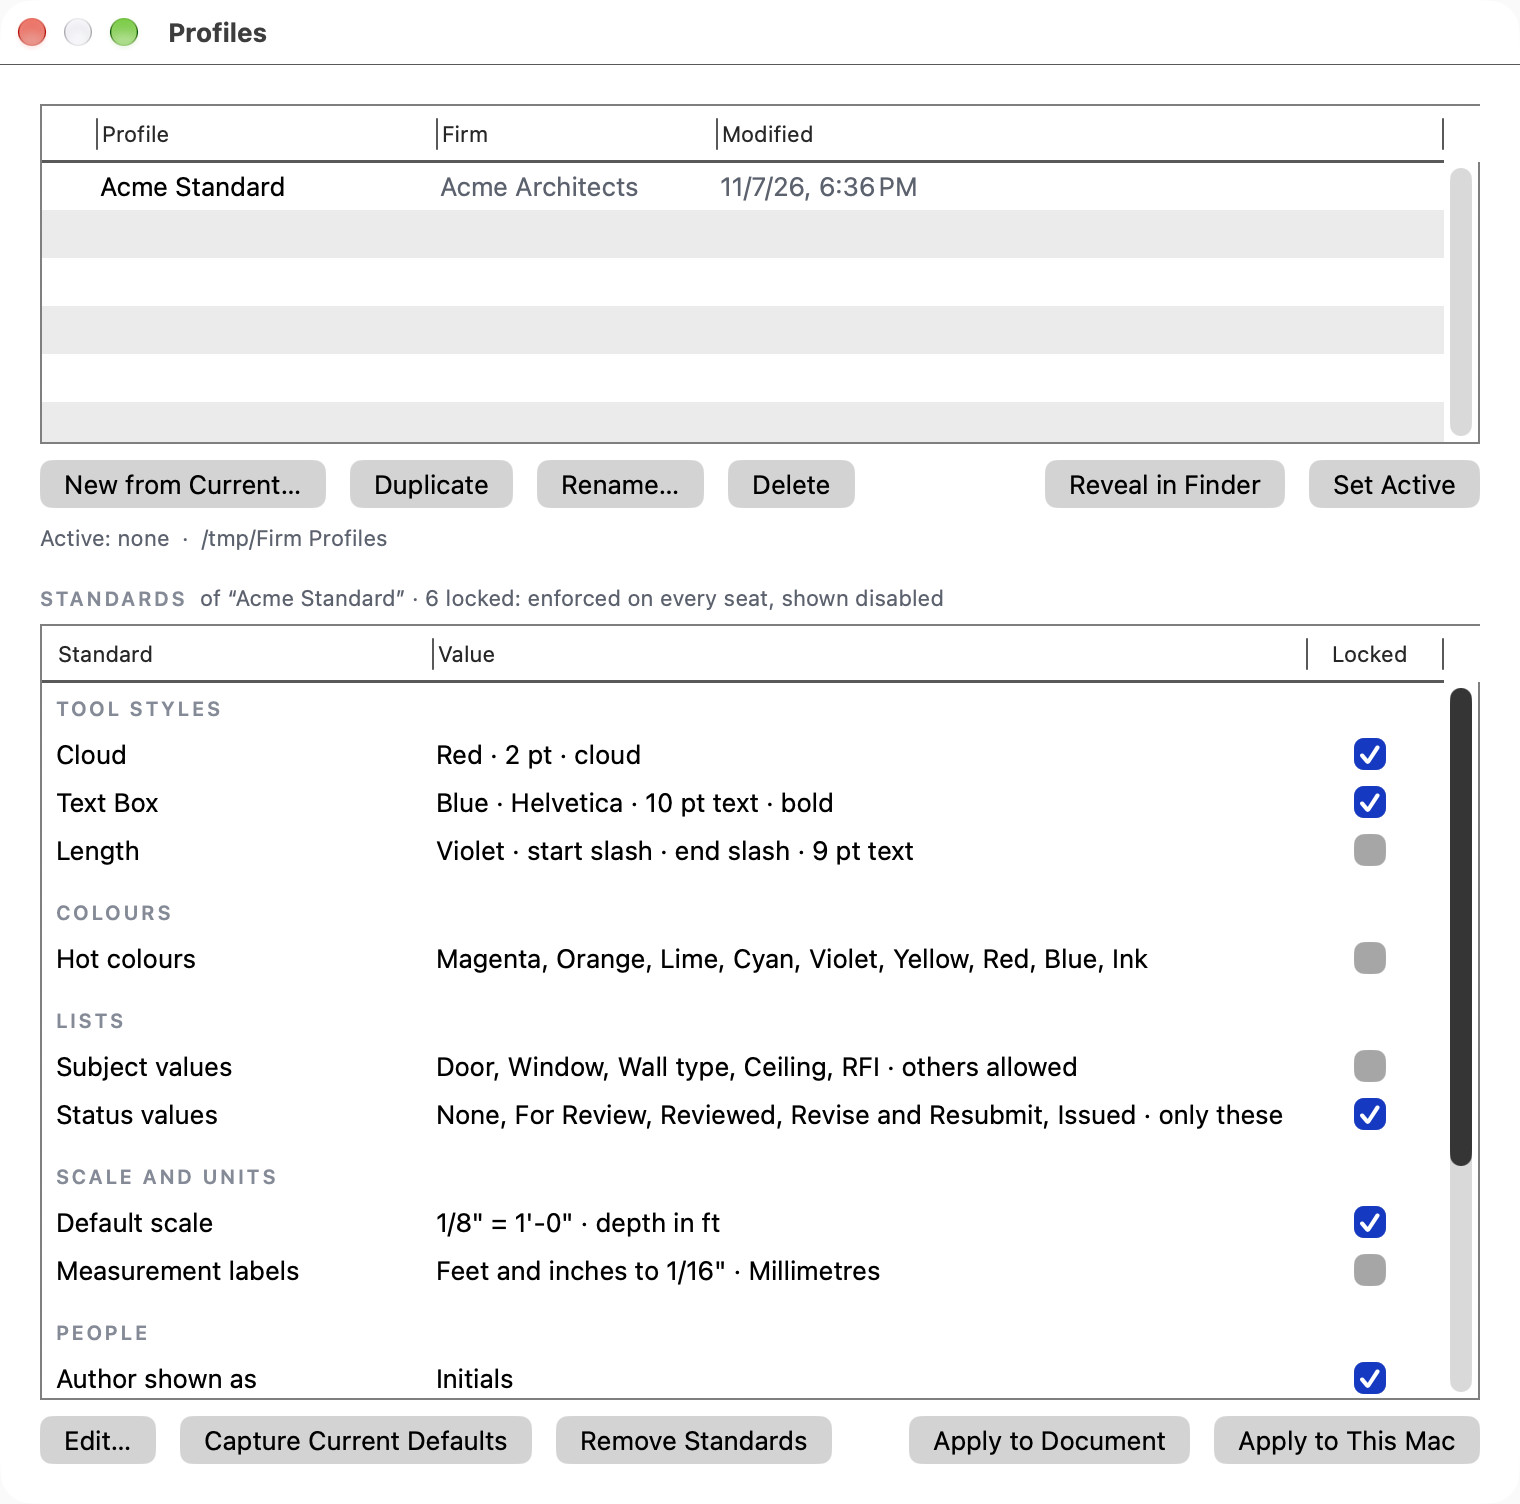
Keyboard shortcuts
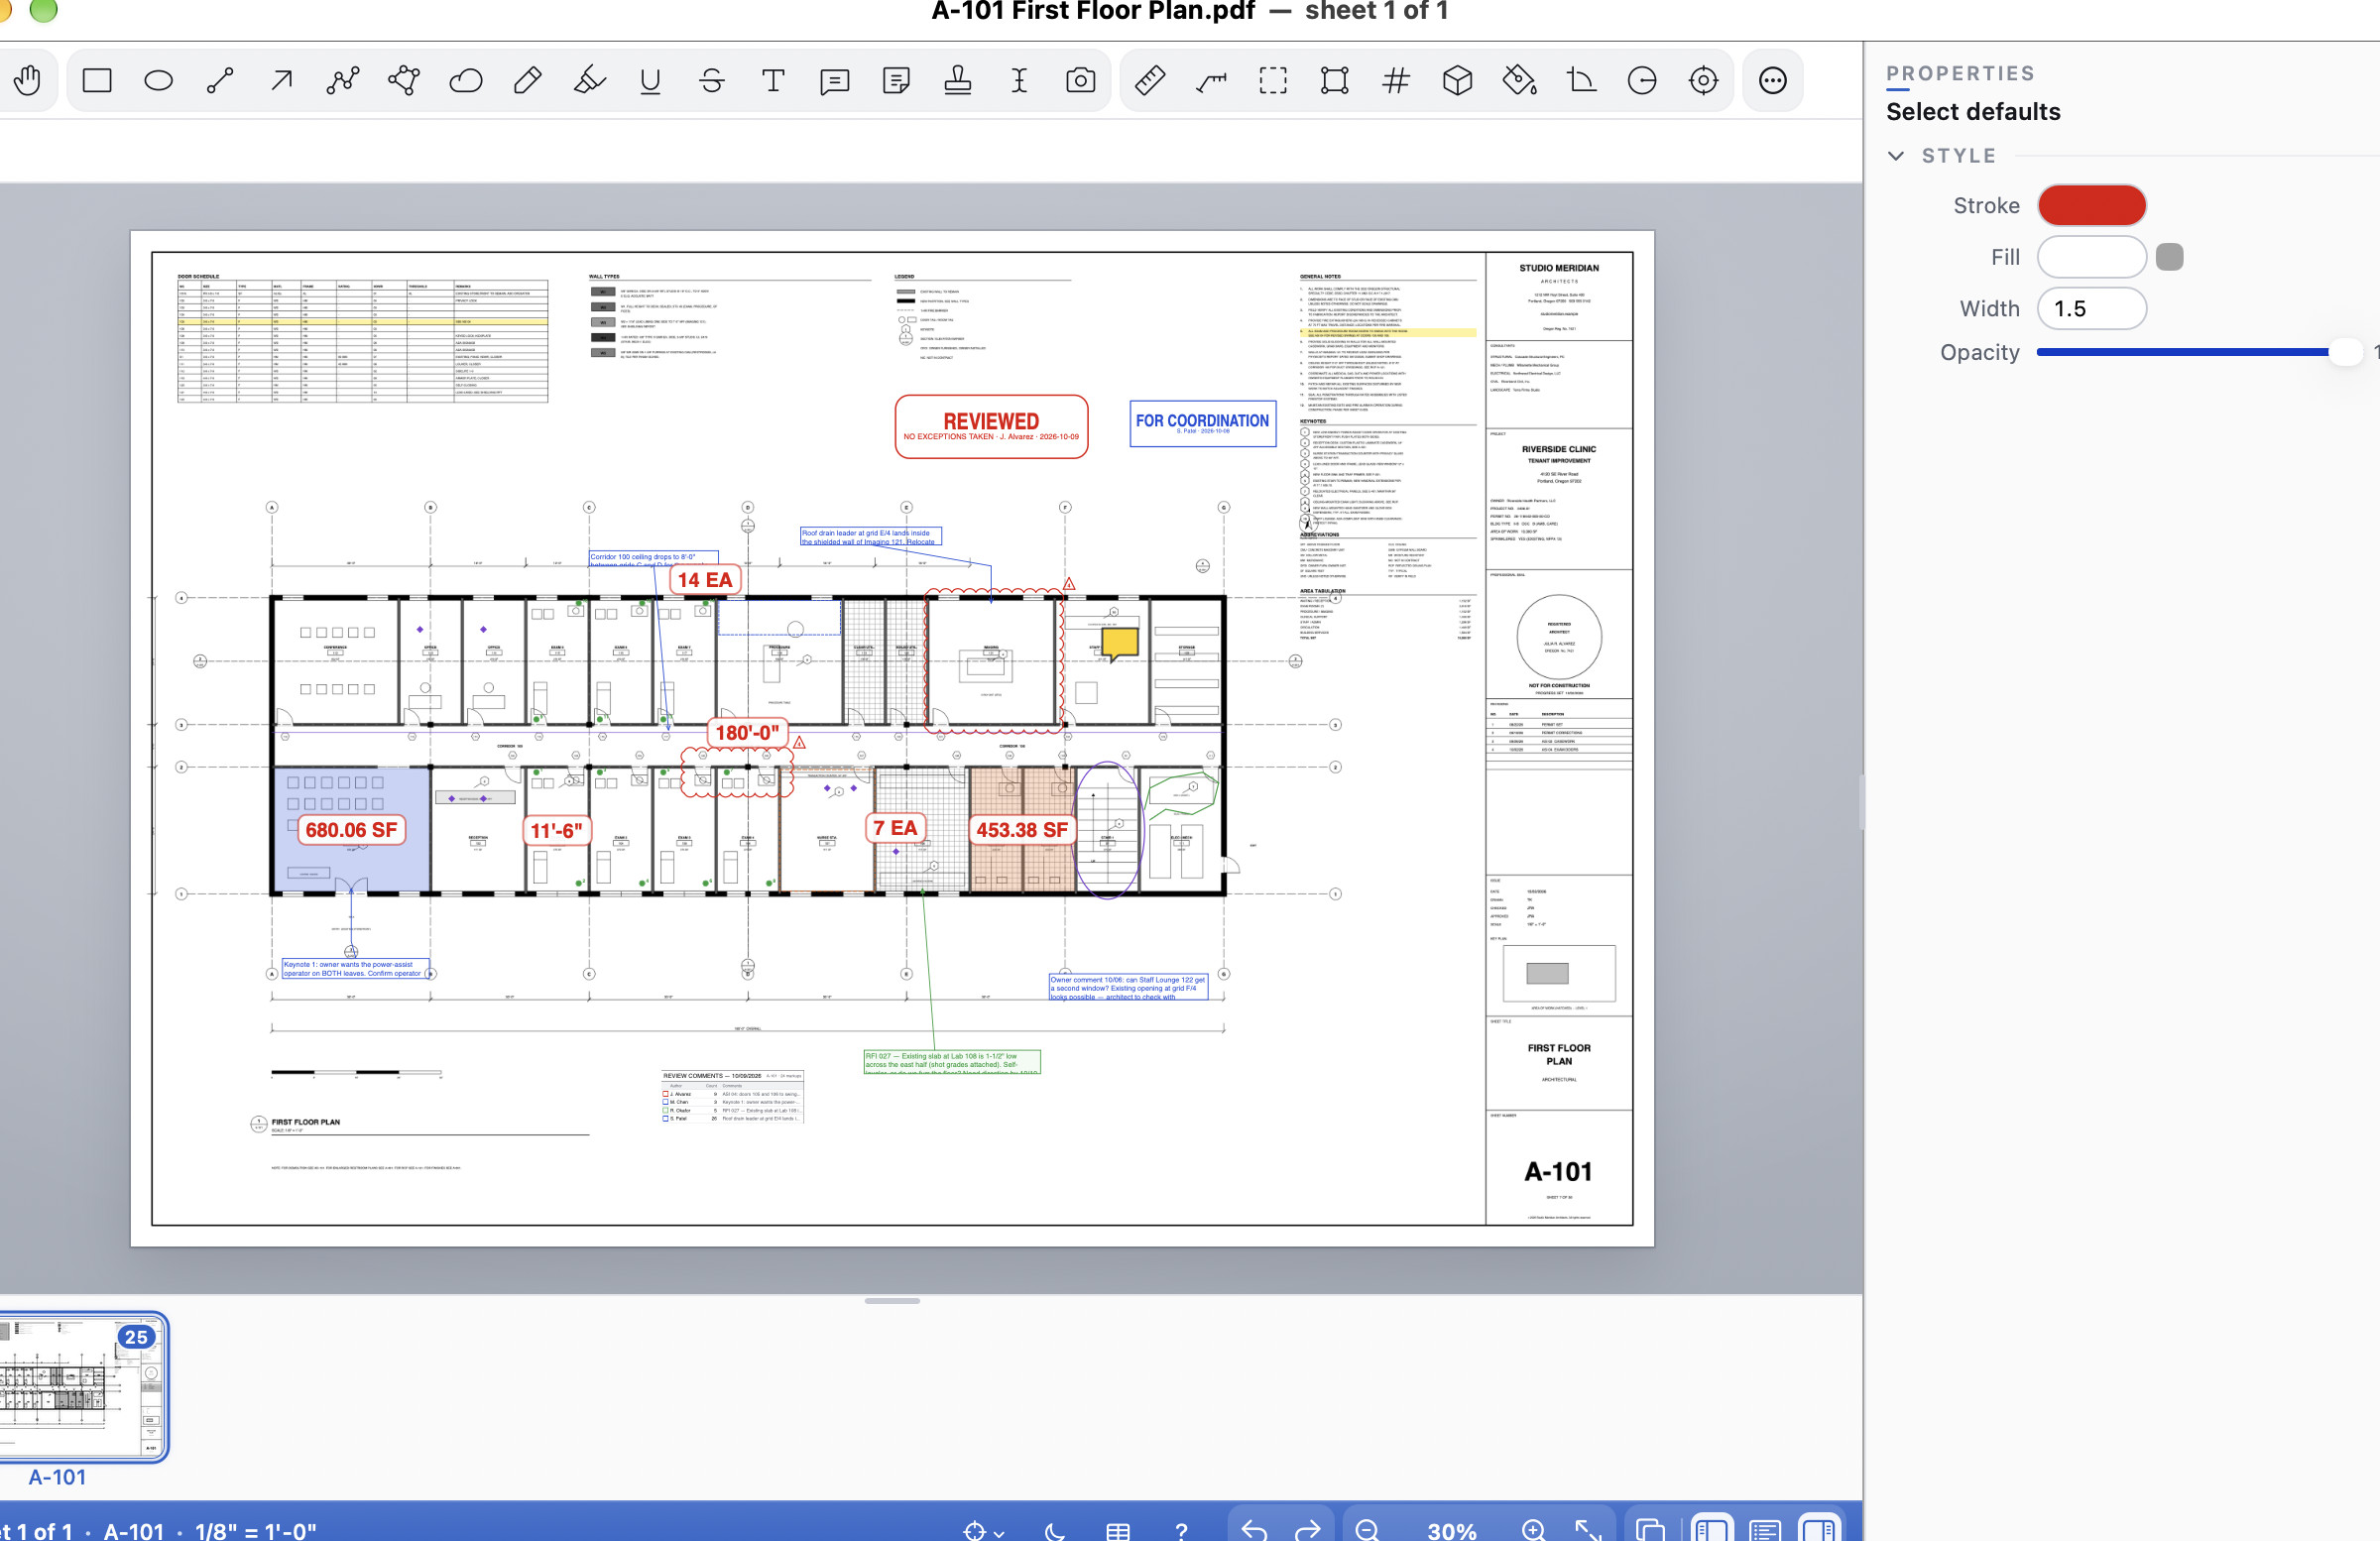
Help ▸ Keyboard Shortcuts (⌘/; Ctrl+/), or the ? at the right of the status band, lists every shortcut over the drawing, with a filter field; Esc closes it. The full list, for both, is the appendix at the end of this guide.
Single-key tool shortcuts (V, R, T, ⇧⌥L; Shift+Alt+L…) work only while the drawing has the keyboard, never while you type in a field. ⌃Tab (Mac) or Ctrl+Tab (Windows and Linux) moves the keyboard between the sheets, the drawing, Properties and the Markups List (⌃⇧Tab or Ctrl+Shift+Tab goes back); the panel that has it shows a blue ring round its heading. In the toolbar the arrow keys move between buttons and Space presses one. Every button and list is named for VoiceOver, Narrator and Orca.
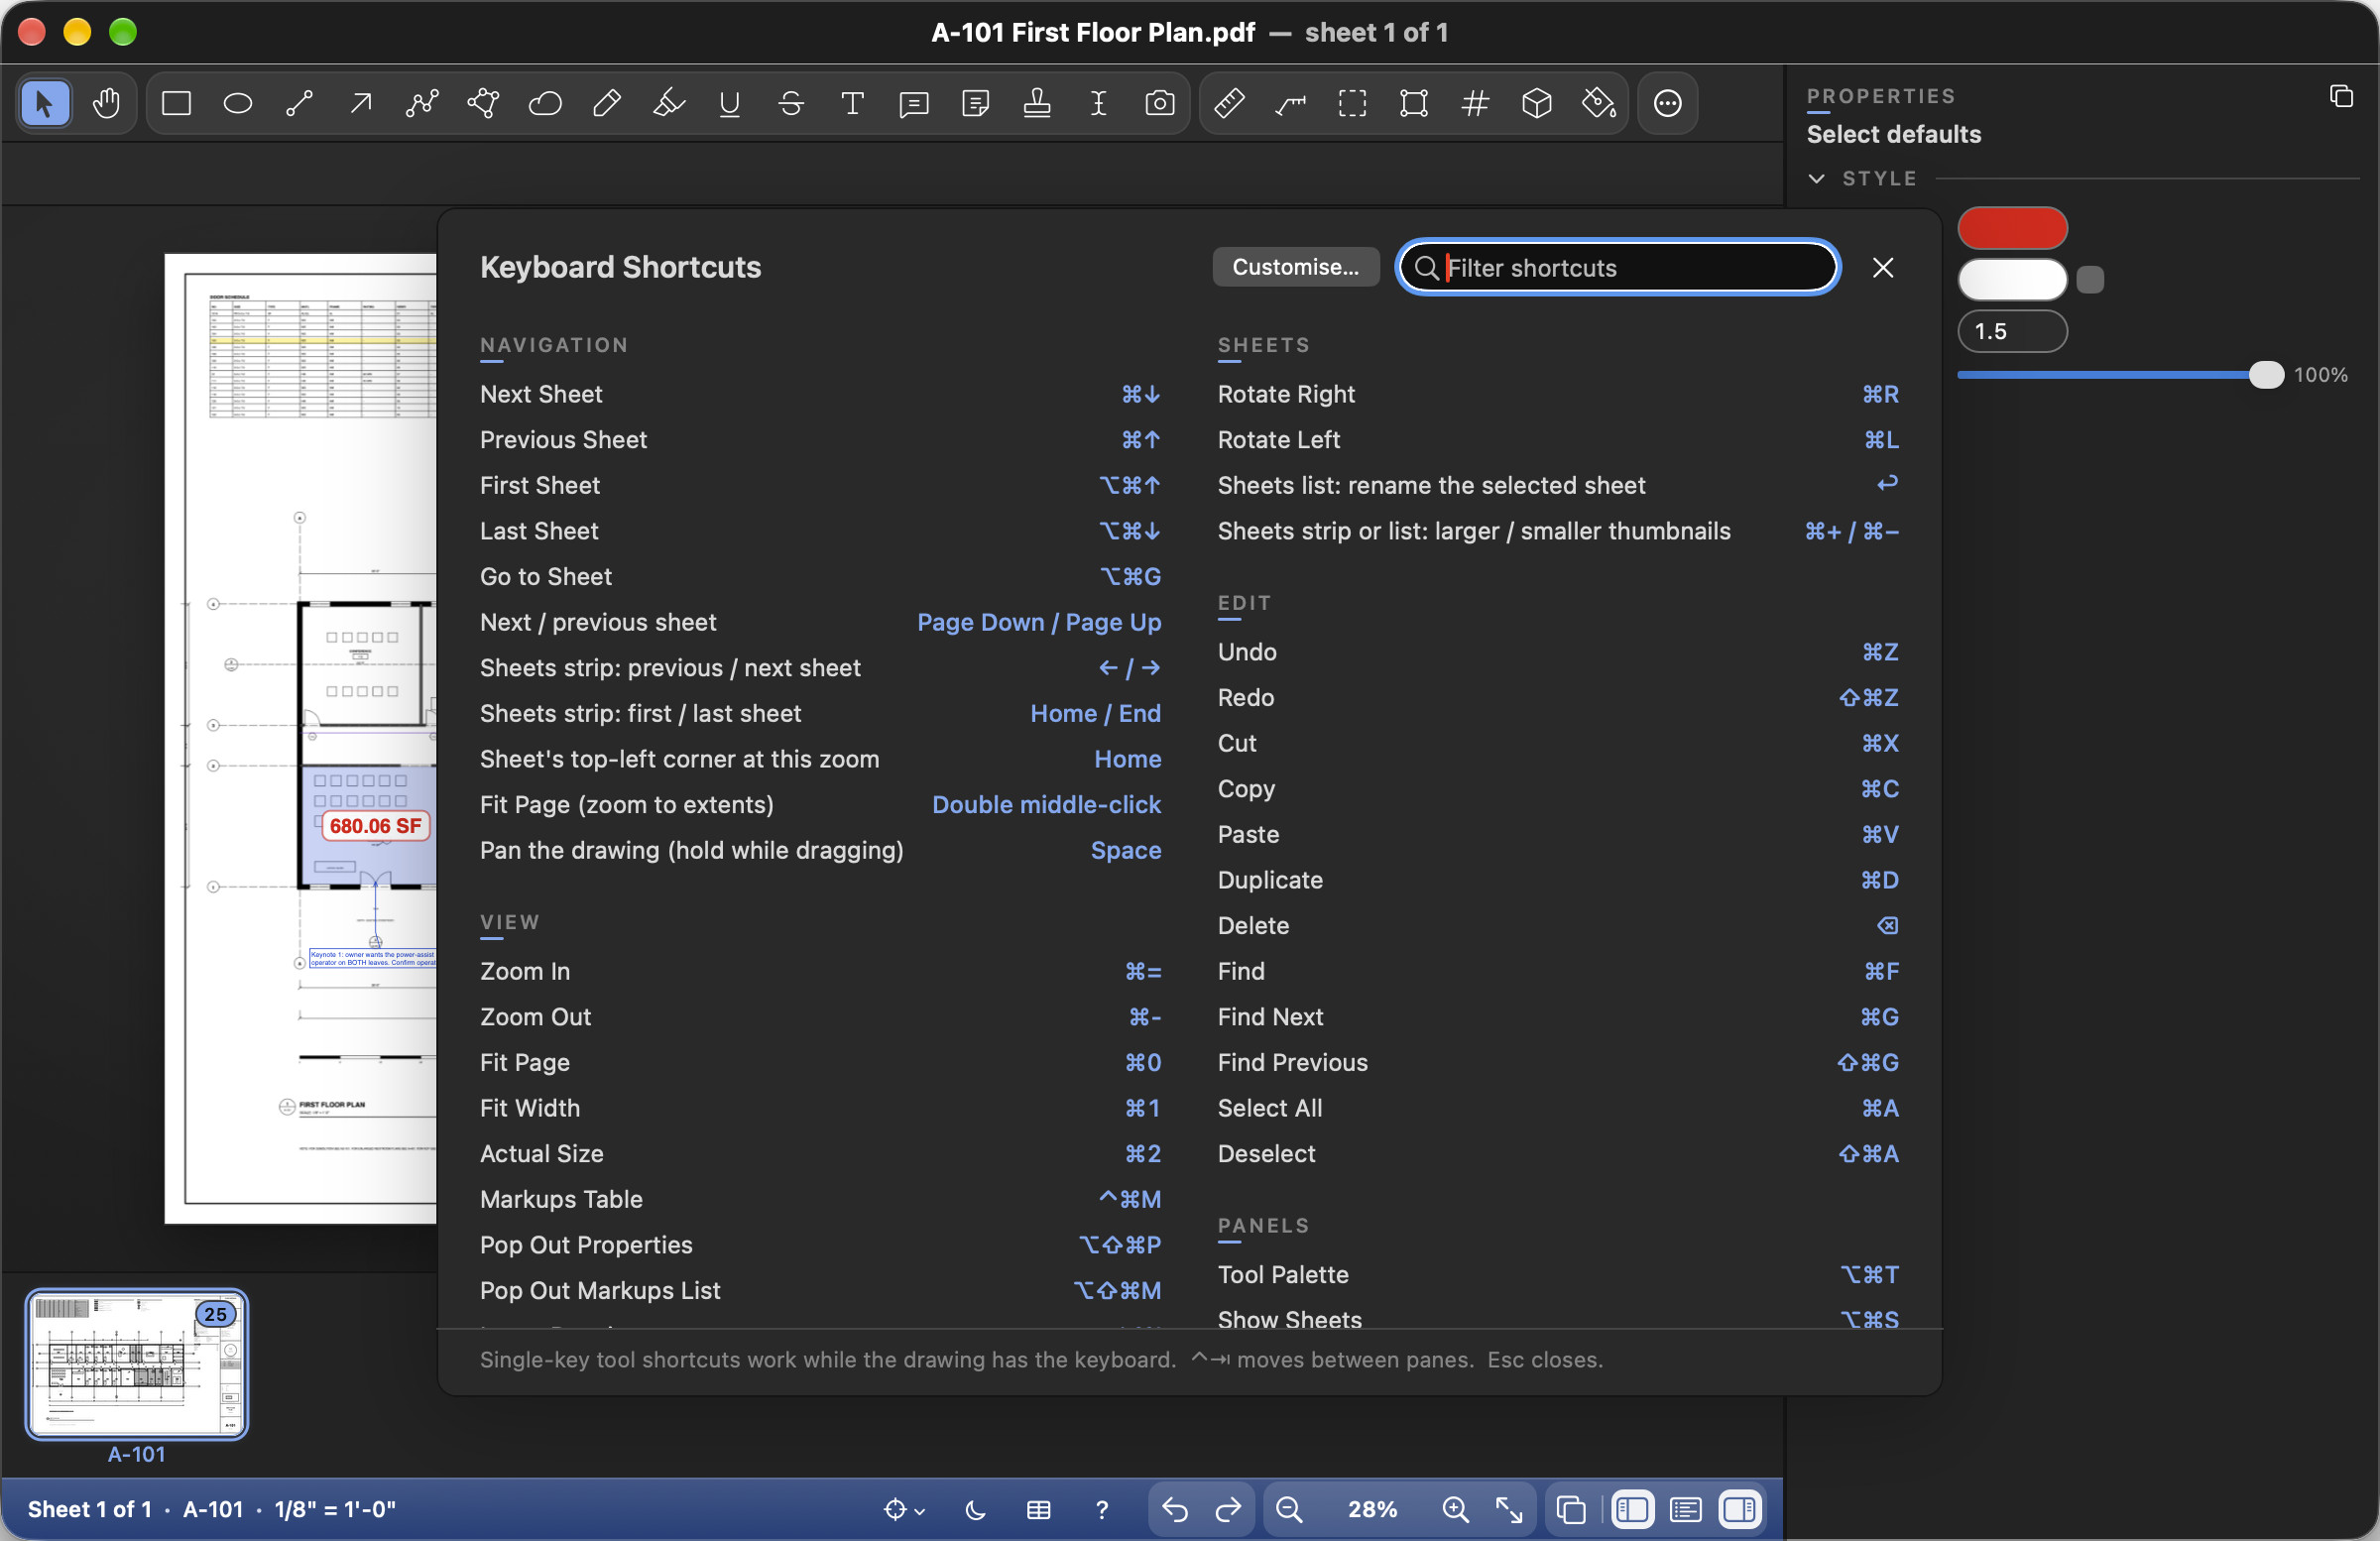
Changing shortcuts
The keys in this guide are the defaults. Cella PDF ▸ Settings… ▸ Shortcuts… (or Customise… at the top of the shortcut list) lists every menu command and every tool, grouped as the menus are, with a search field. Click a command's shortcut and press the new keys; Esc cancels and Delete leaves the command without one. ↺ puts one command back and Restore All Defaults puts them all back. Nothing changes until you click OK; then the menus, the toolbar's tooltips, the tool buttons, the command palette and the shortcut list all show the new keys.
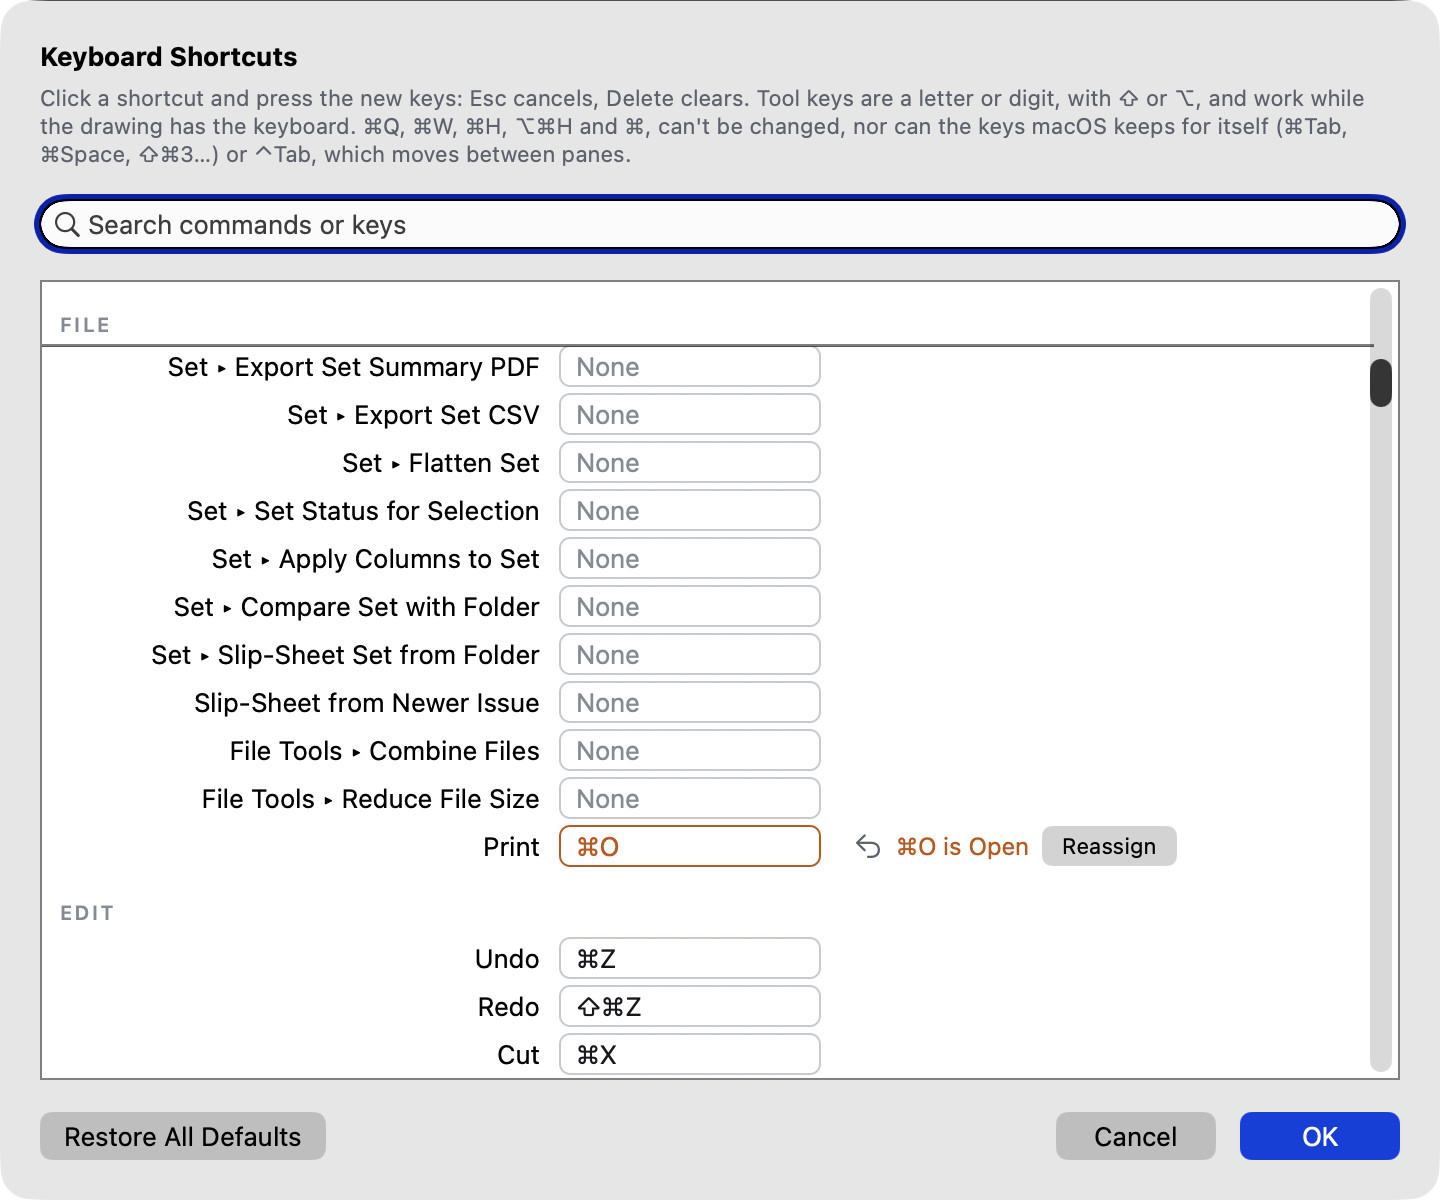
- In the Mac's editor, a menu command's shortcut needs ⌘ or ⌃ (or is a function key such as F5). A tool's key is a single letter or digit, with ⇧ or ⌥ if you like, and works while the drawing has the keyboard.
- If another command already has the keys, the row names it in orange with a Reassign button; only Reassign moves the keys (the other command is then left without any).
- On the Mac, ⌘Q, ⌘W, ⌘H, ⌥⌘H and ⌘, can't be changed, and neither can the keys macOS keeps for itself (⌘Tab, ⌘Space, ⇧⌘3 and the other screenshot keys, ⌃ and the arrow keys…) or ⌃Tab, which moves between panels.
- Your changes travel in a profile (Export Profile…), and a firm profile can set them for everyone.
Windows and Linux have the same editor under Settings (Options on Windows), Keyboard: Shortcuts….
Mac, Windows and Linux keys
Most keys match: ⌘ on the Mac is Ctrl on Windows and Linux, ⌥ is Alt and ⇧ is Shift, so ⌘S is Ctrl+S and ⇧⌥L is Shift+Alt+L. These are the keys that don't follow that rule:
| Command | Mac | Windows | Linux |
|---|---|---|---|
| Cella PDF Help | ⌘? | F1 | F1 |
| Redo | ⇧⌘Z | Ctrl+Y | Ctrl+Shift+Z |
| First / Last Sheet | ⌥⌘↑ / ⌥⌘↓ | Ctrl+Home / Ctrl+End | Ctrl+Home / Ctrl+End |
| Group / Ungroup | ⌃⌘G / ⌃⇧⌘G | Ctrl+J / Ctrl+Shift+J | Ctrl+J / Ctrl+Shift+J |
| Autosize Text Box | ⌥⌘Z | Alt+Z | Alt+Z |
| Invert Drawing | ⌃⌘I | Ctrl+Alt+I | Ctrl+Alt+I |
| Scale Ruler | ⌃⌘R | Ctrl+Alt+R | Ctrl+Alt+R |
| Constrain to Ruler | ⌃⌥⌘R | Ctrl+Shift+Alt+R | Ctrl+Shift+Alt+R |
| Triangle | ⌃⌘T | Ctrl+Shift+Alt+T | Ctrl+Shift+Alt+T |
| Protractor | ⌃⌘A | Ctrl+Shift+Alt+A | Ctrl+Shift+Alt+A |
| Tool Palette | ⌥⌘T | Ctrl+Shift+T | Ctrl+Shift+T |
| Pop Out Properties / Markups List | ⌥⇧⌘P / ⌥⇧⌘M | Ctrl+Shift+Alt+P / Ctrl+Shift+Alt+M | Ctrl+Shift+Alt+P / Ctrl+Shift+Alt+M |
| Markups Table | ⌃⌘M | Ctrl+Shift+M | Ctrl+Shift+M |
| Ortho | F8 | F8 | F8 |
| Find Next / Previous | ⌘G / ⇧⌘G | Ctrl+G / Ctrl+Shift+G, or F3 / Shift+F3 | Ctrl+G / Ctrl+Shift+G, or F3 / Shift+F3 |
| Show Previous / Next Tab | ⌥⌘← / ⌥⌘→ | Ctrl+Page Up / Ctrl+Page Down | Ctrl+Page Up / Ctrl+Page Down |
| Go to tab 1 to 9 | — | Alt+1 … Alt+9 | Alt+1 … Alt+9 |
| Enter Full Screen | ⌃⌘F | F11 | F11 |
| Settings | ⌘, (Cella PDF ▸ Settings…) | Ctrl+, (File ▸ Options…) | Ctrl+, (File ▸ Settings…) |
| Quit | ⌘Q | File ▸ Exit | Ctrl+Q |
| Export Markups as CSV | ⇧⌘E | File ▸ Export ▸ Markups as CSV… | File ▸ Export ▸ Markups as CSV… |
| Bring to Front / Send to Back, Lock / Unlock | ⇧⌘] / ⇧⌘[, ⇧⌘L | no keys | no keys |
| Markups List: edit the row | double-click | F2 | F2 |
On Linux, Ctrl+Alt+T is left to the desktop (it opens a terminal), which is why the tool palette is Ctrl+Shift+T on Windows and Linux alike.
Troubleshooting and recovery
Saving can't lose your file
Save (⌘S; Ctrl+S) writes the PDF to a temporary file next to the original, reads it back to make sure it is a complete, valid PDF, and only then swaps it in. If anything goes wrong (the folder is read-only, the file is locked or open in another program, the disk is full, the copy doesn't read back the same), your file stays exactly as it was. The document stays open with your markups in it, and an alert says why: "Couldn't save “A-101.pdf”". Use File ▸ Save As… to put a copy somewhere else. While a save hasn't worked, Cella PDF won't close the window or switch to another file of the set, so nothing is dropped on the way.
The first save of a session also keeps the original in the .cella folder next to the file (.cella/<file>.bak), and every save adds to a log of the markups there.
Saving keeps signatures valid
When you save a file you opened from disk, Cella PDF adds your changes to the end of the file and leaves everything that was already there exactly as it was, as Acrobat does. Saving is quick even on big sets, and a digitally signed drawing stays signed: the signature still covers exactly what was signed, and a reader that checks signatures shows it valid, with your markups as changes made after signing.
Saving an encrypted or damaged file rewrites the whole file instead, and so does changing the sheets of a signed file (rotating, moving, inserting, deleting, cropping or replacing them, flattening, headers and footers). Then Cella PDF asks first: Save Anyway rewrites it (the signature is no longer valid), Save a Copy… saves your changes to a new file and leaves the signed one as it is, and Cancel saves nothing.
Earlier versions stay inside the file until it is rewritten (Cella PDF does that by itself every 25 saves, or when you choose File ▸ File Tools ▸ Compact File, but never to a signed file), so a markup or a sheet you deleted can still be found by PDF tools. To hand out a file without them, use File ▸ Export ▸ Flattened Copy… or File ▸ File Tools ▸ Reduce File Size.
Autosave and crash recovery
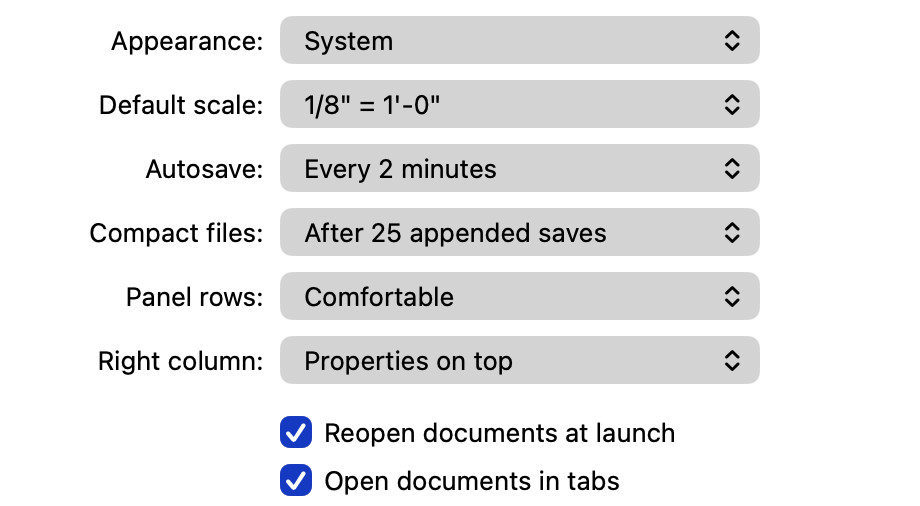
While a document has unsaved changes, Cella PDF writes them every two minutes to a recovery copy, .cella/<file>.<code>.autosave.pdf next to the file, where the code stands for your computer and user name (or, if that folder can't be written, in Cella PDF's own application data folder). Your file itself is not touched. Each person gets their own recovery copy, so a colleague who opens the same drawing from a shared project folder is never offered your unsaved changes, and their saving or closing it never deletes yours. Saving, reverting or closing the document cleanly deletes the recovery copy.
If Cella PDF ends unexpectedly, the next time you open that file, or start Cella PDF, it asks "Recover unsaved changes from Today at 14:32?" Recover opens them as unsaved changes to the file (save to keep them); Discard deletes the recovery copy and opens the file as it is on disk. Choose how often under Settings ▸ Autosave: Off, or every 1, 2, 5 or 10 minutes. View-only Cella PDF doesn't save, so it doesn't autosave either.
Encrypted and protected PDFs
A PDF that is encrypted but opens without a password (RC4, AES-128 or AES-256, which is how most "owner password only" files come) opens normally, and a save writes it back encrypted with the same protection and permissions. If its permissions forbid adding or changing comments, Cella PDF opens it read-only and tells you once: ask the sender for a copy without that restriction. A PDF that needs a password to open can't be opened in Cella PDF. Cella PDF says so; ask whoever sent it for an unprotected copy.
Read-only files and folders
A file you can't write to (locked in the Finder, read-only on a server, in a folder you can't write in) opens normally and you can mark it up, but Save says why it can't, before anything is written: "You don't have permission to save in the folder “Issued”". Use File ▸ Save As… to save a copy somewhere you can write. The recovery copy goes to Cella PDF's own folder instead.
Other things to try
- The keys don't pick tools. Tool keys only work while the drawing has the keyboard: click the drawing (or press ⌃Tab on the Mac, Ctrl+Tab on Windows and Linux, until it has the blue ring) and try again.
- The sidebar covers the drawing. Below 1280 points wide the sidebar floats over the drawing; click the pin at the top of it to dock it, or choose View ▸ Layout ▸ Panels Overlay ▸ Never.
- A measurement reads "No scale". Set the sheet's scale (Tools ▸ Set Scale…) or calibrate.
- A damaged file. A damaged list of annotations doesn't stop a file opening; if a file won't open at all, Cella PDF says why. Send it to us with Help ▸ Report a Bug….
Getting help
- Help ▸ Cella PDF Help (⌘?; F1) opens this guide in its own window, with a search field and the contents at the side. Help ▸ Online Documentation opens the same guide on the website, where it may be newer.
- Help ▸ What’s New lists what is new in every version of Cella PDF, newest first, with the versions down the left side; a version that also fixed things ends with “+ bug fixes”.
- Help ▸ Report a Bug… (⌥⌘B; Ctrl+Alt+B) sends us a report: see Reporting a problem below.
- Help ▸ Check for Updates… (on the Mac, Cella PDF ▸ Check for Updates…) looks for a newer version. The daily automatic check sends only the app's version, whether a trial or a license is active, and the system version, and can be turned off in Settings.
Cella PDF keeps no account and sends no documents, markups or usage data anywhere, except a report you send yourself with Help ▸ Report a Bug…. Sync talks only to your firm's Atrium server. AI Assistants is off until you turn it on, and the only assistant that can read anything is one you bring in yourself: you authorize it, you connect it, and what it does with what it reads is between you and that assistant, under its own terms, not ours. Cella PDF and Sorted Solution send nothing to any assistant on their own. Window ▸ AI Assistant Activity lists every request an assistant makes.
Reporting a problem
Help ▸ Report a Bug… (⌥⌘B; Ctrl+Alt+B) opens a short form: the type (a bug, something that looks wrong, a feature request or a question), a one-line title, what happened, what you expected, the steps if you know them, and your email so we can reply. Three boxes choose what goes with it, and What is sent lists it exactly before you send:
- Include a screenshot (on): the window as it was just before the form opened, with a preview and Retake; on the Mac and Windows you can send the whole screen instead.
- Include diagnostics (on): Cella PDF's version and license state (never your license key); your computer's model, system version, displays, language and free disk space; and your settings (not your name, and no folder paths). For the open document it adds its name, size, page count and sheet sizes, never its content, with the last 300 lines of its save log in the
.cellafolder. It also adds the system's record of Cella PDF's last crash, if there is one newer than your last report. - Include this document (off): the PDF itself. Tick it only if you may share the drawing with us; we use it to find the bug and delete it after. Files over 200 MB can't be sent this way: say so in the report and we'll send you a link.
On the Mac, Send opens Mail with everything attached (if you use another mail app, the report is saved on your Desktop as a zip and an email opens for you to attach it to). On Windows and Linux the zip is saved on your Desktop and an email to our support address opens; Reveal shows the zip. A copy of every report stays on your computer: Help ▸ Previous Bug Reports lists them. If Cella PDF crashed the last time it ran, it asks at the next start whether to send the crash report (Send, Not Now or Never Ask).
After a crash. Cella PDF keeps its own short record of a crash on your computer: what went wrong, its version, the open documents' file names, sizes, sheet and markup counts (never their folders or content), how much memory it was using, and the names of the last 50 commands and tools you used. Nothing is sent by itself. At the next start, Send… (or Help ▸ Report a Bug… later) opens the form with the record attached, and What is sent lists it before anything goes. The records are in ~/Library/Logs/Cella on the Mac, %LOCALAPPDATA%\Cella\Crash on Windows and ~/.local/state/cella/crash on Linux; the newest ten are kept. Unsaved changes are kept by autosave and offered back when the document opens again (see Autosave and crash recovery).
If the drawing view itself stops (on a very large set, or when the system runs short of memory), Cella PDF restarts it and opens the document again, offering back any changes autosave kept. If it stops more than three times in a minute, the window closes instead and says so; the file is not changed. On Windows, an unexpected error that Cella PDF can survive asks whether to Continue (save your work soon) or Quit.
Coming from Bluebeam Revu
If you have used Revu for years, most of Cella PDF is where you expect it, and the PDFs go both ways: Revu's files open in Cella PDF with their markups, and what Cella PDF saves is read by Revu (see Tool sets and markup exchange). This section is a map: what each Revu feature is called in Cella PDF and where to find it, the keys, and what to do with your Revu files. Most of it needs a key or the trial. A view-only Cella PDF views, searches and prints (see One product, one key).
Revu to Cella PDF, feature by feature
| In Revu … | In Cella PDF … |
|---|---|
| Markups list | View ▸ Show Markups List (⌥⌘M; Ctrl+Alt+M), with the sorting, grouping, filter and totals of The Markups List |
| Tool Chest | Tools ▸ Tool Chest (the presets) and Tools ▸ Manage Tool Chest…; right-click a markup ▸ Add to Tool Chest… (The Tool Chest) |
| Punch keys | A grouped markup (a circle with its letter) added to the Tool Chest becomes a one-click tool; Markups ▸ Group (⌃⌘G; Ctrl+J) (The Tool Chest, Arranging and editing markups) |
| Profiles | File ▸ Profiles ▸ Export Profile…, Import Profile… (which also reads a Revu .bpx), Manage Profiles…, plus a firm profile in Cella PDF ▸ Settings… (Profiles, What to do with your Revu files) |
| Spaces | Tools ▸ Space (⇧S; Shift+S), Tools ▸ Sheet Setup ▸ Create Spaces from Rooms…, and the Space column of the Markups List (Spaces) |
| Sets (a drawing set of several files) | File ▸ Open Folder as Set… (⇧⌘O; Ctrl+Shift+O) and the File ▸ Set ▸ operations (Folder sets) |
| Sequences | Tools ▸ Sequence… (Sequences) |
| Snapshot | The Snapshot tool (G) copies part of a sheet, drawing and markups, as a picture to place, move and paste anywhere; a placed signature is a snapshot markup too (The tools) |
| Flatten | Markups ▸ Flatten ▸ Flatten Selected / Flatten All; File ▸ Export ▸ Flattened Copy…; File ▸ Set ▸ Flatten Set… (Flattening) |
| Compare Documents | View ▸ Compare ▸ Compare Documents…; for a whole issue File ▸ Set ▸ Compare Sets… (Compare) |
| Overlay Pages | View ▸ Compare ▸ Overlay Pages… (Overlay pages) |
| Batch Link, auto-link of sheet numbers | Tools ▸ Sheet Setup ▸ Link Sheet References… (Links) |
| Hyperlinks | Tools ▸ Link (K) and Markups ▸ Add Link to Markup… (Links) |
| Visual Search | Edit ▸ Find…, then Visual and Pick Symbol… in the sidebar's search (Search) |
| Dynamic Fill | The Dynamic Fill tool (⇧⌥F; Shift+Alt+F), with Fill gap in the options row (The measuring tools) |
| Legend | Markups ▸ Insert Legend… (Legends) |
| Stamps | Tools ▸ Stamps ▸ and Tools ▸ Stamps ▸ Create Stamp…; Document ▸ Apply Stamp to Every Sheet… (Stamps) |
| Digital signatures | Document ▸ Sign Digitally… and Document ▸ Signatures…; a picture of your signature is Tools ▸ Signatures ▸ Add Signature… and is not a digital signature (Signatures) |
| OCR | Document ▸ Recognize Text (OCR)… (Search) |
| Studio Sessions | An Atrium server: Sync ▸ Join Server…, then Sync ▸ Connect Document to Project… (Sharing and sync) |
| Studio Projects | Put the project's drawings in a folder and open it with File ▸ Open Folder as Set…; sharing between people is Atrium (Folder sets, Sharing and sync) |
| Batch Slip Sheet | File ▸ Slip-Sheet Set from Folder…; for one file File ▸ Slip-Sheet from Newer Issue… (Slip-sheeting) |
| Redaction | Markups ▸ Redaction ▸ Mark Text for Redaction, Markups ▸ Redaction ▸ Mark Area for Redaction, then Markups ▸ Redaction ▸ Apply Redactions… (Redaction) |
| Forms | Fill in place; the Forms menu (Highlight Fields, Clear Form…, Flatten Form…, Export Form Data…, Import Form Data…). You can't create or edit form fields (Forms) |
| Search | Edit ▸ Find… (⌘F; Ctrl+F), with Match Case, Whole Word, Regular Expression and, for a folder set, Whole Set (Search) |
| Split View | View ▸ Split View (⌘\; Ctrl+\) (Split View) |
| Measurement calibration | Tools ▸ Measure ▸ Calibrate (⇧⌥K; Shift+Alt+K), or Tools ▸ Set Scale… (Setting the scale) |
| Scale regions, viewports | Tools ▸ Measure ▸ Scale Region (⇧⌥R; Shift+Alt+R) and Tools ▸ Remove Scale Regions on This Sheet (Setting the scale) |
| Count | The Count tool (⇧⌥C; Shift+Alt+C) (Counts) |
| Area with cut-outs | Select the area, Markups ▸ Cut Out from Area, draw the opening (Areas and cut-outs) |
| Volume | The Volume tool (⇧⌥V; Shift+Alt+V), with Depth in Properties (The measuring tools) |
| Polylength | The Polylength tool (⇧⌥Y; Shift+Alt+Y) (The measuring tools) |
| Callout | The Callout tool (Q) (The tools, Text boxes and callouts) |
| Cloud | The Cloud tool (C) (The tools) |
| Revision tags | The Revision Cloud tool (⇧C; Shift+C), Markups ▸ Revisions ▸ Revision Schedule…, Markups ▸ Revisions ▸ Insert Revision Schedule (Revision clouds and tags) |
| Custom columns | Markups List ⋯ ▸ Custom Columns…; File ▸ Set ▸ Apply Columns to Set… (Custom columns and formulas) |
| Keyboard shortcuts customisation | Cella PDF ▸ Settings… ▸ Shortcuts… (Changing shortcuts) |
| Export to Excel | Markups List ⋯ ▸ Export to Excel…, File ▸ Export ▸ Markups to Excel…, File ▸ Set ▸ Export Set to Excel… (Summary PDF, CSV and Excel) |
| Summary | File ▸ Export ▸ Markups Summary PDF…; for a set File ▸ Set ▸ Export Set Summary PDF… (Summary PDF, CSV and Excel) |
| File ▸ Print… (⌘P; Ctrl+P); for a set File ▸ Set ▸ Print Set… (Printing) | |
| Headers & Footers | Document ▸ Headers & Footers… (Headers and footers) |
| Reduce File Size | File ▸ File Tools ▸ Reduce File Size… (Reducing file size) |
| Flatten to image (heavy sheets) | File ▸ File Tools ▸ Rasterize Sheets… (Rasterizing heavy sheets) |
| Combine | File ▸ File Tools ▸ Combine Files… (Combining files) |
| Split Document | File ▸ File Tools ▸ Split Document… (Splitting a document) |
| Crop, Rotate, Insert pages | Document ▸ Crop Pages…, Sheets ▸ Rotate Right / Rotate Left, Sheets ▸ Insert Pages… and Insert Blank Page… (Page operations, Cropping and resizing pages) |
| Page labels | Rename a sheet (double-click it in the Sheets list); saving writes page labels the other viewers show (Sheets and sheet numbers) |
| Bookmarks | Sheets ▸ Add Bookmark, Sheets ▸ Bookmarks from Sheet Labels… (Bookmarks) |
| Layers | View ▸ Layers ▸ Layers Panel (new, rename, delete, show, hide, lock, draw on); Markups ▸ Move to Layer… (Markup layers) |
| Sign & Seal | A picture of your signature or seal as a signature or stamp (Tools ▸ Signatures ▸, Tools ▸ Stamps ▸); to certify the file, Document ▸ Sign Digitally… (Signatures) |
Keys
Cella PDF uses Revu's single-letter tool keys, so a tool's key is the same: press it while the drawing has the keyboard. The Mac and the Windows and Linux keys are the same letters; where a key takes modifiers, ⇧ is Shift and ⌥ is Alt, so Length is ⇧⌥L on the Mac and Shift+Alt+L on Windows and Linux.
| Tool | Mac | Windows and Linux |
|---|---|---|
| Select / Pan | V / ⇧V | V / Shift+V |
| Rectangle / Ellipse | R / E | R / E |
| Line / Arrow | L / A | L / A |
| Polyline / Polygon | ⇧N / ⇧P | Shift+N / Shift+P |
| Cloud / Revision Cloud | C / ⇧C | C / Shift+C |
| Pen | P | P |
| Highlight / Underline / Strikeout | H / U / D | H / U / D |
| Eraser | ⇧E | Shift+E |
| Text Box / Callout / Note | T / Q / N | T / Q / N |
| Stamp / Snapshot | S / G | S / G |
| Edit Text | ⇧T | Shift+T |
| Length / Polylength | ⇧⌥L / ⇧⌥Y | Shift+Alt+L / Shift+Alt+Y |
| Area / Perimeter | ⇧⌥A / ⇧⌥P | Shift+Alt+A / Shift+Alt+P |
| Count / Volume | ⇧⌥C / ⇧⌥V | Shift+Alt+C / Shift+Alt+V |
| Dynamic Fill | ⇧⌥F | Shift+Alt+F |
| Angle / Radius | ⇧⌥G / ⇧⌥D | Shift+Alt+G / Shift+Alt+D |
| Calibrate / Scale Region | ⇧⌥K / ⇧⌥R | Shift+Alt+K / Shift+Alt+R |
| Link / Space | K / ⇧S | K / Shift+S |
Most menu keys match: ⌘ on the Mac is Ctrl on Windows and Linux and ⌥ is Alt. The ones you will reach for, with the exceptions:
| Command | Mac | Windows and Linux |
|---|---|---|
| Find | ⌘F | Ctrl+F |
| Markups List | ⌥⌘M | Ctrl+Alt+M |
| Properties | ⌥⌘P | Ctrl+Alt+P |
| Tool Palette | ⌥⌘T | Ctrl+Shift+T |
| Pop Out Properties / Markups List | ⌥⇧⌘P / ⌥⇧⌘M | Ctrl+Shift+Alt+P / Ctrl+Shift+Alt+M |
| Markups Table | ⌃⌘M | Ctrl+Shift+M |
| Ortho | F8 | F8 |
| Split View | ⌘\ | Ctrl+\ |
| Compare With… | ⇧⌘K | Ctrl+Shift+K |
| Snap to Drawing | ⌥⌘N | Ctrl+Alt+N |
| Group / Ungroup | ⌃⌘G / ⌃⇧⌘G | Ctrl+J / Ctrl+Shift+J |
| Autosize Text Box | ⌥⌘Z | Alt+Z |
| Copy Style / Paste Style | ⌥⌘C / ⌥⌘V | Ctrl+Alt+C / Ctrl+Alt+V |
| ⌘P | Ctrl+P | |
| Command Palette | ⌘K | Ctrl+K |
If a key isn't the one you are used to, change it: Cella PDF ▸ Settings… ▸ Shortcuts… lists every menu command and tool, and Help ▸ Keyboard Shortcuts (⌘/; Ctrl+/) shows the keys you have now (see Changing shortcuts). The whole list is the appendix.
What to do with your Revu files
- Drawings with markups. Open them. Revu's markups, measurements, scales, replies, statuses, groups and custom column values are read and kept, and a markup you don't touch is saved as it was.
- Tool sets. In Revu, Tool Chest ▸ Manage Tool Sets ▸ Export makes a
.btx. In Cella PDF choose Tools ▸ Import Bluebeam Tool Set… (or Import… in Tools ▸ Manage Tool Chest…). Do this for each set, including your punch keys. - Profiles. Export the profile from Revu (a
.bpx), open any drawing in Cella PDF and choose File ▸ Profiles ▸ Import Profile… with the.bpx. Cella PDF reads its tool sets (each its own set), its custom columns (text, number, choice list, checkmark and formula columns; a date column becomes text, and a formula Cella PDF can't read is kept as a text column with a note) and its Markups List layout (saved as the view "Revu: profile name"). The import sheet shows them with a checkbox each before anything is installed. It also lists what is not carried: toolbars, keyboard shortcuts, Studio settings and stamps. To take only the tool sets, give the.bpxto Tools ▸ Import Bluebeam Tool Set…. Then save the setup with File ▸ Profiles ▸ Export Profile… so the office can share it, or put it on the shared drive as the firm profile (Profiles and settings). - Custom columns. The columns on your markups are read from the PDF. Markups List ⋯ ▸ Custom Columns… shows them, and File ▸ Set ▸ Apply Columns to Set… gives every file of a set the same ones.
- Exchanging markups. Markups ▸ Export Markups… writes a
.baxthat Revu imports (Markups ▸ Import in Revu), and Markups ▸ Import Markups… reads one. - Cut-outs. An area's openings are read and written, so an area with cut-outs keeps them both ways.
- Studio Sessions and Projects. A PDF you have from them opens like any other; in Cella PDF, sharing between people is done with an Atrium server (Sharing and sync).
Appendix: Keyboard shortcuts
Help ▸ Keyboard Shortcuts (⌘/; Ctrl+/) shows this list over the drawing, with a filter field. These are the default keys, the Mac's and Windows and Linux's side by side. Change them in Settings ▸ Keyboard on every platform (on the Mac, Cella PDF ▸ Settings… ▸ Shortcuts…); the list then shows yours. Single-key tool shortcuts work while the drawing has the keyboard, never while you type in a field. Once the free trial has ended, only Select and Pan work until you buy Cella PDF.
Navigation
| Command | Mac | Windows and Linux |
|---|---|---|
| Next Sheet | ⌘↓ | Ctrl+Down |
| Previous Sheet | ⌘↑ | Ctrl+Up |
| First Sheet | ⌥⌘↑ | Ctrl+Home |
| Last Sheet | ⌥⌘↓ | Ctrl+End |
| Go to Sheet | ⌥⌘G | Ctrl+Alt+G |
| Next / previous sheet | Page Down / Page Up | Page Down / Page Up |
| Sheets strip: previous / next sheet | ← / → | Left / Right |
| Sheets strip: first / last sheet | Home / End | Home / End |
| Sheet's top-left corner at this zoom | Home | Home |
| Fit Page (zoom to extents) | Double middle-click | Double middle-click |
| Pan the drawing (hold while dragging) | Space | Space |
View
| Command | Mac | Windows and Linux |
|---|---|---|
| Zoom In | ⌘= | Ctrl++ |
| Zoom Out | ⌘- | Ctrl+- |
| Fit Page | ⌘0 | Ctrl+0 |
| Fit Width | ⌘1 | Ctrl+1 |
| Actual Size | ⌘2 | Ctrl+2 |
| Previous View | ⌃⌘← | Alt+Left |
| Next View | ⌃⌘→ | Alt+Right |
| Markups Table | ⌃⌘M | Ctrl+Shift+M |
| Pop Out Properties | ⌥⇧⌘P | Ctrl+Shift+Alt+P |
| Pop Out Markups List | ⌥⇧⌘M | Ctrl+Shift+Alt+M |
| Invert Drawing | ⌃⌘I | Ctrl+Alt+I |
| Scale Ruler | ⌃⌘R | Ctrl+Alt+R |
| Constrain to Ruler | ⌃⌥⌘R | Ctrl+Shift+Alt+R |
| Triangle | ⌃⌘T | Ctrl+Shift+Alt+T |
| Protractor | ⌃⌘A | Ctrl+Shift+Alt+A |
| Split View ▸ Toggle Split View | ⌘\ | Ctrl+\ |
| Compare ▸ Compare With | ⇧⌘K | Ctrl+Shift+K |
| Show All Tabs | ⇧⌘\ | none |
| Presentation | ⇧⌘↩ | F5 |
| Enter Full Screen | fn F | F11 |
Tools
| Command | Mac | Windows and Linux |
|---|---|---|
| Stamps ▸ Previous Stamp | [ | [ |
| Stamps ▸ Next Stamp | ] | ] |
| Snap to Drawing | ⌥⌘N | Ctrl+Alt+N |
| Ortho | F8 | F8 |
| Select | V | V |
| Pan | ⇧V | Shift+V |
| Rectangle | R | R |
| Ellipse | E | E |
| Line | L | L |
| Arrow | A | A |
| Polyline | ⇧N | Shift+N |
| Polygon | ⇧P | Shift+P |
| Cloud | C | C |
| Revision Cloud | ⇧C | Shift+C |
| Pen | P | P |
| Highlight | H | H |
| Eraser | ⇧E | Shift+E |
| Underline Sheet Text | U | U |
| Strike Through Sheet Text | D | D |
| Text Box | T | T |
| Callout | Q | Q |
| Cloud Callout | ⇧Q | Shift+Q |
| Note | N | N |
| Stamp | S | S |
| Stencil | ⇧B | Shift+B |
| Edit Text | ⇧T | Shift+T |
| Snapshot | G | G |
| Site Item | I | I |
| Length | ⌥⇧L | Shift+Alt+L |
| Polylength | ⌥⇧Y | Shift+Alt+Y |
| Area | ⌥⇧A | Shift+Alt+A |
| Perimeter | ⌥⇧P | Shift+Alt+P |
| Count | ⌥⇧C | Shift+Alt+C |
| Volume | ⌥⇧V | Shift+Alt+V |
| Dynamic Fill | ⌥⇧F | Shift+Alt+F |
| Angle | ⌥⇧G | Shift+Alt+G |
| Radius | ⌥⇧D | Shift+Alt+D |
| Calibrate | ⌥⇧K | Shift+Alt+K |
| Scale Region | ⌥⇧R | Shift+Alt+R |
| Link | K | K |
| Space | ⇧S | Shift+S |
| Back to Select, or cancel the markup being drawn | ⎋ | Esc |
| Finish a polyline or polygon | ↩ | Enter |
| Draw, move or resize free of snapping (hold while dragging) | ⌘ | Ctrl |
Markup
| Command | Mac | Windows and Linux |
|---|---|---|
| Arrange ▸ Bring to Front | ⇧⌘] | none |
| Arrange ▸ Bring Forward | ⌘] | Ctrl+] |
| Arrange ▸ Send Backward | ⌘[ | Ctrl+[ |
| Arrange ▸ Send to Back | ⇧⌘[ | none |
| Lock / Unlock | ⇧⌘L | none |
| Group | ⌃⌘G | Ctrl+J |
| Ungroup | ⌃⇧⌘G | Ctrl+Shift+J |
| Offset | ⌥⌘O | Ctrl+Alt+O |
| Autosize Text Box | ⌥⌘Z | Alt+Z |
| Text Style ▸ Bold | ⌘B | Ctrl+B |
| Text Style ▸ Italic | ⌘I | Ctrl+I |
| Text Style ▸ Underline | ⌘U | Ctrl+U |
| Copy Style | ⌥⌘C | Ctrl+Alt+C |
| Paste Style | ⌥⌘V | Ctrl+Alt+V |
| Nudge the selection | ← / → / ↑ / ↓ | Left / Right / Up / Down |
| Nudge the selection 10 points | ⇧← / ⇧→ / ⇧↑ / ⇧↓ | Shift+Left / Shift+Right / Shift+Up / Shift+Down |
| Nudge the selection 0.1 point | ⌥← / ⌥→ / ⌥↑ / ⌥↓ | Alt+Left / Alt+Right / Alt+Up / Alt+Down |
| Resize keeping the proportions (drag a corner handle) | ⇧ | Shift |
| Markups List: show the selected markup | ↩ | Enter |
| Markups List: delete the selected markups | ⌫ | Del |
| Markups List: previous / next group | ⌘↑ / ⌘↓ | Ctrl+Up / Ctrl+Down |
Sheets
| Command | Mac | Windows and Linux |
|---|---|---|
| Rotate Right | ⌘R | Ctrl+R |
| Rotate Left | ⌘L | Ctrl+L |
| Sheets list: rename the selected sheet | ↩ | Enter |
| Sheets strip or list: larger / smaller thumbnails | ⌘+ / ⌘− | Ctrl++ / Ctrl+− |
Edit
| Command | Mac | Windows and Linux |
|---|---|---|
| Undo | ⌘Z | Ctrl+Z |
| Redo | ⇧⌘Z | Ctrl+Y (Linux: Ctrl+Shift+Z) |
| Cut | ⌘X | Ctrl+X |
| Copy | ⌘C | Ctrl+C |
| Paste | ⌘V | Ctrl+V |
| Paste in Place | ⇧⌘V | Ctrl+Shift+V |
| Duplicate | ⌘D | Ctrl+D |
| Delete | ⌫ | Backspace |
| Find | ⌘F | Ctrl+F |
| Find Next | ⌘G | Ctrl+G |
| Find Previous | ⇧⌘G | Ctrl+Shift+G |
| Select All | ⌘A | Ctrl+A |
| Deselect | ⇧⌘A | Ctrl+Shift+A |
Panels
| Command | Mac | Windows and Linux |
|---|---|---|
| Tool Palette | ⌥⌘T | Ctrl+Shift+T |
| Show Sheets | ⌥⌘S | Ctrl+Alt+S |
| Show Markups List | ⌥⌘M | Ctrl+Alt+M |
| Show Properties | ⌥⌘P | Ctrl+Alt+P |
| Next pane (sheets, drawing, Properties, Markups List) | ⌃⇥ | Ctrl+Tab |
| Previous pane | ⌃⇧⇥ | Ctrl+Shift+Tab |
| Next / previous control | ⇥ / ⇧⇥ | Tab / Shift+Tab |
| Toolbar: move between buttons | ← / → | Left / Right |
| Press the focused button | Space | Space |
File
| Command | Mac | Windows and Linux |
|---|---|---|
| New Window | ⌘N | Ctrl+N |
| New Tab | ⌘T | Ctrl+T |
| Open | ⌘O | Ctrl+O |
| Open Folder as Set | ⇧⌘O | Ctrl+Shift+O |
| Close | ⌘W | Ctrl+W |
| Save | ⌘S | Ctrl+S |
| Save As | ⇧⌘S | Ctrl+Shift+S |
| Export ▸ Markups as CSV | ⇧⌘E | none |
| ⌘P | Ctrl+P |
App and Window
| Command | Mac | Windows and Linux |
|---|---|---|
| Settings | ⌘, | Ctrl+, |
| Hide Cella PDF | ⌘H | none |
| Hide Others | ⌥⌘H | none |
| Quit Cella PDF | ⌘Q | none (Linux: Ctrl+Q) |
| Minimize | ⌘M | none |
| Show Previous Tab | ⌥⌘← | Ctrl+Page Up |
| Show Next Tab | ⌥⌘→ | Ctrl+Page Down |
| Welcome | ⇧⌘1 | Ctrl+Shift+1 |
| Cella PDF Help | ⌘? | F1 |
| Keyboard Shortcuts | ⌘/ | Ctrl+/ |
| Command Palette | ⌘K | Ctrl+K |
| Report a Bug | ⌥⌘B | Ctrl+Alt+B |